How to Add a Contact Form to Your Footer or Sidebar

If you want your website visitors to contact you, it’s smart to make yourself as accessible as possible by adding a contact form to your footer or sidebar. This way your form displays on every page (or most of them, depending on your site’s layout).
Think about it like this: When your visitors have questions, will they always visit your contact page to look for a form, email address, or telephone number? Probably not. They may not even be aware that they can contact you.
But if your customers see a contact form on every page they visit, they’ll know you’re always available to answer their questions, hear their comments, and resolve their problems. You never know when a casual web surfer will turn into a customer, or when a user will send you a valuable piece of feedback.
So how do you add a contact form to your footer or sidebar? Fortunately, it’s easy in WordPress with Gravity Forms.
First Step: Create a New Form
We’ve gone over this a bunch, so we won’t waste your time with a long explanation if you already know how to create a Gravity Form. If you’re new to Gravity Forms, however, review our Getting Started Guide.
You can also check out some of our other guides on creating forms:
- How to Create a Form
- Create a Contact Form in Under 2 Minutes
- Event Registration Forms
- Service Agreement Forms
- Net Promoter Score Surveys
- Job Application Forms
Once you’ve created a form, there are a few ways to add them to your sidebar or footer.
Option 1: Add the Form to a Widget (Recommended)
This is the easiest way to add a contact form to your footer or sidebar. It requires that you have already set up widget areas for those locations. Fortunately, most themes come with this functionality already set up.
Click Widgets under Appearance on the left side of your WordPress dashboard. This will bring you to the widget manager page.

The widget manager is a list of widgets you can add to your sidebars, footers, and any other widget areas defined by your theme. Available Widgets are on the left. Widget areas are on the right.
Look for a drop down menu called Forms. This is the widget for Gravity Forms. There are two ways to add this widget to a widget area:
- Click the Forms widget and drag it to the widget area you’d like it to appear. This is quick if you have a basic widget manager without many options.
- Expand the Forms widget and select the widget area where you’d like the form to appear. Then click Add Widget. This method is useful if you have a lot going on on your widget manager page and scrolling around is tedious.
Once you’ve added a form widget to your desired widget area, expand its menu, customize any options you prefer, and click Save. Then visit the location on the front end of your website to make sure the form displays properly.
Note: The title field is for the widget area, not the form. This title field often adds a subheading above the widget on your page, but all themes are different. If you want the form’s title to display on the page, you must check the “Display form title” box.
Option 2: Embed a Shortcode
Shortcodes are short lines of text that represent complex pieces of code. They’re useful ways for non-programmers to manipulate their websites without learning how to code. You can paste a shortcode almost anywhere on your website to inject complex features.
Building a Gravity Form shortcode is simple and does not require any programming knowledge. Here’s the syntax and what each parameter means:
![]()
- id – The form’s ID number
- title = Whether to display the form’s title (true or false).
- description – Whether to display the form’s description (true or false).
- ajax – Whether to use AJAX to submit the form.
- tabindex – Specify the starting tab index for the fields of this form.
- field_values – Specify the default field values. (Read our guide on dynamic population for more information.)
The only required parameter is the ID number (otherwise WordPress wouldn’t know which Gravity Form you’re referring to). If you leave out the other parameters, the Gravity Form will load with the default options.
Where can you insert a Gravity Form shortcode? In any WordPress editor or block.
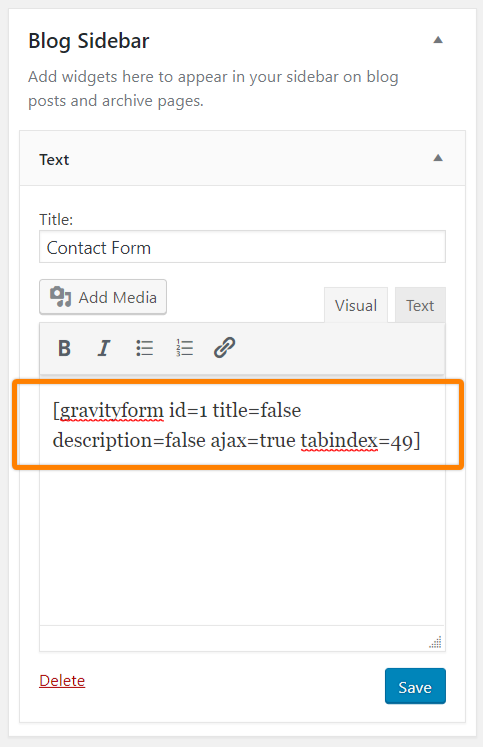
You could add it to a text widget in the widgets managers.
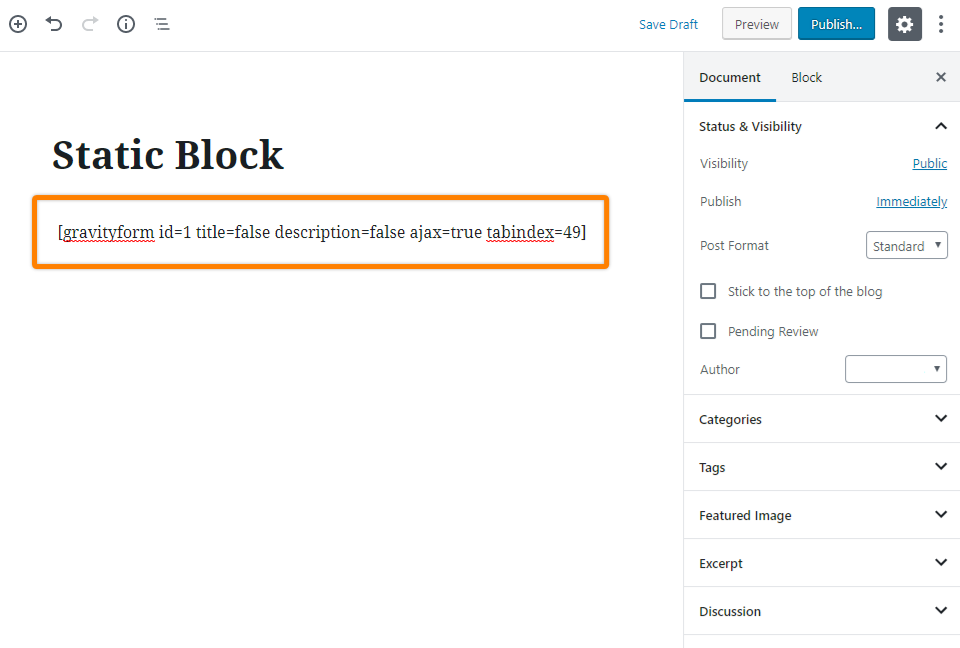
If you use a plugin that lets you create widgets in a WordPress editor (sometimes called static blocks), you can paste shortcodes there as well.
Option 3: Add the Form to Your Theme File
This option requires some professional developer work, but we didn’t want to leave it out in case you’re up for it.
One way to add a contact form (or anything else, for that matter) to your website is to drop its code directly into your theme files. This bypasses your WordPress dashboard so you don’t have to deal with widgets. It’s critical that you backup your website before making changes to theme files.
Why would you use this method? It makes the code a bit cleaner which improves your site’s performance. It also prevents anyone else who uses your WordPress account from accidentally (or intentionally) disrupting your contact forms.
Your first step is to locate the spot you want to place the form in your theme file. If you want to place the form in your footer, locate the footer.php file in the WordPress Theme Editor. If you want to place the form in a sidebar, find sidebar.php.

Once you open the code for either page, locate the place in the HTML where you want the form to appear. Insert this snippet of PHP:
<!-- BEGIN GRAVITY FORM -->
<?php gravity_form( 1, false, false, false, '', false ); ?>
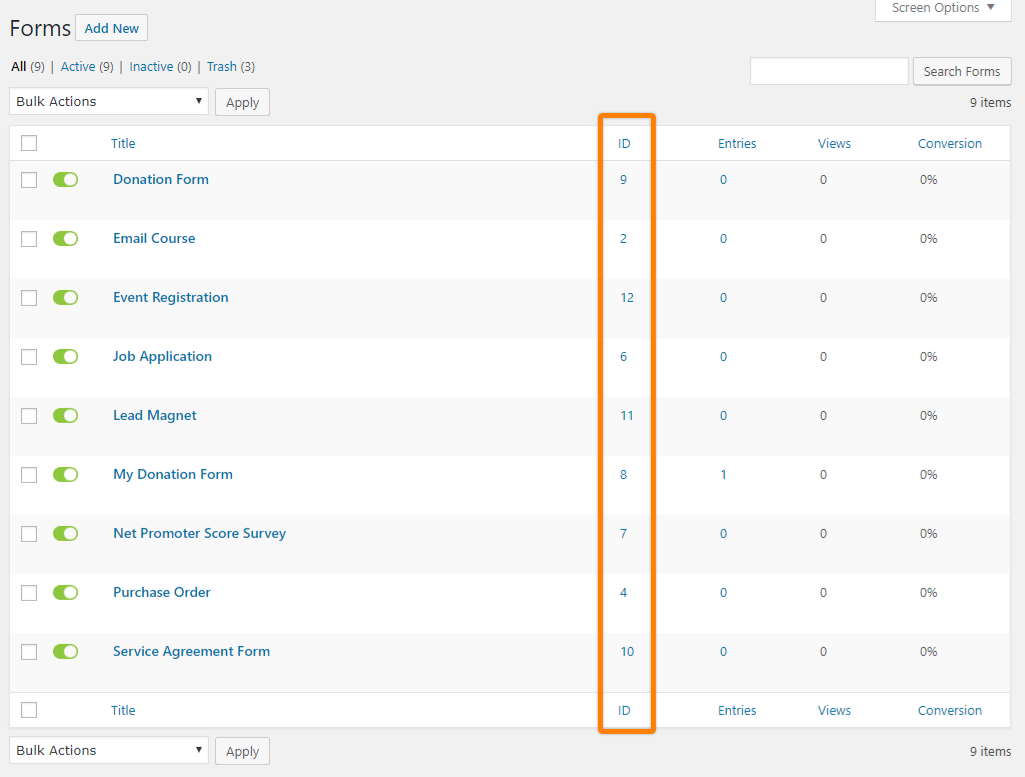
<!-- END GRAVITY FORM -->This is a basic snippet that will display the Gravity Form that has an ID of 1, hide the title and description, hide the entire form if it’s set to inactive, and not use AJAX for form submission. Replace the “1” with your form’s ID number. You can find its ID number on the Forms list.
You can adjust any of the parameters within the parentheses of that PHP snippet. For instance, changing the first “false” to “true” will display the form’s title. There are other parameters you can add as well. Learn more about this function’s parameters by reading our documentation for adding a form to the theme.
The comments on either side of the PHP snippet aren’t necessary, but they will help you locate that particular piece of code if you ever have to edit or remove it in the future.
Once you’re finished adding the PHP snippet to your footer or sidebar file, make sure to save the page. Visit the page’s front end to make sure it looks right.
Make Yourself Available
As you can see, adding a contact form to your sidebar or footer is quite easy. It only takes a few minutes to set up, but it could create a substantial impact on your website and your business. With forms available on every page of your website, your visitors, leads, and customers will never have a hard time getting a hold of you.