
Booking gigs shouldn’t feel like a full-time job.
As a musician, every minute you spend chasing down event details or untangling email threads is time you’re not rehearsing, performing, or recording. Whether you’re booking bar gigs, weddings, festivals, or private events, the back-and-forth can get messy fast.
What if your website could do the heavy lifting for you?
With WordPress and Gravity Forms, you can build a professional, customizable booking request form that collects everything you need to make booking simple – for you and your clients. It’s easy to set up, mobile-friendly, and integrates with your existing tools.
In this post, we’ll show you how to build the ultimate booking request form, automate your follow-ups, and turn your website into your hardest-working bandmate.
Key takeaways:
- A dedicated booking request form helps musicians collect key event details upfront – like date, location, and budget – so they can spend less time on email and more time making music.
- With WordPress and Gravity Forms, you can create a professional, mobile-friendly form that filters out unqualified leads and automates follow-ups.
- Gravity Forms is fully customizable, integrates with payment tools, and works great on any device.
- A smart booking request form turns your website into a streamlined, professional tool for landing more gigs with less hassle.
Why musicians need a booking request form
Let’s be honest. Most gig inquiries start with an email that’s missing key info:
- “Are you available next month?”
- “What do you charge?”
- “It’s for a wedding… somewhere in Ohio…”
Without the right system, you end up chasing answers, losing leads, or double-booking dates.
A well-built booking request form fixes that. It helps you:
- Collect everything you need up front (dates, budget, location, event type).
- Reduce email back-and-forth.
- Filter out unqualified leads.
- Respond faster and more professionally.
And best of all? You don’t need to be a developer to make it happen.
FAQs about booking request forms for musicians
Do I really need a booking request form if I already have a contact form?
Yes. A general contact form doesn’t collect the detailed info you need to evaluate a gig. A dedicated booking request form helps you stay organized and professional by capturing key event details up front.
Can I accept deposits or payments through the form?
Definitely. Gravity Forms integrates with payment processors like PayPal, Stripe, and Square, so you can accept deposits or full payments directly from the form.
What if I only want to be booked for certain event types?
Use conditional logic to filter or adjust the form based on event type. You can also include a dropdown field to limit booking requests to specific event categories like weddings, corporate gigs, or private parties.
How do I make sure I don’t miss any inquiries?
Enable email notifications and confirmations in the form settings. You can also route submissions to different inboxes or tools like Slack, CRMs, or Trello using integrations.
Is Gravity Forms mobile-friendly?
Absolutely. All Gravity Forms are responsive by default, so your booking request form will work beautifully on phones and tablets.
Can I customize the form with my branding?
Yes. Gravity Forms gives you full control over field styling, layout, and labels. You can also use custom CSS to match your form to your site’s branding.
Why WordPress and Gravity Forms are perfect for the job
If you’re building a serious musician or band website, WordPress is the best place to start. It’s free, powerful, and totally yours.
Add Gravity Forms, and you can create forms that do more than just collect names and emails – they work like full-fledged booking systems.
Before we get into the details, here’s why the WordPress + Gravity Forms combo is a musician’s dream:
- You get full control over your content. With WordPress, you’re not limited by an algorithm or locked into a third-party platform. You own your content and your contacts.
- Many options for themes with built-in audio features. Many musician WordPress themes come with audio players, tour date sections, and galleries so you can showcase your music and your vibe.
- Customization at your fingertips. WordPress + Gravity Forms means you can tweak the layout, form fields, notifications, and workflows to fit exactly how you run your business.
- SEO and growth potential. Want your site to show up when someone Googles “wedding band in Chicago”? WordPress can help you get discovered and grow your audience organically.
What makes a great booking request form?
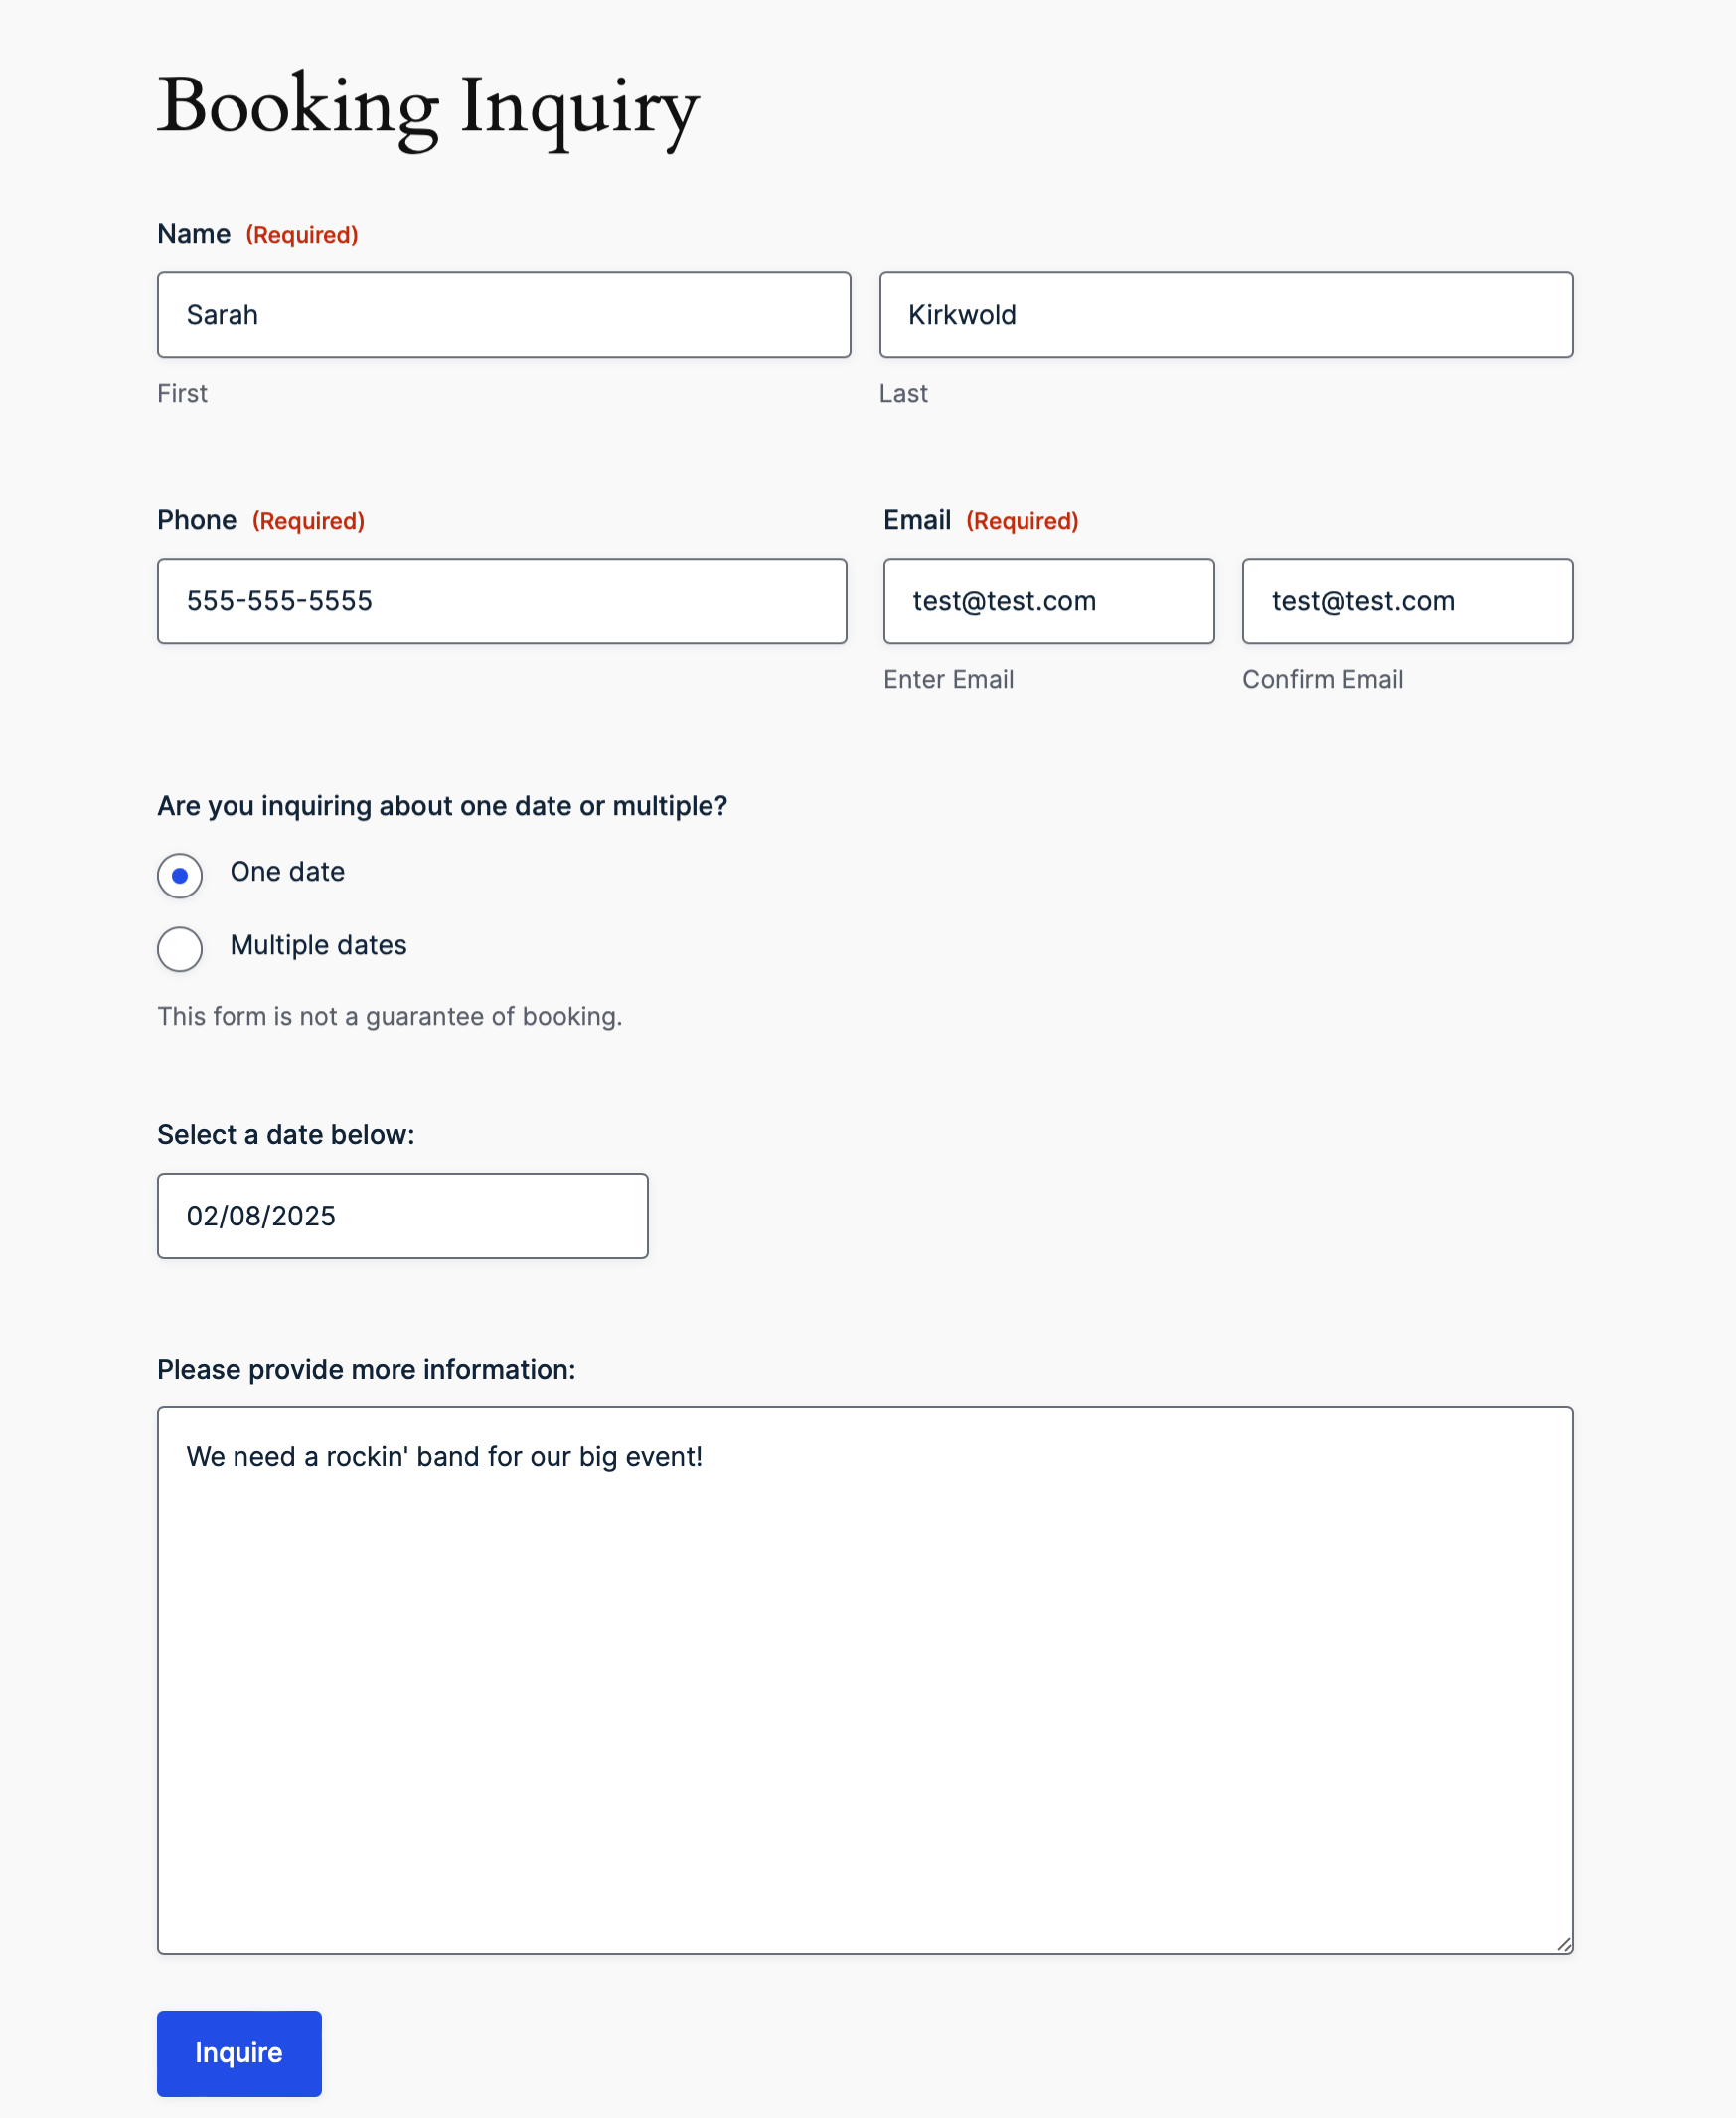
A great booking request form does more than capture contact info. It sets expectations, builds trust, and saves you time. Below, we’ll show you how to create one.
Here’s what your form should include:
- Contact details – Name, email, phone.
- Event date and time – With a calendar picker so you don’t get ambiguous “next Saturday” requests.
- Location – City, venue, or even zip code.
- Type of event – Wedding, corporate, private party, etc.
- Budget – Optional, but helpful to qualify leads.
- How they found you – Great for tracking what’s working.
You can even add conditional logic. For example, if someone selects “wedding,” you can show extra fields for ceremony vs. reception.
And with Gravity Forms, adding payment fields for deposits or travel fees is just a few clicks away.
How to create a booking request form on WordPress with Gravity Forms
Purchase a Gravity Forms License
Gravity Forms offers a few types of licenses, all of which include access to our knowledgeable and friendly support team. You can compare license types here, and pick the one that will suit your needs.
It’s worth noting that if you eventually also want to accept payments, you’ll need to purchase a Pro or Elite license.
If you’d like to try before you buy, you can create a free demo site – it has all the functionality you’ll need to follow along with this tutorial.
After you’ve made your purchase, you can log in and download Gravity Forms directly from your My Account section. This download should remain a ZIP file, as this is the format in which you’ll upload it to your WordPress site.
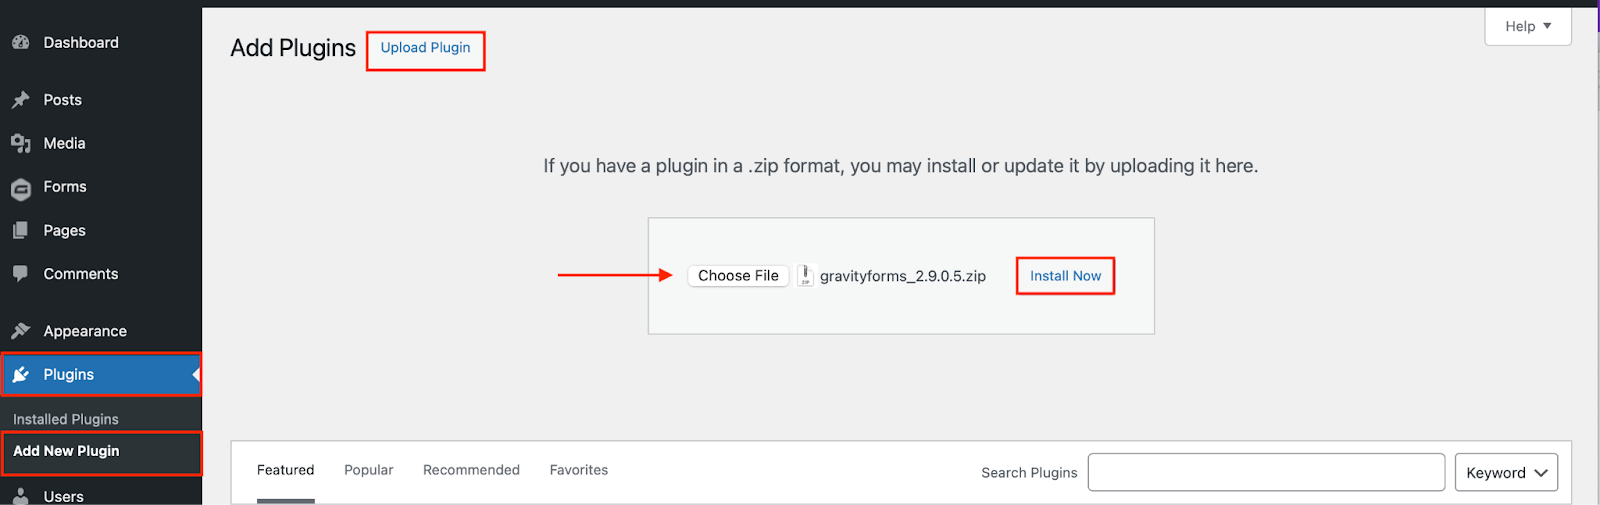
Next, install the Gravity Forms plugin on your WordPress site. Here’s how:
- Go to your WordPress dashboard and navigate to Plugins → Add New Plugin.
- Click Upload Plugin.
- Choose the ZIP file you just downloaded, then click Install Now.
- After the plugin is installed, click Activate.
Now, follow the instructions in the Setup Wizard. You’ll be asked to enter your Gravity Forms license key and answer a few questions to help you get started. You can find your license key by logging in to Gravity Forms and clicking My Account.
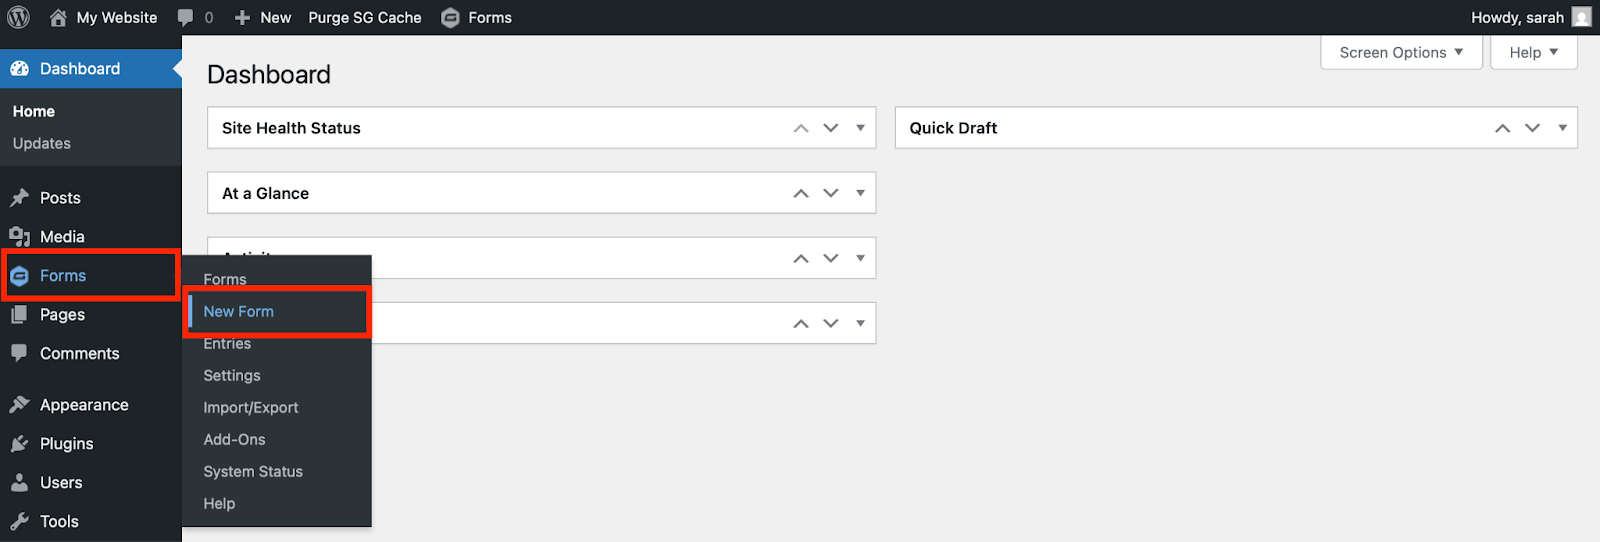
Create your first form
Once Gravity Forms is installed (or if you’re using our demo), creating a form is simple. Here’s how:
From your WordPress dashboard, go to Forms → New Form.
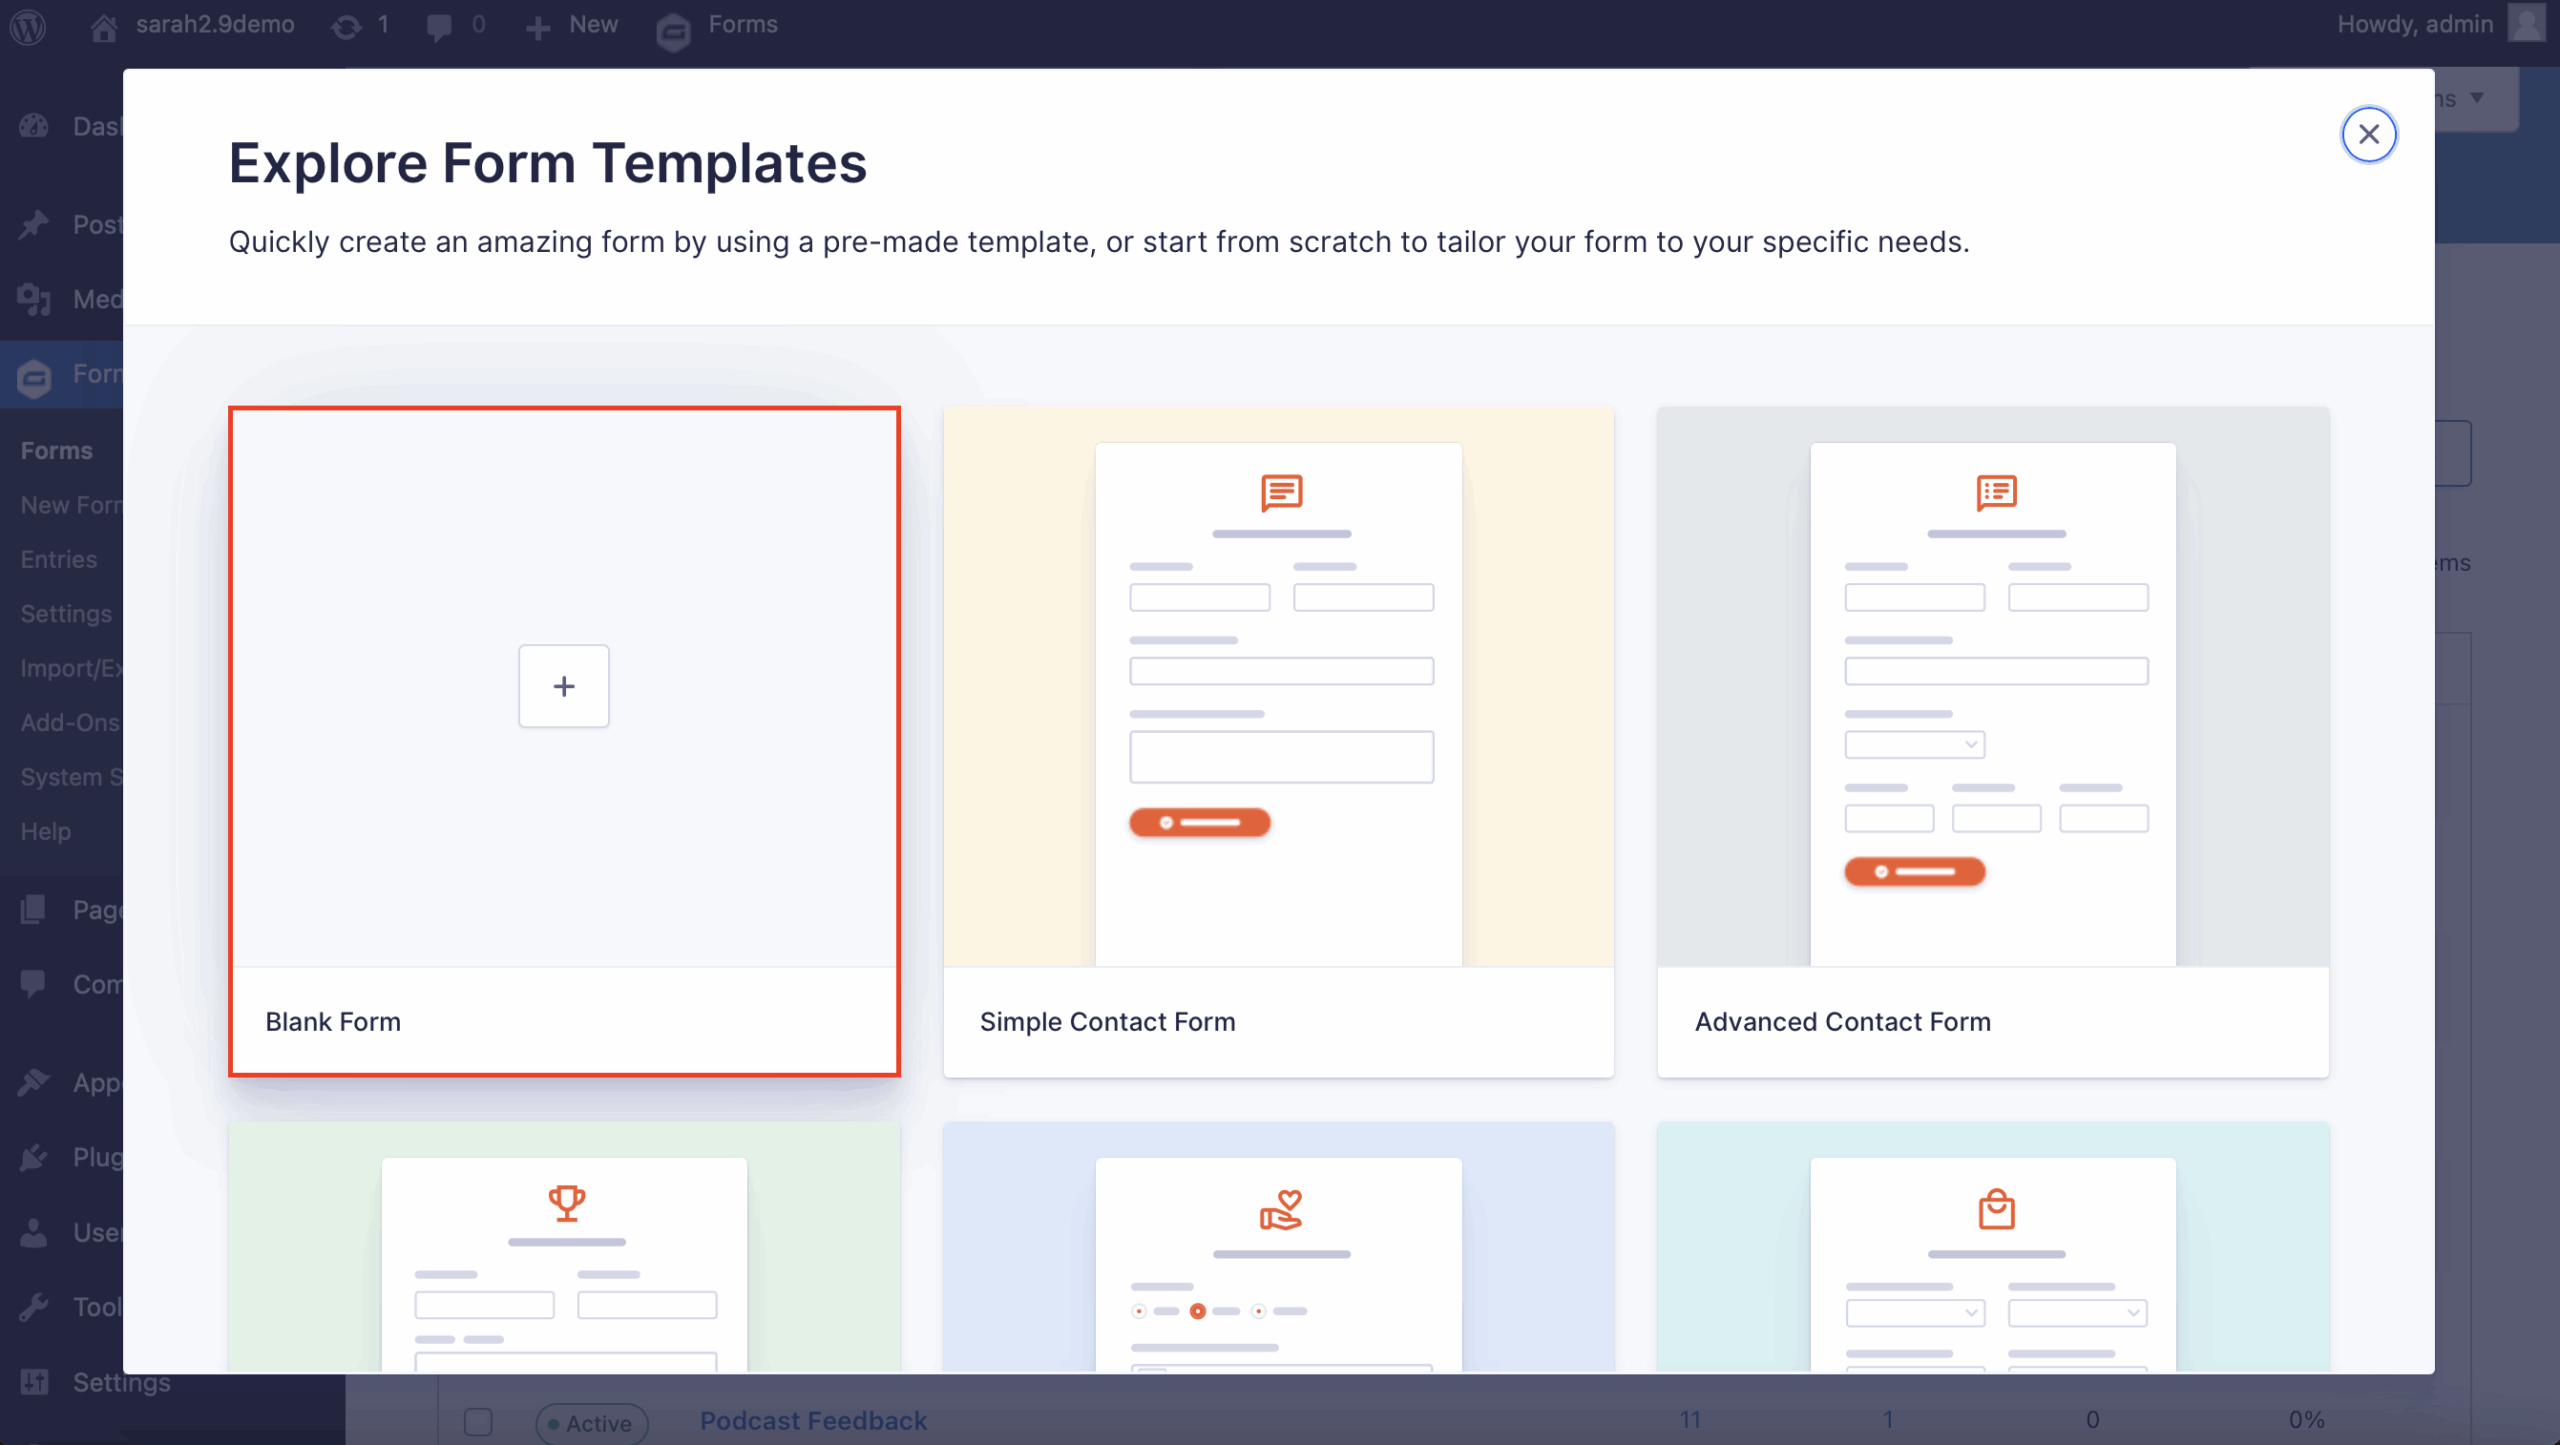
Choose a form template from the Gravity Forms template library, or start from scratch by choosing the Blank Form.
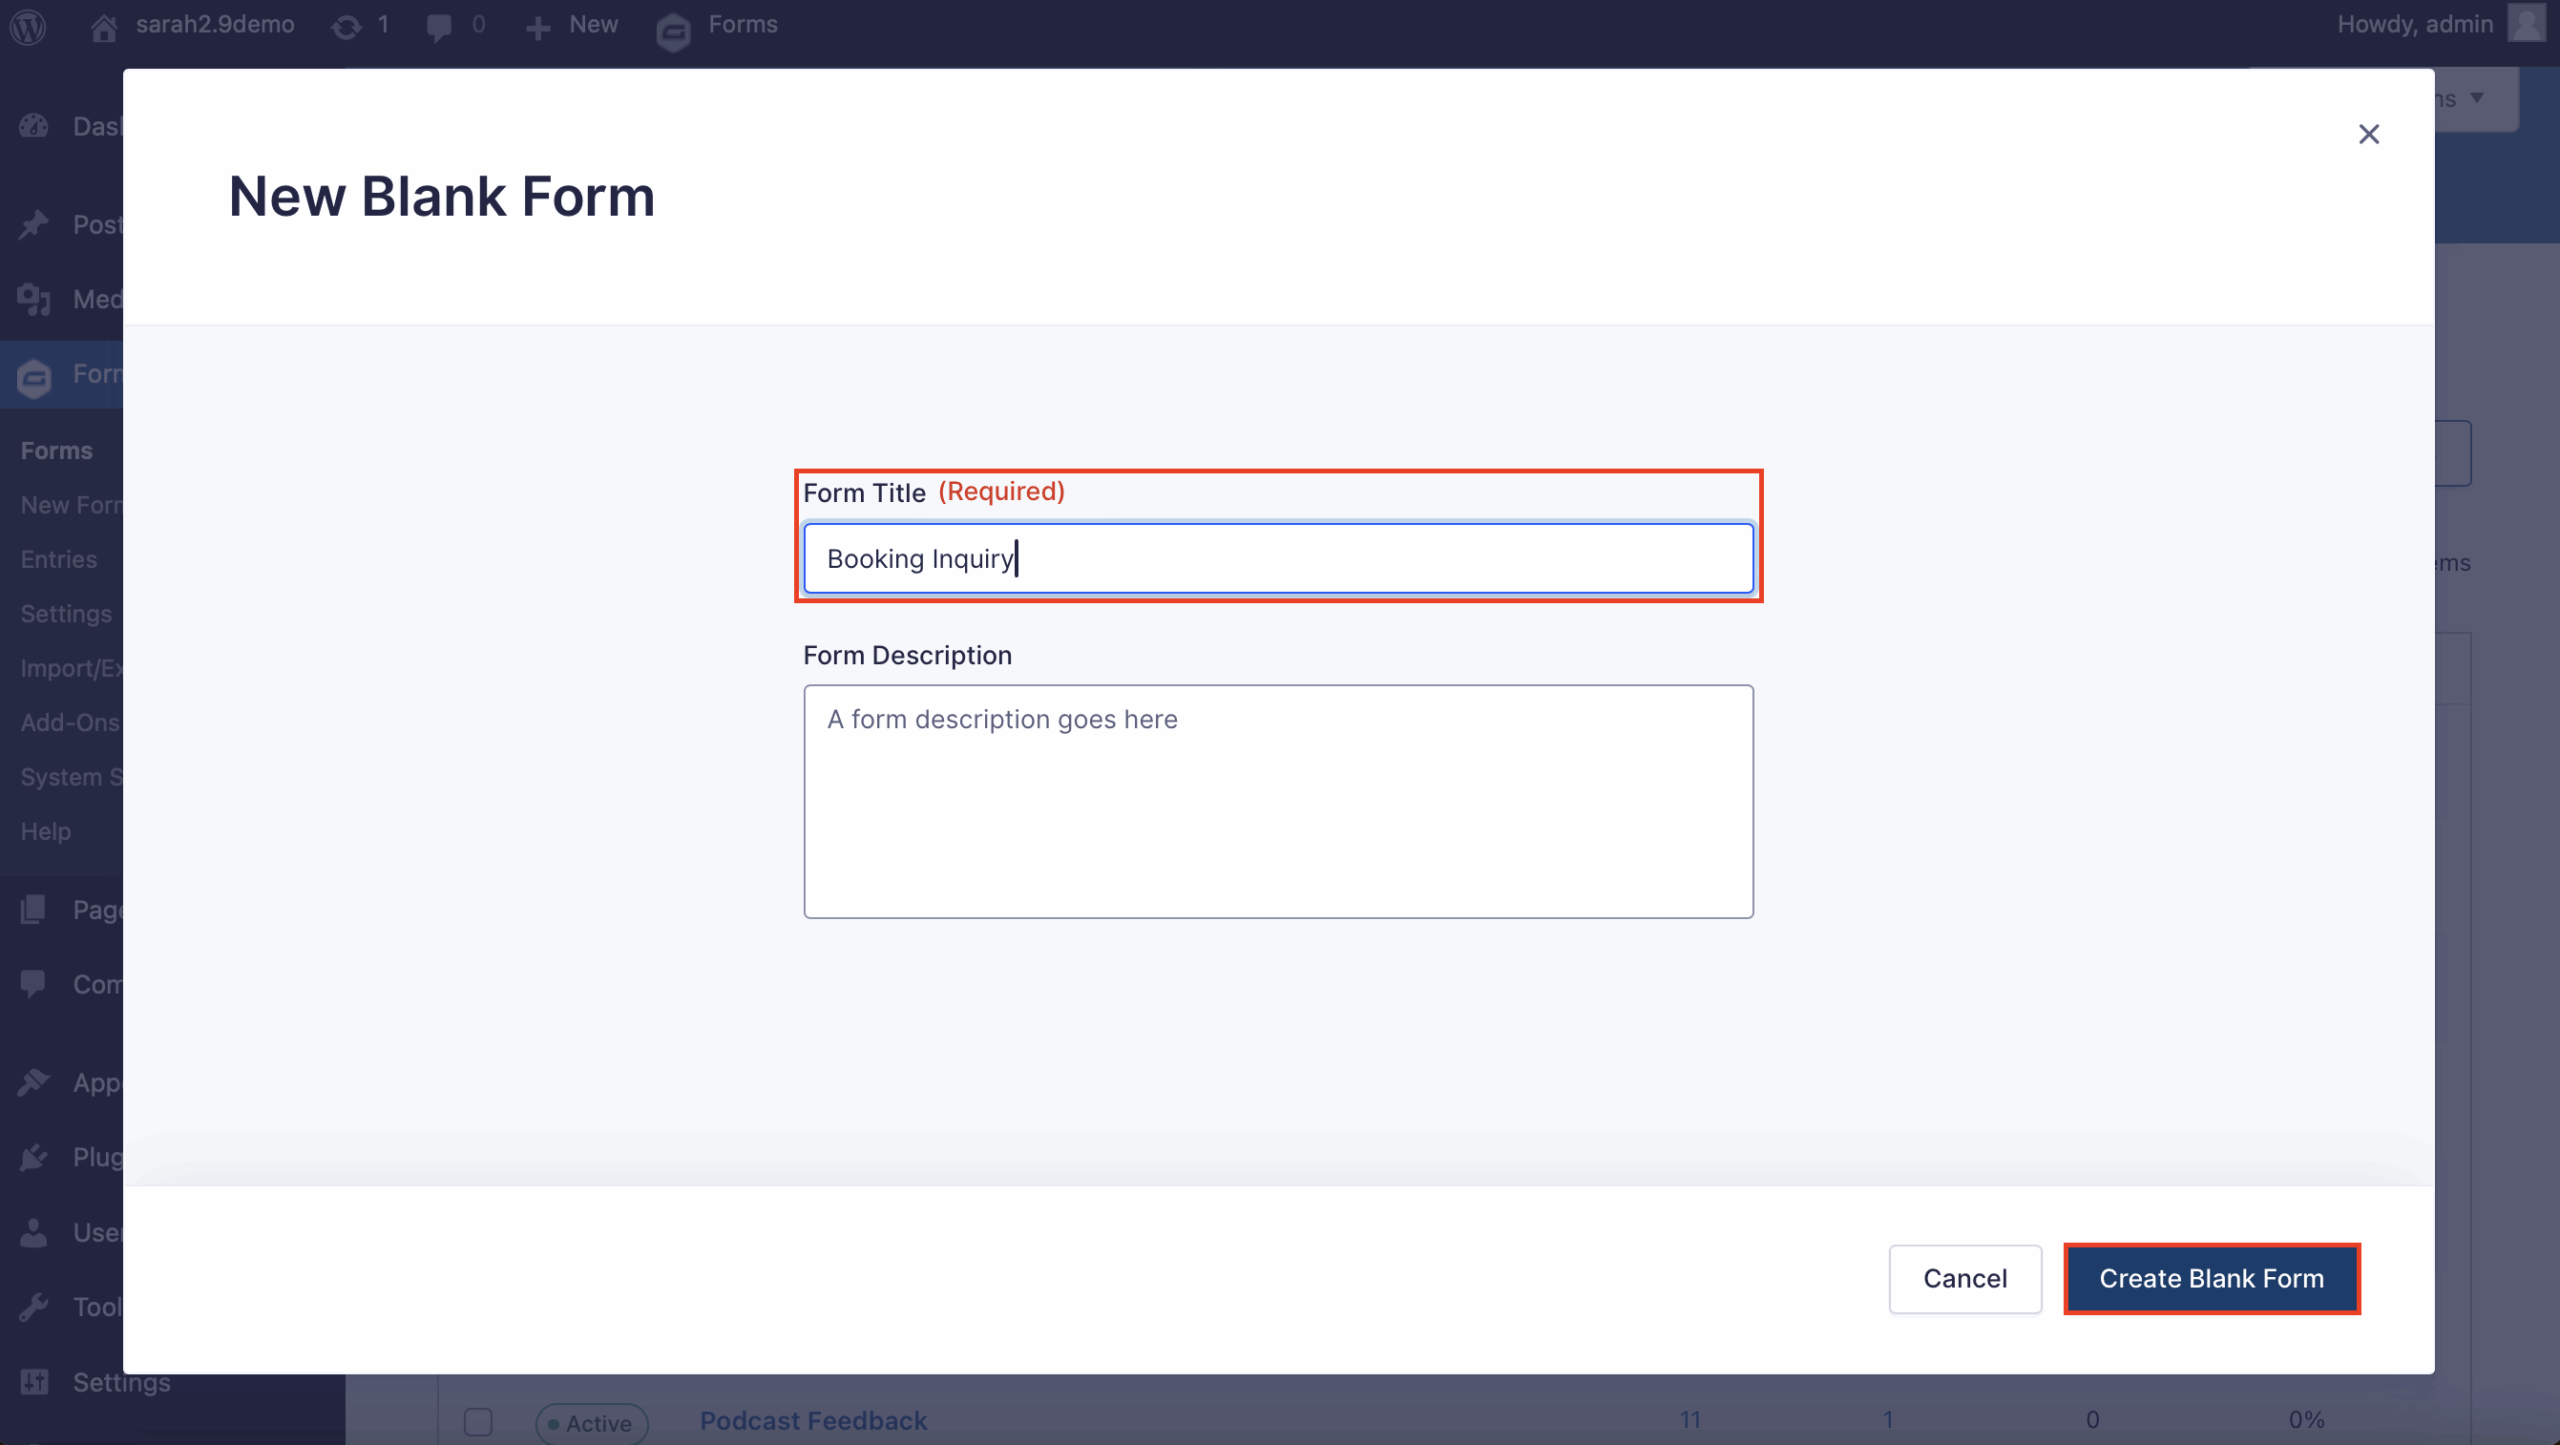
In this tutorial, let’s create a booking request form. Give your form a title and optionally a description, and then click Create Blank Form.
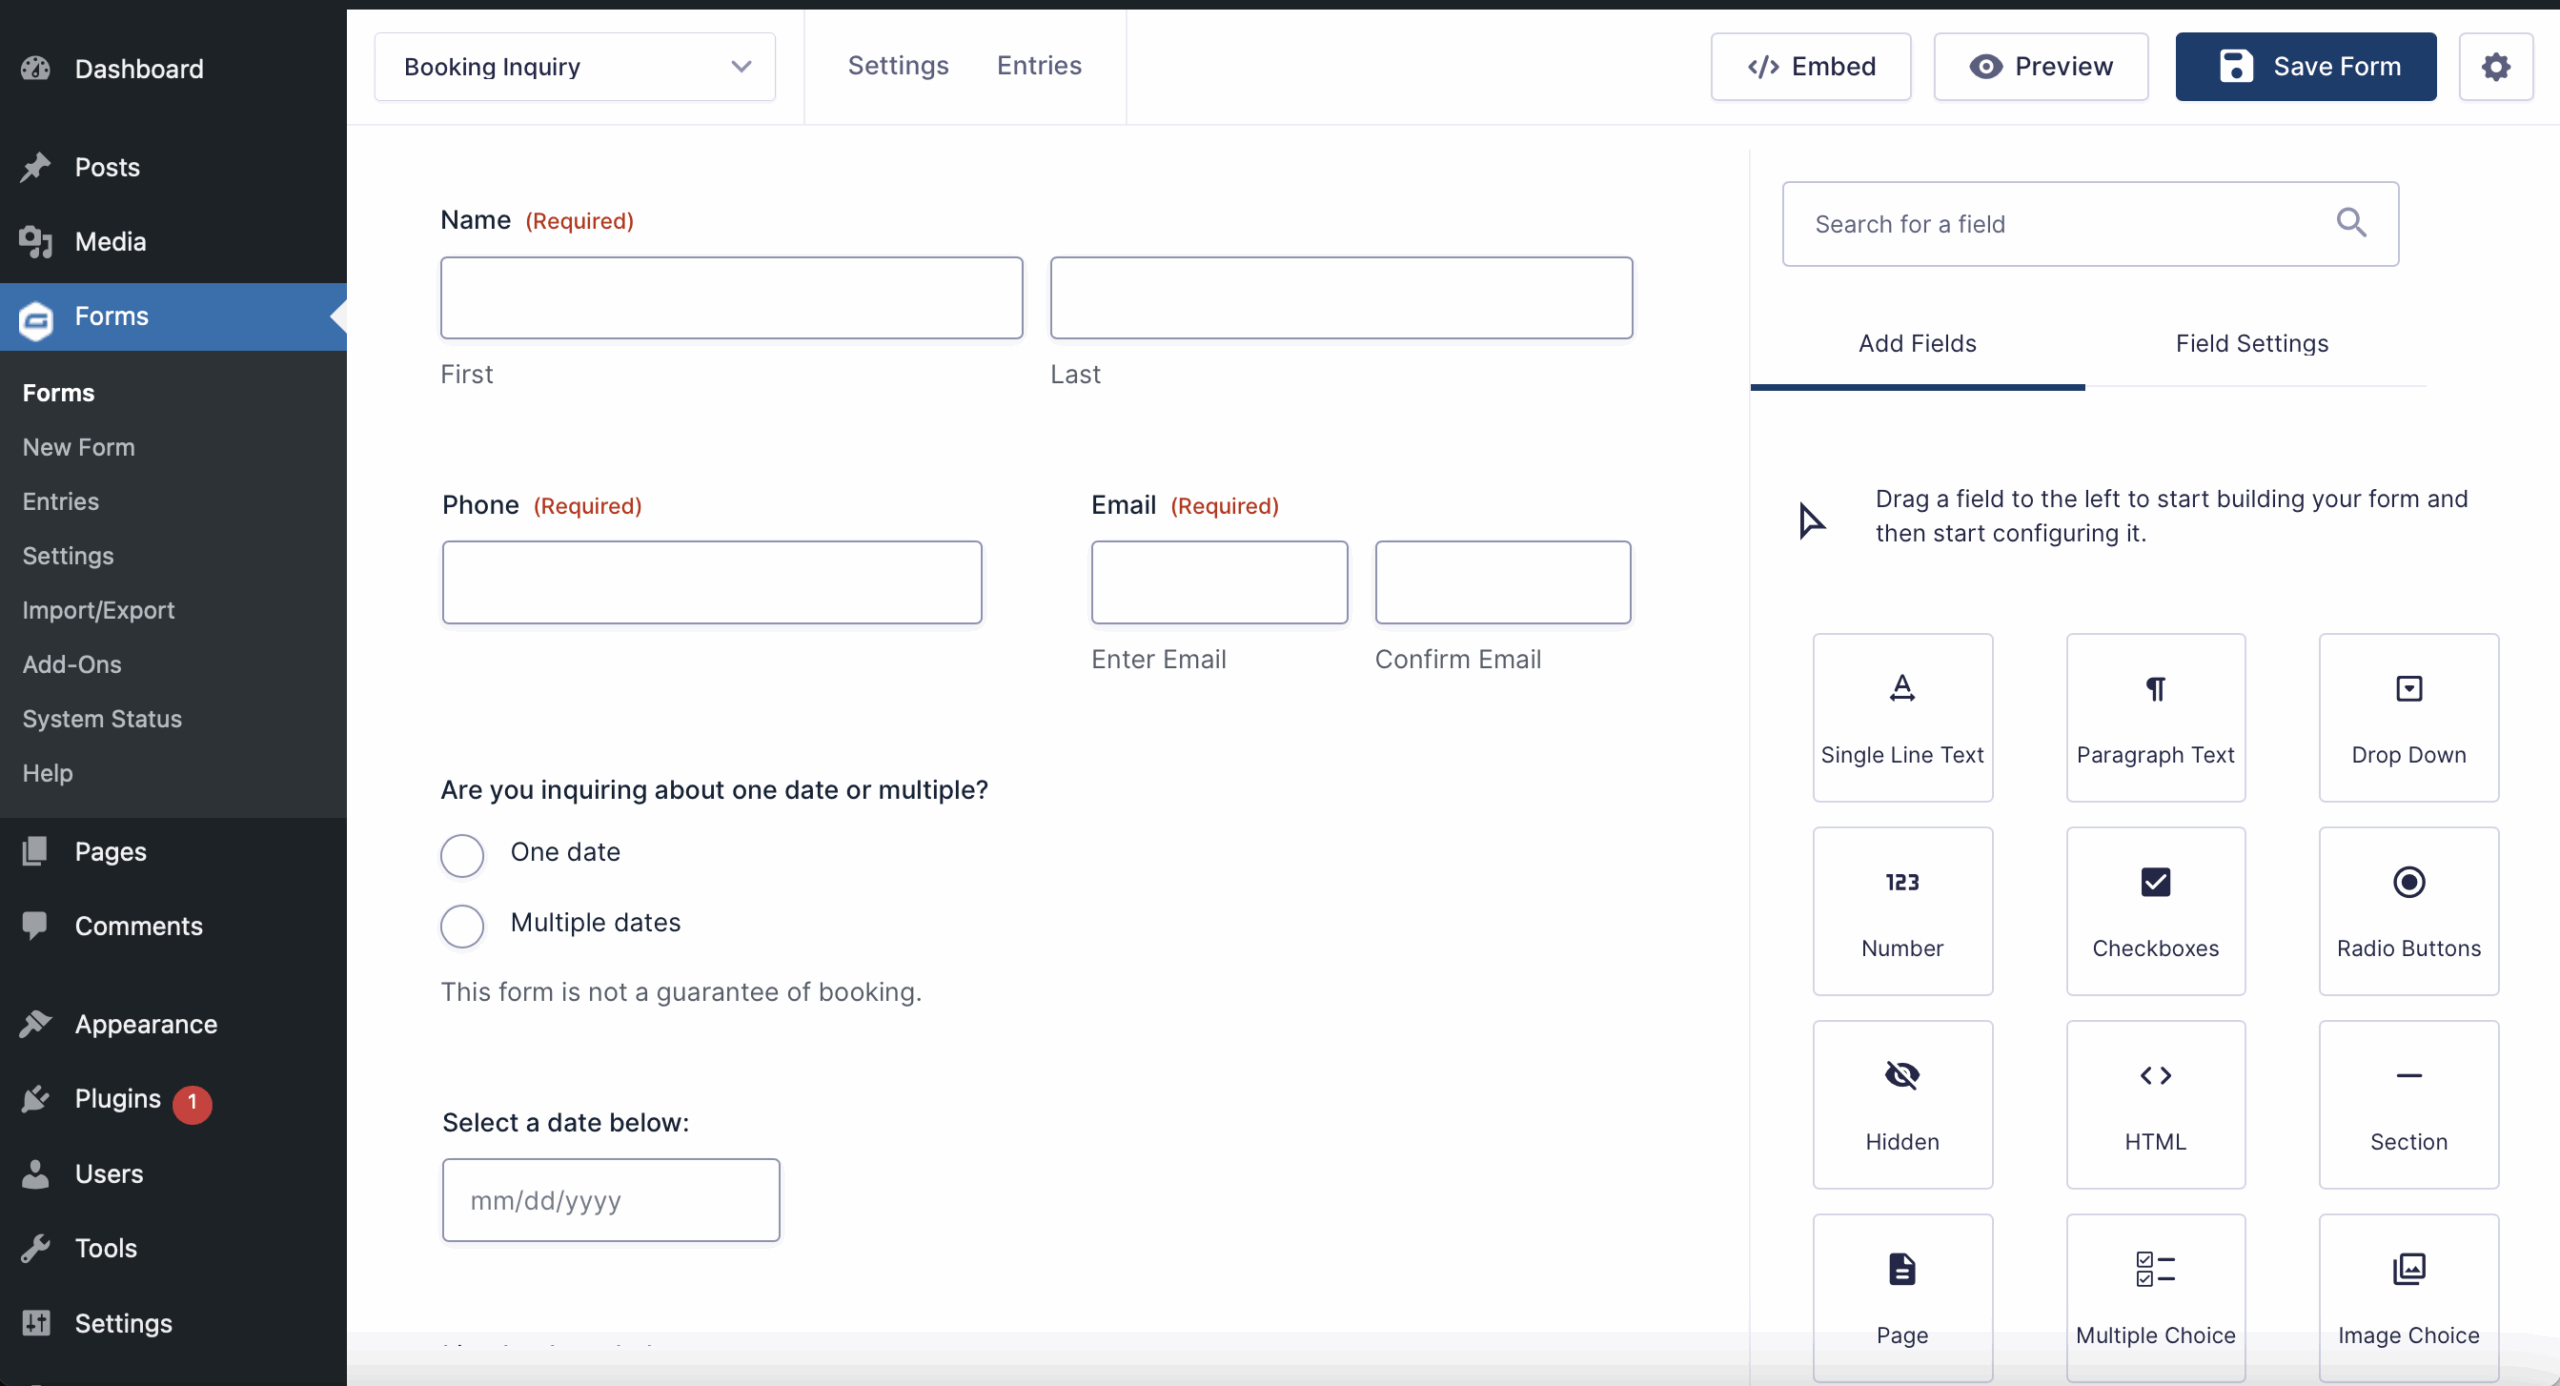
This is the fun part. Drag and drop fields onto your form and arrange them as needed. Edit the field settings to make fields required, modify the appearance, add conditional logic and so on. With Gravity Forms, you have an enormous amount of flexibility when it comes to customization. When you are satisfied, click Save Form.
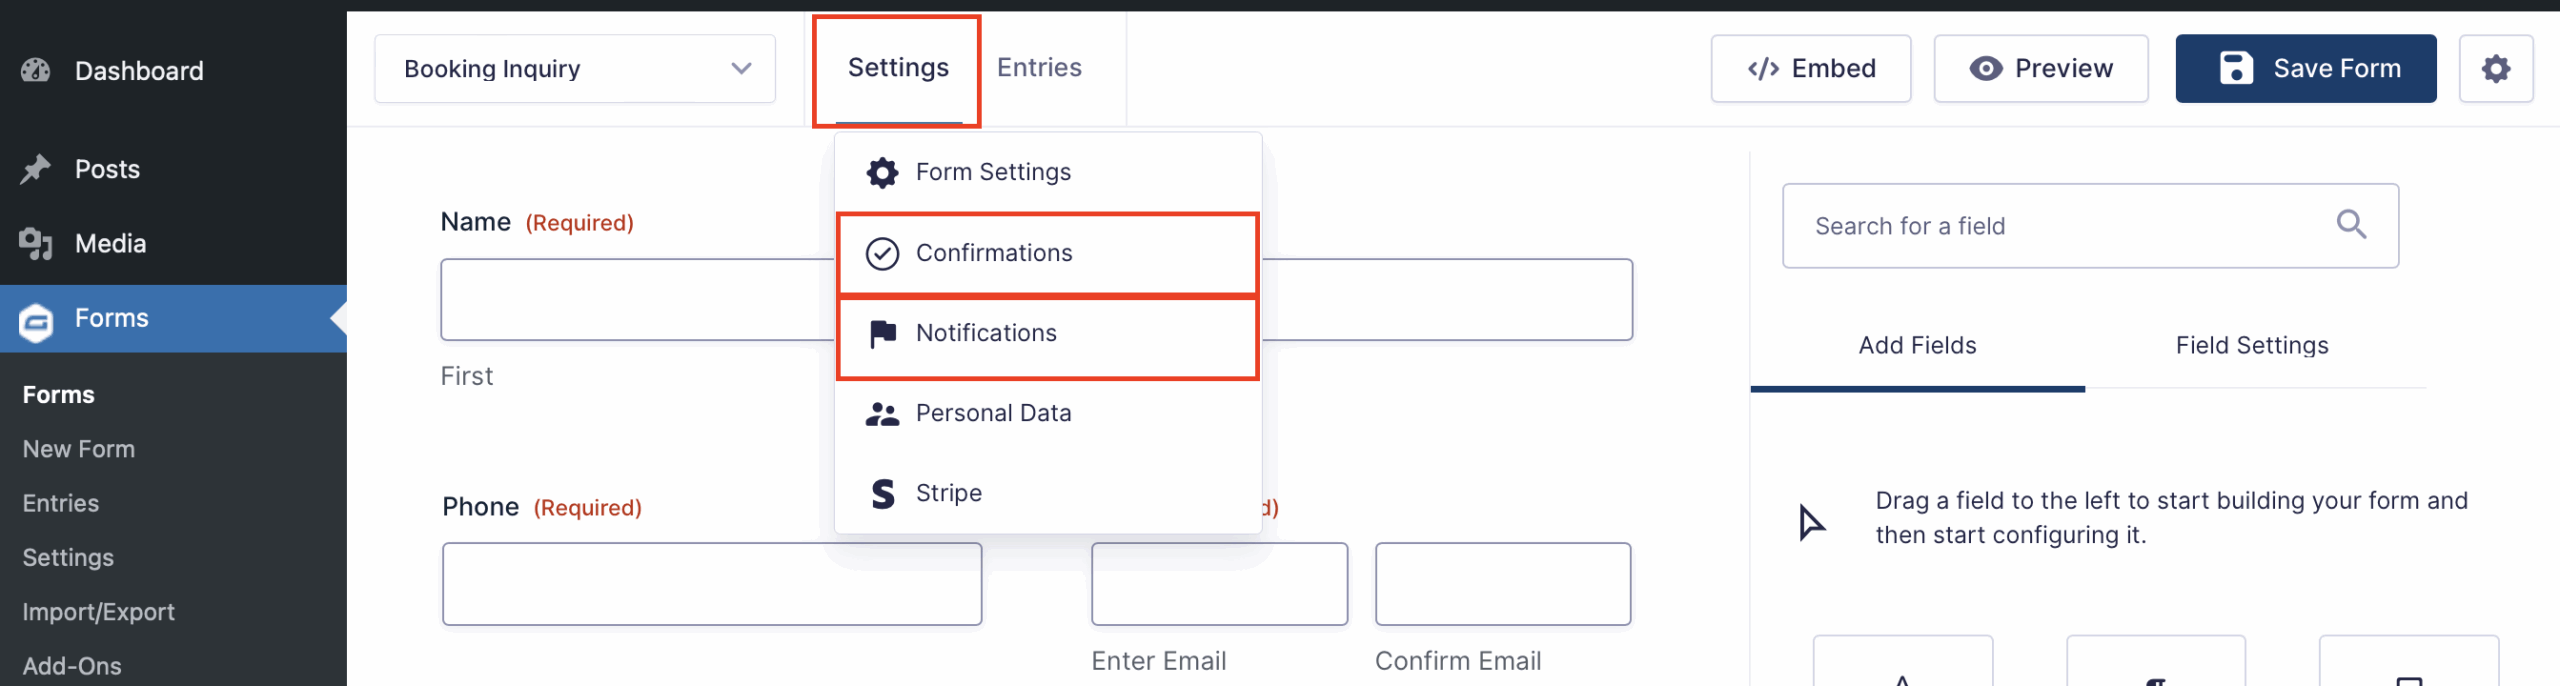
Under Settings, you can further enhance your form by customizing the notifications and confirmations to let your users know their form has been submitted successfully. Our documentation will help you get started with notifications and confirmations.
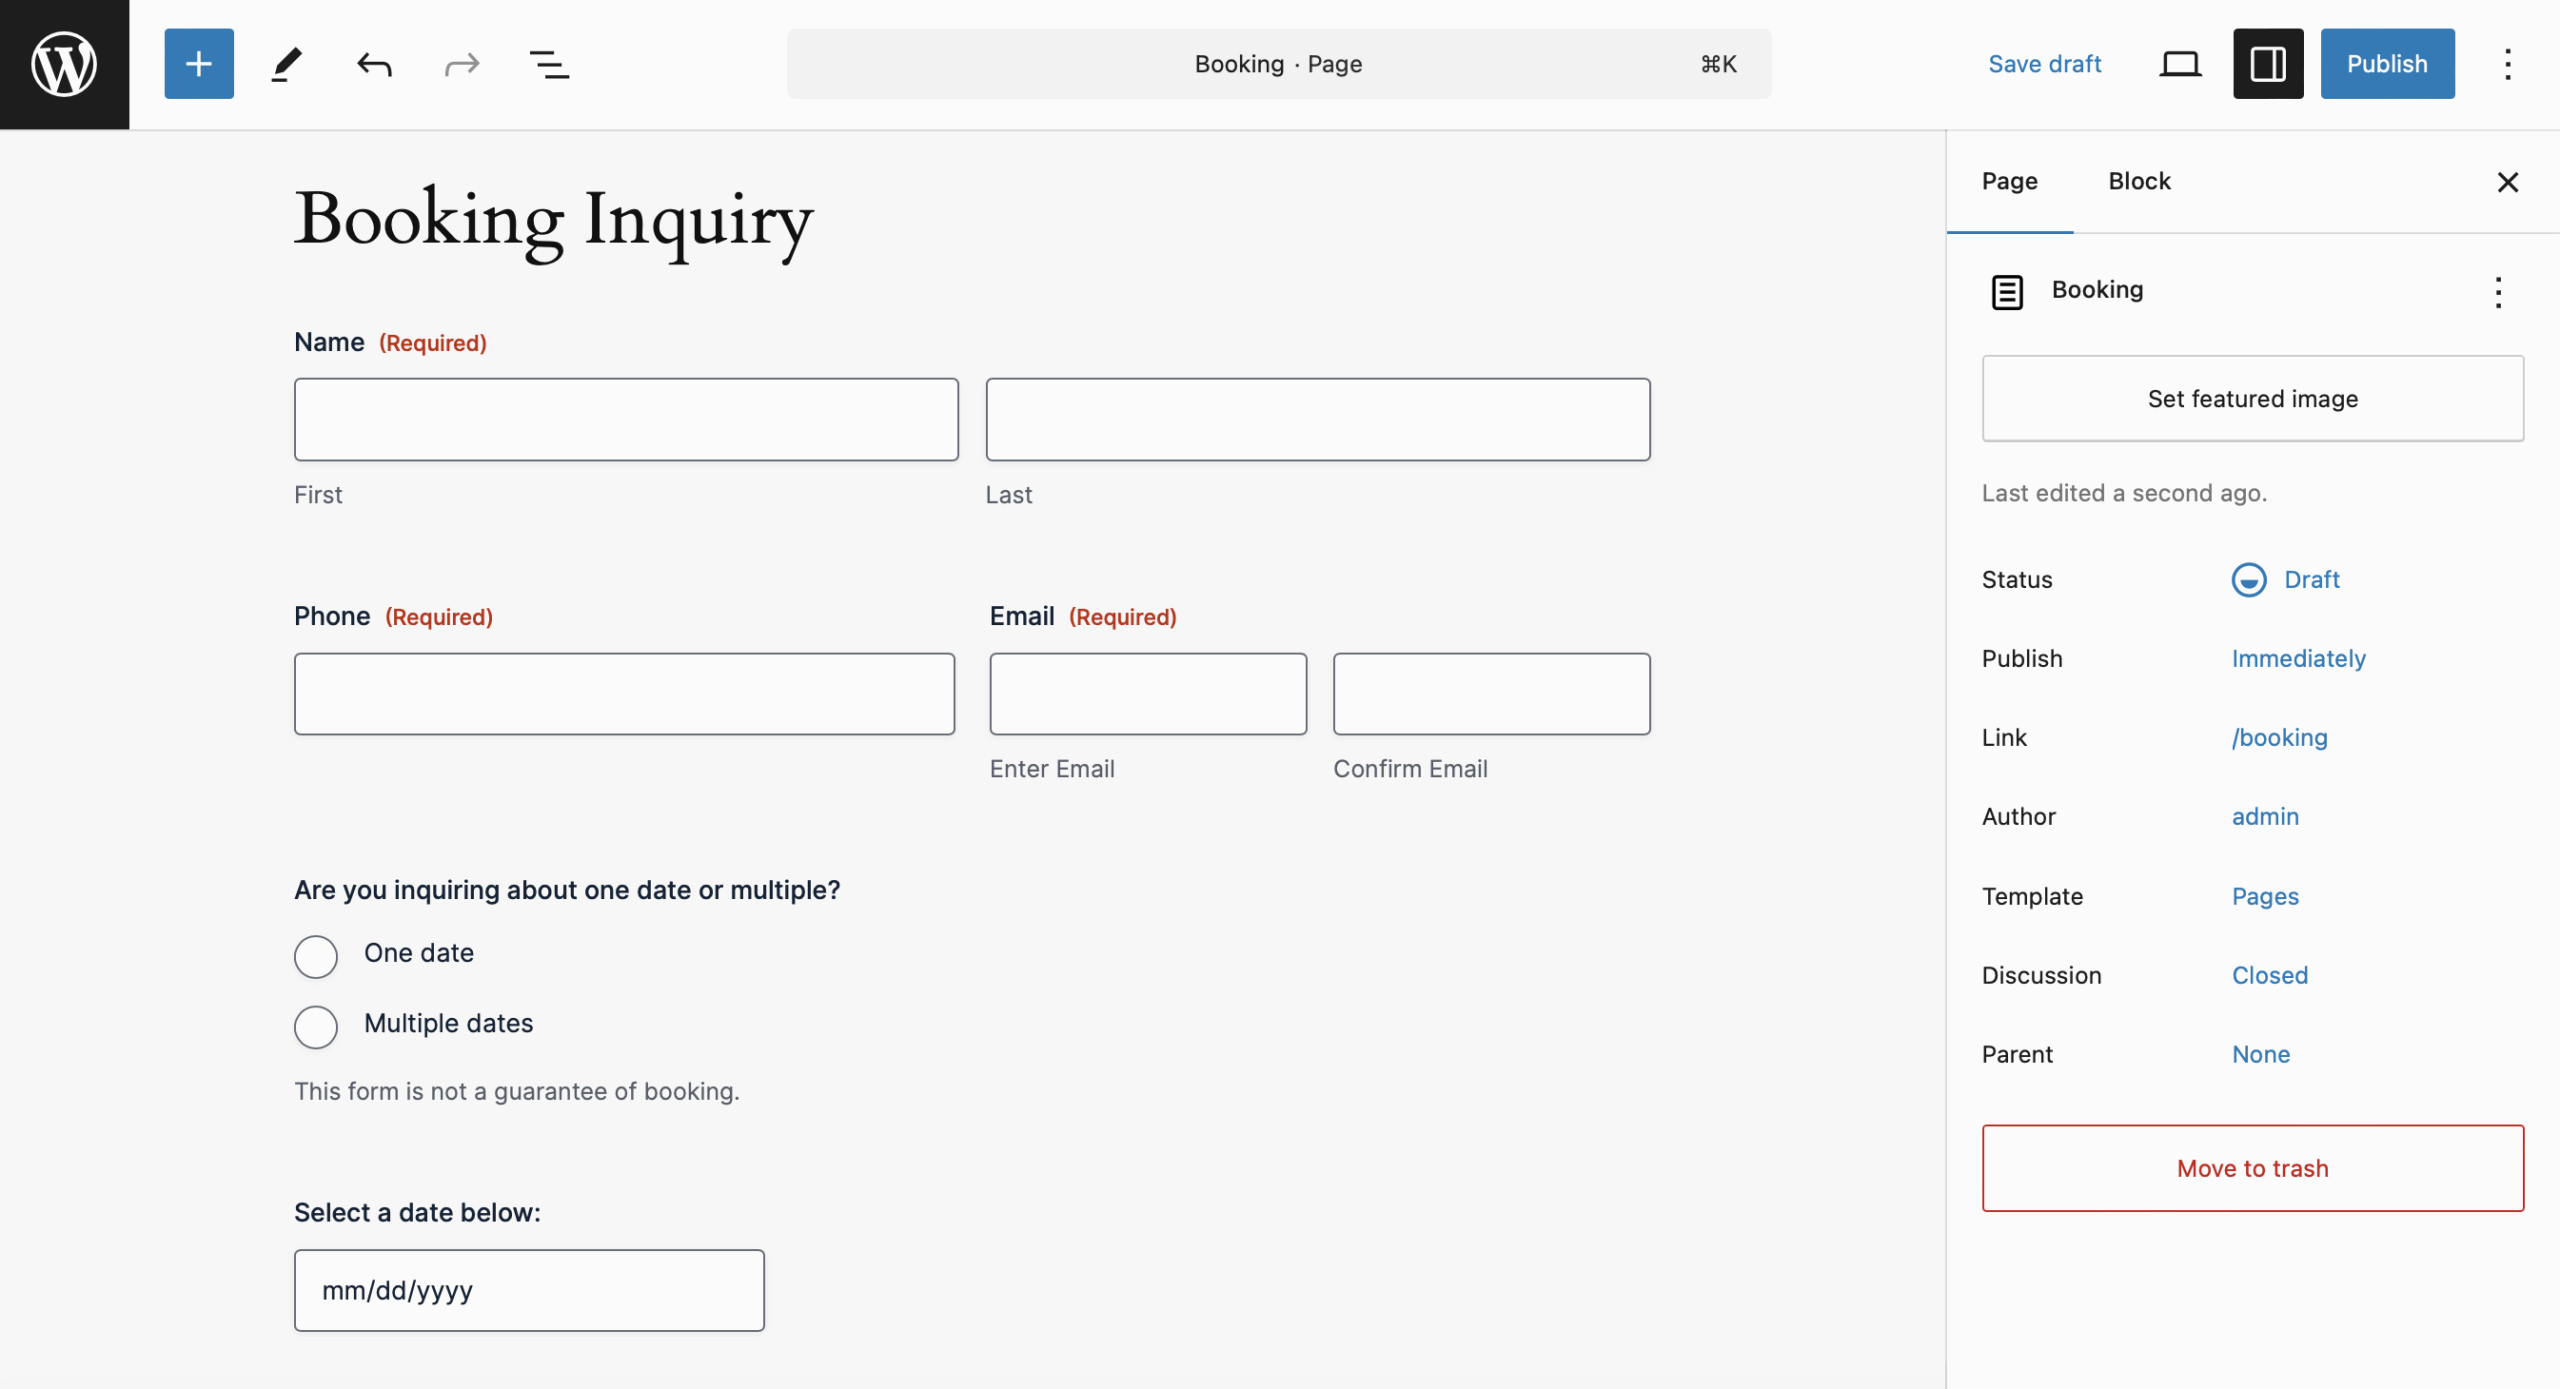
To view the finished product, embed the form on any page or post. In this case, we’ll embed the form on a new page:
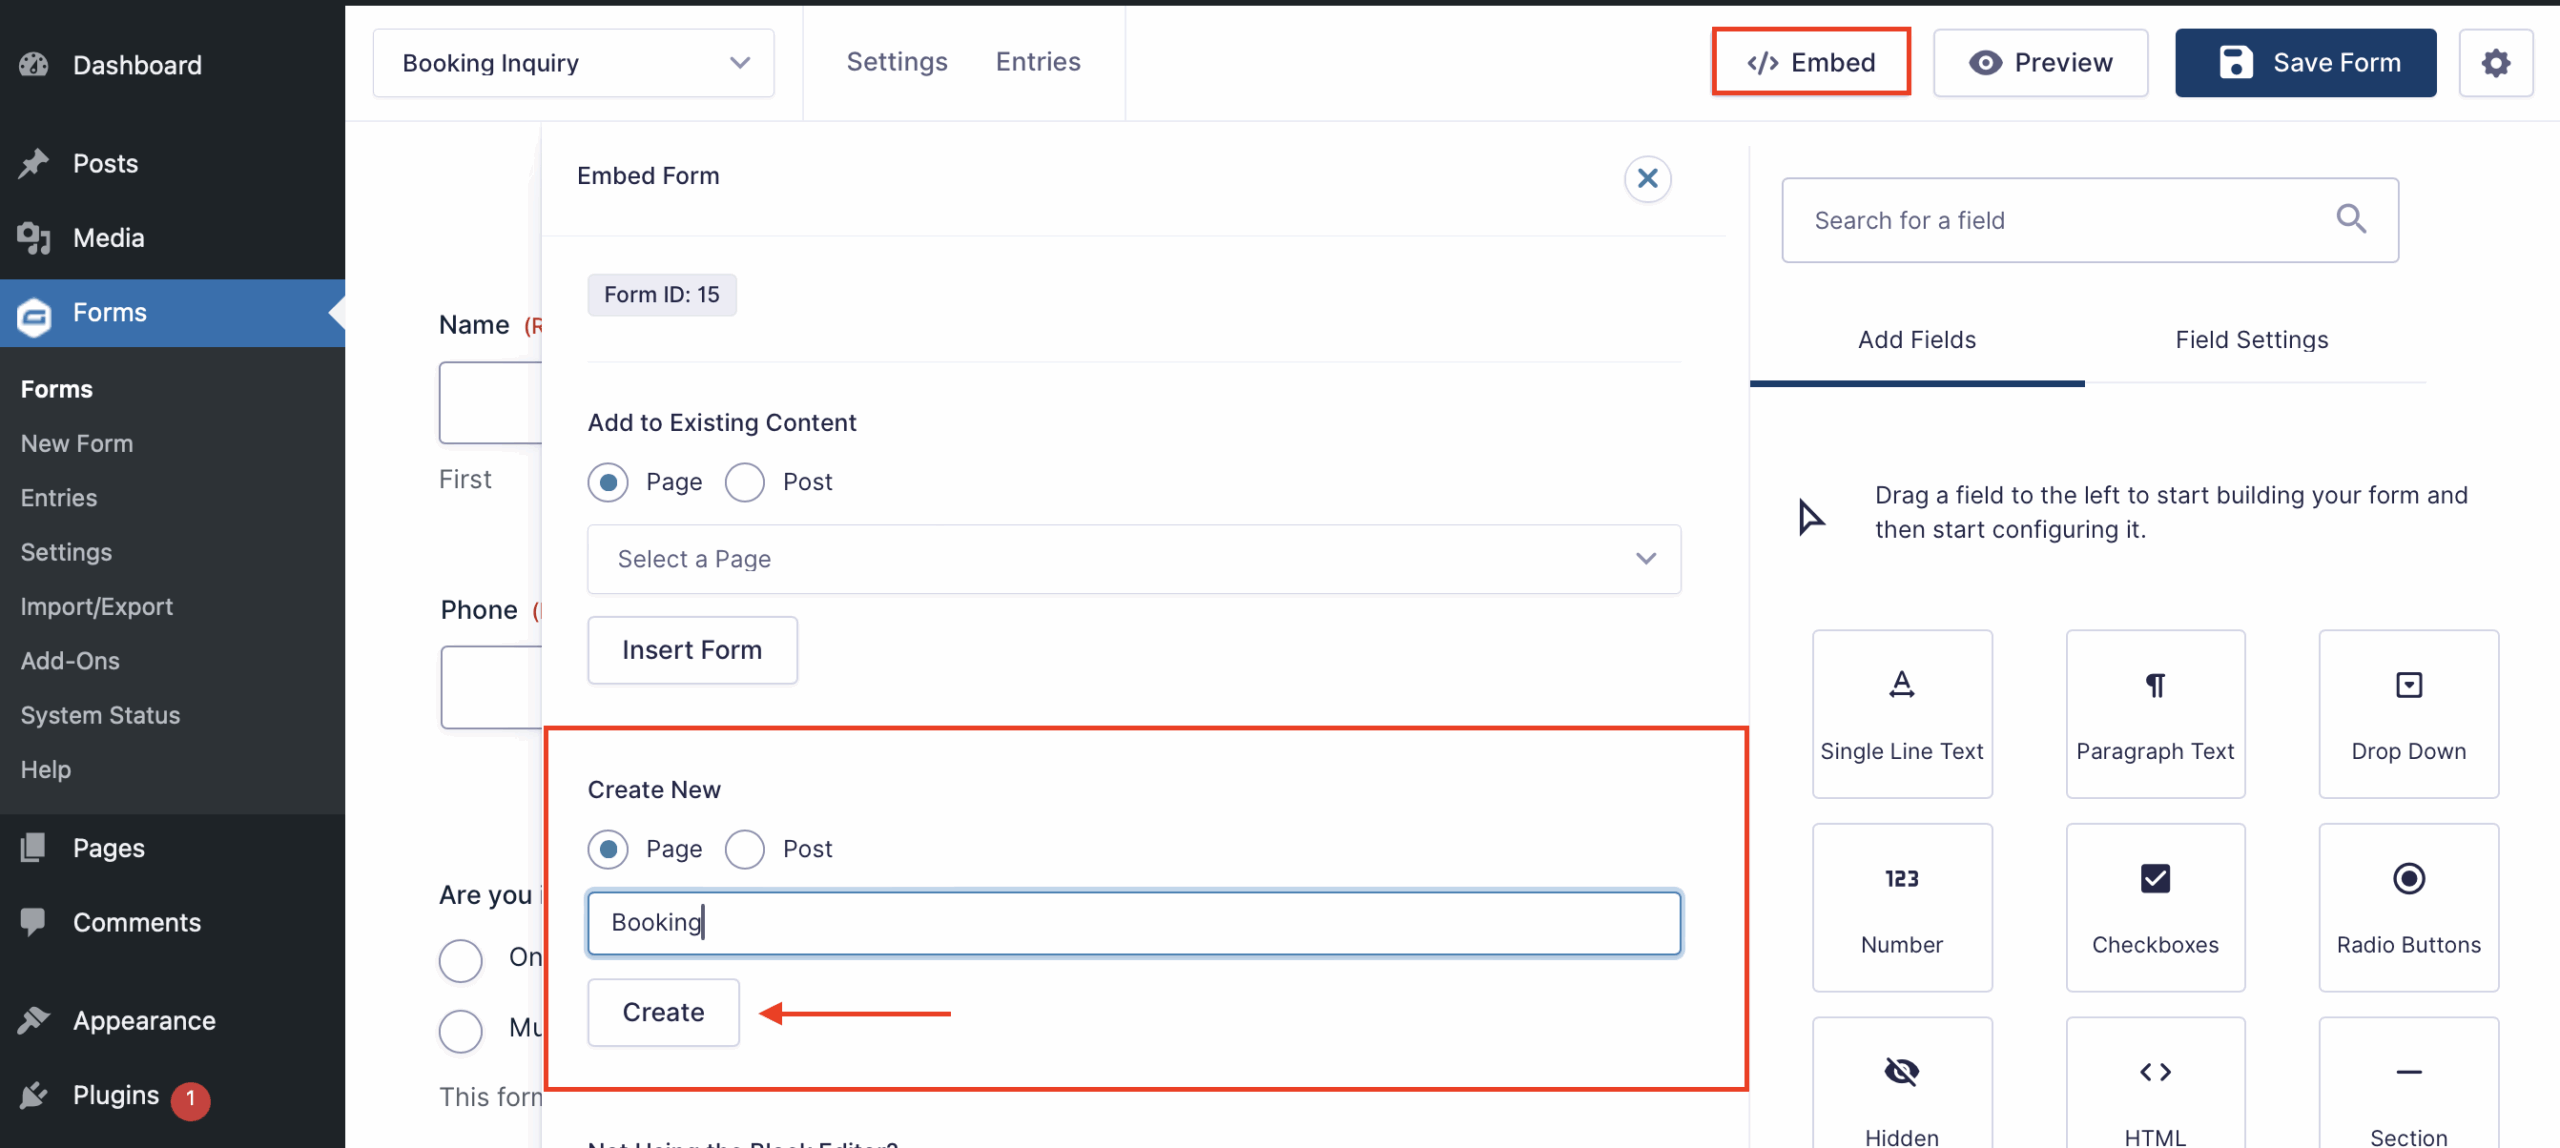
From here, you’ll be able to view your form and make further changes to style your form via the block editor as needed. Don’t worry, this page starts out in Draft status, so you can still make as many changes as you need to before publishing for the world to see.
Test your form
Make sure to test your form by submitting a few test entries. The easiest way to do this is from the page editor, by clicking Preview in new tab.
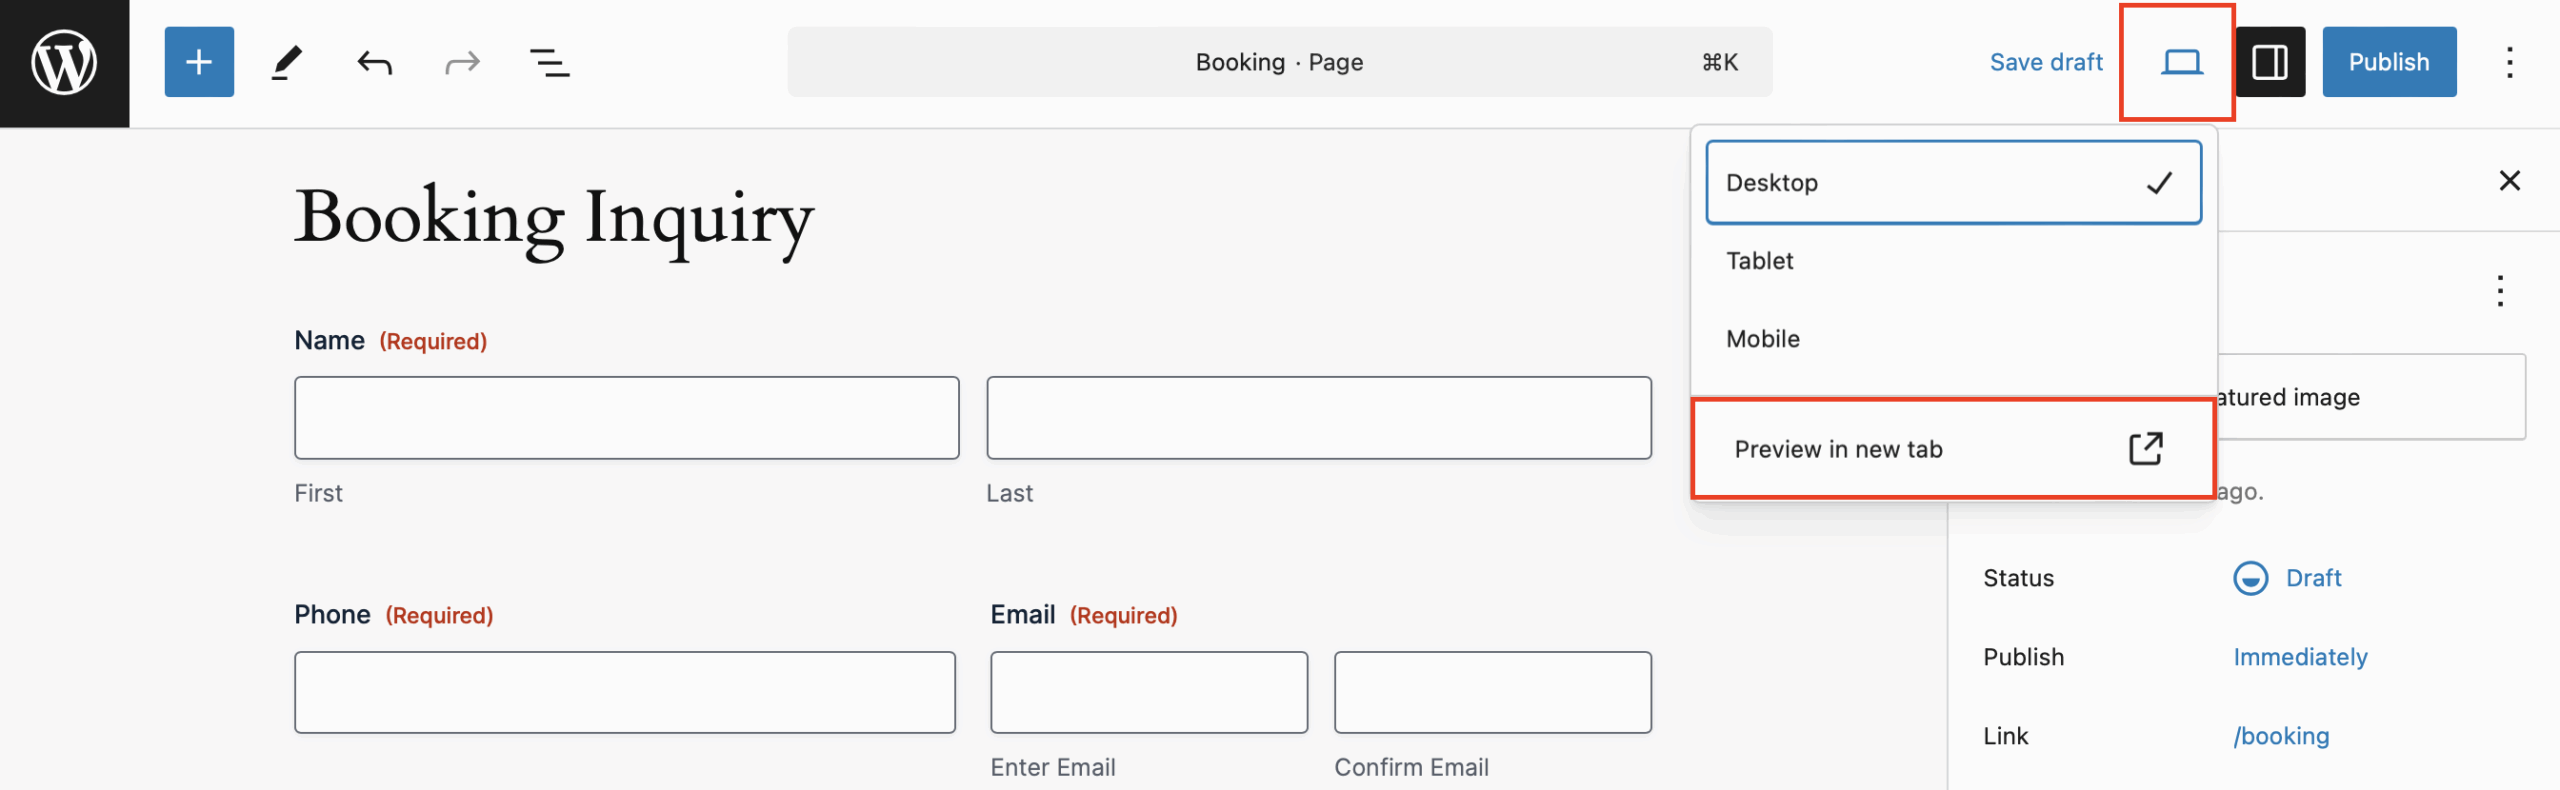
Fill out the form and click to submit.
This will ensure everything is working as expected and that all submissions are being routed correctly. This is also how you’ll be able to validate your confirmation messages and notifications, if you’ve added any.
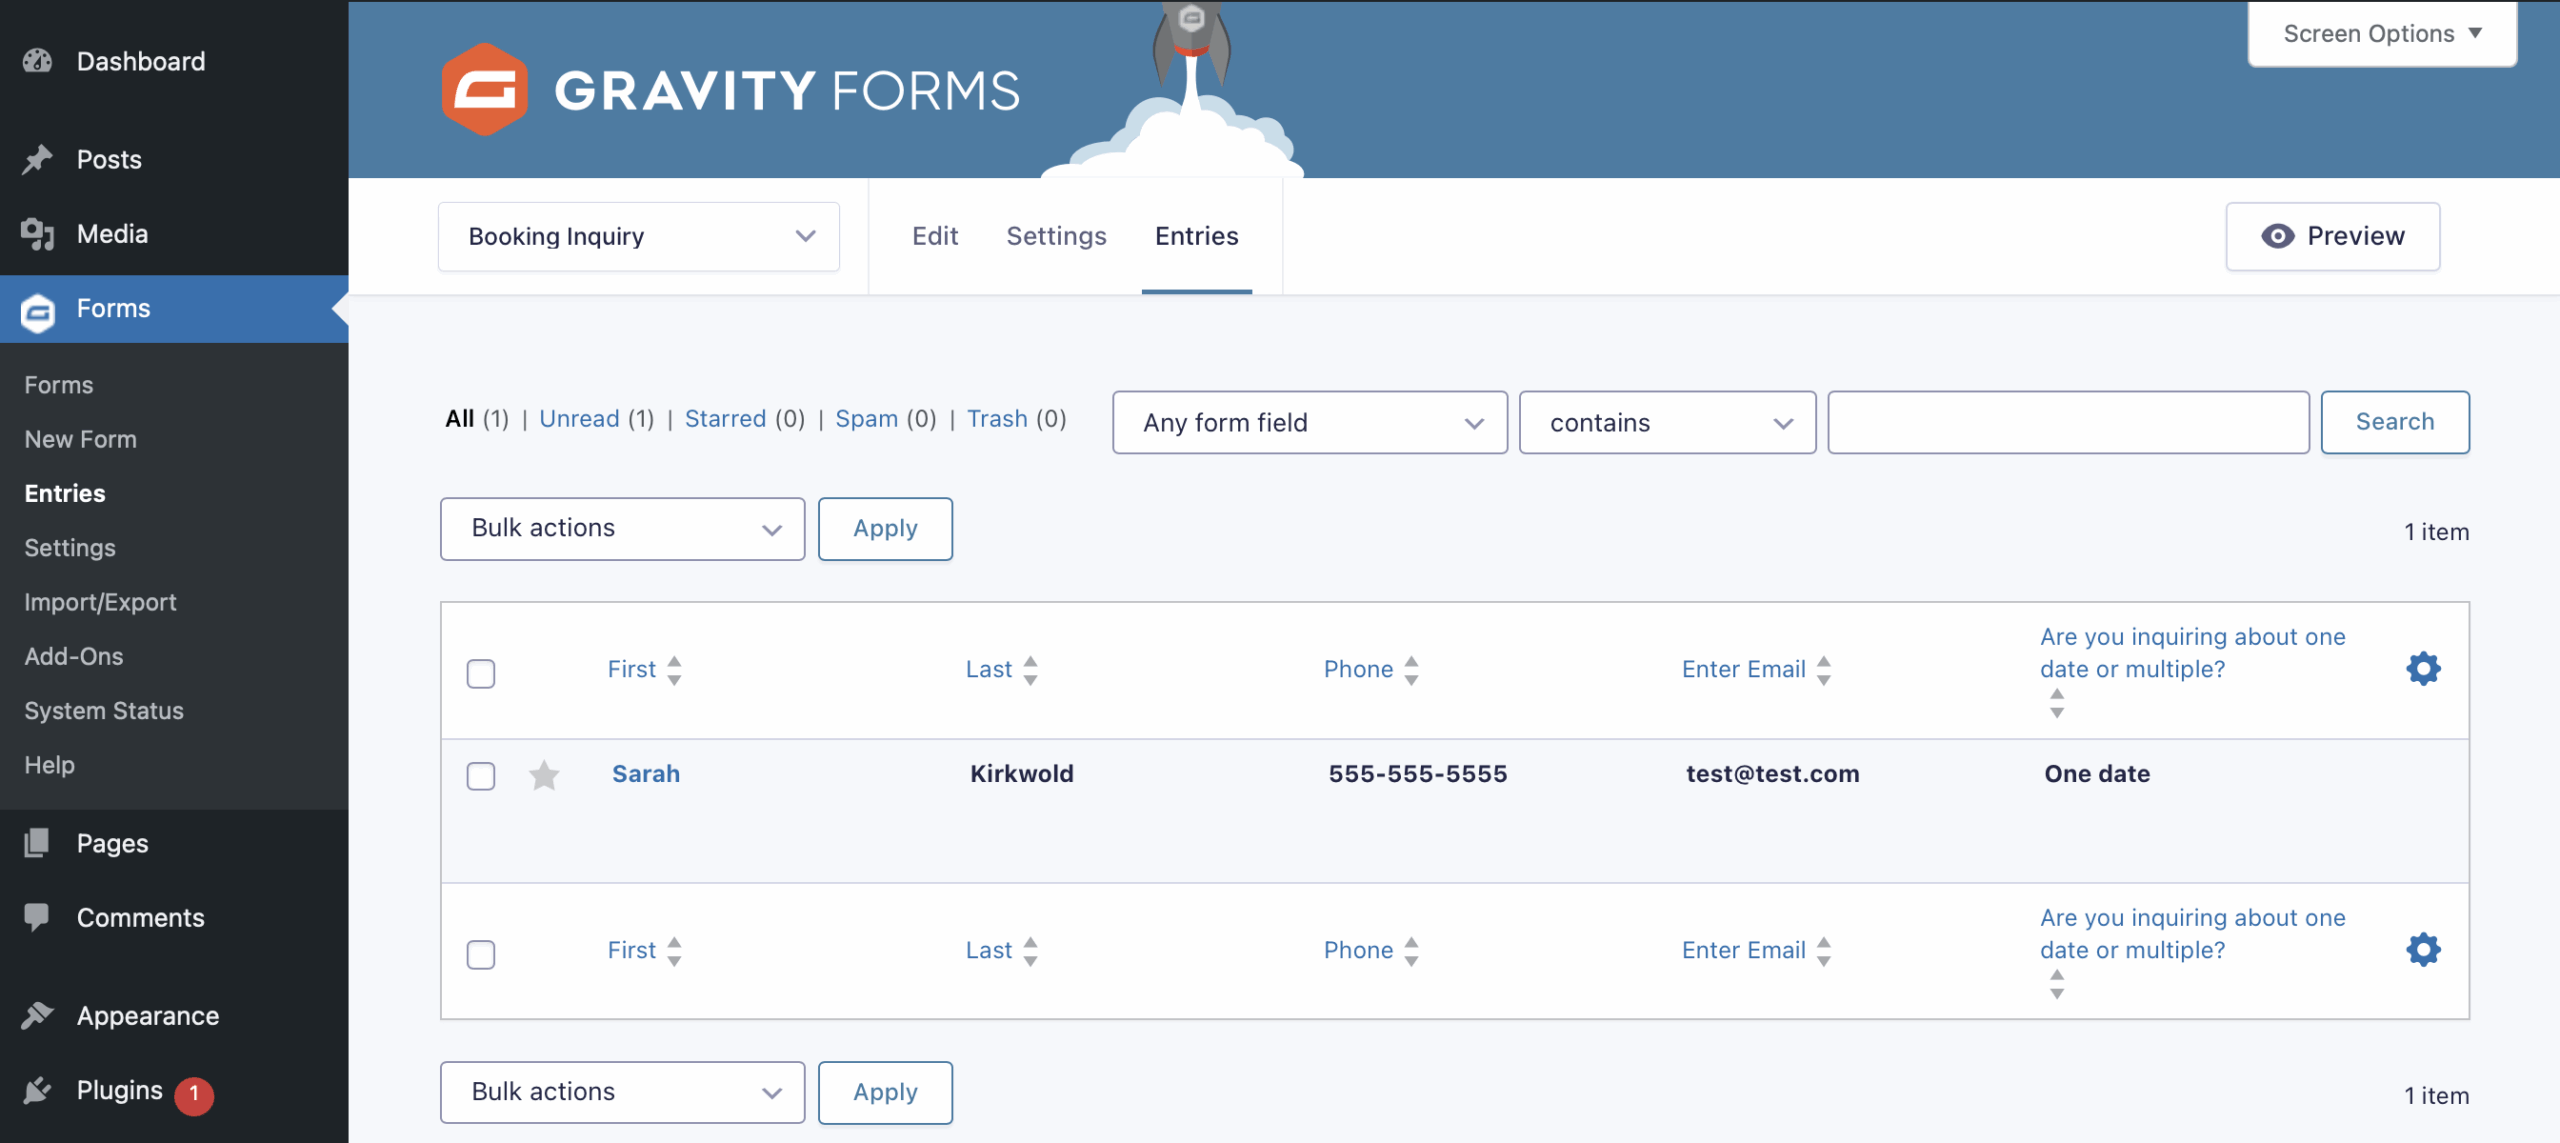
To check that your form submission has been received, head to your Forms list and click Entries.
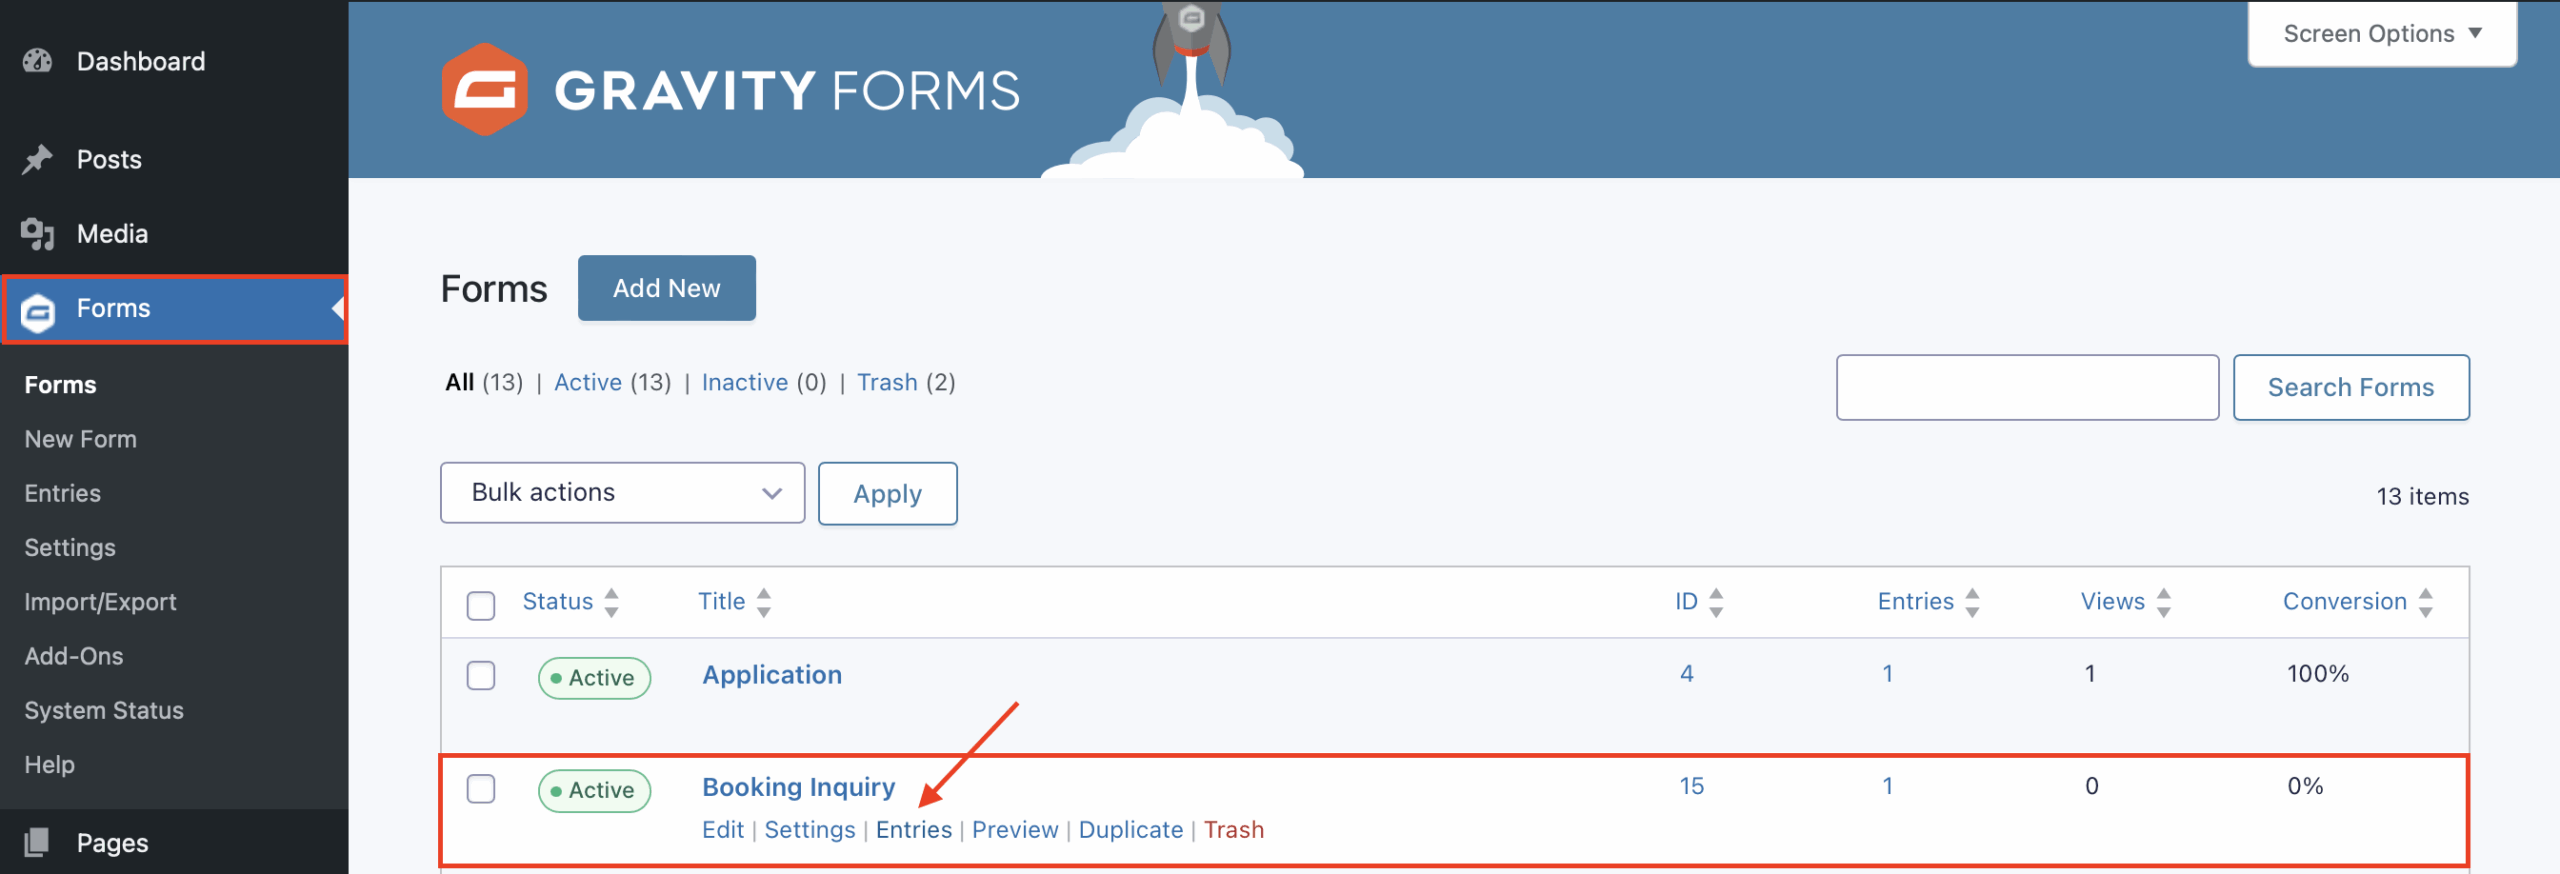
Here you should see the test entry you just submitted, and can confirm everything is working properly.
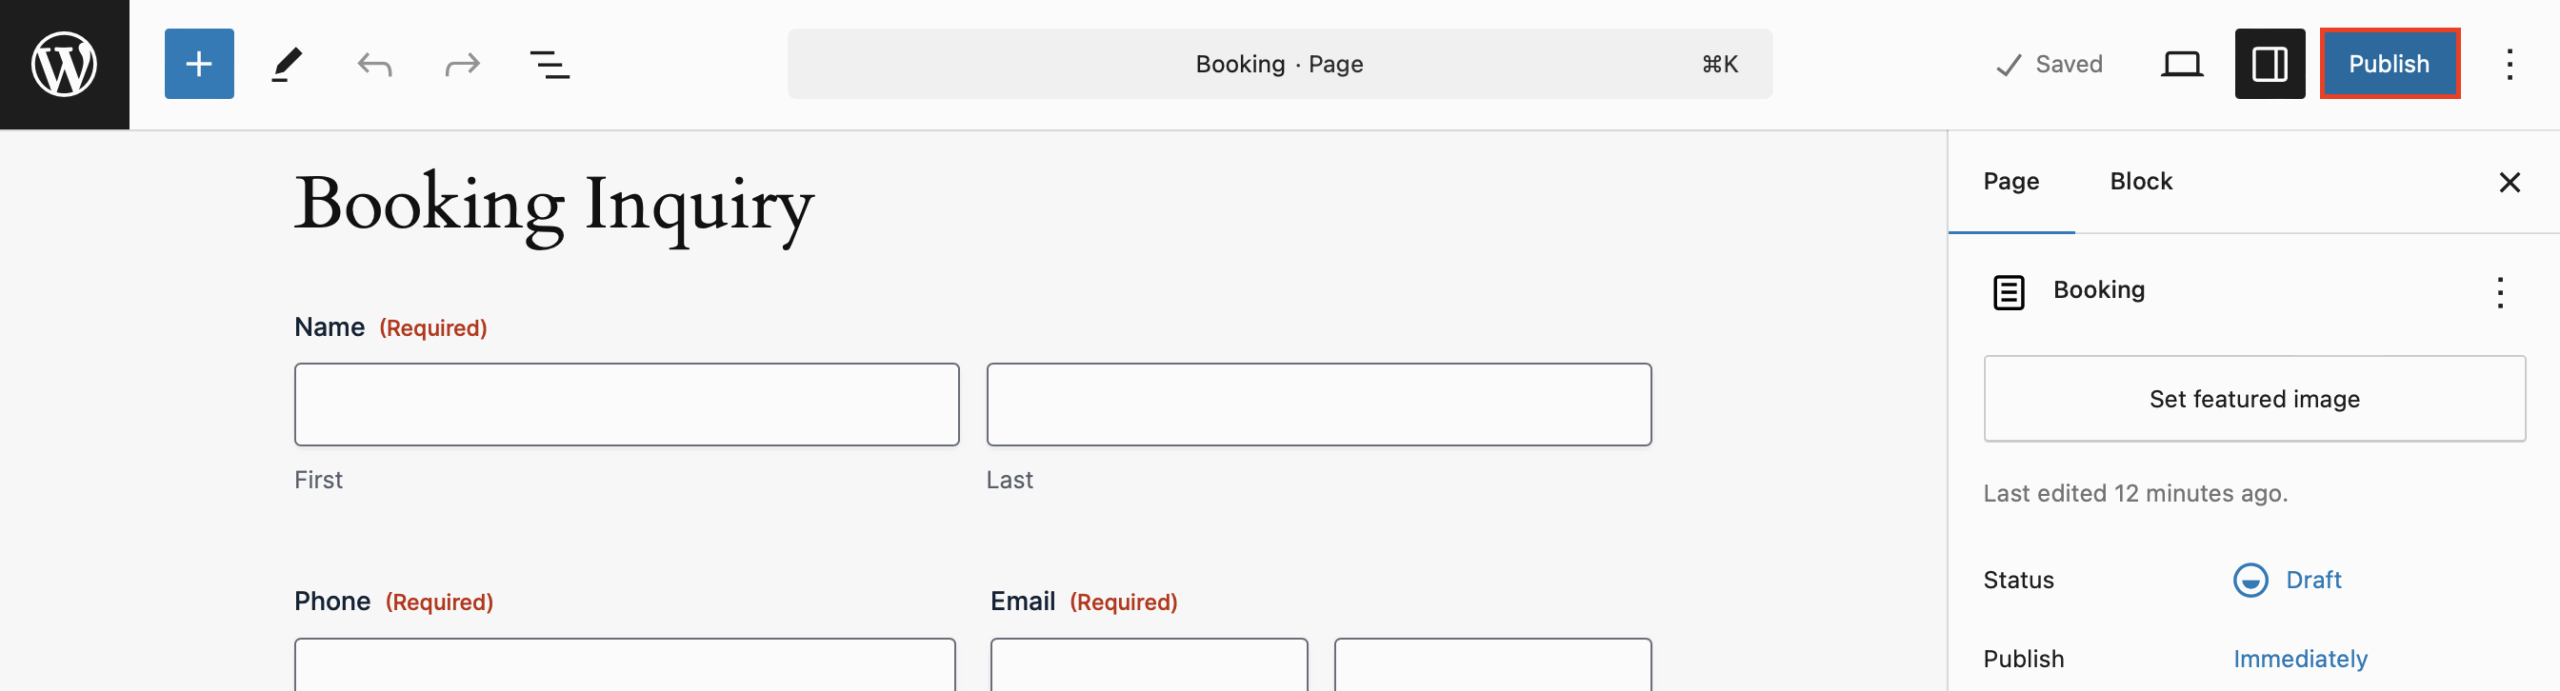
Publish your form
When you are ready to publish your page, simply navigate back to the page you created and click Publish. That’s it!
Enhance your form
If you really want to take your forms to the next level, you can extend the functionality of your WordPress site by taking advantage of the many features and add-ons available with your Gravity Forms license.
To name a few:
Enable conditional logic
Think of conditional logic as an “if-this-then-that” system. For example, if someone inquires about booking you for a wedding gig, then show additional questions about ceremony music.
Check out our documentation to learn more about conditional logic.
Set up custom confirmations and notifications
Confirmations appear after someone submits your form. You can show a simple “Thank you” message, or direct them to take further action like signing up to your email list, or following you on social media.
Notifications are the emails that get sent from your WordPress website. Send payment receipts, booking confirmations and more – automatically.
Accept file uploads
Add the File Upload field to accept things like signed contracts, song lists, sheet music and more.
Learn more about the many other fields you can use in the Gravity Forms documentation.
Reduce manual work
One of the biggest advantages of using Gravity Forms is the ability to automate many of the repetitive tasks involved in managing your business. By setting up conditional logic, confirmation messages, notifications, and integrations with other platforms, you can automate things like:
- Sending unique confirmation emails when someone submits a gig request.
- Adding friends, family, and fans to your email marketing list.
- Notifying you whenever a song request is submitted.
- Generating an invoice or receipt for gigs or payments.
This automation saves you time and ensures your processes run smoothly without manual intervention.
Additionally, if you hold a Pro, Elite, Nonprofit, or Developer (legacy) license, you can take advantage of the powerful Gravity Forms Zapier Add-On, and connect your forms to thousands of other web services.
Control what happens after the form submission
If you want to make your life even easier, you can use a dedicated automation tool like Gravity Flow. Gravity Flow helps musicians focus more on their craft while automating the behind-the-scenes work by streamlining tasks including:
- Gig invoicing – Automatically send an invoice after your gig, and receive responses straight to your inbox.
- Testimonials – Set up automated approval workflows to instantly review and manage testimonials from your clients and fans.
- Collaboration requests – Automatically assign collaboration inquiries to the appropriate musician or manager for faster responses and better organization.
For more information on Gravity Flow and to see examples of automation in action, check out the video tutorials in our documentation or try out a free demo!
Easily integrate with other tools
Gravity Forms integrates seamlessly with a wide range of third-party tools. Whether you’re integrating your calendar, automating social media posts, or generating contracts, Gravity Forms allows for a smooth workflow.
Check out our expansive list of add-ons and explore the possibilities.
Examples of other musician-friendly forms you can build
Once your booking request form is live, consider adding these useful forms to your WordPress site:
- Song request form. Let fans submit songs in advance or at the event. Use conditional fields to group by genre or artist.
- Event registration form. Hosting your own show or open mic? Let people RSVP and collect their email addresses at the same time.
- Virtual tip jar form. Add a simple payment form for digital tips.
- Press kit request form. Let venues or media request your EPK or one-sheet, and deliver it automatically via email.
- Merch pre-order form. Sell t-shirts or vinyl before your next release drops. Collect payment securely, no ecommerce plugin required.
Turn your website into a booking machine
WordPress and Gravity Forms give you the tools to look professional, stay organized, and book more gigs – with less stress.
Your booking request form should reflect your vibe, answer the right questions, and make it easy for people to hire you.
Start with a simple form. Add notifications, payment options, and conditional logic as you grow. The easier you make it for people to book you, the more gigs you’ll land.
Let your website handle the logistics so you can focus on the music. Purchase your Gravity Forms license today to get started!
Newsletter
If you want to keep up-to-date with what’s happening on the blog sign up for the Gravity Forms newsletter!
"*" indicates required fields


