

Crafting the perfect brewery website design is just as important as crafting the perfect recipe, and it requires more than just enticing images. You need a professional website with functionality that helps you connect with customers, manage events, and streamline operations.
You need digital tools that work as hard as you do while remaining simple to manage.
This is where WordPress and Gravity Forms come in. Together, they create a powerful foundation that can help breweries of all sizes automate tedious tasks, capture valuable customer information, and create seamless interactions with beer enthusiasts.
Even if you’re brand new to WordPress, we’ll break down the basics and show you how to get started with Gravity Forms.
Soon, you’ll be building forms and freeing yourself up to focus on brewing exceptional beer and building meaningful connections within your community.
Key takeaways
- WordPress is the best platform for brewery websites thanks to its flexibility, cost-effectiveness, and brewery-specific themes for managing menus, events, and blogs.
- Gravity Forms enhances brewery website design with conditional logic, payment processing, and marketing integrations that transform a site into a business tool.
- Essential brewery forms include newsletter signups, beer club memberships, event registrations, beer-to-go pre-orders, and customer feedback surveys.
- Both WordPress and Gravity Forms are beginner-friendly, offering visual builders, templates, and robust documentation.
- Breweries can add Gravity Flow to automate workflows for event planning, catering requests, and testimonial collection.
Why use WordPress and Gravity Forms in your brewery website design
Building a strong online presence is crucial for any brewery in today’s digital landscape. WordPress offers a free, powerful platform that can easily be customized to suit the unique needs of brewery websites.
WordPress powers more than 40% of all websites on the internet, making it the most popular content management system worldwide. This popularity means abundant resources, tutorials, and support are available when you need help.
Before we dive deeper into Gravity Forms, let’s take a moment to highlight why WordPress is the best platform for hosting and managing your website:
- Full control over your content – With WordPress, you own your website, so you get the freedom to share your content on your terms (unlike social media platforms where you’re at the mercy of changing algorithms).
- Customization at your fingertips – WordPress is known for its flexibility and vast array of themes and plugins. You can customize the look and functionality of your site with just a few clicks, ensuring it reflects your unique style.
- Themes built for breweries – There are many free and paid WordPress themes geared toward breweries. Some options even include tap lists, event calendars, and age verification features.
- SEO & growth potential – With its built-in SEO features and powerful plugins like Yoast SEO, WordPress gives you the tools to help you get discovered by new, thirsty fans. This helps you to optimize your content and attract organic traffic to your website.
WordPress is not only cost effective, it makes updating your beer menu, announcing special releases, or sharing brewery events simple. However, to truly elevate your brewery website design, you need forms that work as hard as you do.

How can your brewery website design be improved with Gravity Forms?
Gravity Forms is a premium WordPress plugin that allows you to create powerful, customizable forms for your brewery website. Beyond basic contact forms, there are more advanced forms and features that can be especially helpful for brewery operations.
With Gravity Forms, it’s easy to collect information from your visitors, process payments, and automate workflows. For breweries, this means streamlining everything from event registrations to beer club memberships.
You can also create and expand on your forms with features like conditional logic. This means your forms are dynamic, and can adapt based on user responses, providing a personalized experience for each visitor.
Going a step further, Gravity Forms integrates seamlessly with powerful add-ons that extend its functionality.
Integrate with popular email marketing platforms like Mailchimp, and payment gateways like PayPal, Stripe, and Square. With features like user registration, you can even allow your customers to create accounts on your brewery website – perfect for managing beer club subscriptions or selling merchandise.
Common questions
Is WordPress really free?
Yes! WordPress is an open-source content management system and is completely free to install and use. You’ll only need to pay for hosting and a domain name.
How much does Gravity Forms cost?
Gravity Forms offers several pricing tiers starting at $59 per year for a basic license. For breweries that just need to collect email addresses via a contact form, the basic license provides all the features you’ll need to get started. However, if you want to accept payments online, you’ll need to purchase at least a Pro license, which will set you back no more than $159 a year.
Do I need technical skills to use WordPress and Gravity Forms?
Not at all! Both WordPress and Gravity Forms are designed with user-friendliness in mind. You can create professional-looking forms with no coding knowledge required.
Can I take online orders through Gravity Forms?
Absolutely! Gravity Forms can be configured to accept payments and process orders for beer-to-go, merchandise, or event tickets directly on your brewery website.
Will my brewery’s website be mobile-friendly?
Yes! Both WordPress and Gravity Forms are fully responsive, meaning your brewery’s website and forms will look great on smartphones and tablets. Keep in mind, modern brewery website design isn’t just about looks – it’s about functionality, user experience, and smart automation.

Best forms for WordPress brewery websites
Before we show you how easy it is to set up Gravity Forms on your WordPress site, let’s take a moment to explore some ideas for forms you might need to create. From beer menus to event calendars, effective brewery website design puts essential information right at your customer’s fingertips.
This list is by no means definitive, as you can create as many forms as your heart desires with Gravity Forms, but it should help get you started. Here are five essential forms every brewery should consider adding to their website:
1. Newsletter signup form
Create a newsletter signup form (we’ll show you how below) and keep your customers informed of new releases and events.
You could even use a service like Mailchimp, which lets you automatically categorize your subscribers based on their interests and follow up via automated email flows.
2. Beer club membership signup
Design a form that collects membership information, preferred beer styles, and payment details. Include recurring payment options for monthly or quarterly membership fees.
If you want to take it a step further, you could integrate with a CRM system like HubSpot to add new members to your database automatically. This can help you provide a seamless experience for customers joining your exclusive beer club.
3. Event registration
Create event registration forms for brewery tours, beer pairing dinners, or release parties. Include fields for attendee information, ticket quantity, and dietary restrictions or preferences.
This form helps you manage event capacity while collecting valuable information about your attendees.
4. Beer-to-go pre-Orders
Build a form that displays your available beers with images, descriptions, and pricing. Allow customers to select quantities and preferred pickup times for their orders.
This streamlines your to-go sales process and reduces wait times in your taproom. Customers will appreciate the convenience of having their orders ready when they arrive.
5. Customer feedback survey
Design a form to collect feedback about beer quality, taproom experience, and customer service. Include rating scales and open-ended questions to gather comprehensive feedback.
This valuable data helps you improve your products and customer experience. Consider offering a small discount on their next visit as an incentive for completing the survey.
Next we’ll show you how easy it is to get started using Gravity Forms on your WordPress site.
How to get started with Gravity Forms on WordPress
For this tutorial, we’ll create a newsletter sign-up form.
Purchase a Gravity Forms license or try our free demo
Gravity Forms offers a few types of licenses, all of which include access to our knowledgeable and friendly support team. You can compare license types here, and pick the one that will suit your needs.
Any license will work for the purposes of this tutorial, but it’s worth noting that if you ultimately want to be able to accept payments on your site, you’ll need to purchase a Pro, or Elite, or Nonprofit license.
If you’d like to try Gravity Forms first, you can create a free demo site – it has all the functionality you’ll need to follow along with this tutorial. If you want to stick with the demo for now, skip ahead to the Create Your First Form section.
Install Gravity Forms
After you’ve made your purchase, you can log in and download Gravity Forms directly from your My Account section. This download should remain a ZIP file, as this is the format in which you’ll upload it to your WordPress site.
Next, install the Gravity Forms plugin on your WordPress site. Here’s how:
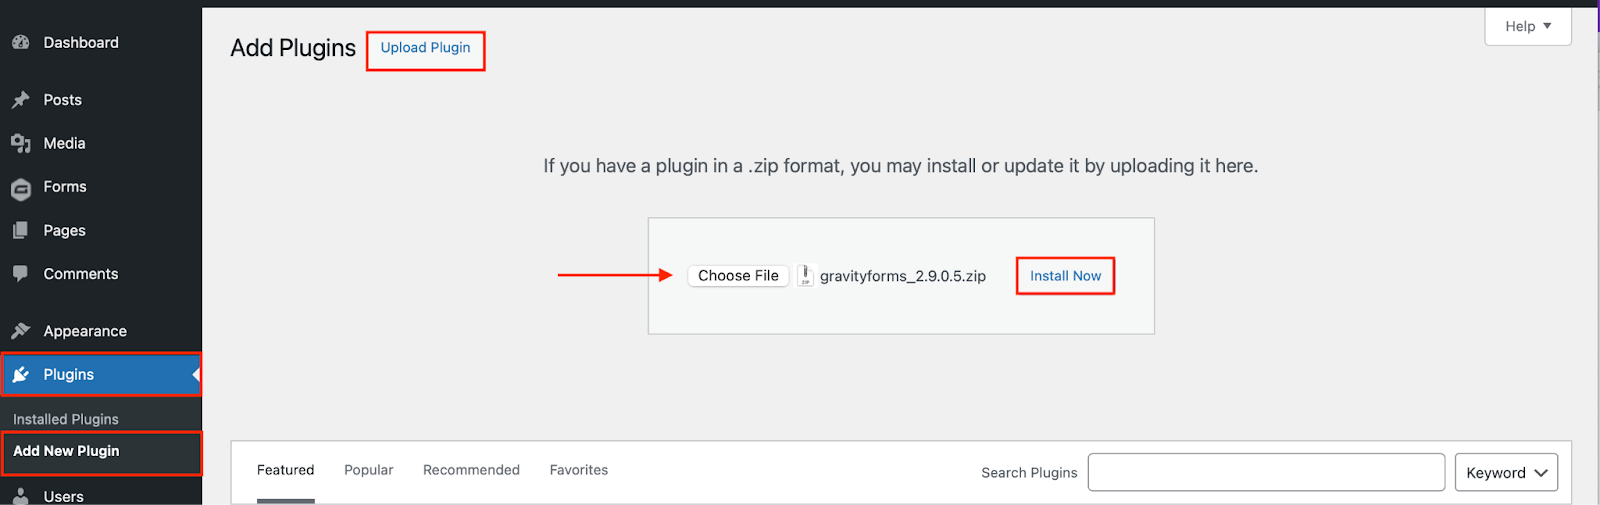
- Go to your WordPress dashboard and navigate to Plugins → Add New Plugin.
- Click Upload Plugin.
- Choose the ZIP file you just downloaded, then click Install Now.
- After the plugin is installed, click Activate.
Now, follow the instructions in the Setup Wizard. You’ll be asked to enter your Gravity Forms license key and answer a few questions to help you get started. You can find your license key by logging in to Gravity Forms and clicking My Account.
Create your first form
Once Gravity Forms is installed (or if you’re using our demo), creating a form is simple. Here’s how:
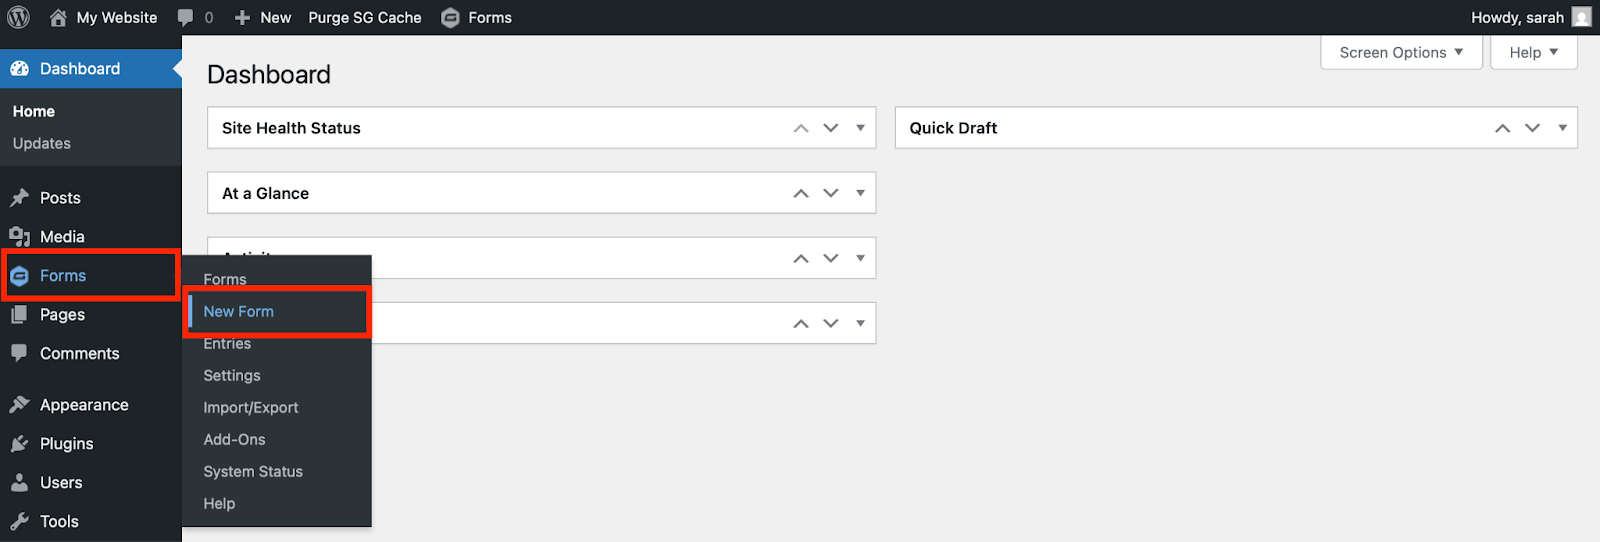
From your WordPress dashboard, go to Forms → New Form.
In this tutorial, we’ll create a simple newsletter signup form, so your subscribing customers can be the first to know about your new brews and upcoming events.
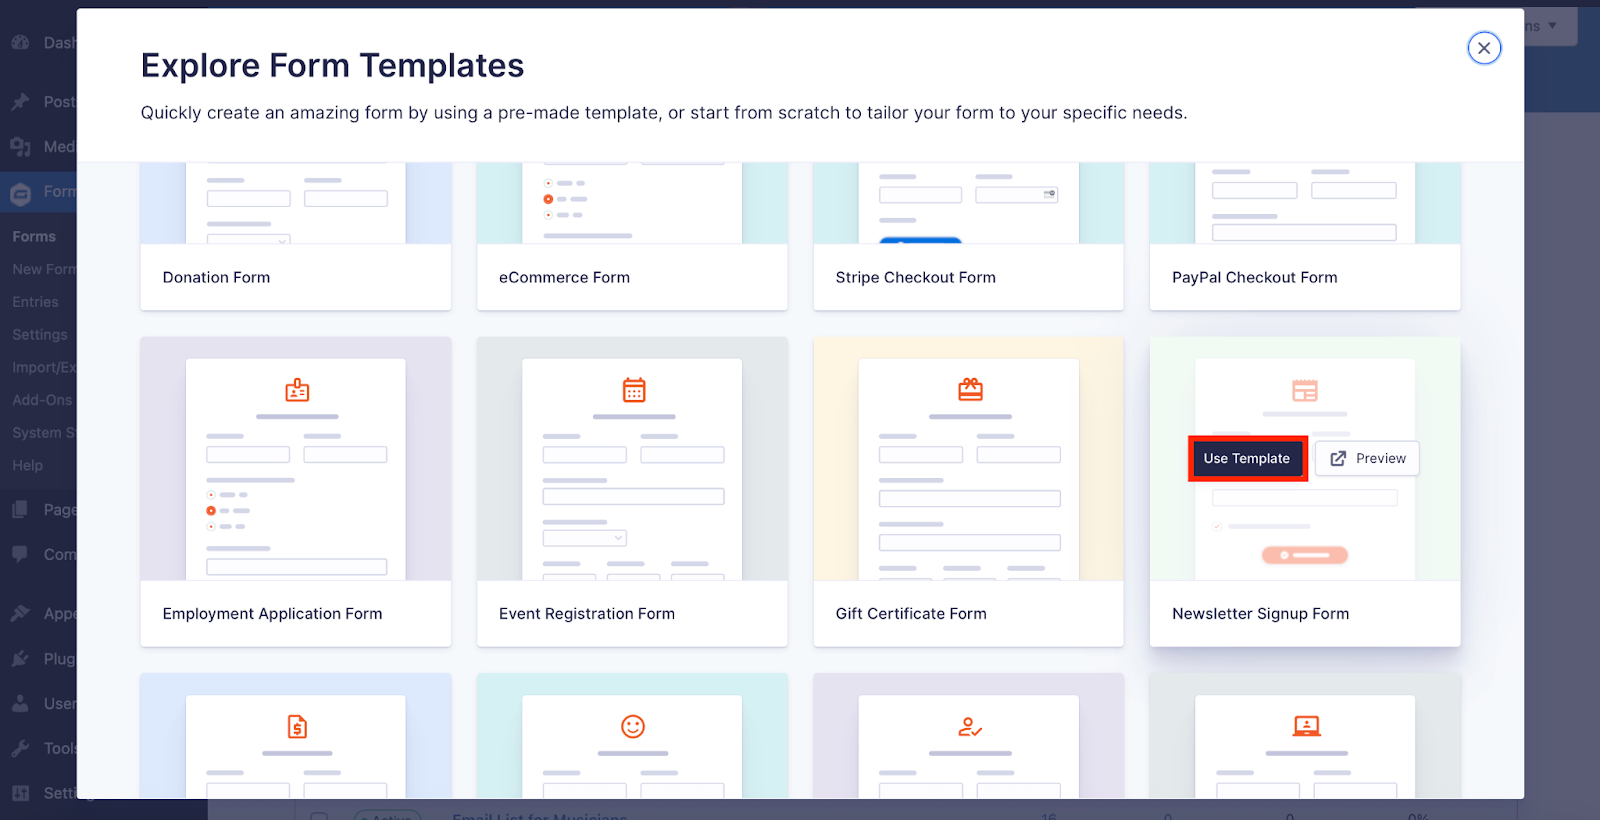
While you can always start from scratch by creating a Blank Form, the newsletter signup form is actually available as a template in the Gravity Forms template library, so this will save you some time.
Find the Newsletter Signup Form from the template library, and click Use Template.
Give your form a title and optionally a description, and then click Use Template.
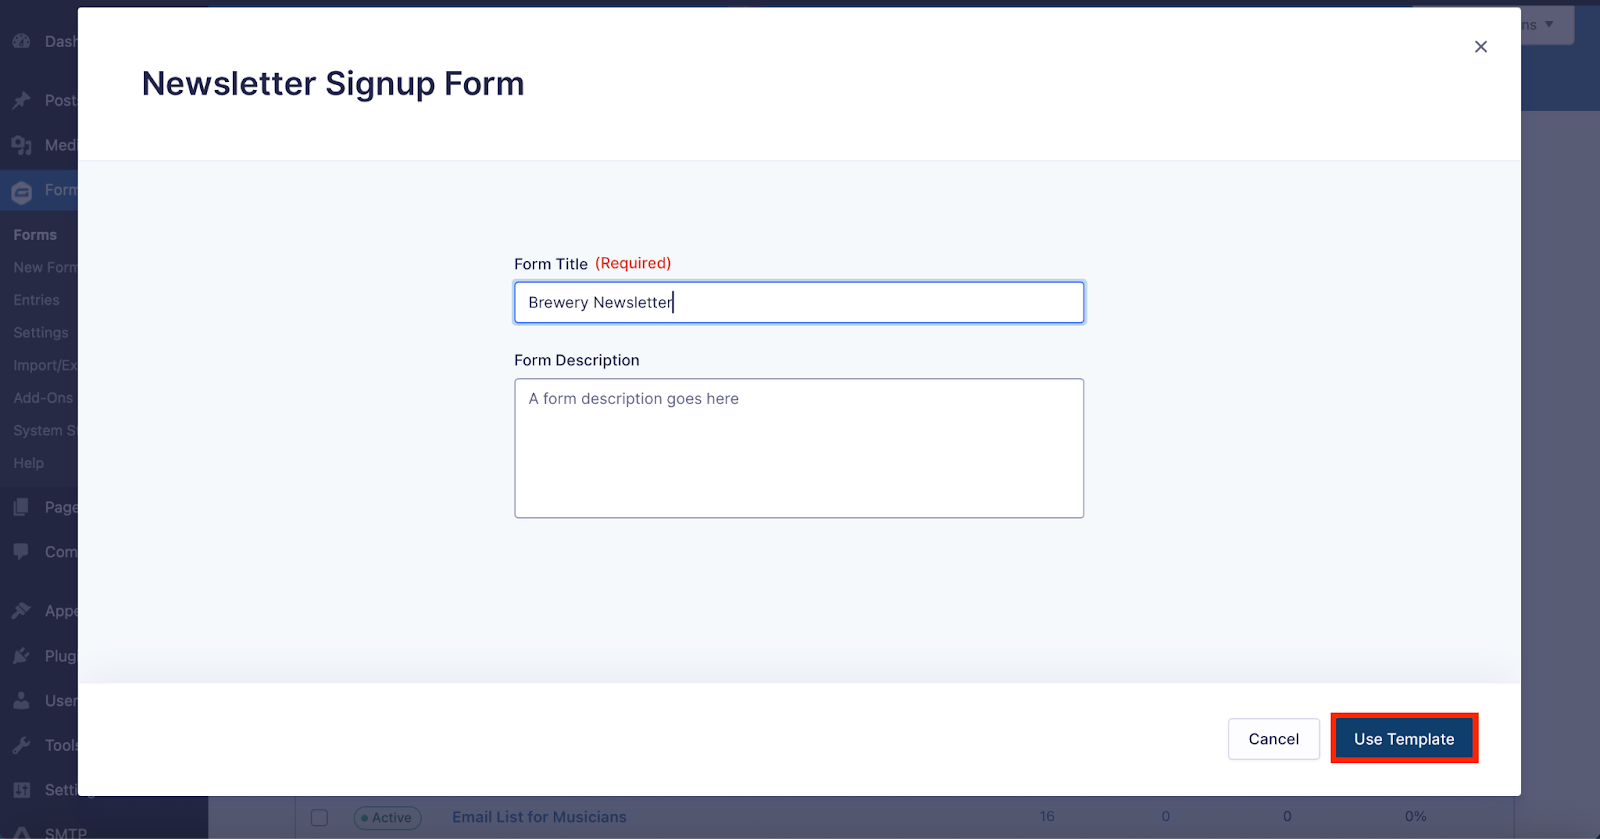
Since we are starting from a template, you will already see some fields on your form.
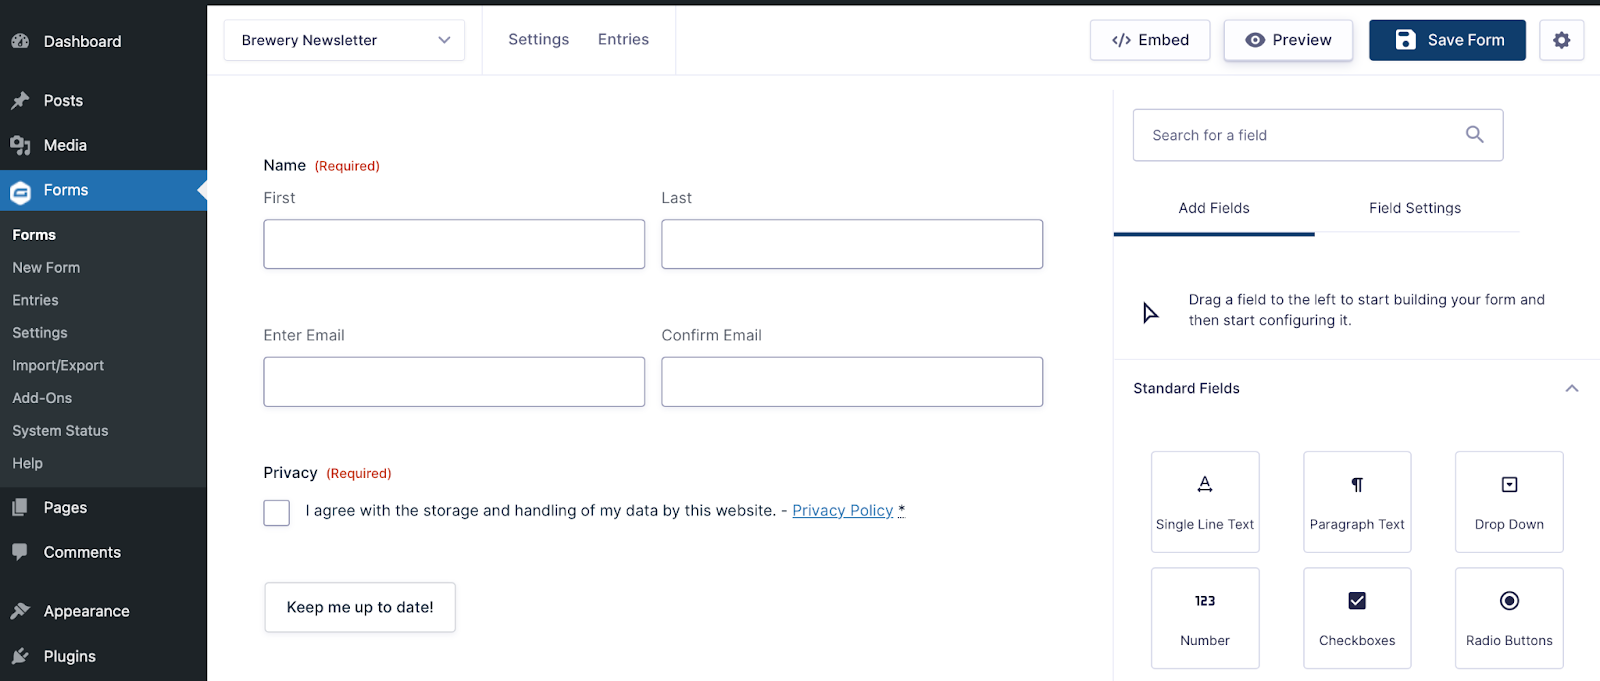
This is the fun part. Click to drag and drop fields onto your form and arrange them as needed. Edit the field settings to make fields required, modify the appearance, add conditional logic and so on.
With Gravity Forms, you have an enormous amount of flexibility when it comes to customization. For example, you might add the Checkboxes field to let customers choose when they want to hear from you.

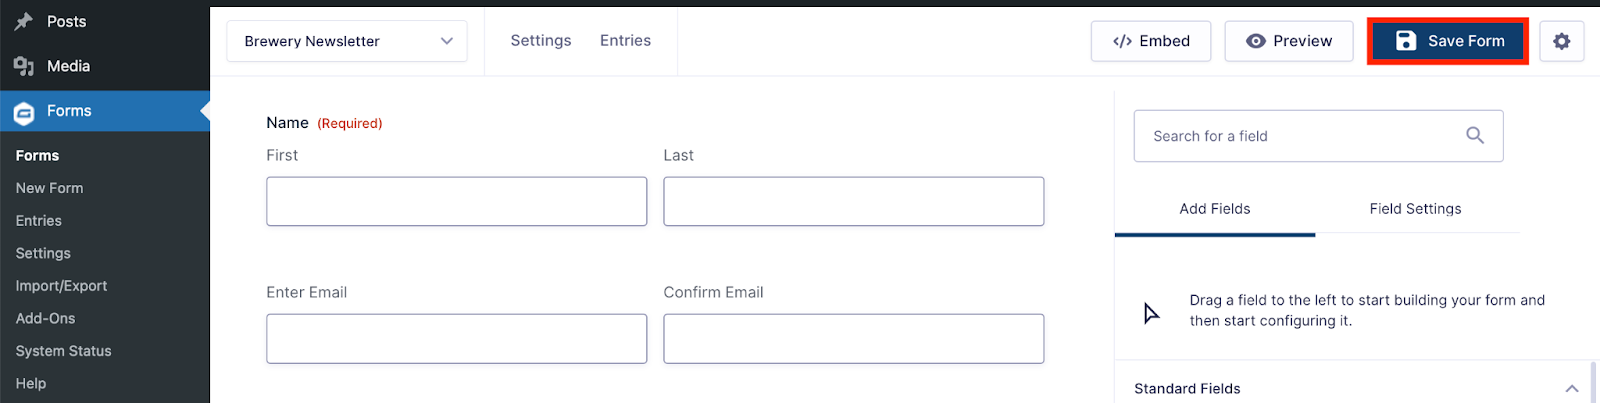
When you are satisfied, remember to click Save Form.
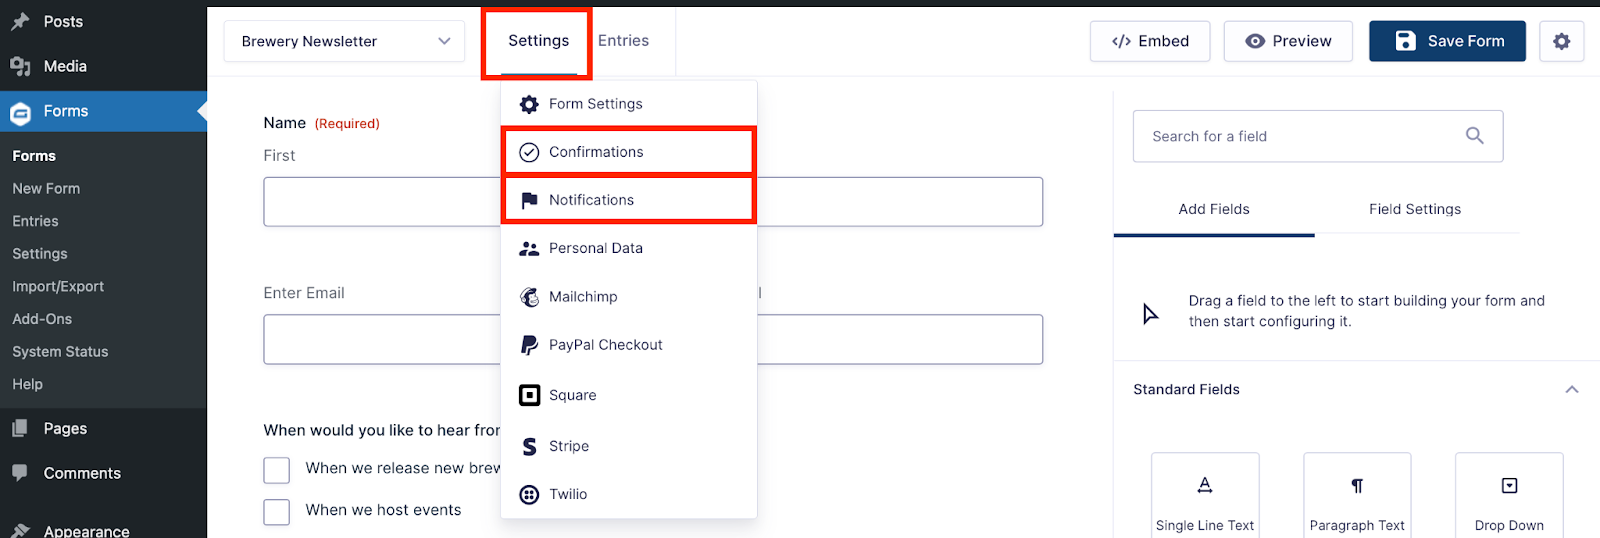
Under Settings, you can further enhance your form by customizing the notifications and confirmations to let your users know their form has been submitted successfully. Our documentation will help you get started with notifications and confirmations.
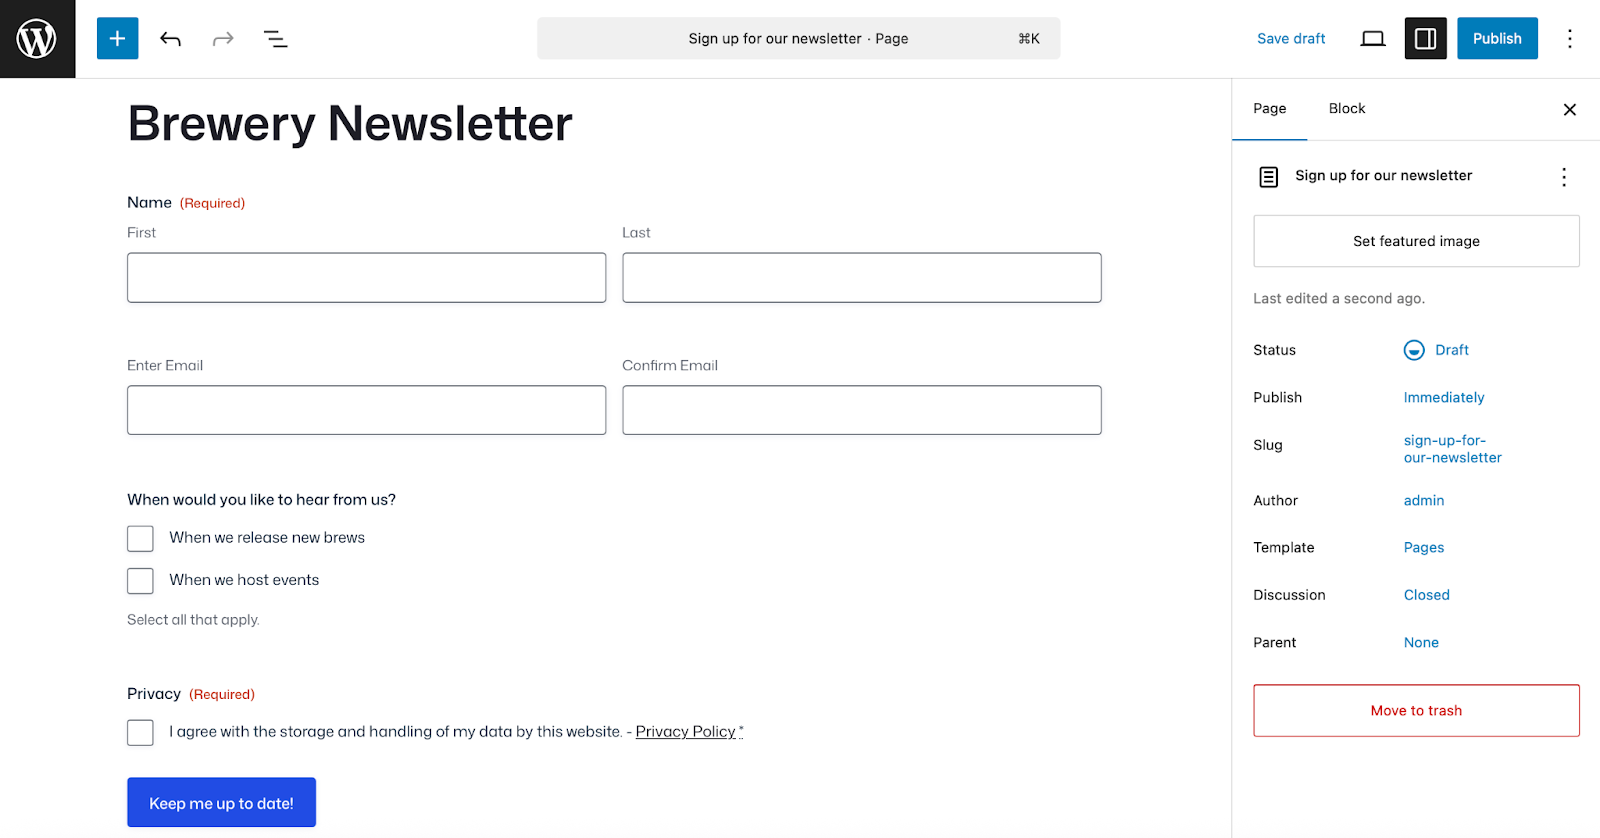
To view the finished product, embed the form on any page or post. In this case, we’ll embed the form on a new page:
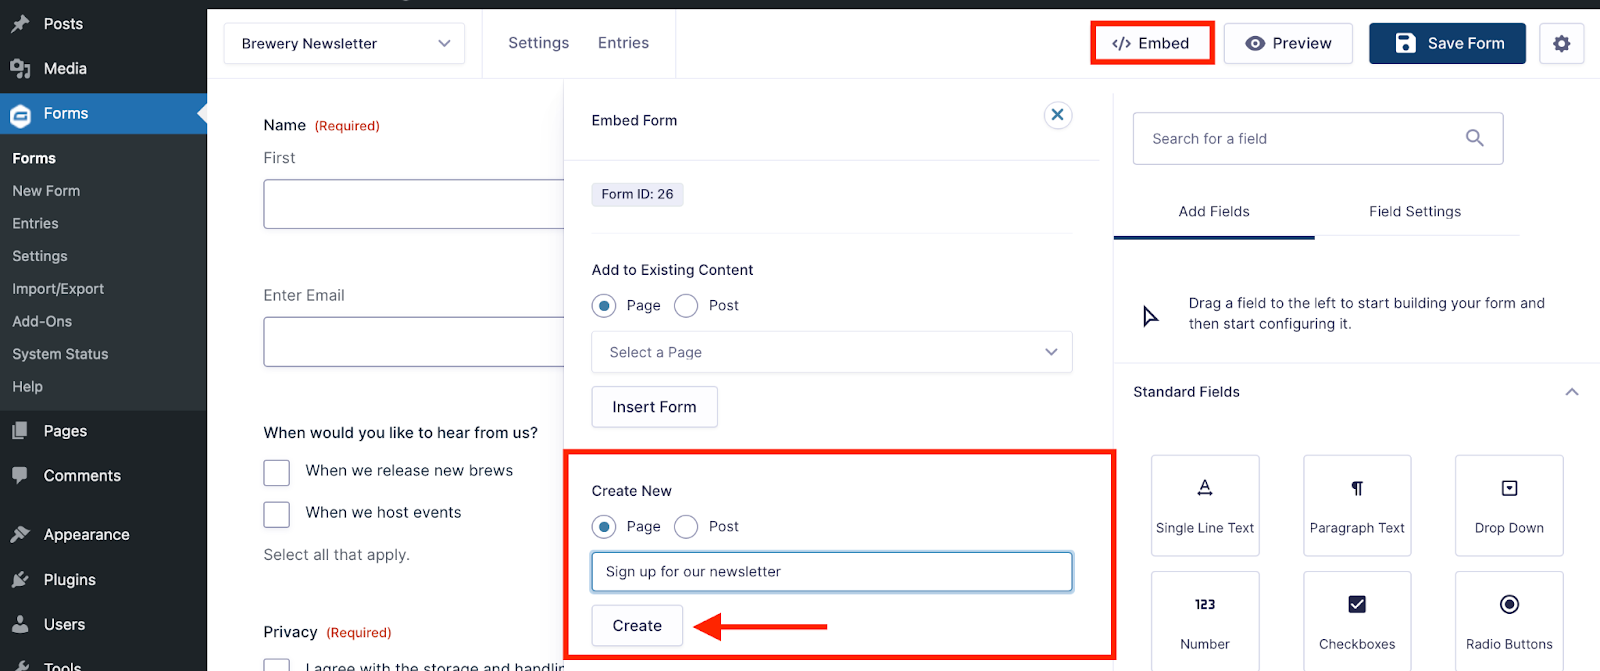
From here, you’ll be able to view your form and make further changes to style your form via the block editor as needed. Don’t worry, this page starts out in Draft status, so you can still make as many changes as you need to before publishing for the world to see.
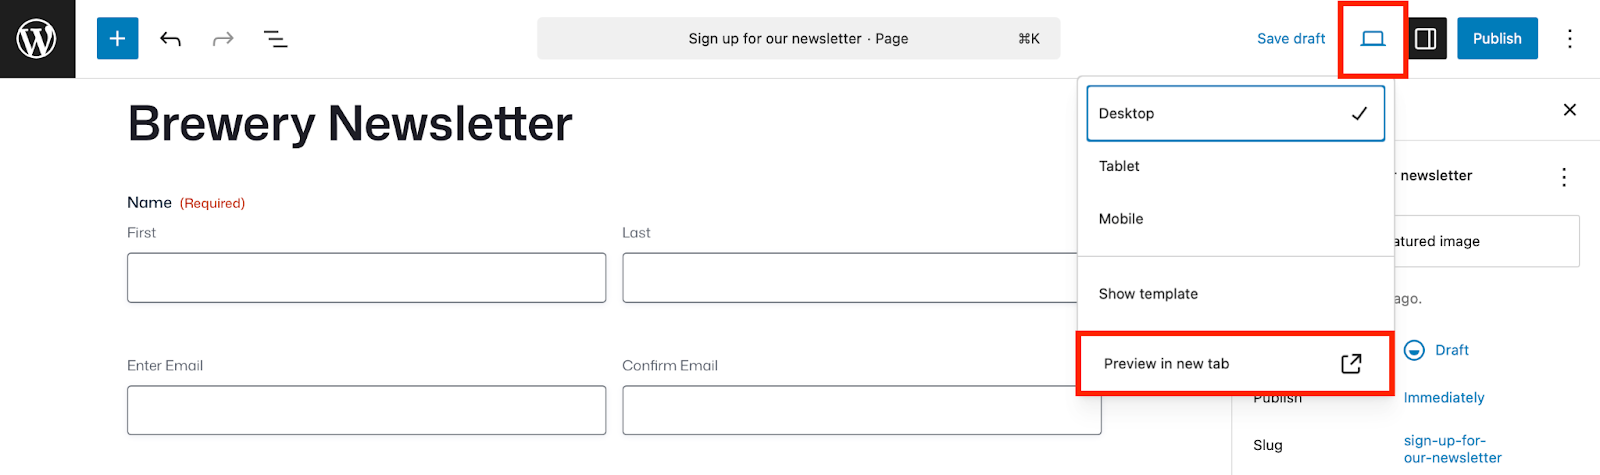
Test your form
Make sure to test your form by submitting a few test entries. The easiest way to do this is from the page editor, by clicking Preview in new tab.
Fill out the form and click to submit.
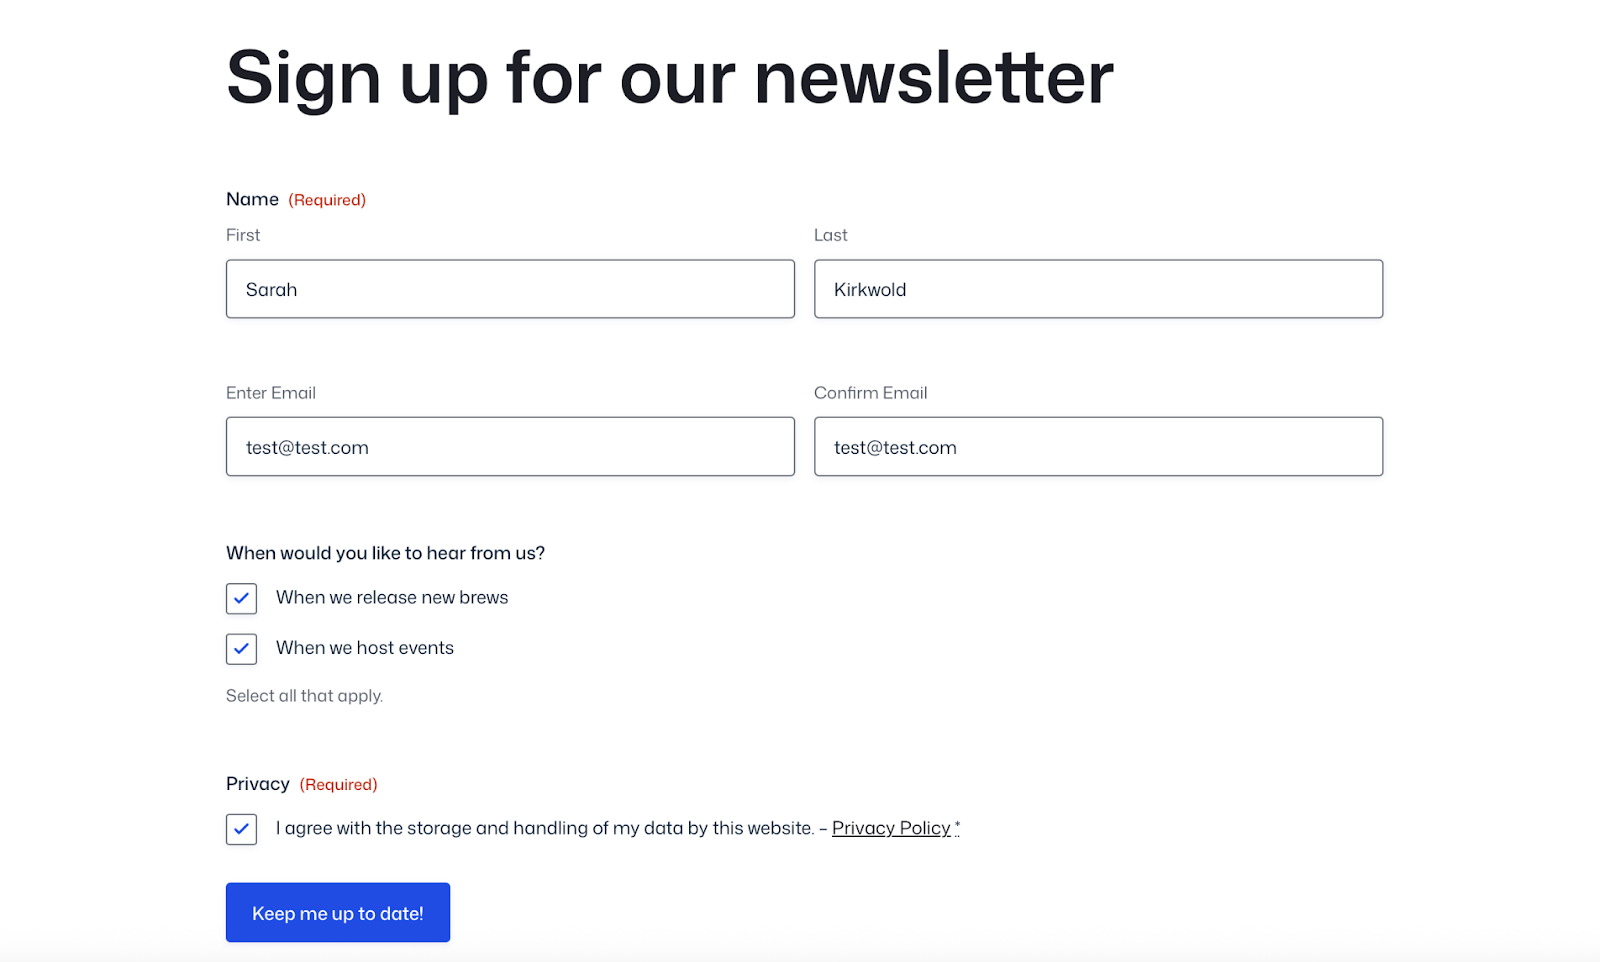
This will ensure everything is working as expected and that all submissions are being routed correctly. This is also how you’ll be able to validate your confirmation messages and notifications, if you’ve added any.
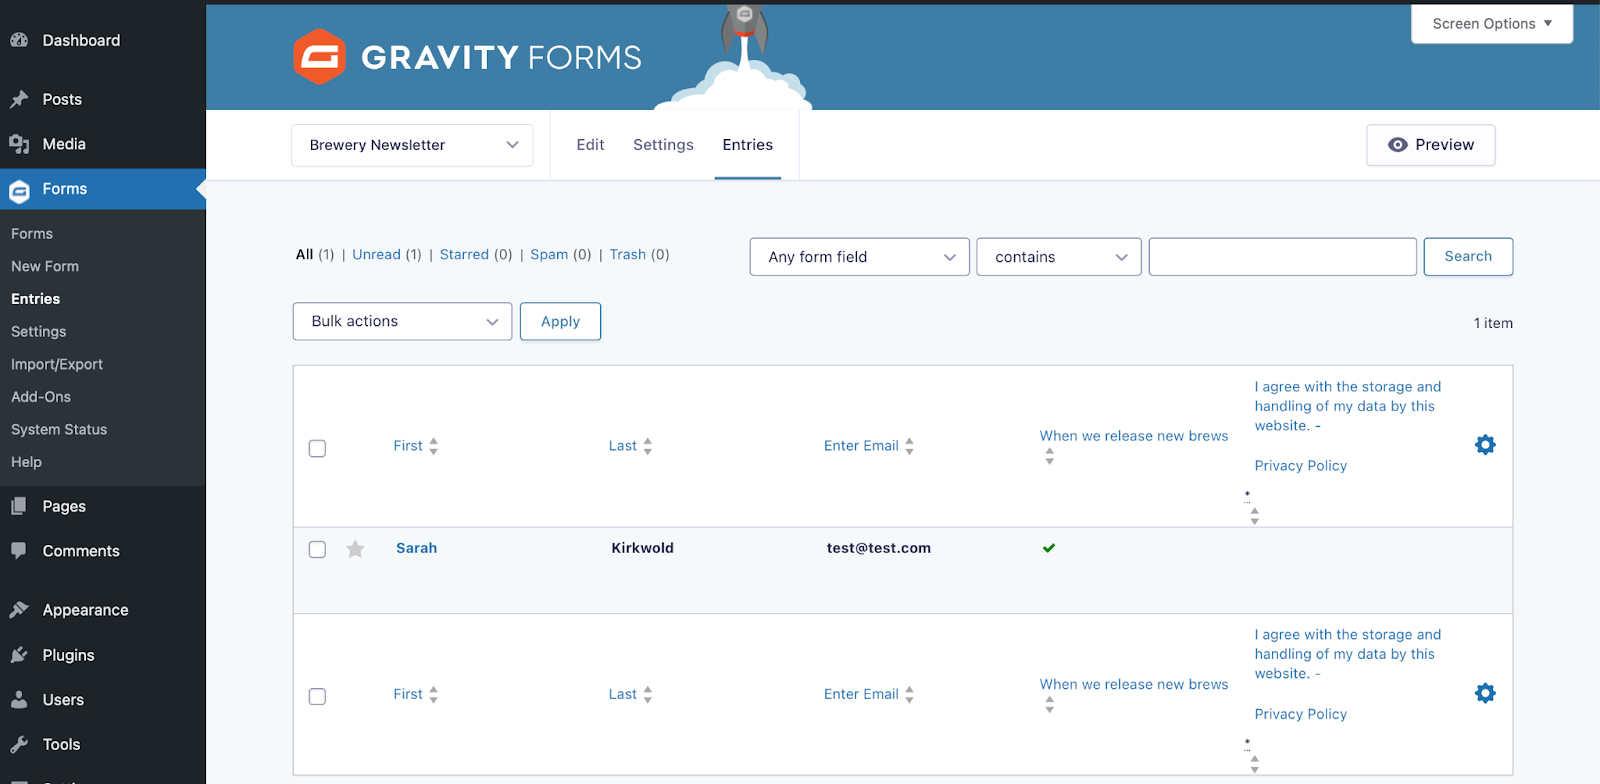
To check that your form submission has been received, head to your Forms list and click Entries.
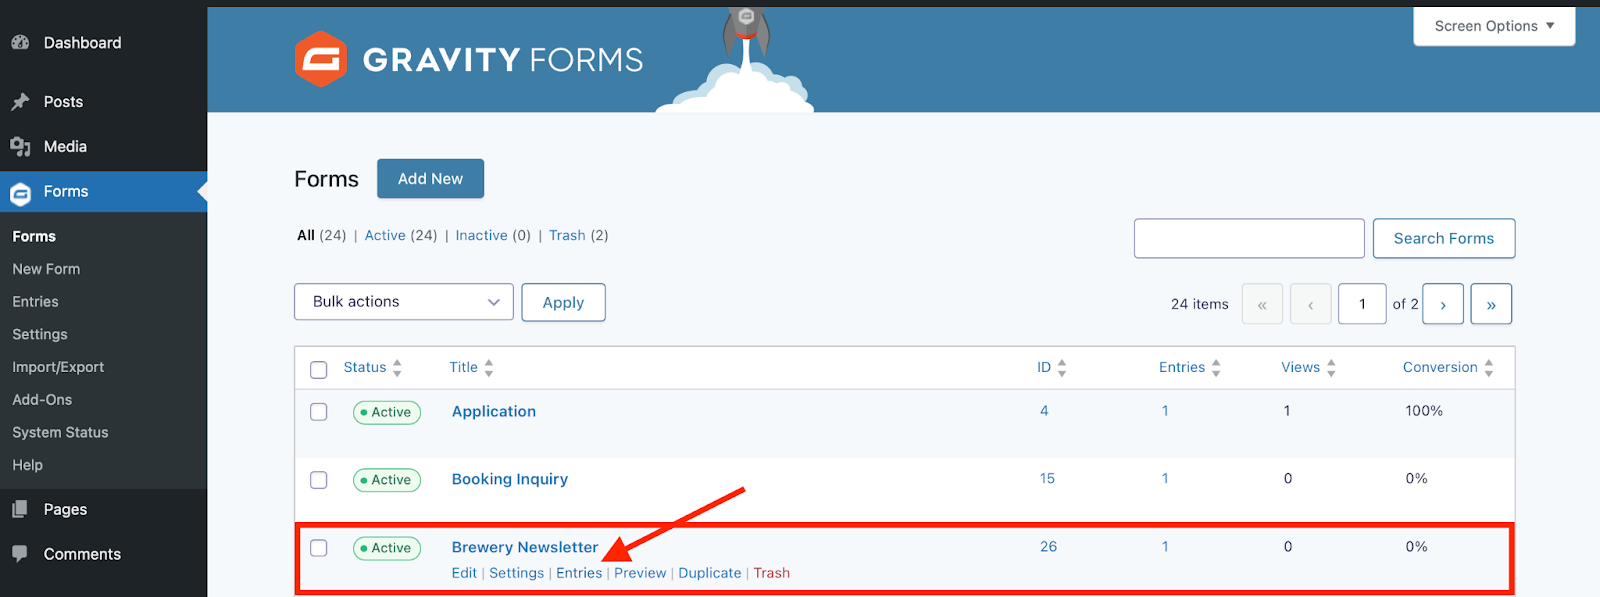
Here you should see the test entry you just submitted, and can confirm everything is working properly.
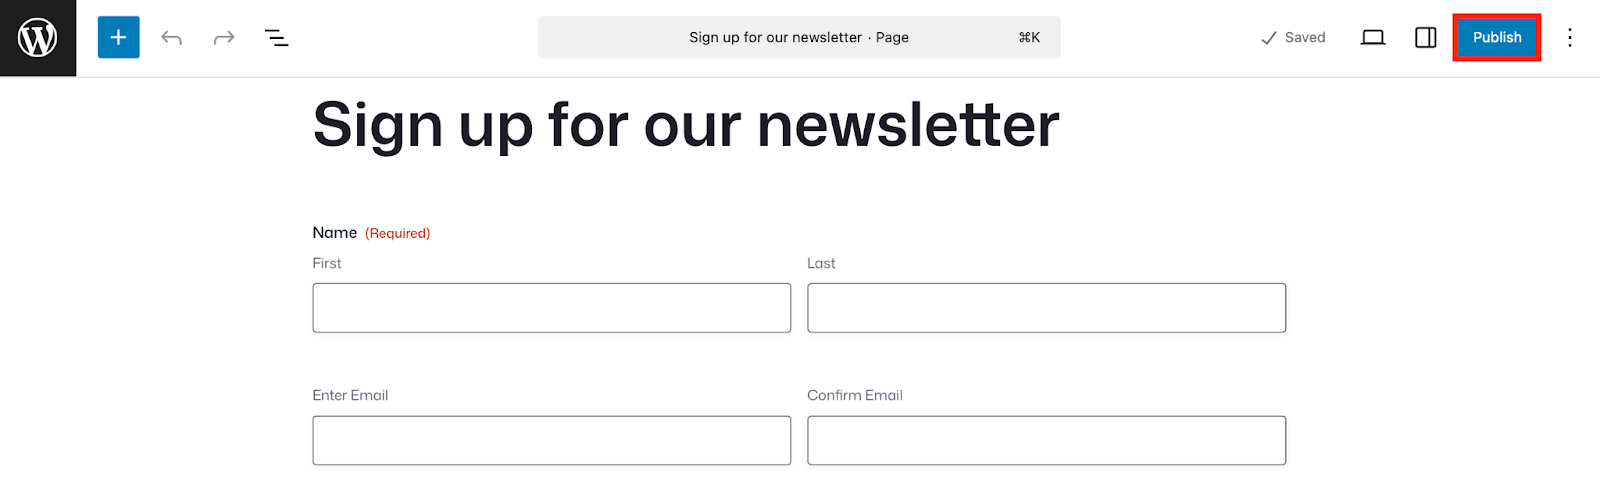
Publish your form
When you are ready to publish your page, simply navigate back to the page you created and click Publish. That’s it!
Enhance your form
If you really want to take your forms to the next level, you can extend the functionality of your WordPress site by taking advantage of the many features and add-ons available with your Gravity Forms license.
To name a few:
Enable conditional logic
Think of conditional logic as an “if-this-then-that” system. For example, if someone inquires about catering their event, then show additional questions about location.
Check out our documentation to learn more about conditional logic.
Set up confirmations and notifications
Confirmations appear after someone submits your form. You can show a simple “Thank you” message, or direct them to take further action like signing up to your email list, or invite them to follow you on social media.
Notifications are the emails that get sent from your WordPress website. Send payment receipts, event registration confirmations, and more – automatically.
Learn more about how to set both of these up in the Gravity Forms documentation.
Easily integrate with other tools
Gravity Forms integrates seamlessly with a wide range of third-party tools. Whether you’re integrating your calendar, automating social media posts, or generating contracts, Gravity Forms allows for a smooth workflow.
Check out our expansive list of add-ons and explore the possibilities. For example, if you hold a Pro, Elite, Nonprofit, or Developer (legacy) license, you can take advantage of the powerful Gravity Forms Zapier Add-On, and connect your forms to thousands of other web services.
Control what happens after the form submission
If you want to make your life even easier, you can use a dedicated automation tool like Gravity Flow. Gravity Flow can help breweries focus more on their craft while automating the behind-the-scenes work by streamlining tasks including:
- Catering requests – Automatically route catering requests to the right team member and notify them without manual intervention.
- Event Questionnaires – Send questionnaires for tasting events asking for things like allergy considerations, and automate reminders to fill them out.
- Testimonials – Set up automated approval workflows to instantly review and manage testimonials from your customers.
For more information on Gravity Flow and to see examples of automation in action, check out the video tutorials in our documentation or try out a free demo!
Elevate your brewery website design with Gravity Forms
Remember that in today’s competitive craft beer landscape, your website is often the first meaningful interaction potential customers have with your brand.
Thankfully, crafting an exceptional website doesn’t require reinventing the wheel. By harnessing the powerful combination of WordPress and Gravity Forms into your brewery website design, you’re setting your brewery up for digital success with minimal technical headaches.
With Gravity Forms and WordPress, you have everything you need to create a functional and attractive website.
The intuitive form-building capabilities of Gravity Forms let you create everything from event registrations to beer club sign-ups, while WordPress provides the reliable foundation your growing brand deserves.
With these tools, you can focus on the fun stuff: brewing exceptional beer. Purchase your Gravity Forms license today and start building your community of beer enthusiasts in minutes.
Newsletter
If you want to keep up-to-date with what’s happening on the blog sign up for the Gravity Forms newsletter!
"*" indicates required fields


