As a podcaster, protecting your content, maintaining brand consistency, and respecting your guest’s rights should be top priorities. A podcast guest release form helps safeguard everyone by outlining expectations, usage rights, and permissions for your content.
With WordPress, the Gravity Forms plugin, and the Gravity Forms Signature Add-On, you can create a seamless, professional process that captures legally binding agreements in minutes.
By the end of this post, you’ll have everything you need to create a seamless podcast guest experience and focus on what matters most – delivering great episodes.
Let’s dive in.
Why a guest release form is essential for podcasters
Many podcasters overlook the importance of a guest release form. But skipping this step can put your content – and reputation – at risk.

Protects your content
A guest release form gives you the right to publish, distribute, and promote podcast episodes that include your guest. Without it, guests may later object to how you’re using the content, potentially forcing you to remove an episode.
Defines usage and rights
Stating how the content will be used protects both you and your guest. It sets clear expectations about whether content can be repurposed for social media, YouTube, or promotional use.
Prevents legal disputes
A signed release eliminates ambiguity and helps you avoid legal challenges. This saves time, money, and stress.
Real-world scenario:
Imagine inviting an industry expert to your show. Months later, they rebrand and ask you to take the episode down. Without a signed release, you may have to comply – losing valuable content and podcast momentum.
Pro tip: Always get a signed guest release form before promoting or publishing your episodes.

What to include in your podcast guest release form
Your podcast guest release form should include the following key sections:
Basic information
- Guest name and contact information – Collect the guest’s full name, email address, and phone number.
- Podcast name and host details – Identify the podcast and the host.
Release of rights
- Permission to record and publish – Make it clear that the guest consents to being recorded and agrees to publication.
- Usage and distribution – Define where and how the episode can be used (e.g., social media, your website, YouTube).
- Repurposing content – Allow the content to be reused in different formats.
Media and promotional rights
- Authorization for promotion – Grant permission to use the guest’s name, image, and voice for marketing.
- License for future use – Clarify whether the content can be syndicated or reused in future promotions.
Limitation of liability
- Waiver of claims – Protect yourself from future claims related to the guest’s appearance.
Important note: This guide is not a substitute for legal advice and you should always review your form with a qualified lawyer.
Now that we’ve outlined some components of what your release form could include, it’s time to bring it to life and start collecting digital signatures. That’s where the Gravity Forms Signature Add-On comes in.
Getting started with Gravity Forms
To follow along with this tutorial, you’ll need to either have the Gravity Forms plugin installed on the WordPress site where you want to collect signatures, or you can use our free demo for now.
The demo will work perfectly, and has everything you need to follow along with this tutorial. It’s worth noting, however, that if you ultimately want to use the Signature Add-On on your WordPress site, you’ll need to purchase an Elite or Nonprofit license.
After you’ve made your purchase, you can log in and download Gravity Forms directly from your My Account section. This download should remain a ZIP file, as this is the format in which you’ll upload it to your WordPress site.
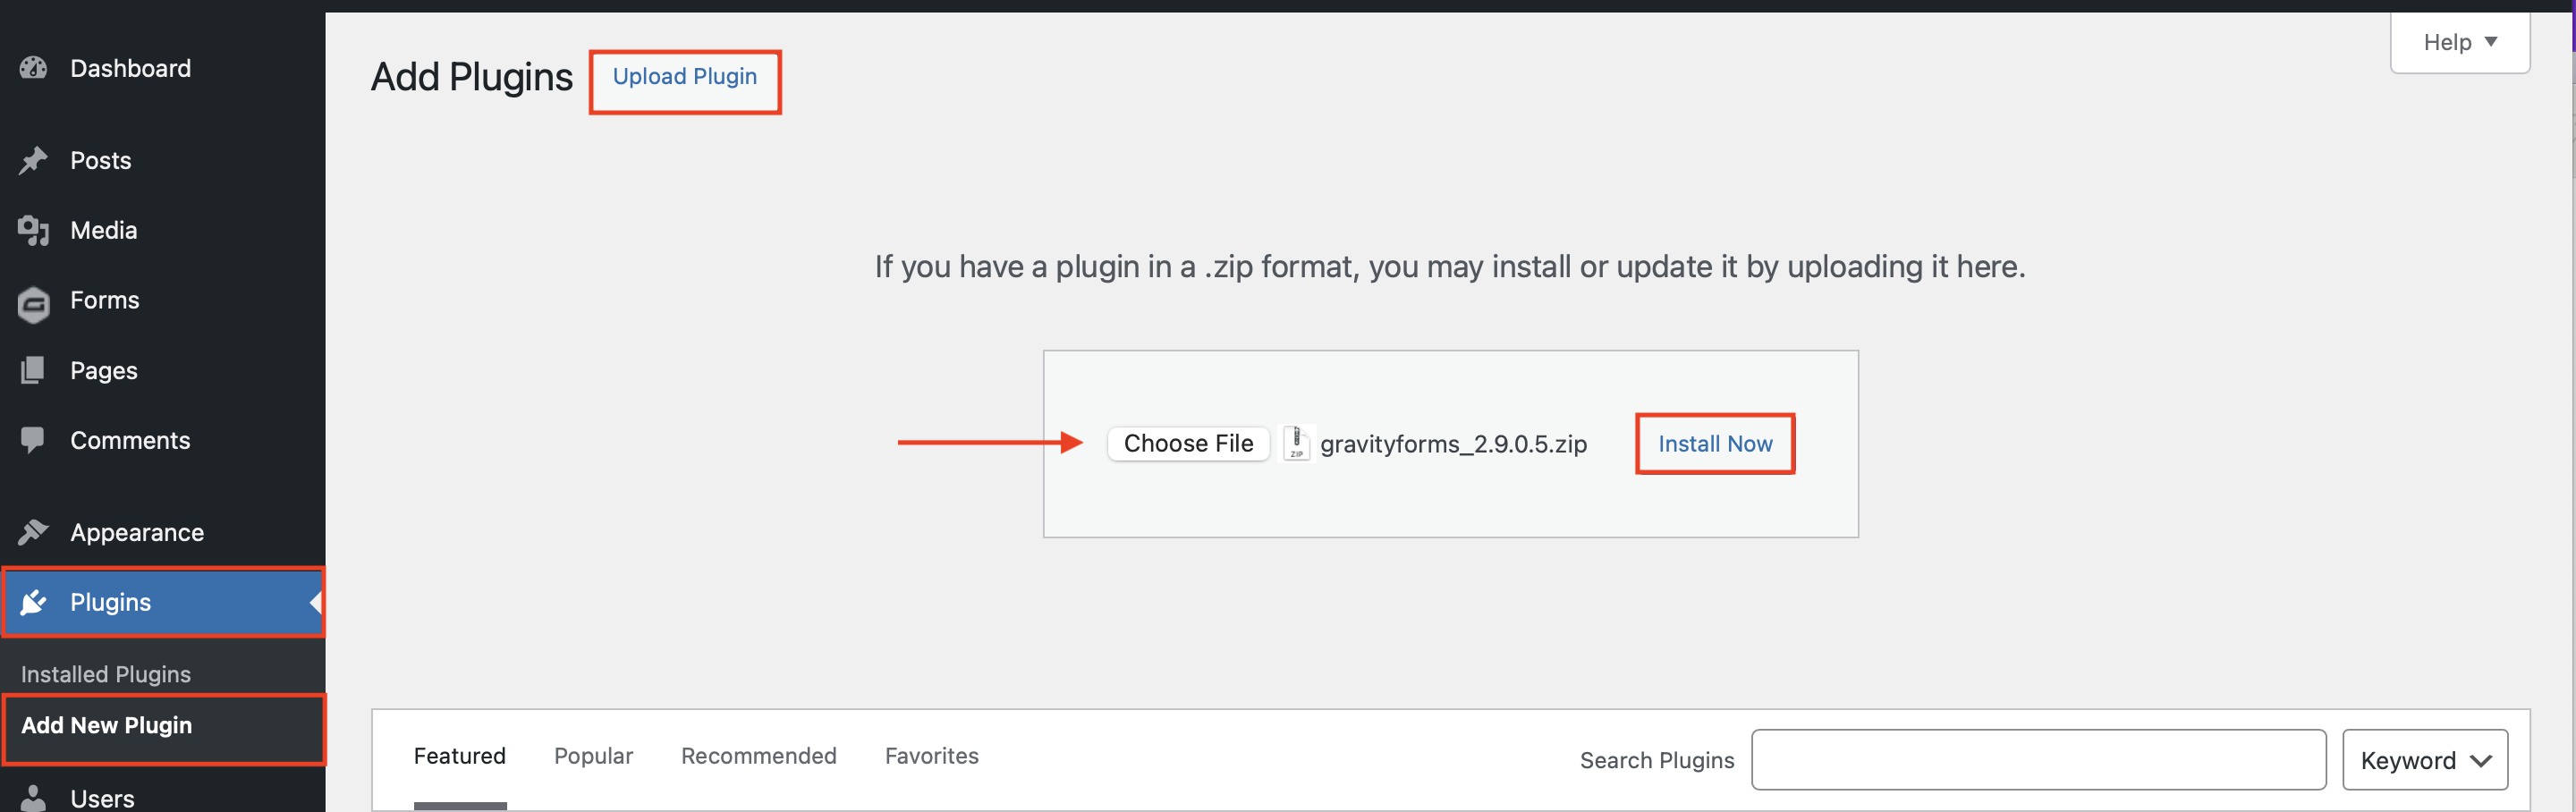
Next, install the Gravity Forms plugin on your WordPress site. Here’s how:
- Go to your WordPress dashboard and navigate to Plugins → Add New Plugin.
- Click Upload Plugin.
- Choose the ZIP file you just downloaded, then click Install Now.
- After the plugin is installed, click Activate.
Now, follow the instructions in the Setup Wizard. You’ll be asked to enter your Gravity Forms license key and answer a few questions to help you get started. You can find your license key by logging in to Gravity Forms and clicking My Account.
Once Gravity Forms is installed, it’s time to install the Signature Add-On.
Install the Gravity Forms Signature Add-On
To collect legally binding signatures, you’ll need the Signature Add-On, which is included with the Elite, Nonprofit, and legacy Developer licenses.
How to install the Signature Add-On
- Go to Forms > Add-Ons.
- Search for Signature Add-On.
- Click Install, then Activate the add-on.

Now that everything is installed and ready to use, the next step is to create the release form.
Create your podcast guest release form
Let’s start by building your form from scratch.
To start, log in to your WordPress dashboard and go to Forms > New Form.
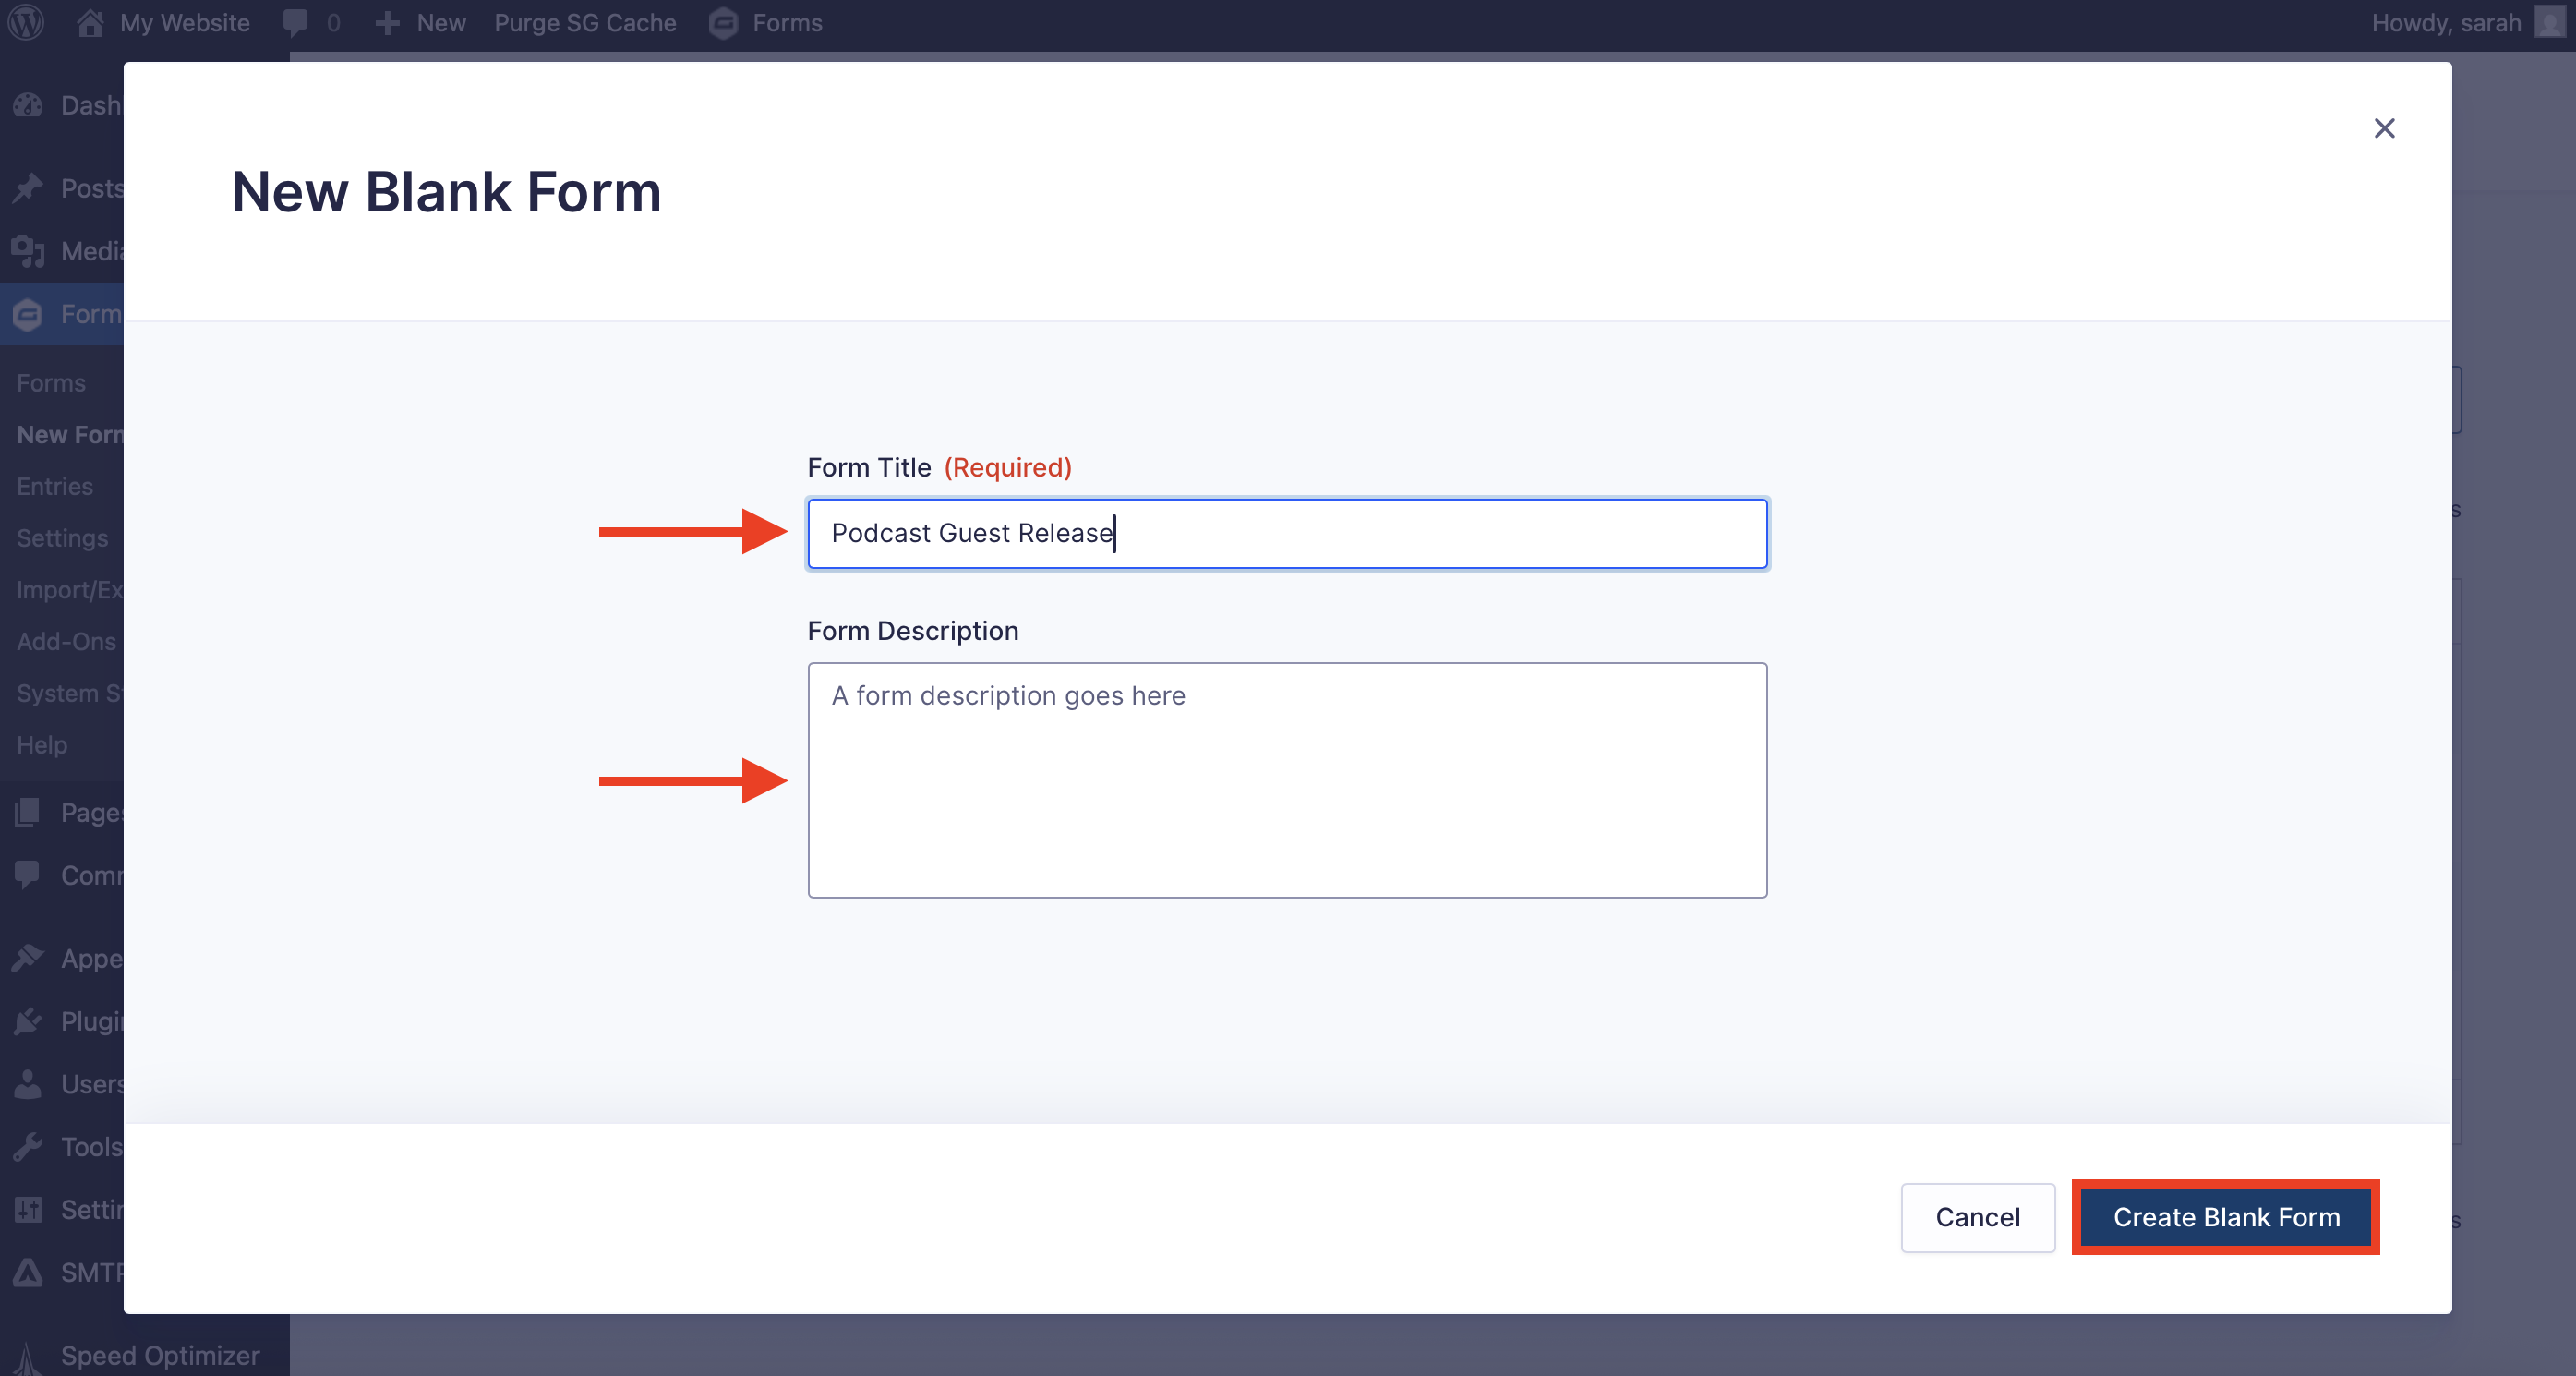
Choose Blank Form from the template library.

Add your form title and description, then click Create Blank Form.
Add essential fields to your form
With Gravity Forms, you have enormous flexibility when it comes to adding and modifying your form fields. We recommend you consult with your own legal resources to determine what information you should collect from your guests. Here are some ideas:
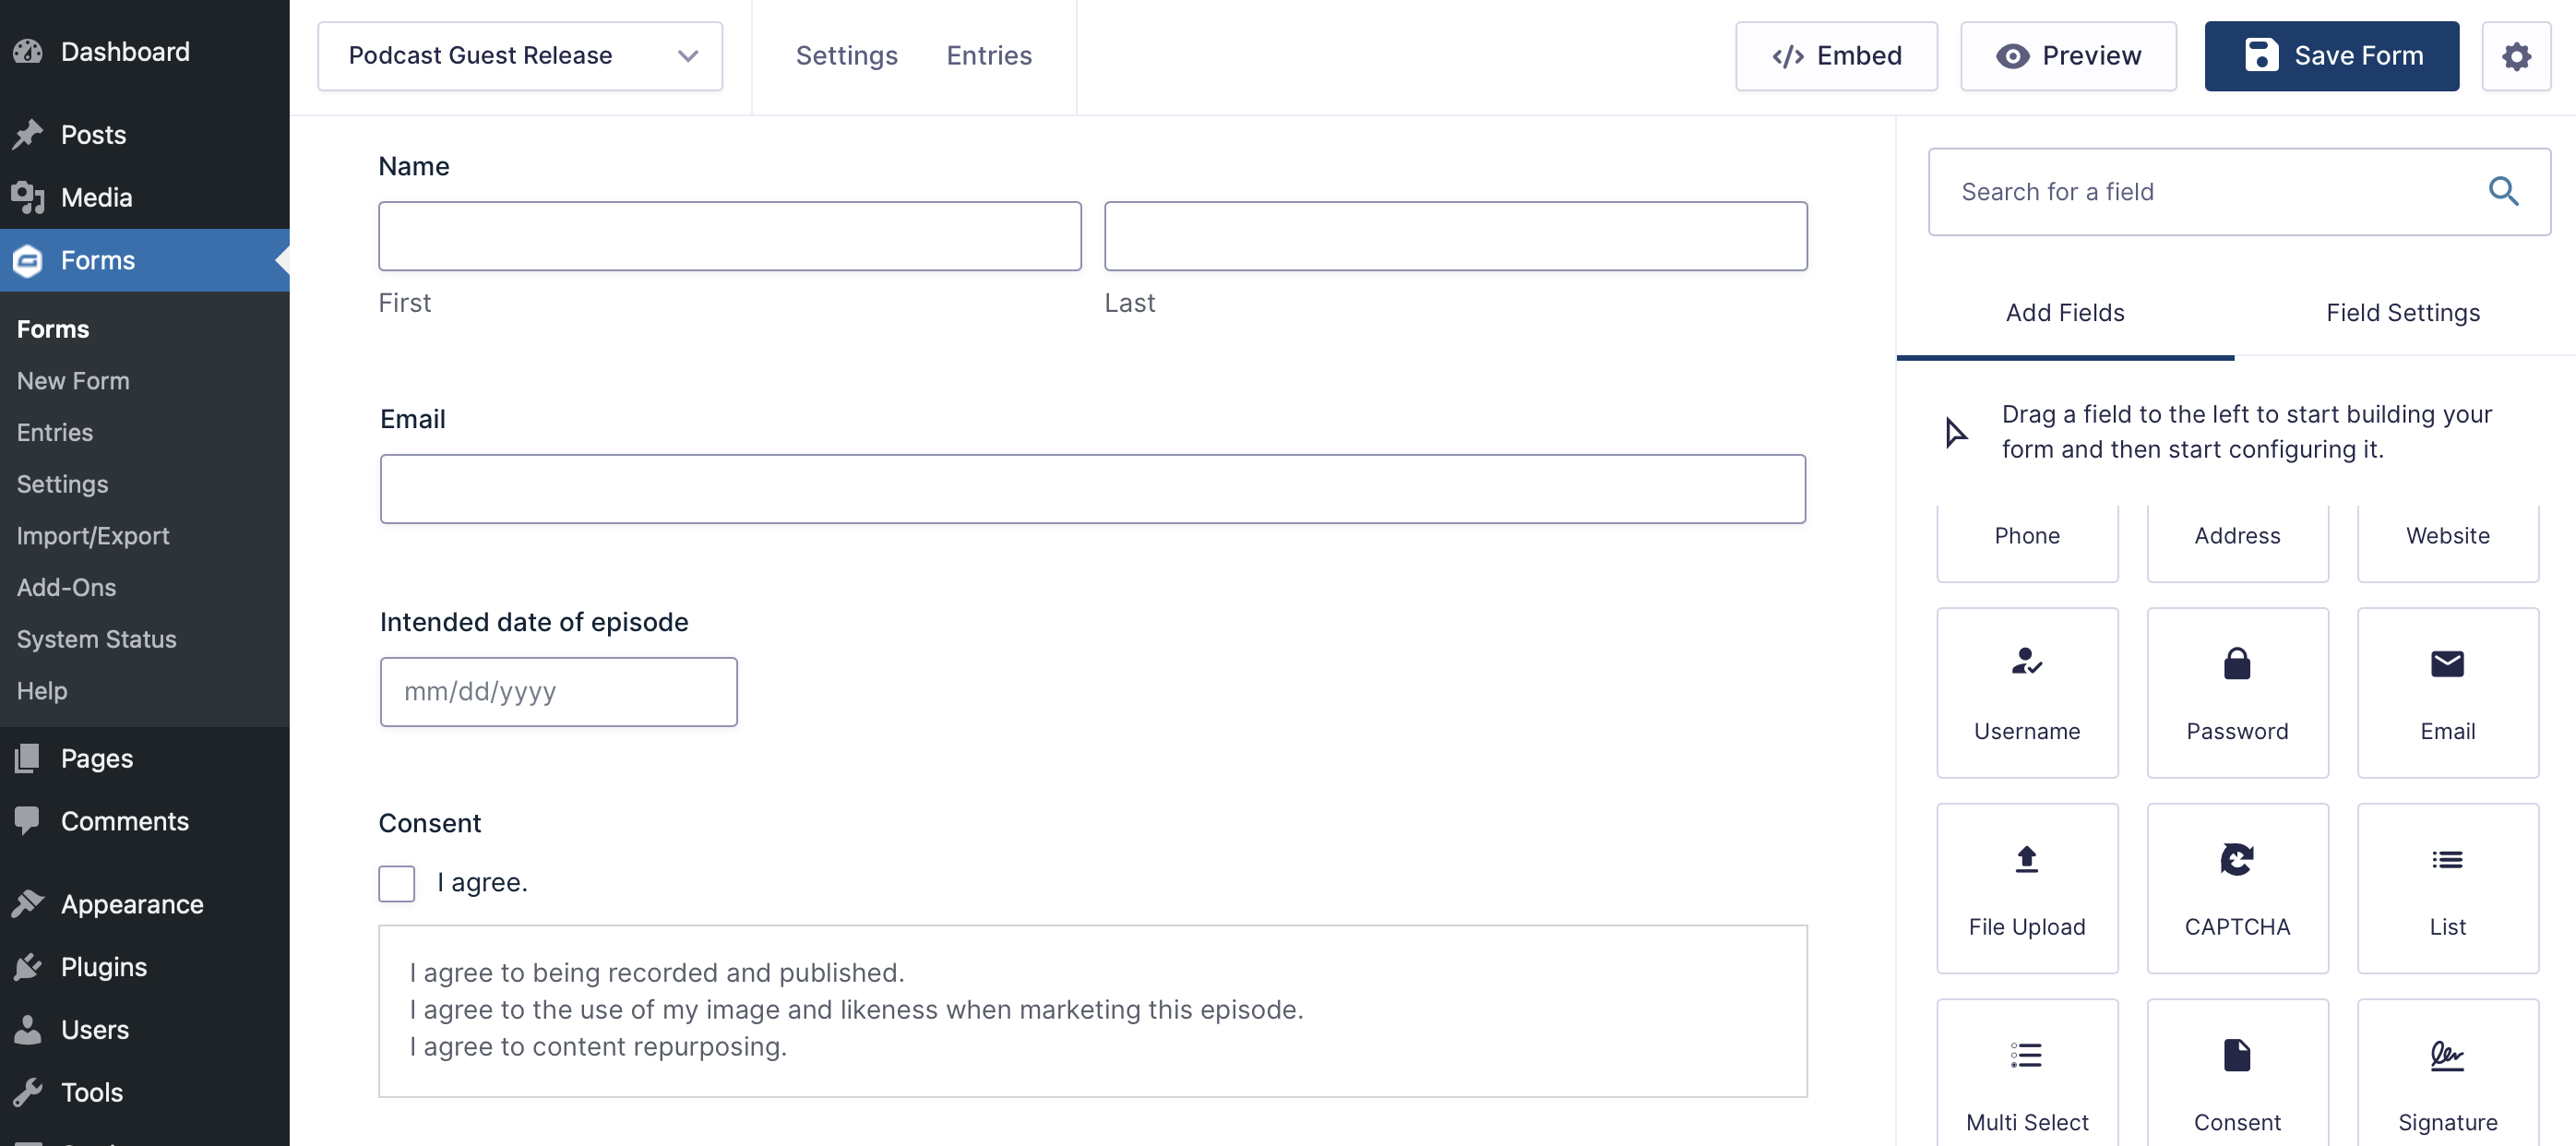
Guest and podcast information
- Name field – Capture the guest’s full name.
- Email field – Send a confirmation and copy of the signed form.
- Date field(s) – To capture the intended episode recording/release date(s).
Consent and agreement
Add required checkboxes where the guest agrees to:
- Being recorded and published.
- Use of their image and likeness in promotions.
- Content repurposing rights.
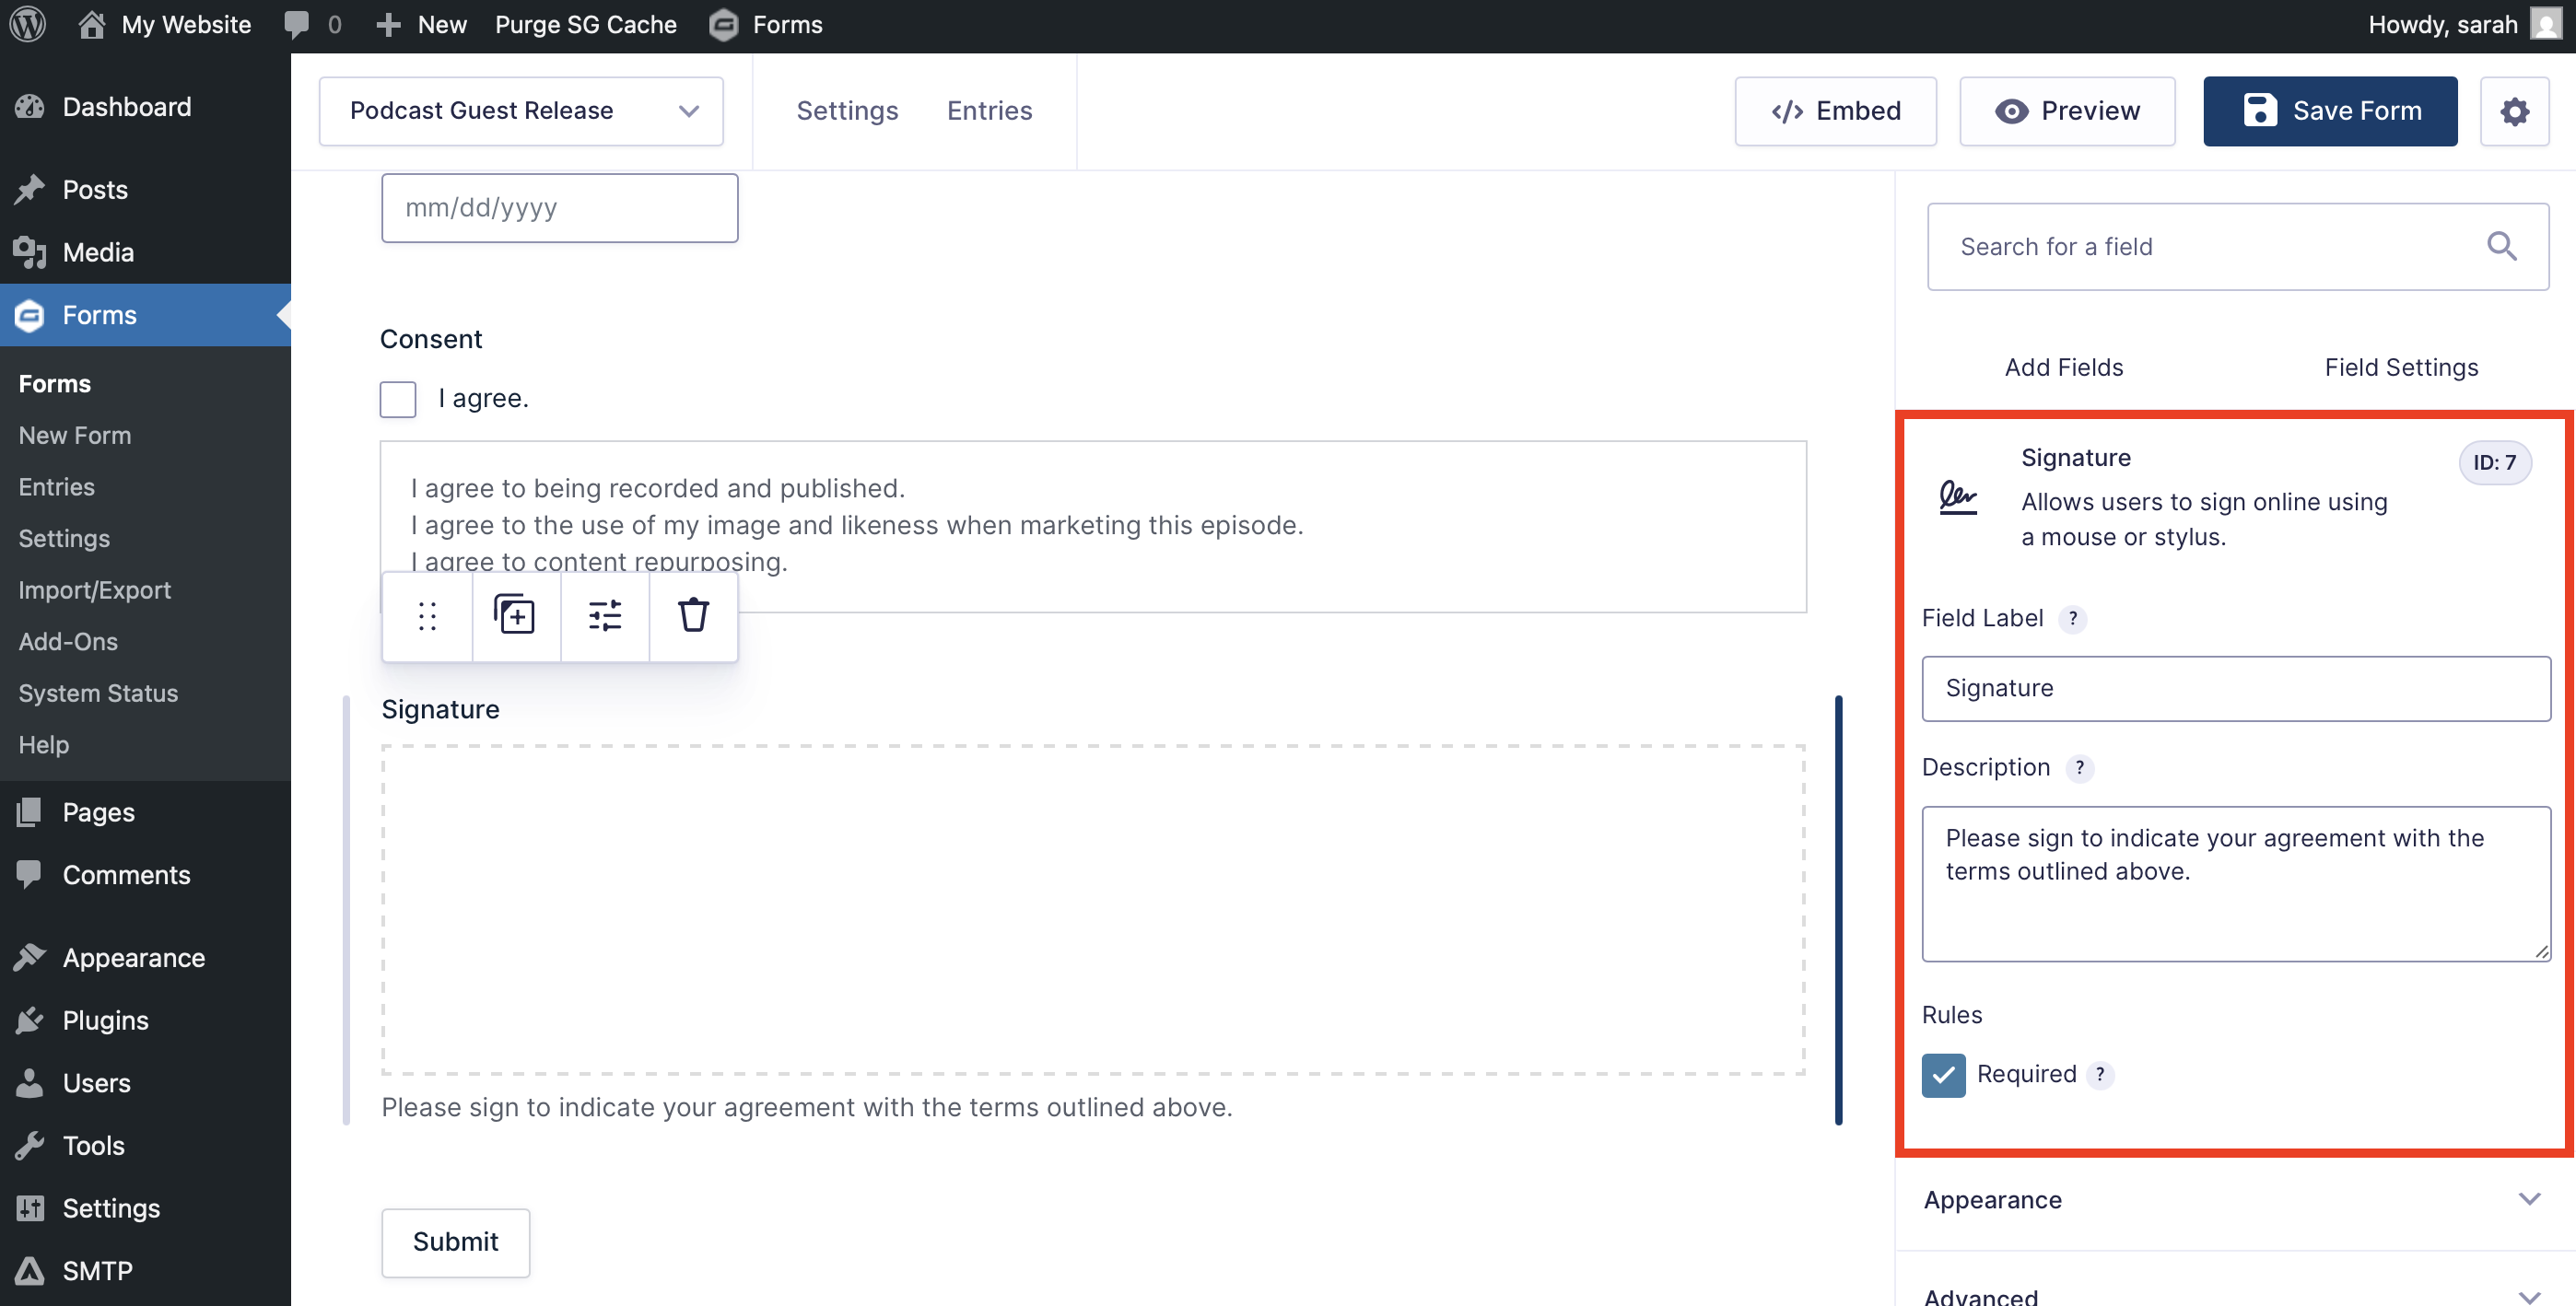
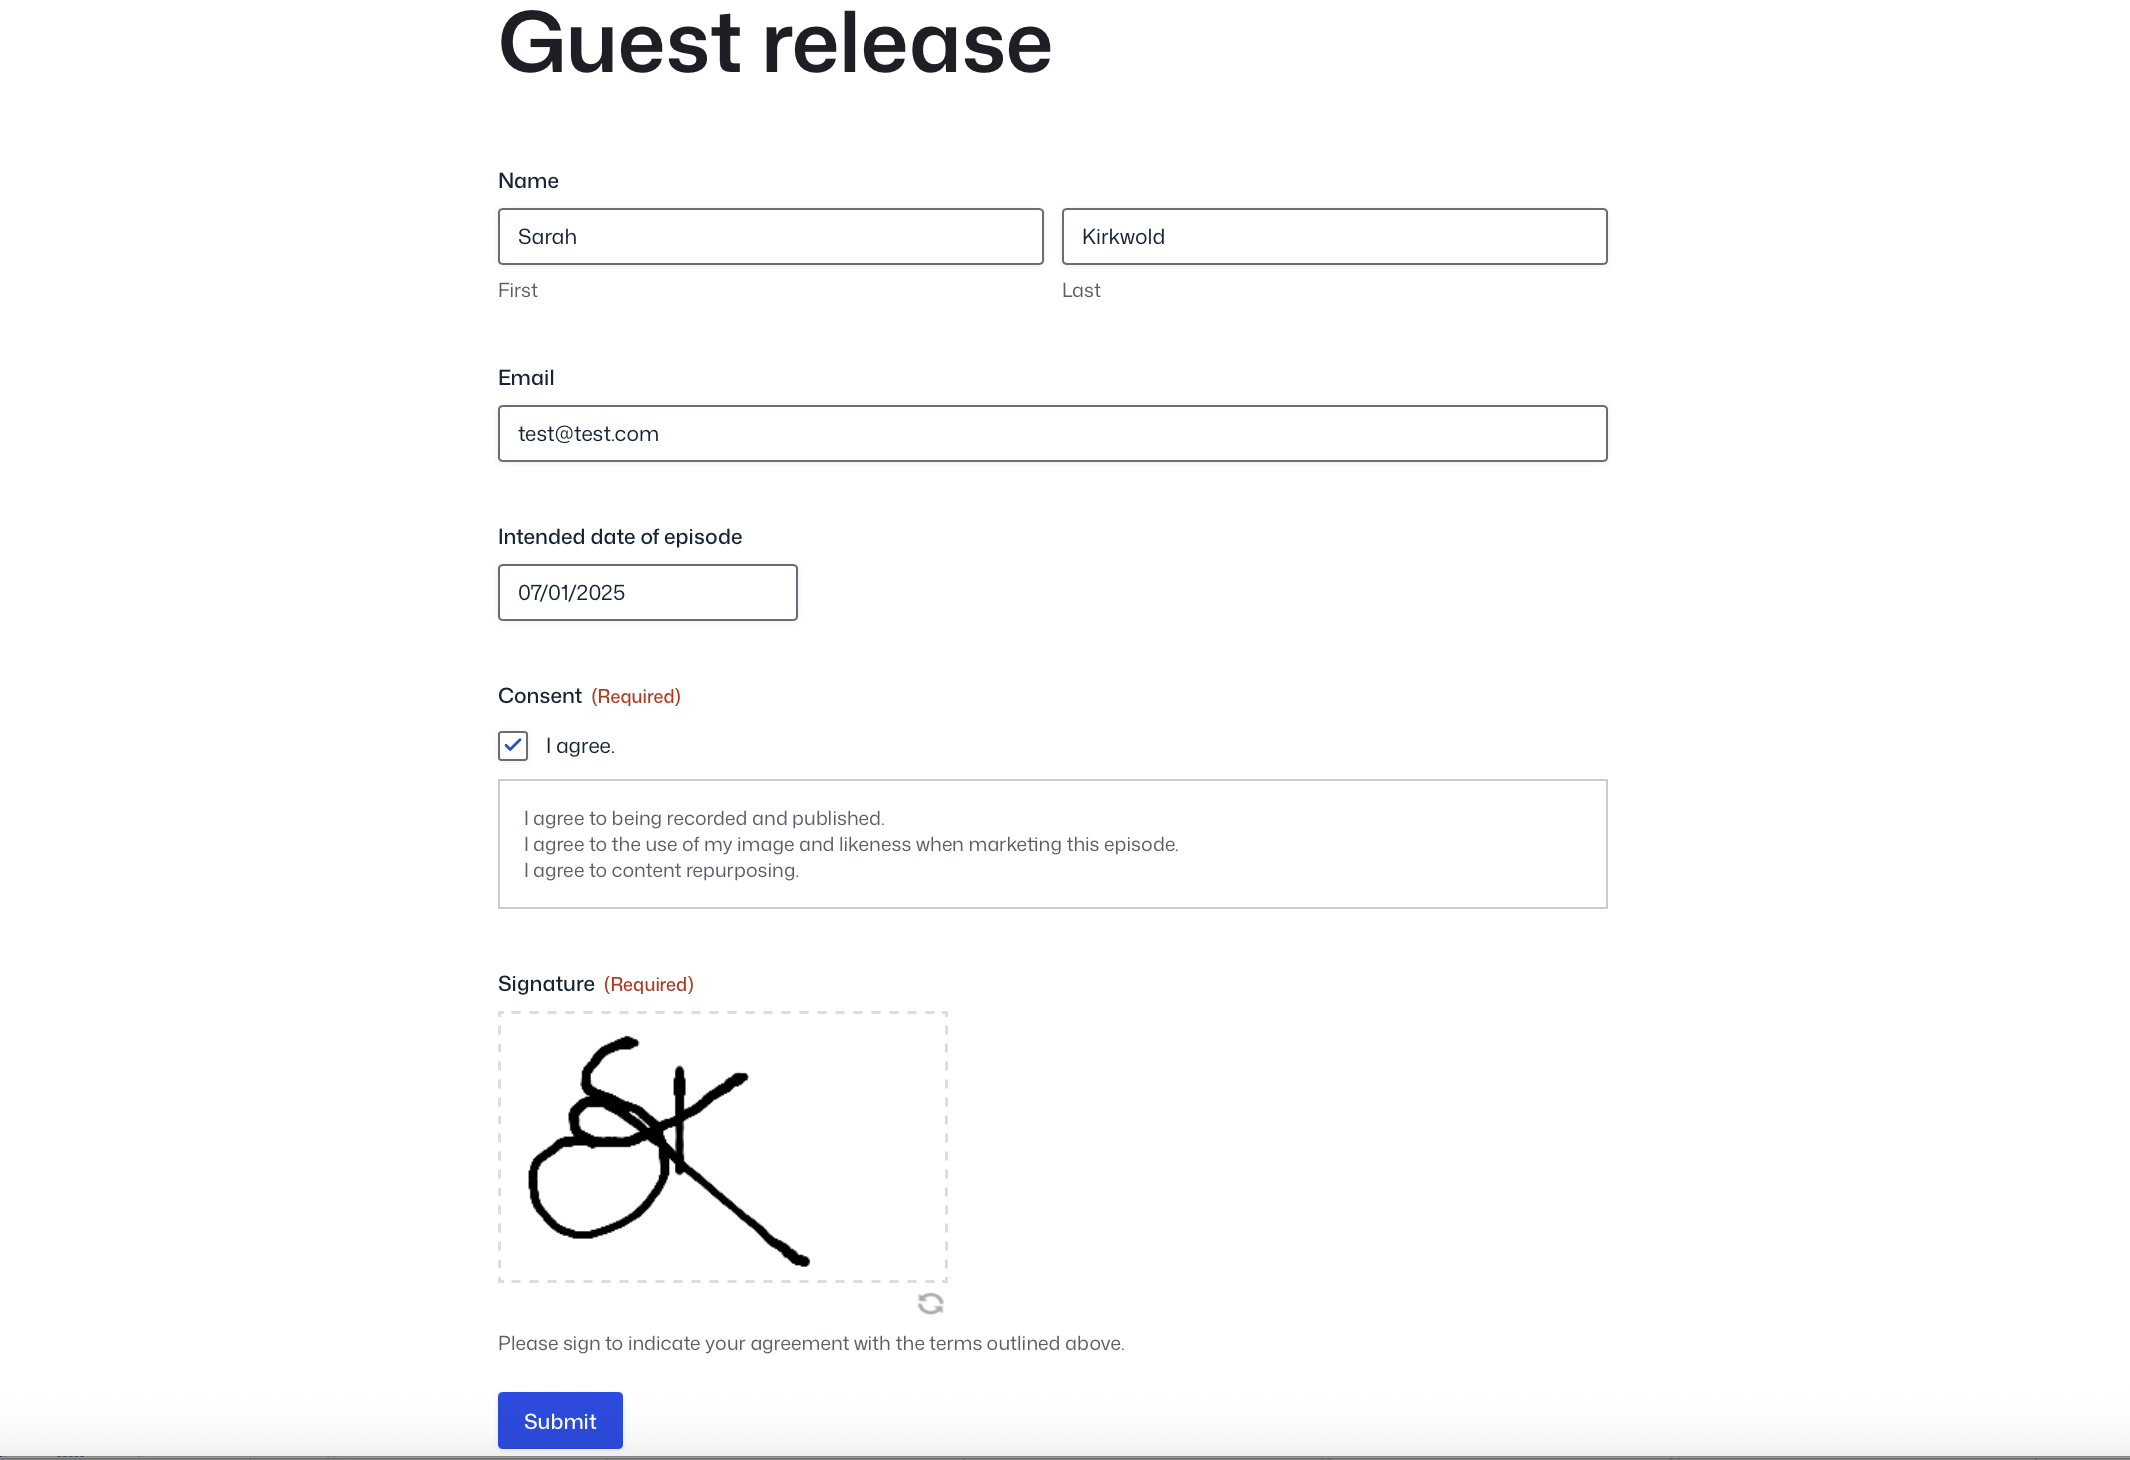
Add the signature field
- Go to Advanced Fields.
- Drag and drop the Signature field.
- Click to configure the field:
- Field name: Signature
- Description: Please sign to indicate your agreement with the terms outlined above.
- Make the field Required.
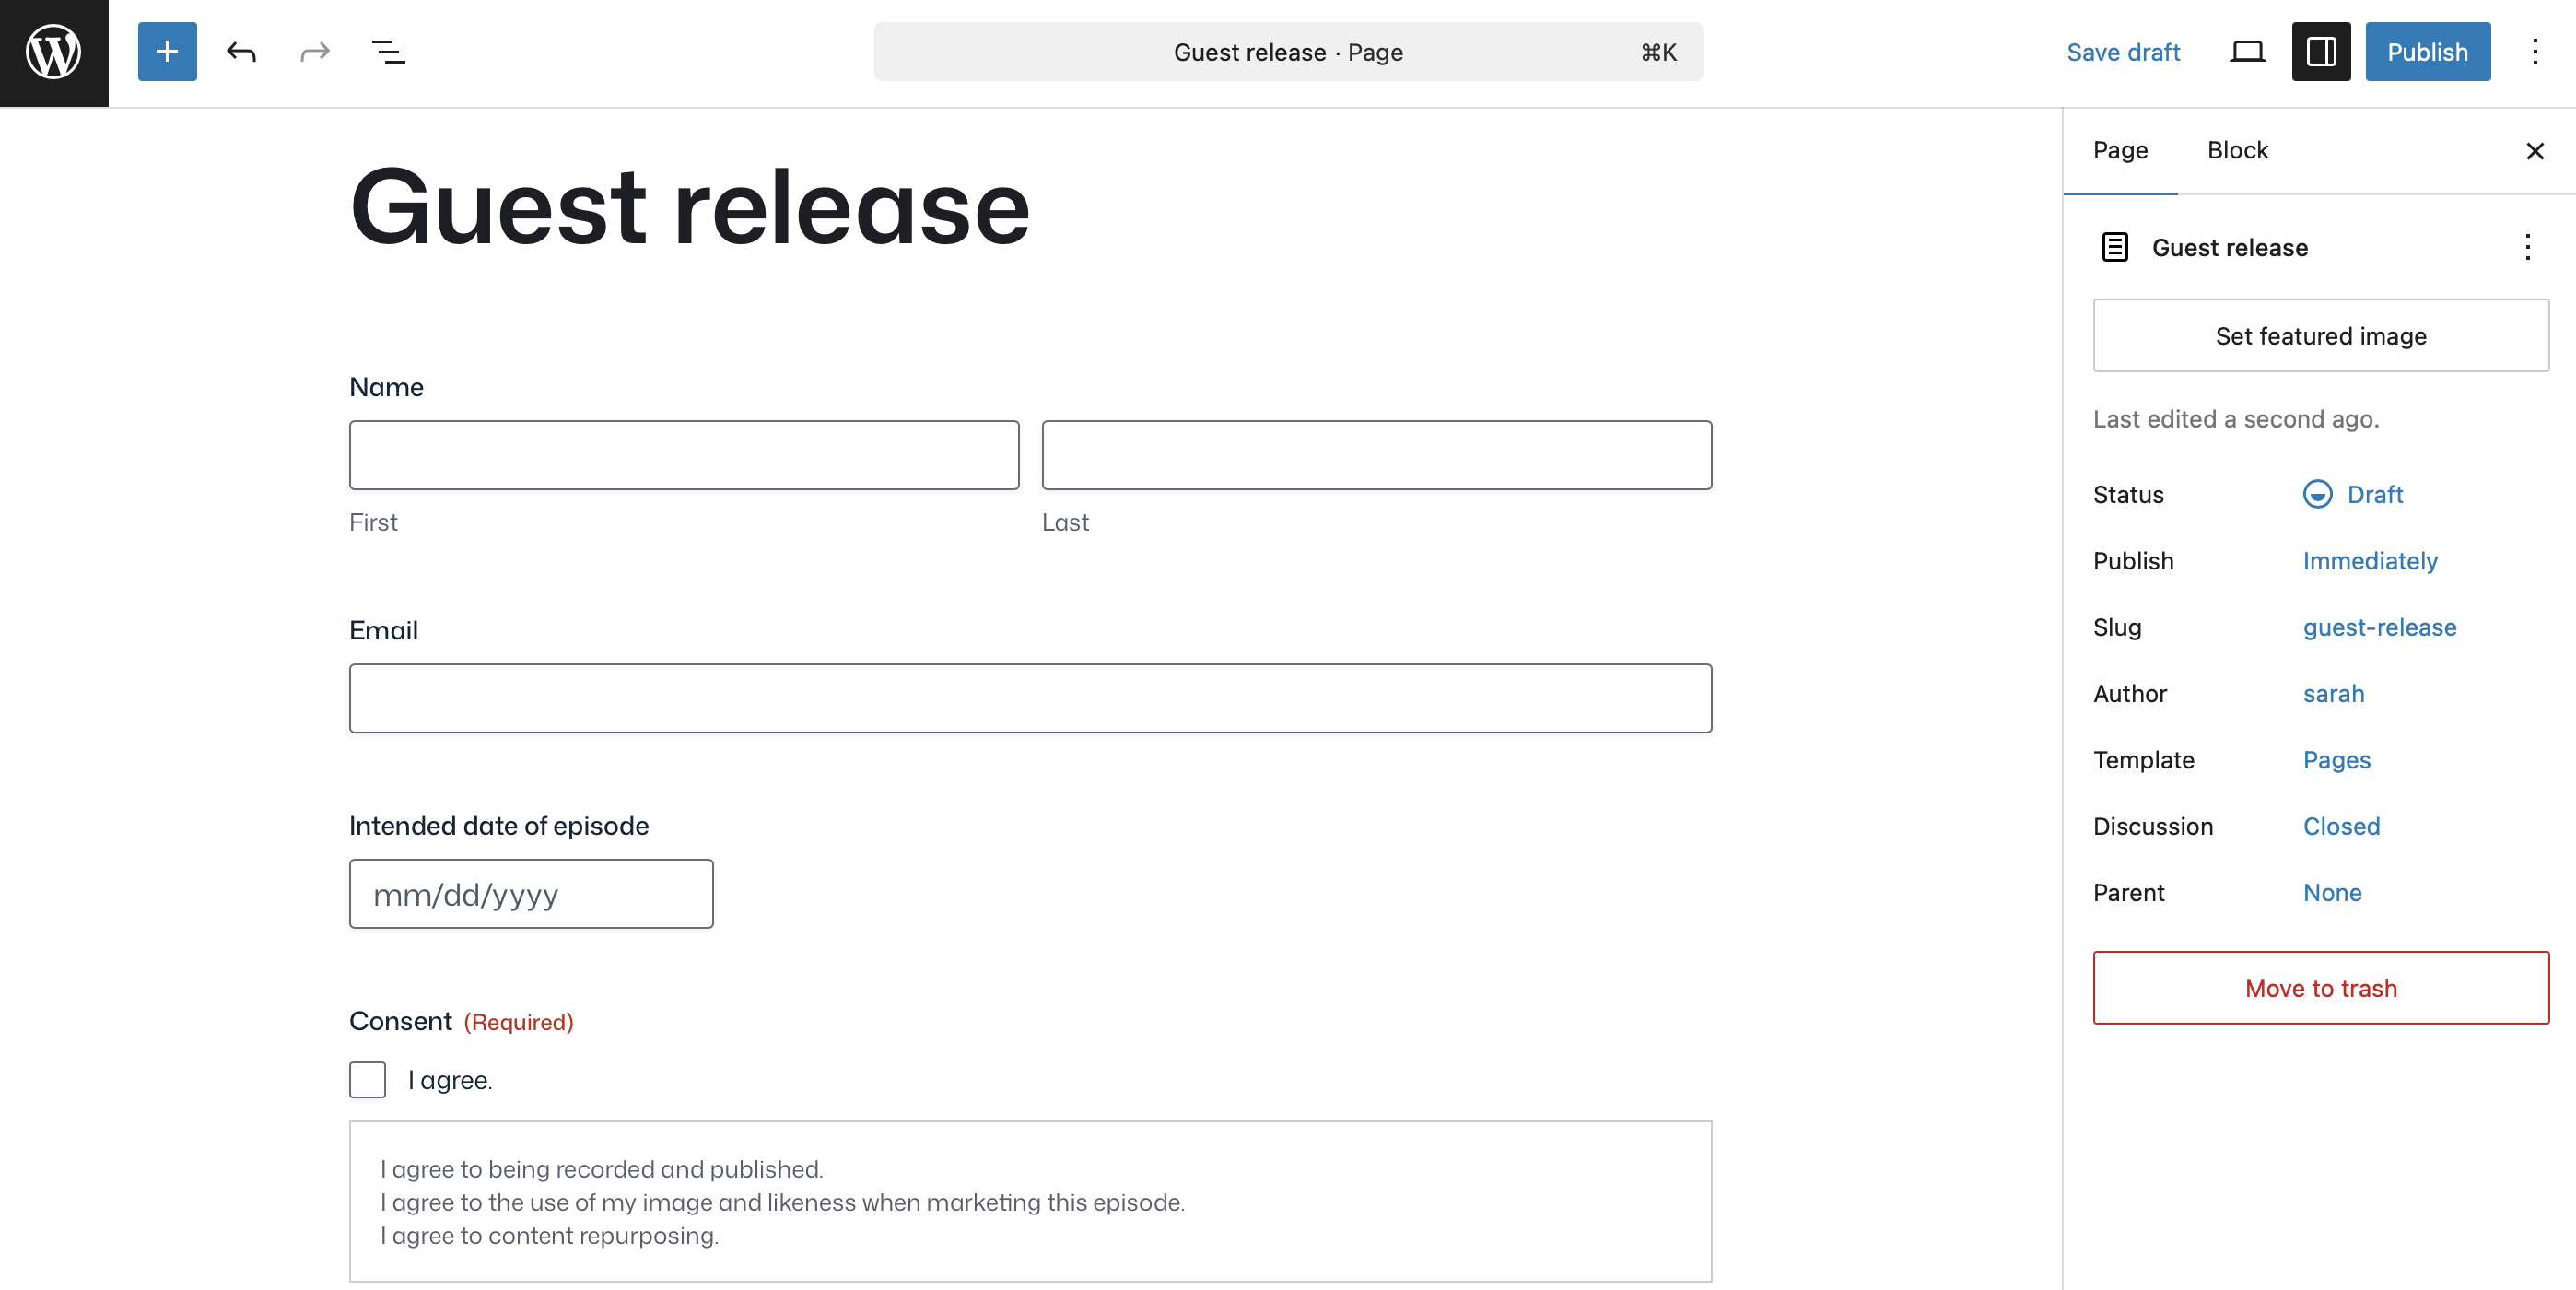
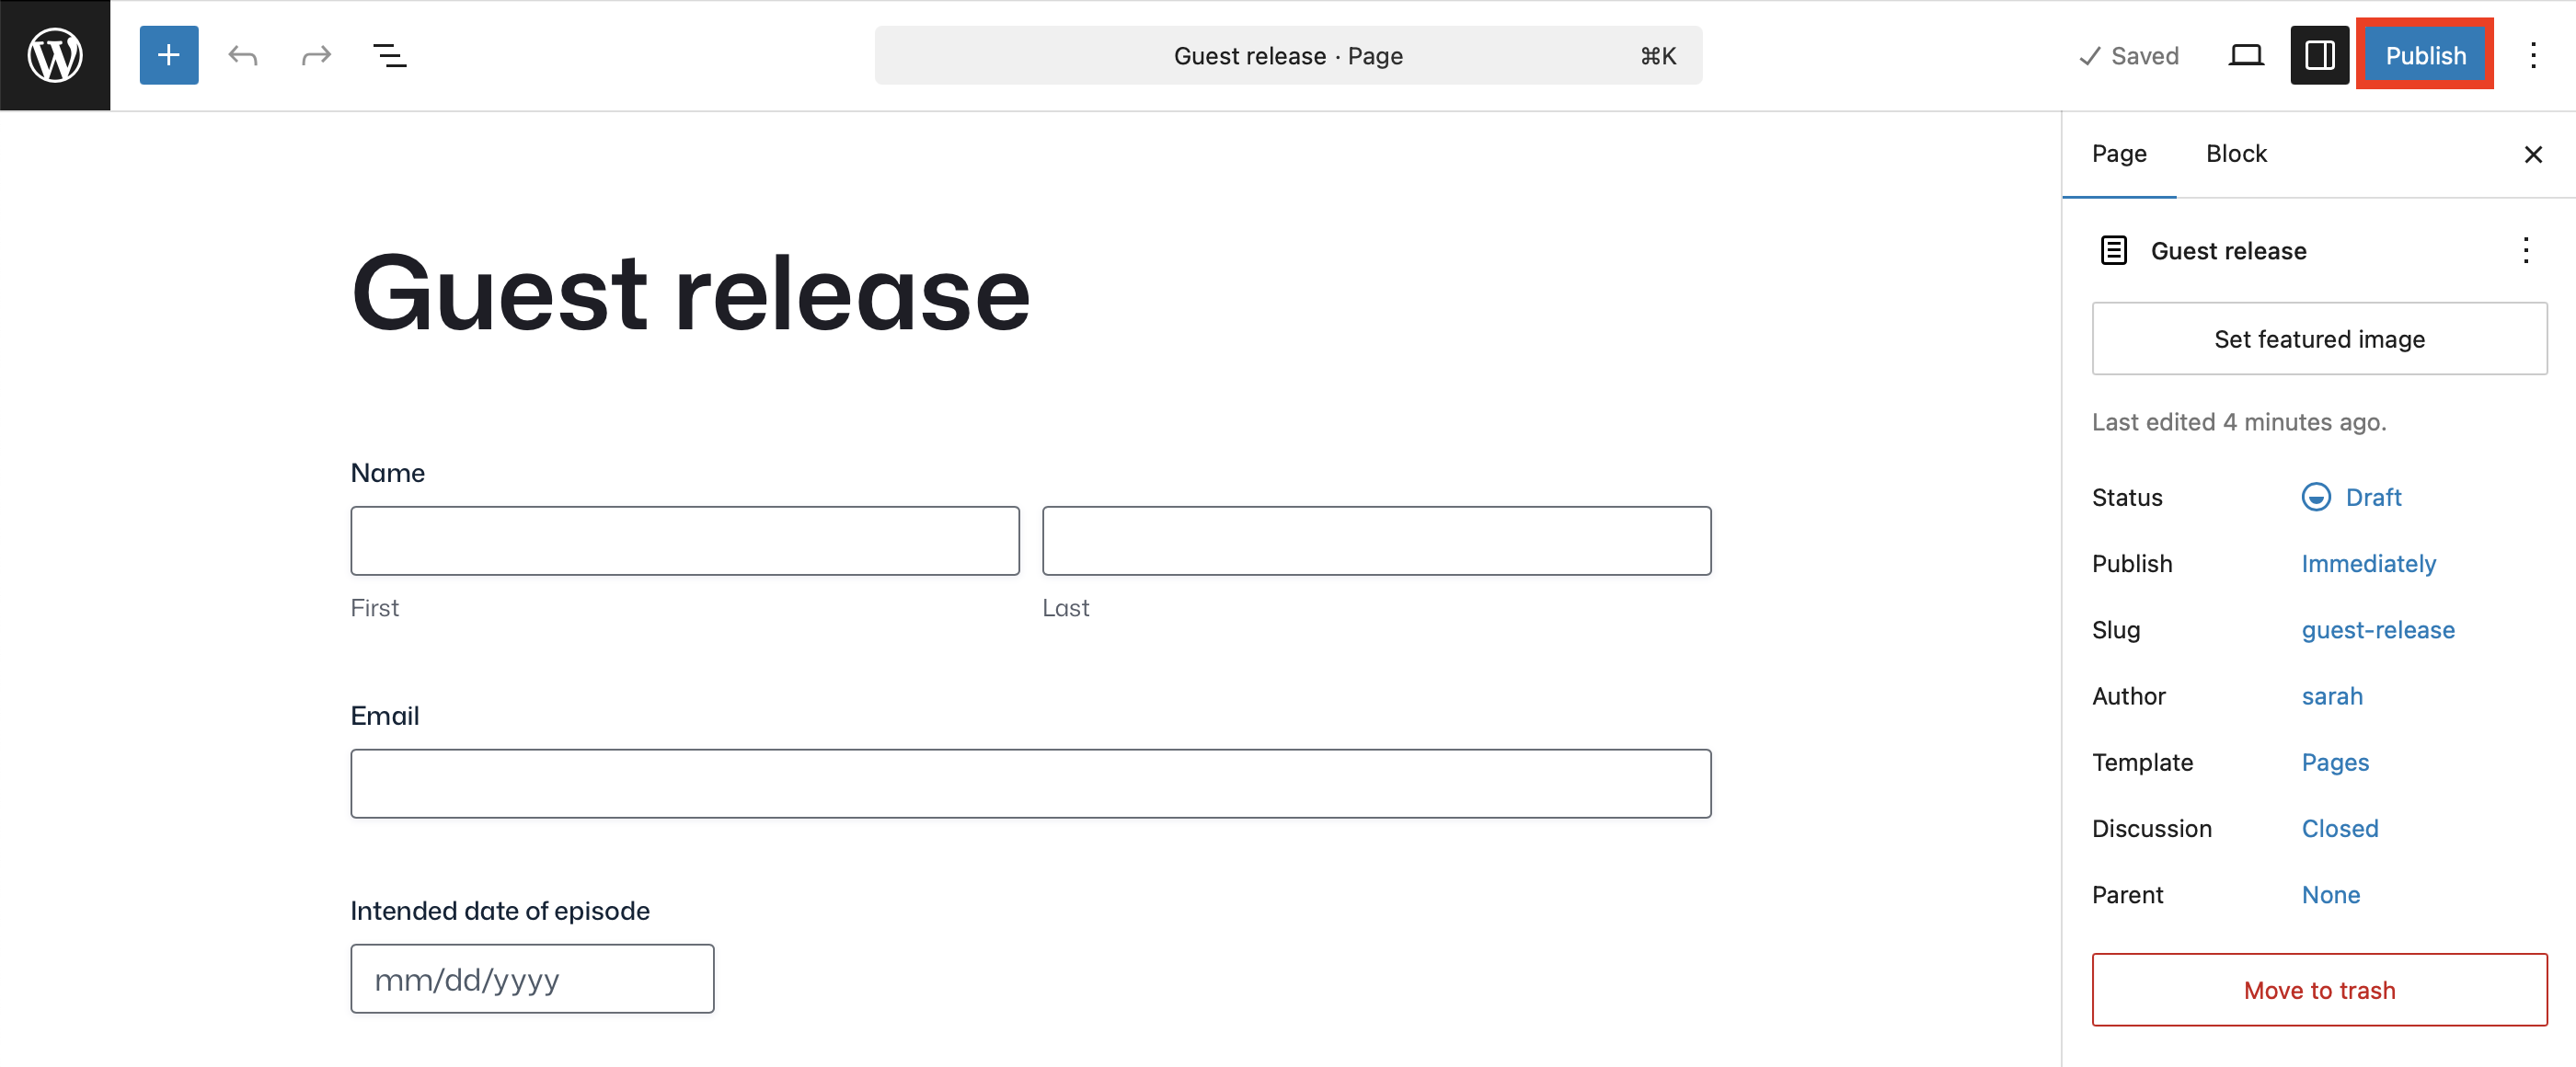
To view the finished product, embed the form on any page or post. In this case, we’ll embed the form on a new page:
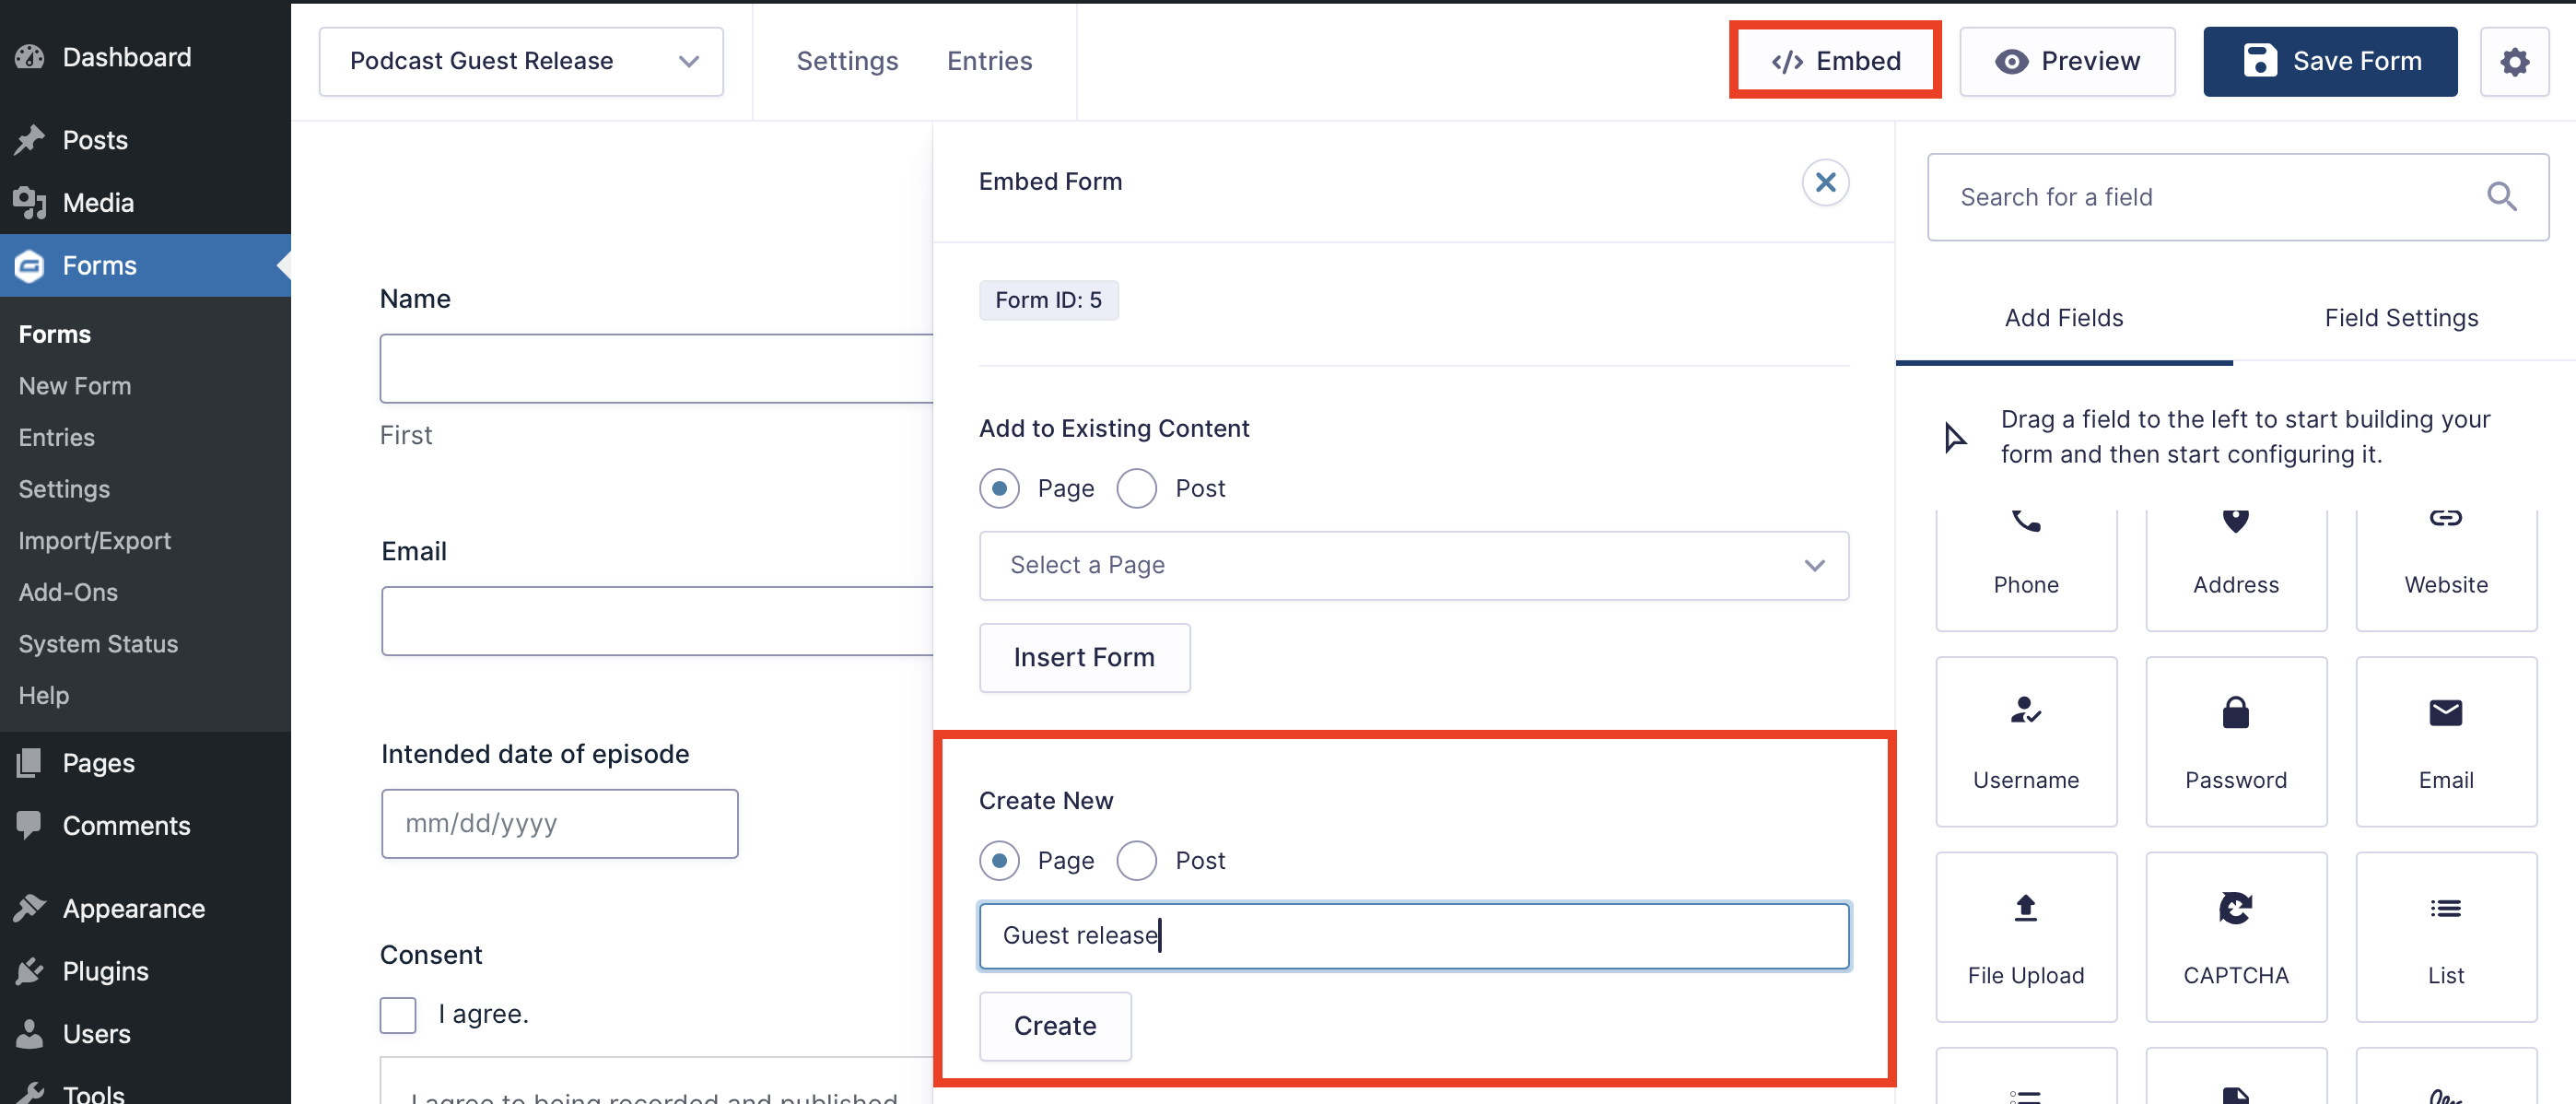
From here, you’ll be able to view your form and make further changes to style your form via the block editor as needed. Don’t worry, this page starts out in Draft status, so you can still make as many changes as you need to before publishing for the world to see.
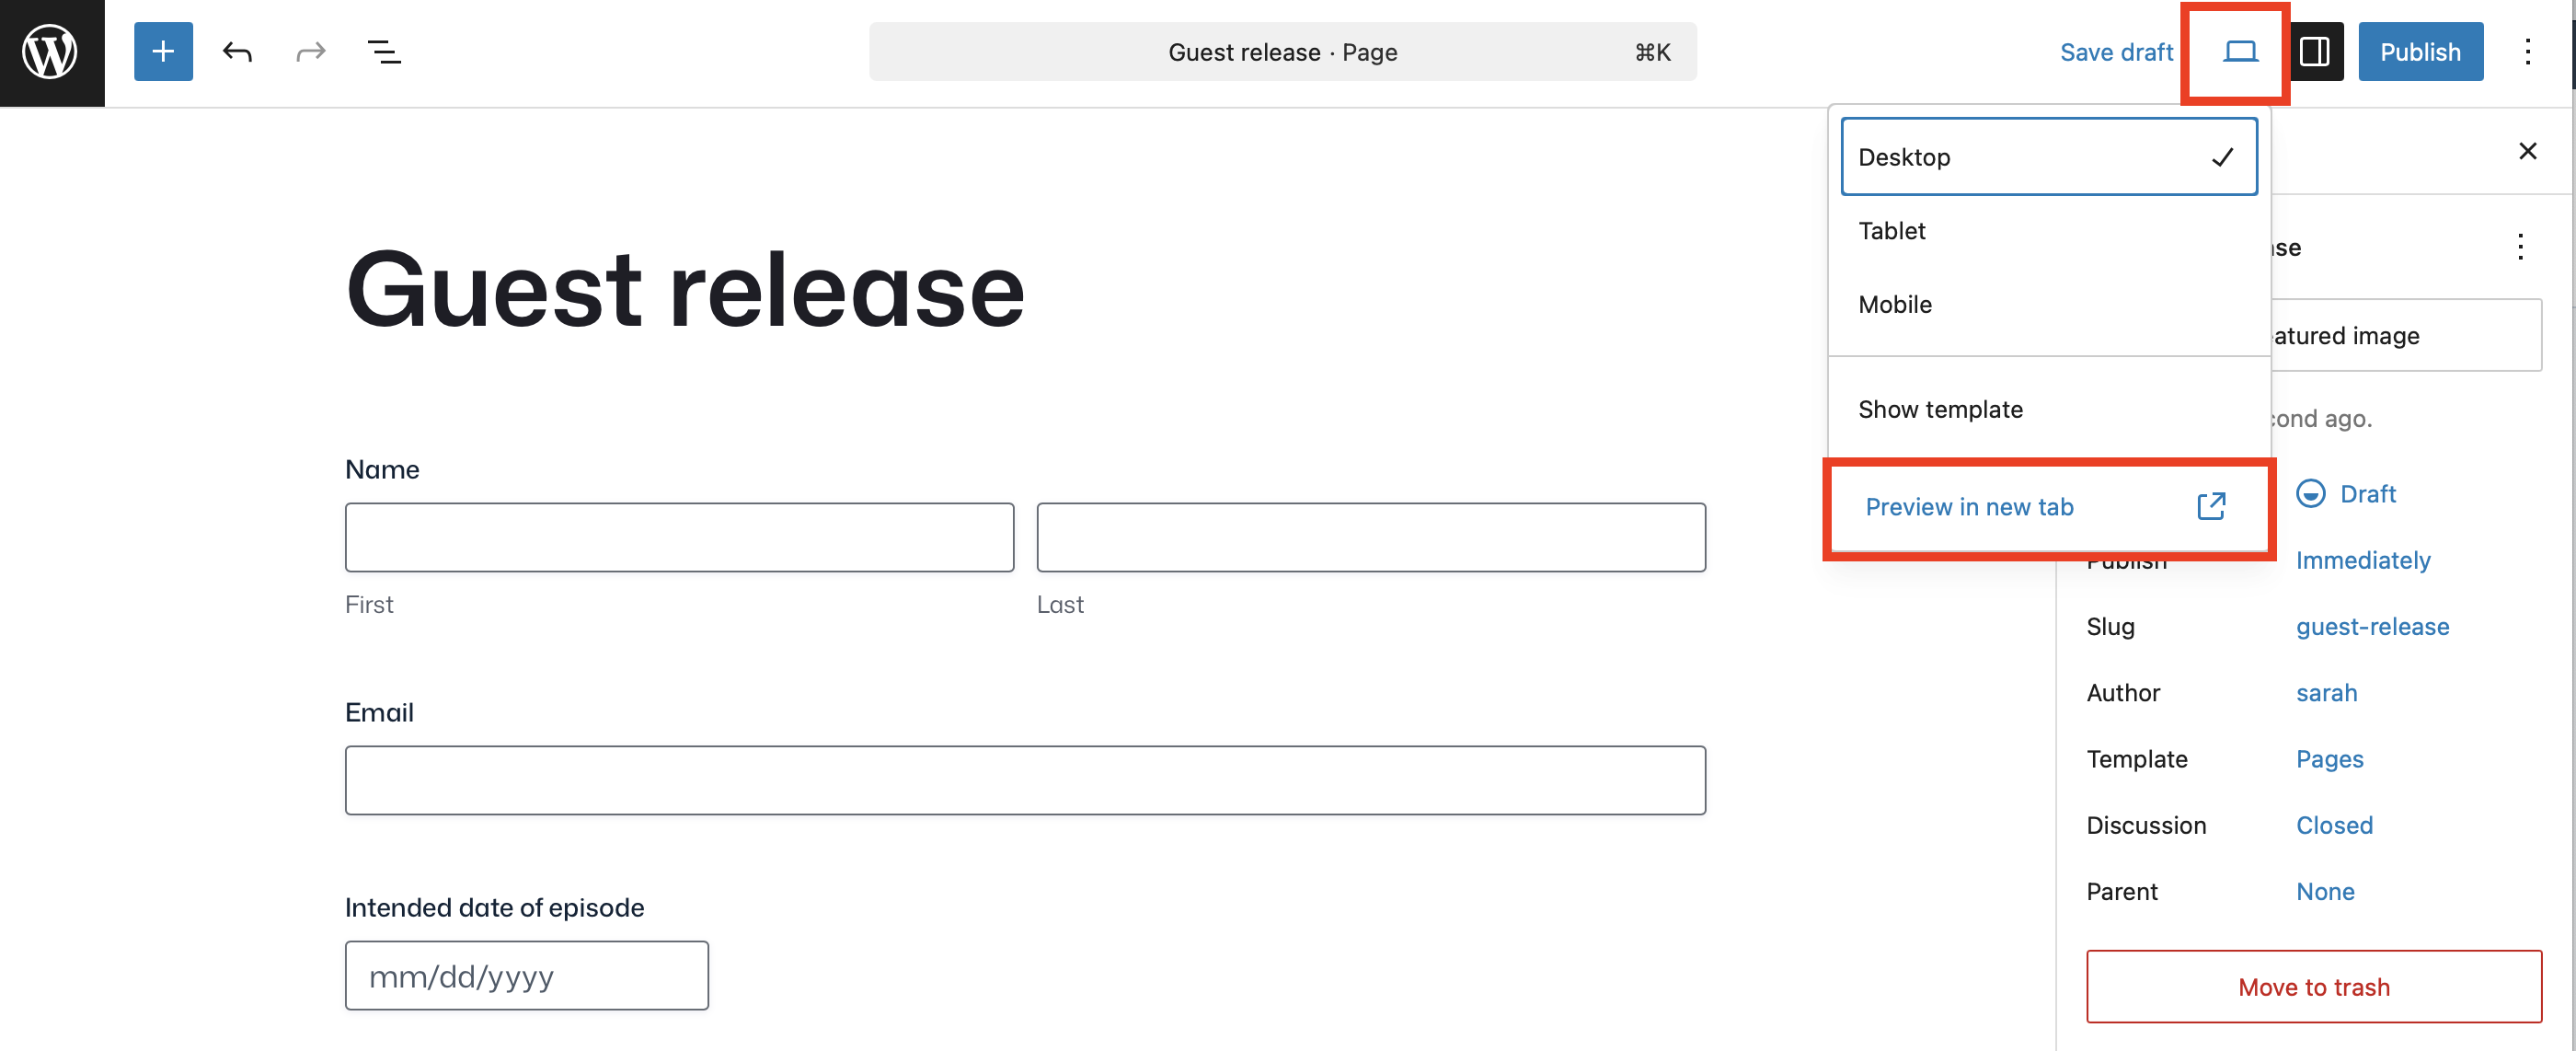
Test your form
Make sure to test your form by submitting a few test entries. The easiest way to do this is from the page editor, by clicking Preview in new tab.
Fill out the form and click to submit.
This will ensure everything is working as expected and that all submissions are being routed correctly. This is also how you’ll be able to validate your confirmation messages and notifications, if you’ve added any.
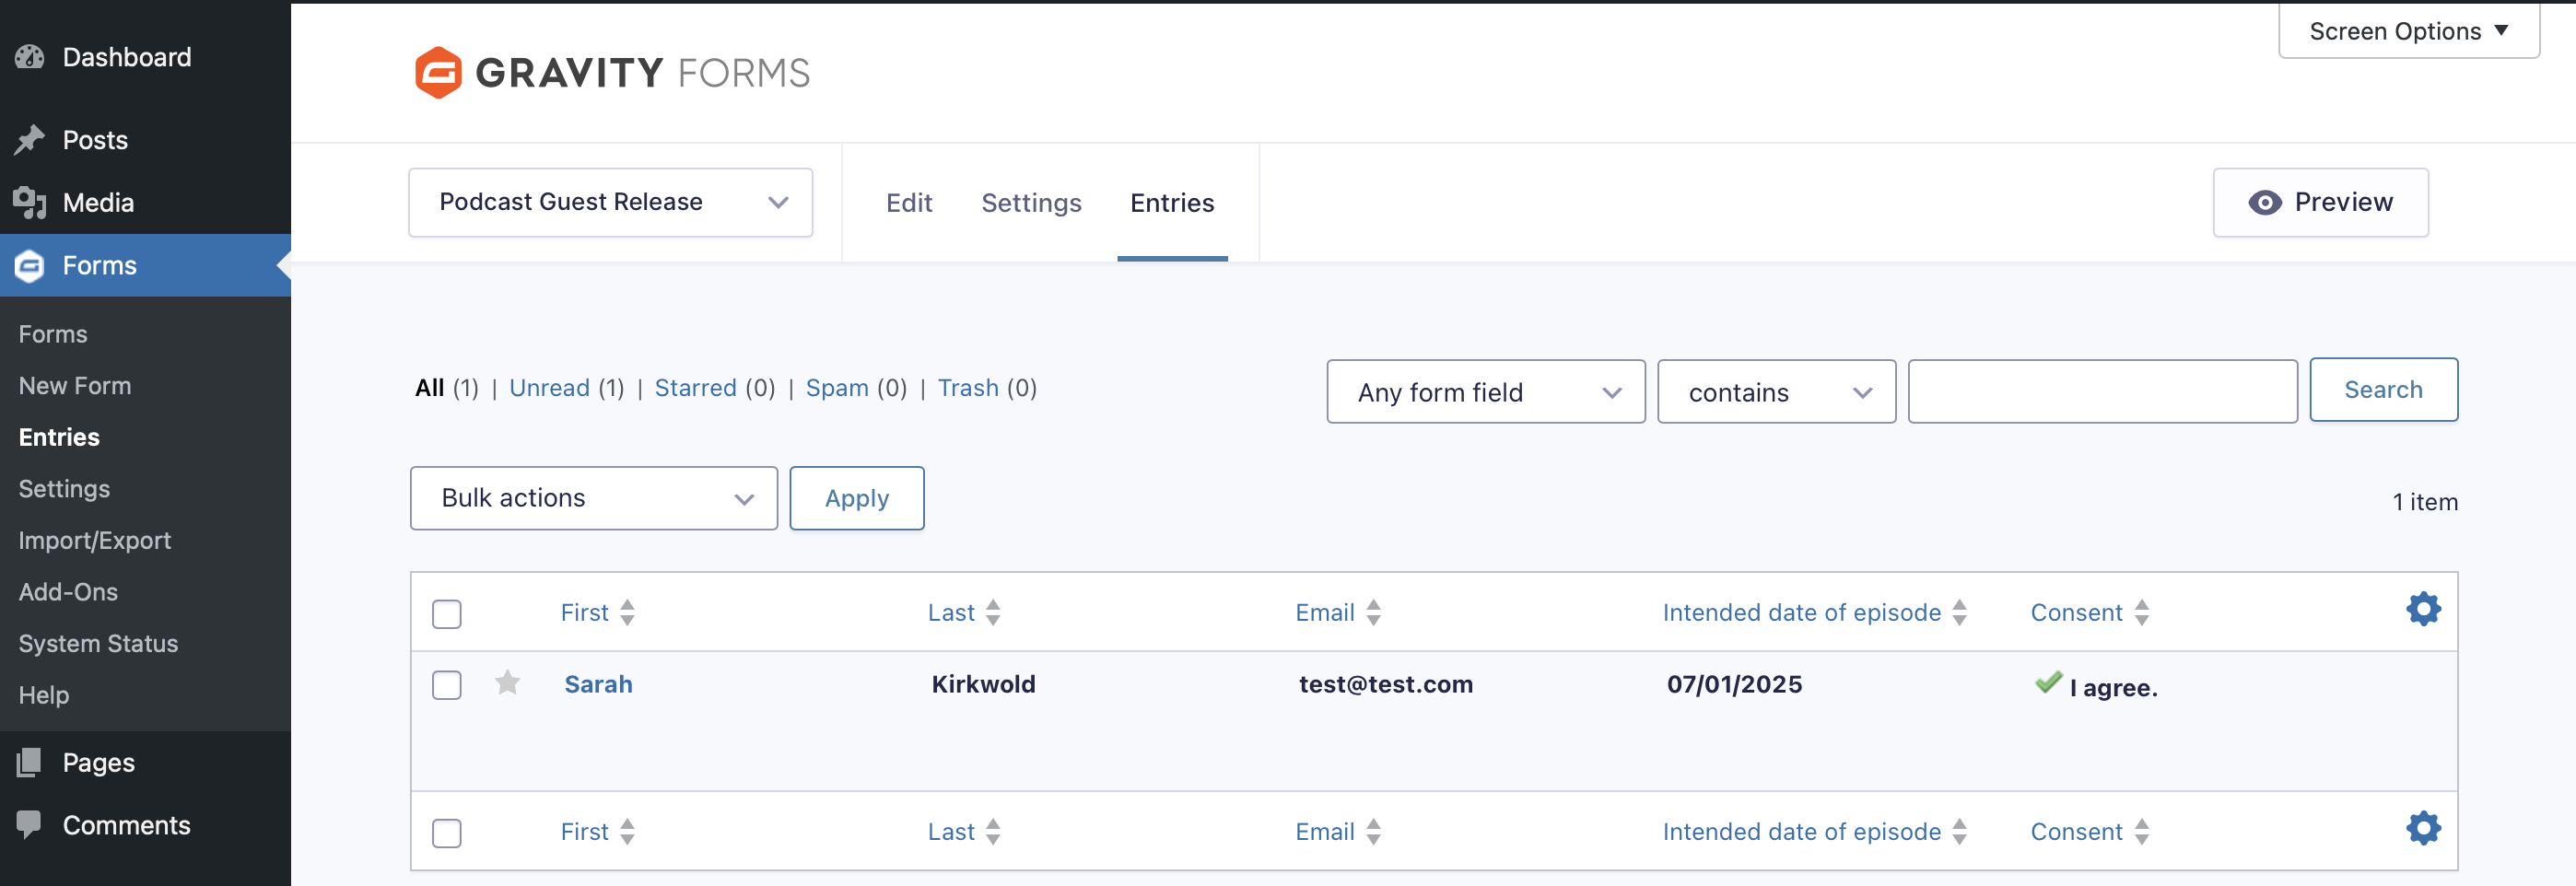
To check that your form submission has been received, head to your Forms list and click Entries.
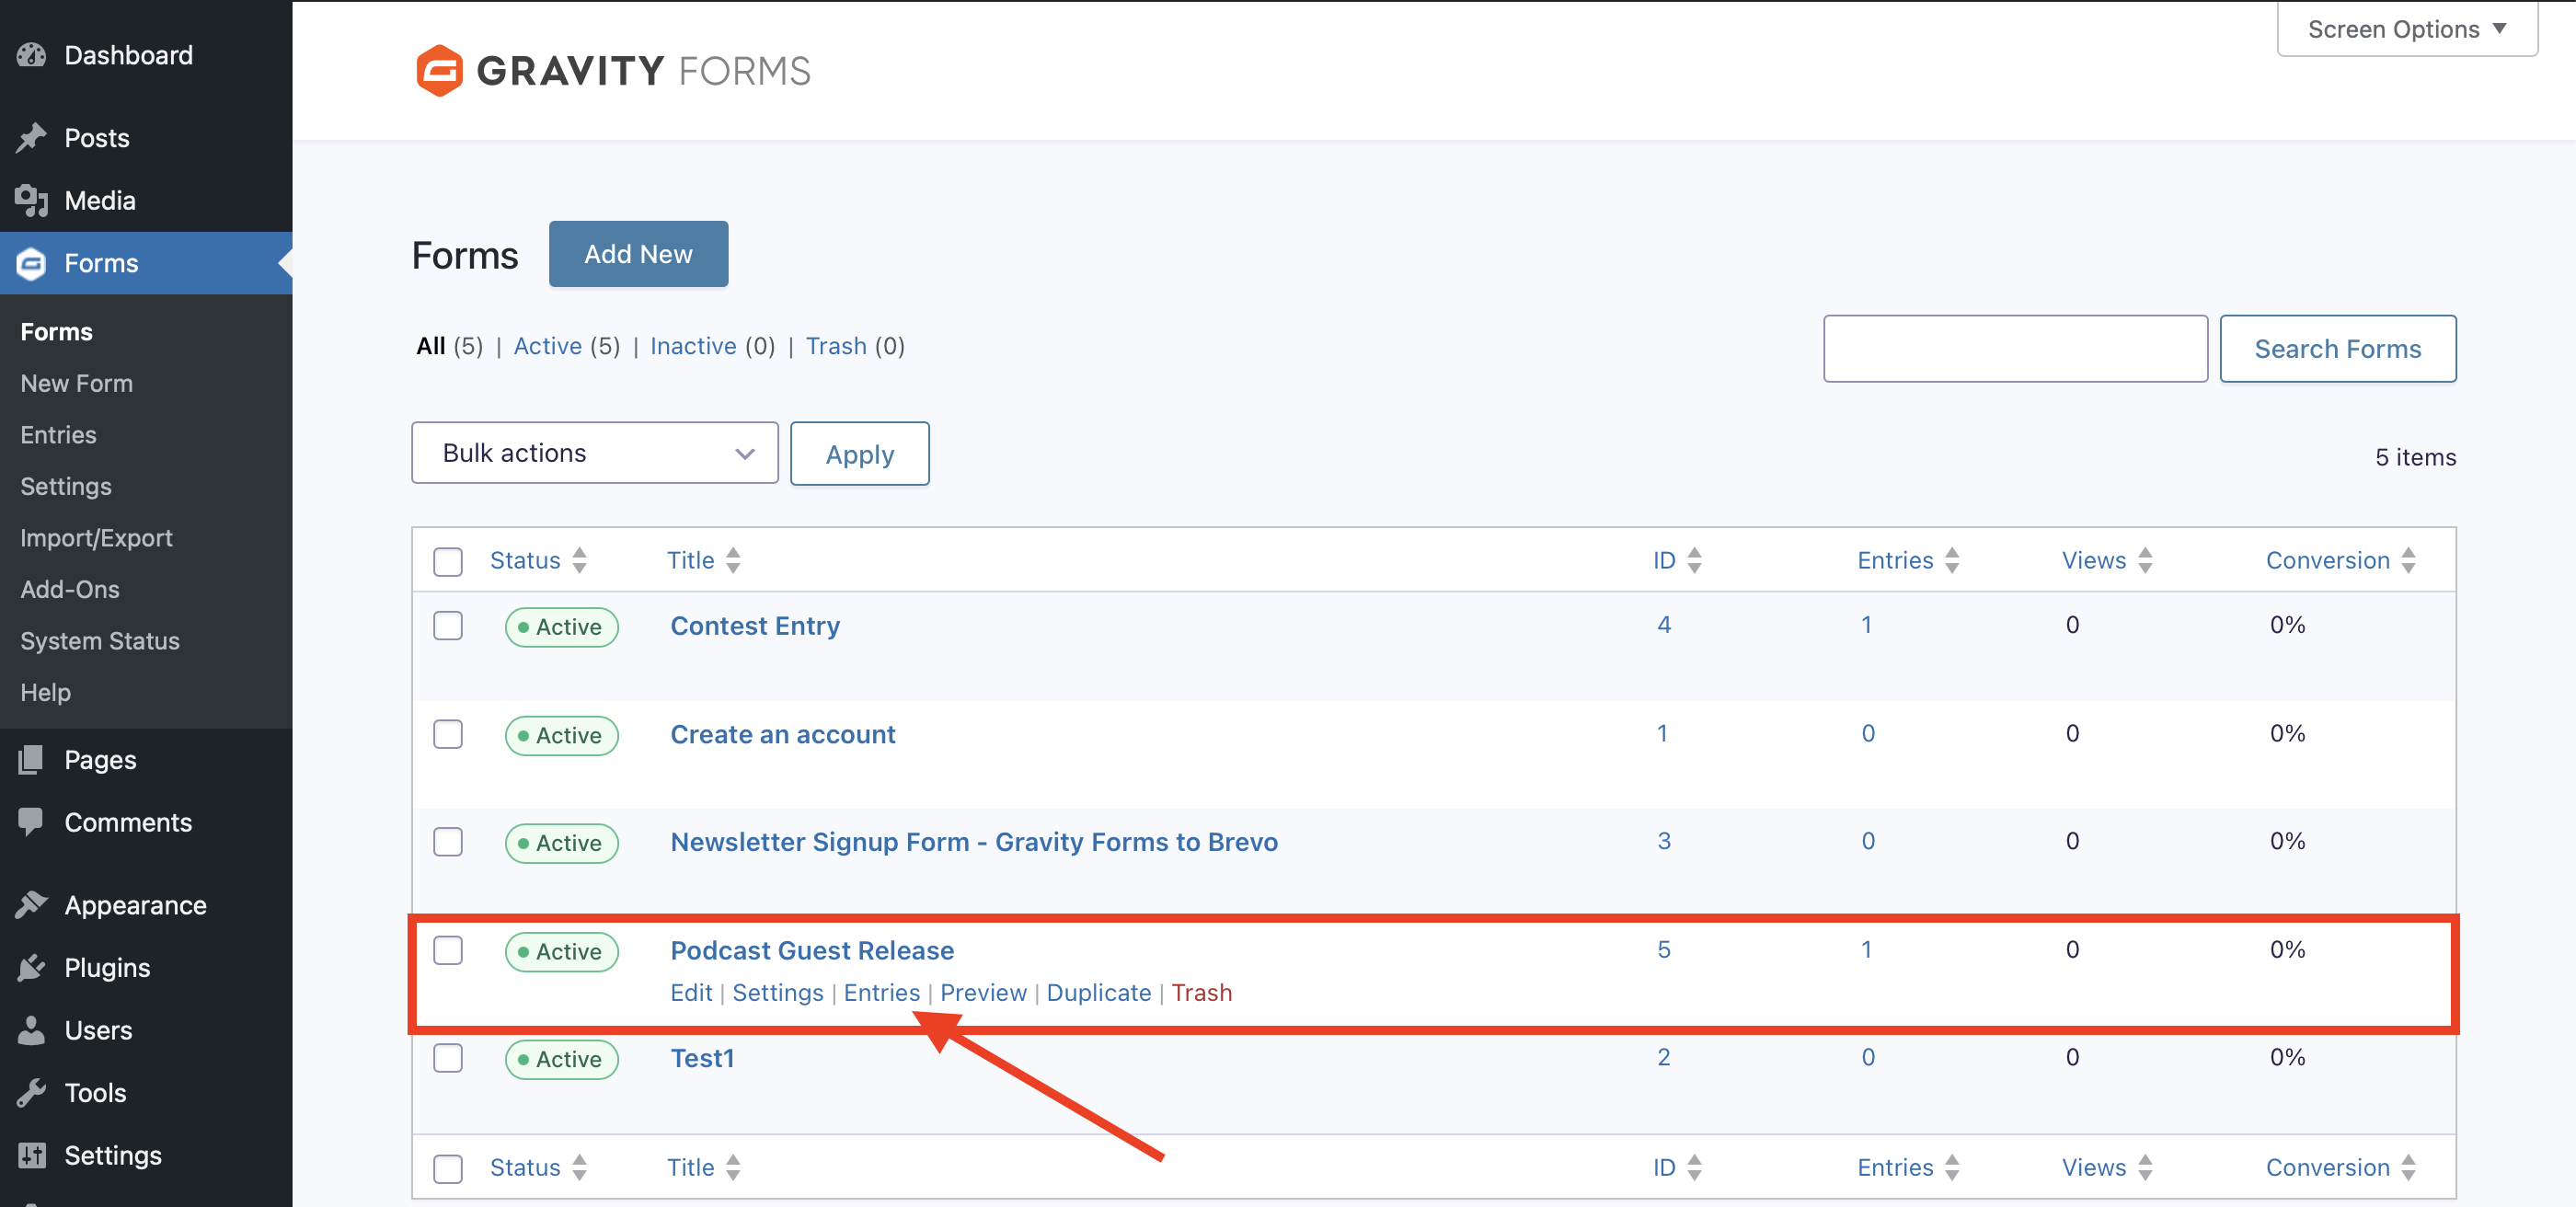
Here you should see the test entry you just submitted, and can confirm everything is working properly.
Publish your form
When you are ready to publish your page, simply navigate back to the page you created and click Publish. That’s it!
Important reminder: consult a lawyer
Before publishing your guest release form:
- Review the language and terms with a legal professional.
- Ensure compliance with privacy and intellectual property laws.
- Update your form regularly to reflect legal changes.
Disclaimer: This guide is for informational purposes only and does not constitute legal advice.
Enhance your form
If you really want to take your forms to the next level, you can extend the functionality of your WordPress site by taking advantage of the many features and add-ons available with your Gravity Forms license.
To name a few:
Enable conditional logic
Think of conditional logic as an “if-this-then-that” system. For example, if someone inquires about guesting on your podcast, you could show additional questions about their background and area(s) of expertise.
Check out our documentation to learn more about conditional logic.
Set up confirmations and notifications
Confirmations appear after someone submits your form. You can show a simple “Thank you” message, or direct them to take further action like signing up to your email list, or following you on social media.
Notifications are the emails that get sent from your WordPress website. Send follow-ups, exclusive listener offers, and more – automatically.
Accept file uploads
Add the File Upload field to accept things like signed contracts, portfolios, published writings, and more.
Learn more about the many other fields you can use in the Gravity Forms documentation.
Reduce manual work
One of the biggest advantages of using Gravity Forms is the ability to automate many of the repetitive tasks involved in managing your business. By setting up conditional logic, confirmation messages, notifications, and integrations with other platforms, you can automate things like:
- Sending unique confirmation emails when someone submits a guest request.
- Adding listeners and fans to your email marketing list.
- Notifying you whenever a guest release form is submitted.
- Generating an invoice or receipt for sponsorship payments.
This automation saves you time and ensures your processes run smoothly without manual intervention.
Additionally, if you hold a Pro, Elite, Nonprofit, or Developer (legacy) license, you can take advantage of the powerful Gravity Forms Zapier Add-On, and connect your forms to thousands of other web services.
Control what happens after the form submission
If you want to make your life even easier, you can use a dedicated automation tool like Gravity Flow. Gravity Flow helps podcasters focus more on their craft while automating the behind-the-scenes work by streamlining tasks including:
- Sponsorship request approvals – Automatically route sponsorship requests to the right team member and notify them without manual intervention.
- Testimonials – Set up automated approval workflows to instantly review and manage testimonials from your listeners and fans.
- Collaboration requests – Automatically assign collaboration inquiries to the appropriate team member for faster responses and better organization.
For more information on Gravity Flow and to see examples of automation in action, check out the video tutorials in our documentation or try out a free demo!
Easily integrate with other tools
Gravity Forms integrates seamlessly with a wide range of third-party tools. Whether you’re integrating your calendar, automating social media posts, or generating contracts, Gravity Forms allows for a smooth workflow.
Check out our expansive list of add-ons and explore the possibilities.
Protect your podcast with a guest release form
Your podcast guest release form isn’t just paperwork. It’s a key part of protecting your creative work and building trust with your guests.
With WordPress and the Gravity Forms Signature Add-On, you can replace manual follow-ups and clunky PDFs with a sleek, professional workflow that runs itself.
Whether you’re just getting started or already managing a growing list of guests, Gravity Forms gives you the tools to simplify your process and stay legally protected – without slowing you down.
Purchase your Gravity Forms license today and create a seamless, branded experience for your podcast guests. The more efficient your behind-the-scenes setup, the more time you’ll have to focus on what matters most: creating great content and connecting with your audience.
Newsletter
If you want to keep up-to-date with what’s happening on the blog sign up for the Gravity Forms newsletter!
"*" indicates required fields