CRMs like Salesforce are important to businesses all over the world for keeping track of clients and closing on leads. Your company is no different, you need a WordPress CRM like Salesforce to organize your contacts and make sales.With WordPress being used on over 27% of the internet and Salesforce being the biggest name in the CRM industry, it makes perfect sense that many users would want to utilize the forms on their WordPress sites to capture leads and save them to Salesforce.
In this article, we’ll show you how to easily send your form submissions directly from your WordPress site to Salesforce and create new Salesforce leads from that data.
Connecting Your Forms to Salesforce
First, you’ll need a form plugin that’s reliable and capable of handling your most critical data. In this example, we’ll use Gravity Forms as well as the Zapier add-on to create the new lead within Salesforce. If you don’t already have a Gravity Forms license and want to follow along before getting one, you can always create a new Gravity Forms demo and follow along there.
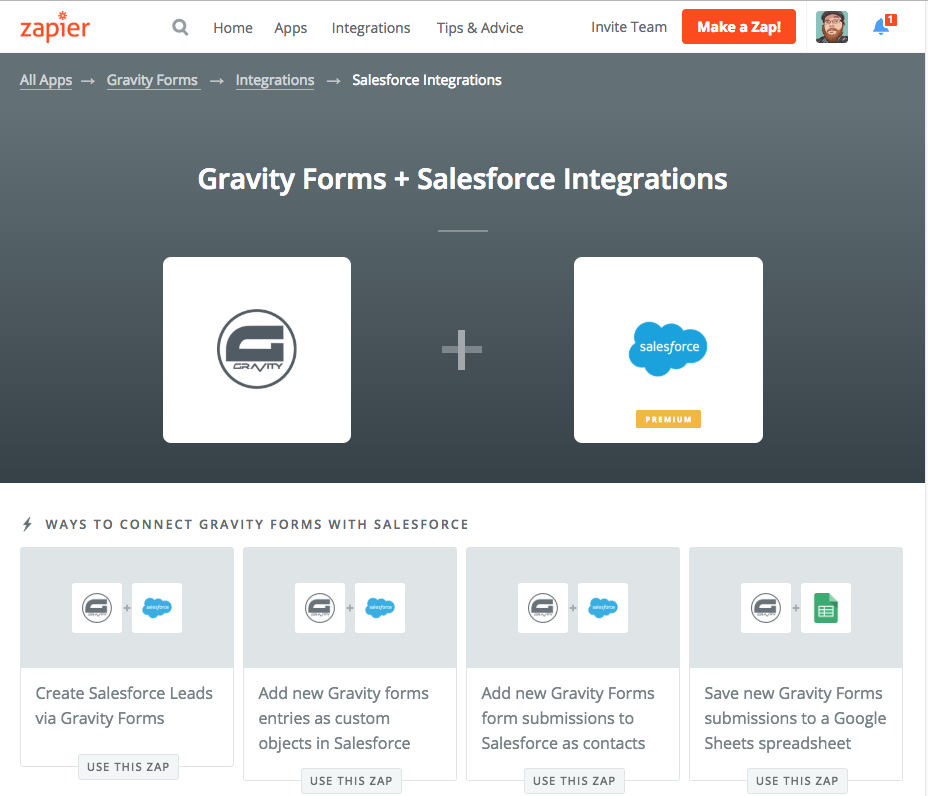
- Due to the wide number of users creating Salesforce leads from Gravity Forms, Zapier already has a template that walks you through the process. Open the Salesforce lead creation from Gravity Forms template and log into your Zapier account to get started with it.Tip: Many other pre-made templates are available for doing other actions between Gravity Forms and Salesforce as well. You can find a listing on the Gravity Forms + Salesforce page within Zapier’s site.
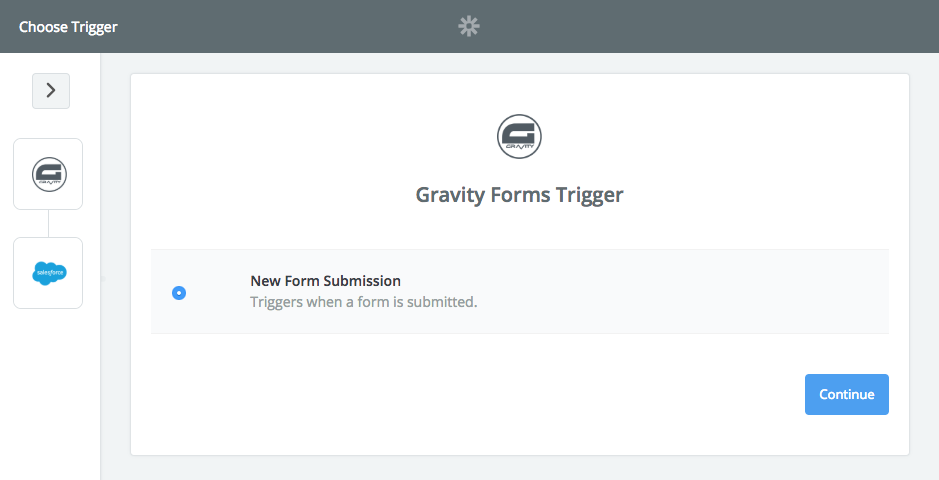
- First, you’ll be prompted to select a trigger for the Zap. As we’ve already selected to create new leads in Salesforce from your form submissions, Gravity Forms should be selected already. Just click the Continue button.
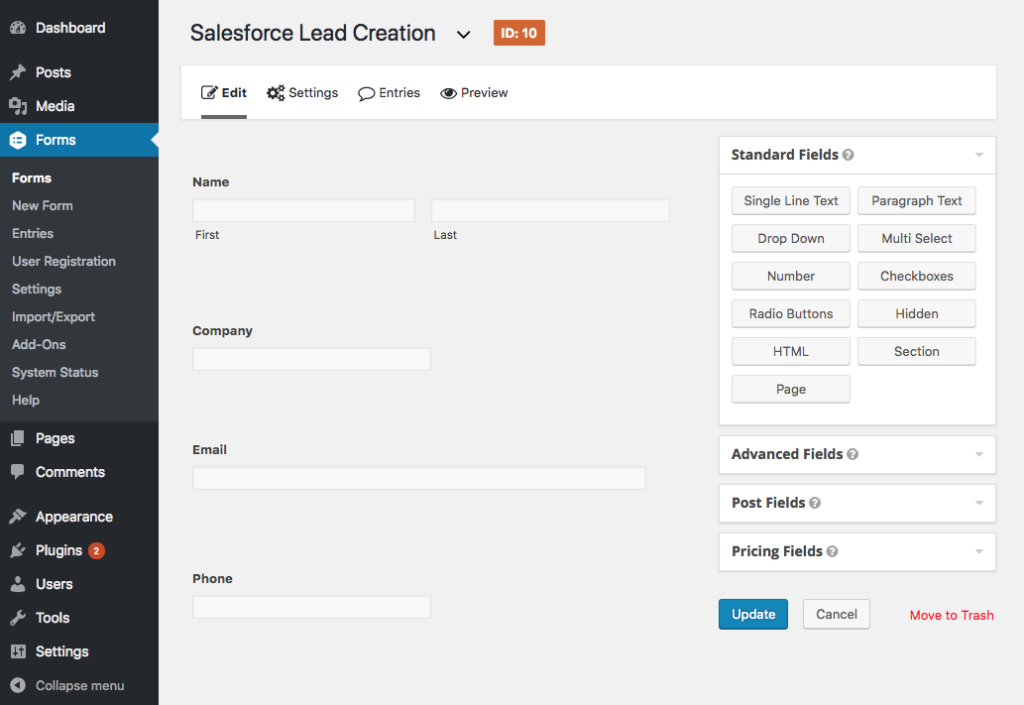
- Next, you’ll be prompted to create a new form on your site to capture Salesforce leads from. If you haven’t already created a form that you want to use, go ahead and create it now and click Continue on your Zap. This form should have all of the necessary information that you’ll need when creating the Salesforce lead, such as name, company, email, and phone number. Of course, this will all vary based on your particular situation, but those fields are a good starting point.
- Now you’ll need to configure Gravity Forms to know where to send your form submission. In a new tab go to your form within the WordPress admin and click on Zapier inside the Form Settings menu item of the form builder and create a new Zapier Feed.
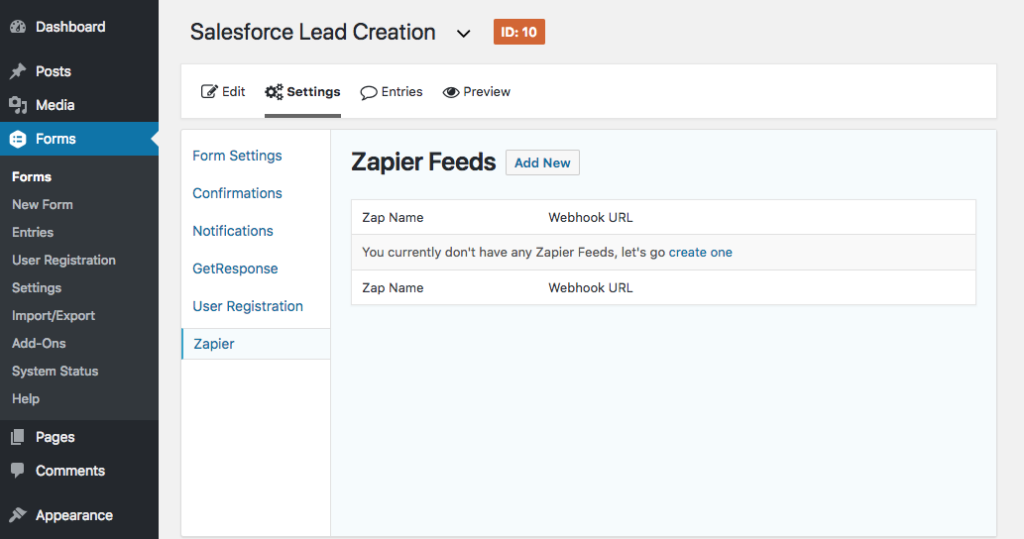
- Inside your Zapier feed, there are just a few options. First is the Feed Name. This name is just for accessing it later, so feel free to name it anything you want. Something like “Form Submission to Salesforce Lead” will work just fine.
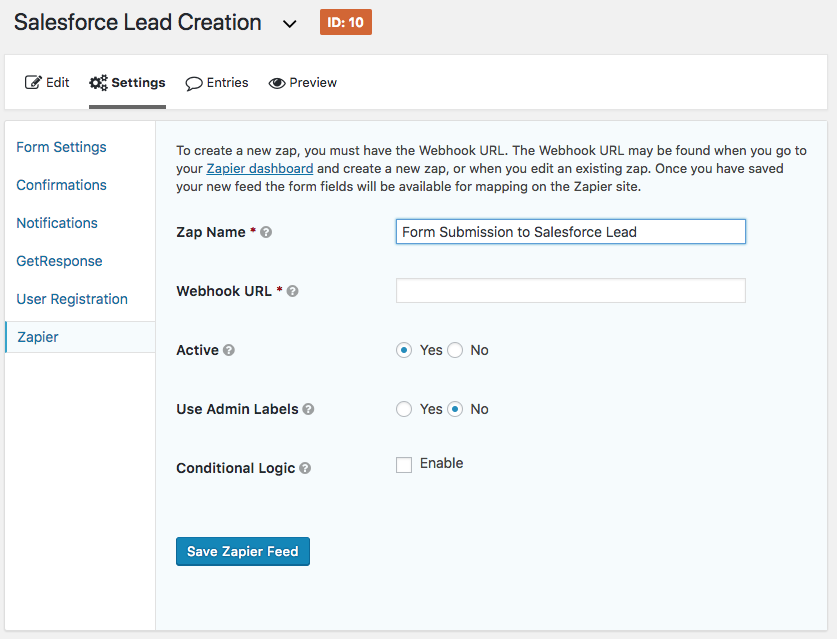
- Next up, you’ll need to add the Zapier webhook that your form will send the submission data to. Remember that URL that Zapier gave you earlier? That’s what you’ll want to put in here. After that, save your settings and jump back to where we left off in Zapier.

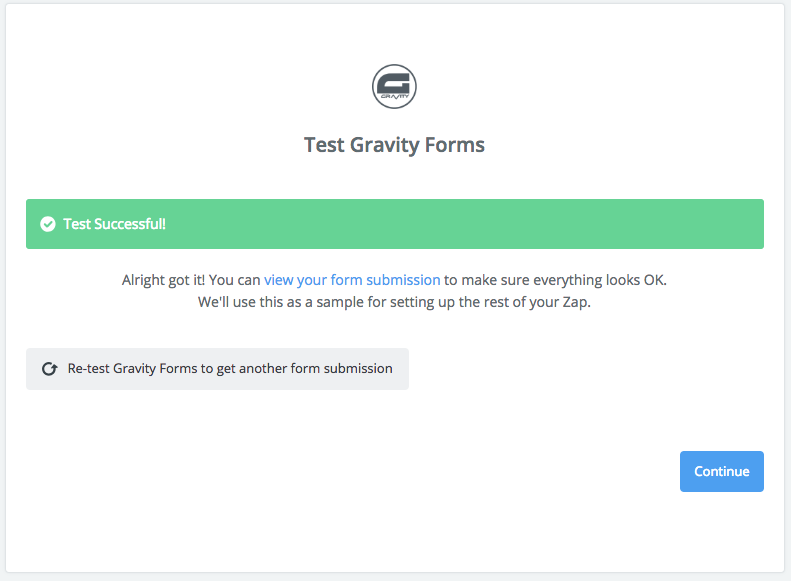
- Back in Zapier, click the OK, I did this button. After clicking it, Zapier should see demo data from your form that can be used for later configuration. If all was successful, click Continue. If not, you might need to submit your form once for the data to appear.
- Next, Zapier will ask you what action you want to perform. Since we’re using the template, the Create Lead option should already be selected. Just click Continue.
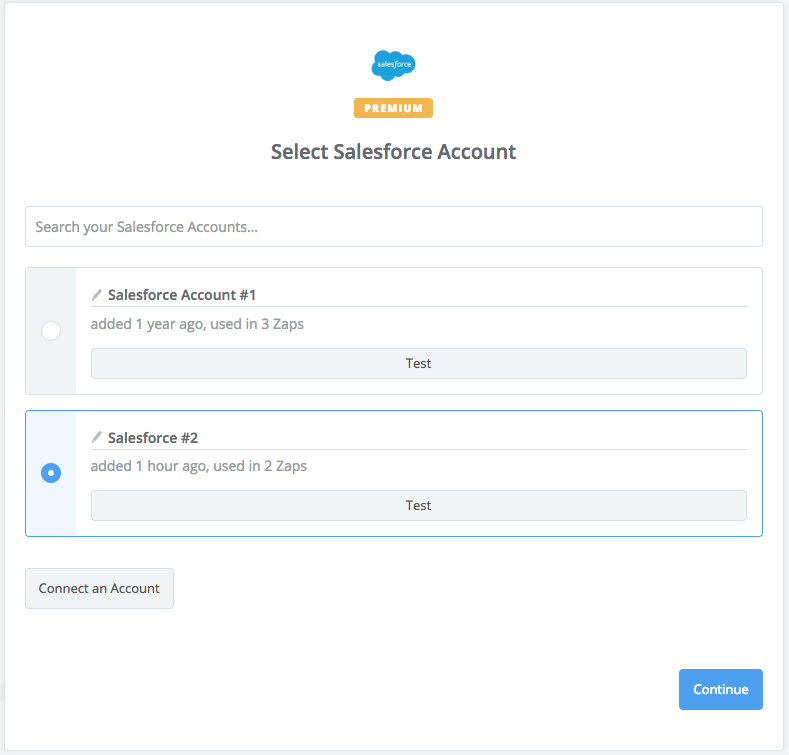
- You’ll now need to select a Salesforce account that you want to create new leads on with your form. If you’ve already been using Zapier with your Salesforce account, you’ll see your account listed here. If not, click the Connect an Account button to connect a new Salesforce account to Zapier. After you’re finished and your Salesforce account is selected, click Continue.
Mapping Form Fields to Salesforce Leads
Now that you’ve connected both Gravity Forms and Salesforce to Zapier, it’s time to determine what data will be sent when creating a new Salesforce lead. Doing so is as simple as mapping form fields to fields within the Salesforce lead object.
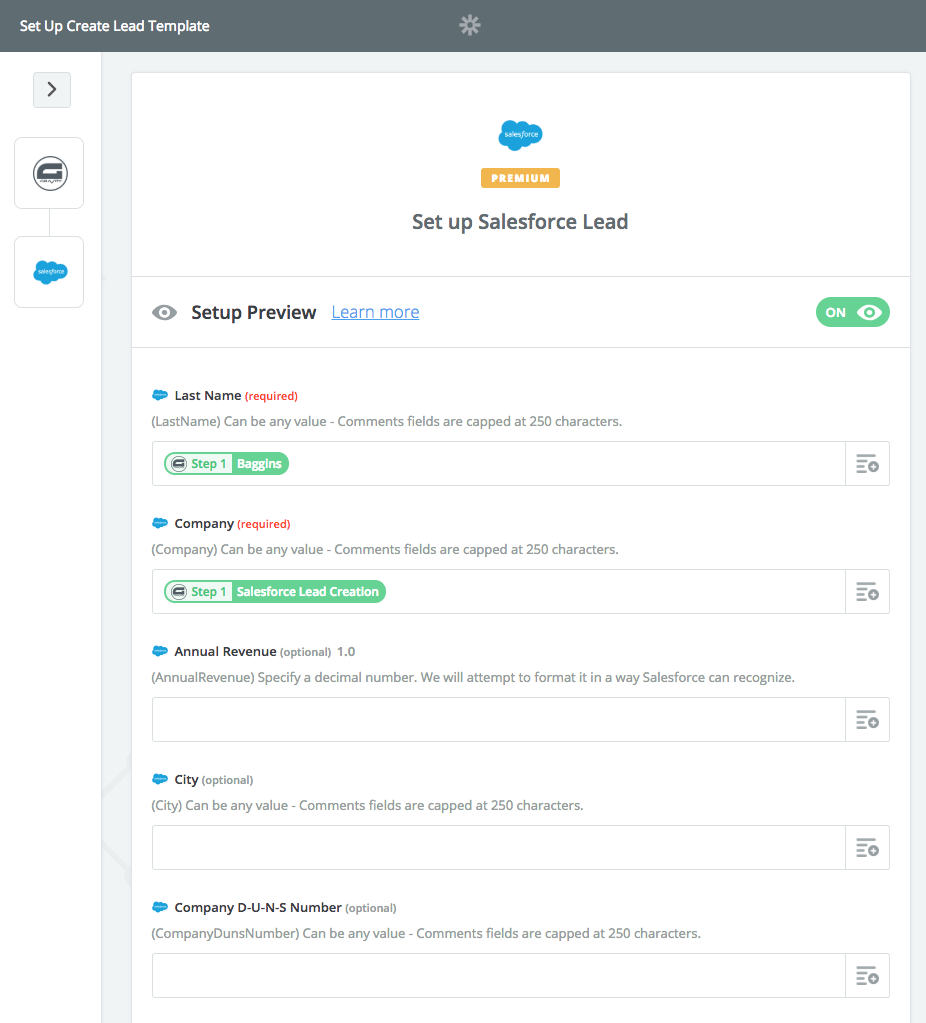
- If you’ve been following along in the previous section, you should now be prompted with a screen asking for a few different fields. The first field is the Last Name field. To begin mapping your form field submission data to it, click on the Insert Field icon to the right of the field. From here, select the form field that contains the value you want to send.
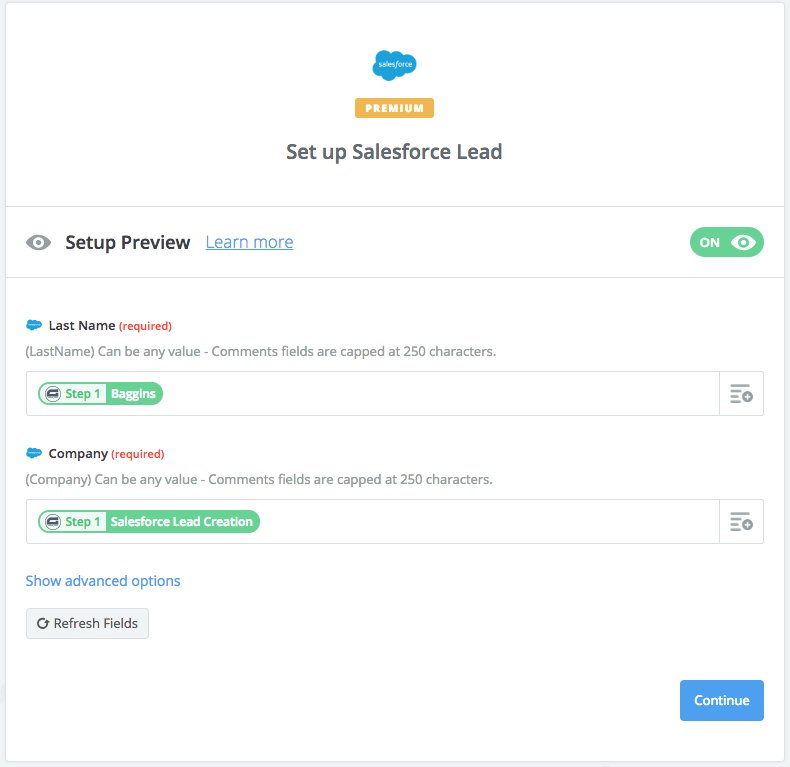
- Next, you will need to set the Company field. To map a value from your form, just follow the same steps as you did with the Last Name field, but instead select the field which contains the company.Tip: If you don’t want to dynamically set the company in Salesforce from a form field, you can also type a value in here that will be used on every form submission.
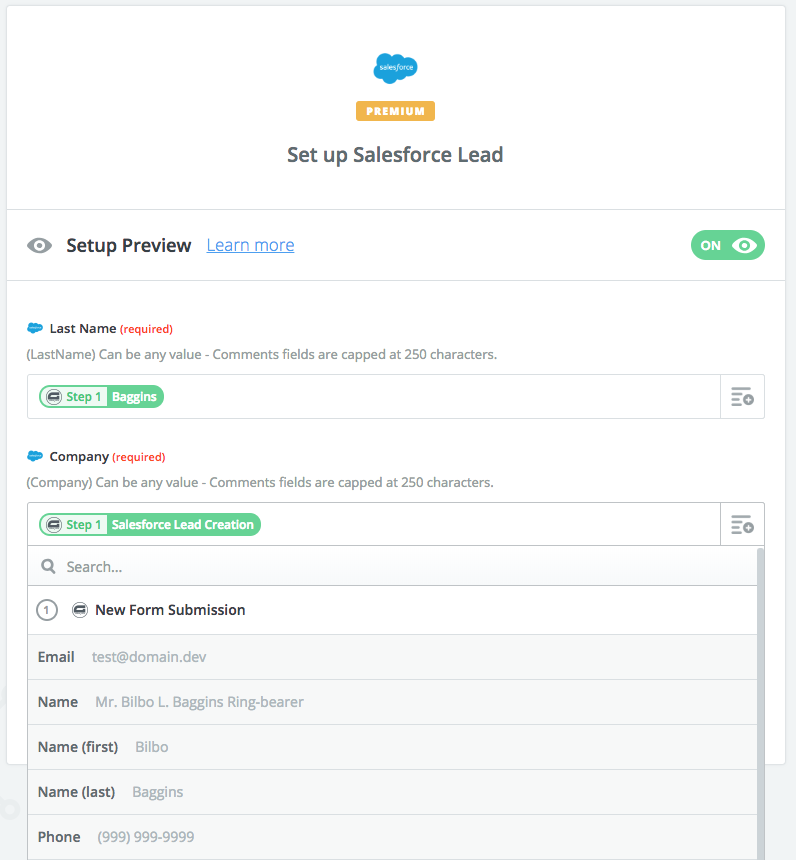
- At this point, you probably have a few more fields such as the lead’s email address, phone number, etc. that you want to set. To set additional fields within the Salesforce lead, click on the Show advanced options link and continue setting up your additional fields just like you did before.
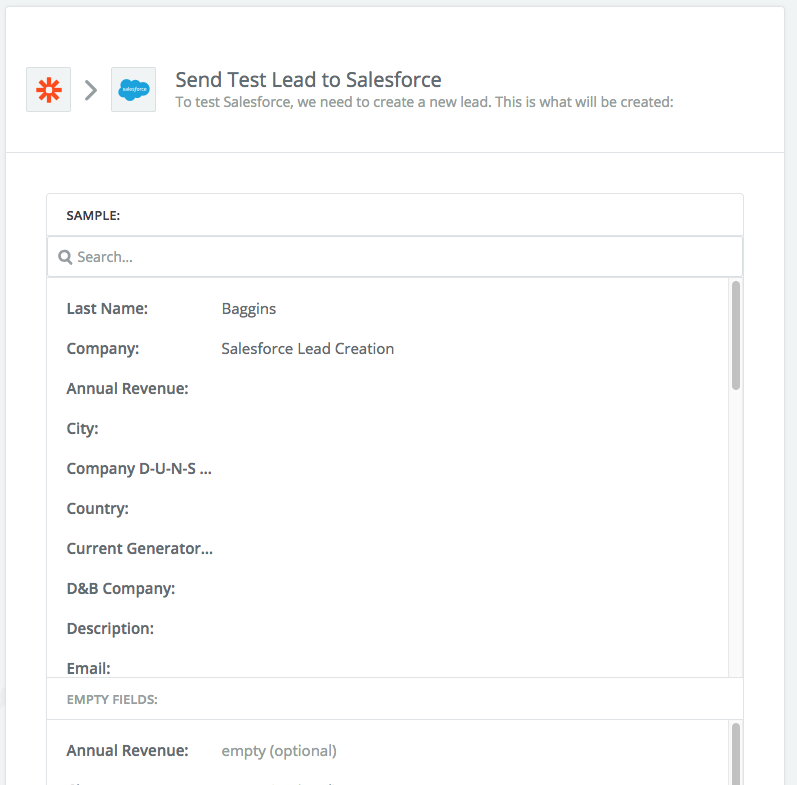
- When you’ve finished setting up your fields, click Continue. Now, it’s time to create a test lead in Salesforce to make sure everything is working as planned. Look at your data and click the Send Test To Salesforce button to send the test lead.
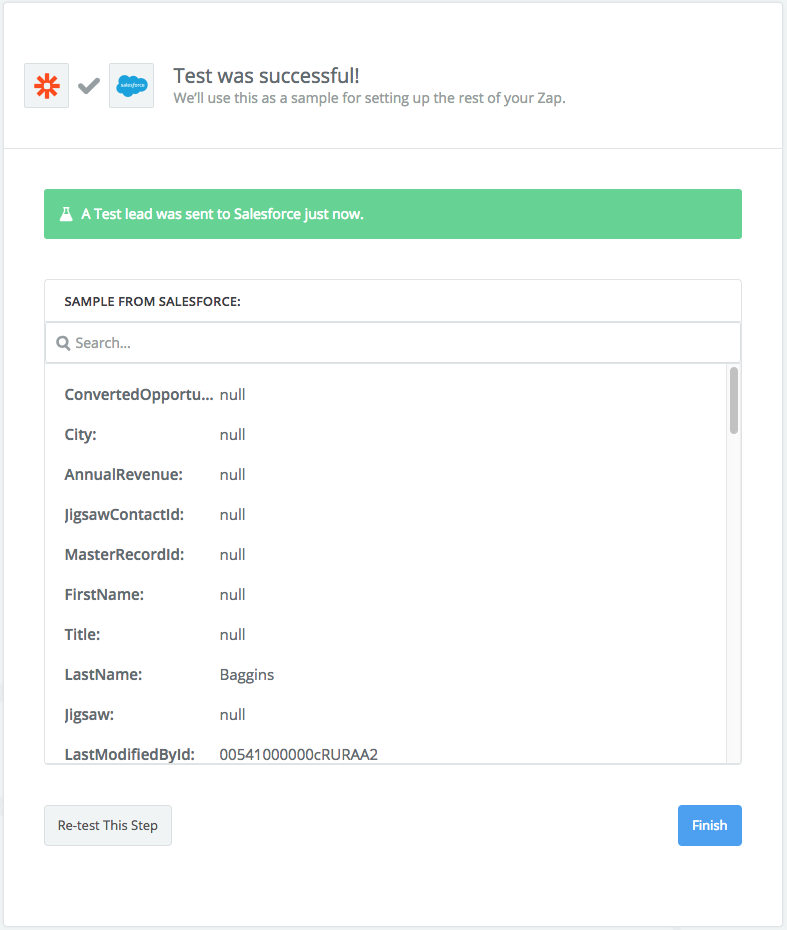
- If the test was successful, you’ll get a nice little confirmation message letting you know that the test lead was successfully created in Salesforce. If everything looks fine, go ahead and finish up by clicking the Finish button.
Congratulations! You’ve now configured your forms to create new Salesforce leads directly from within your WordPress site. Have any questions or helpful tips? Let us know in the comments below!

If you want to keep up-to-date with what’s happening on the blog sign up for the Gravity Forms newsletter!
"*" indicates required fields