

We’ve always said that we’d love to create a Gravity Forms Add-On for every third party service. Unfortunately, that isn’t possible. There are just too many high-quality third party tools.
But if you’re like most businesses, you’d love to move your form data outside of WordPress and into a third party tool that serves your other needs. Maybe you’d like to manipulate that data in another tool. Maybe you’d like to create automations that save you time and hassle.
That’s where Zapier comes in.
Zapier is a powerful app that connects other apps. The Gravity Forms Zapier Add-On allows you to leverage Zapier to integrate with over 3000 different web services! And that number grows every day as Zapier creates more integrations.
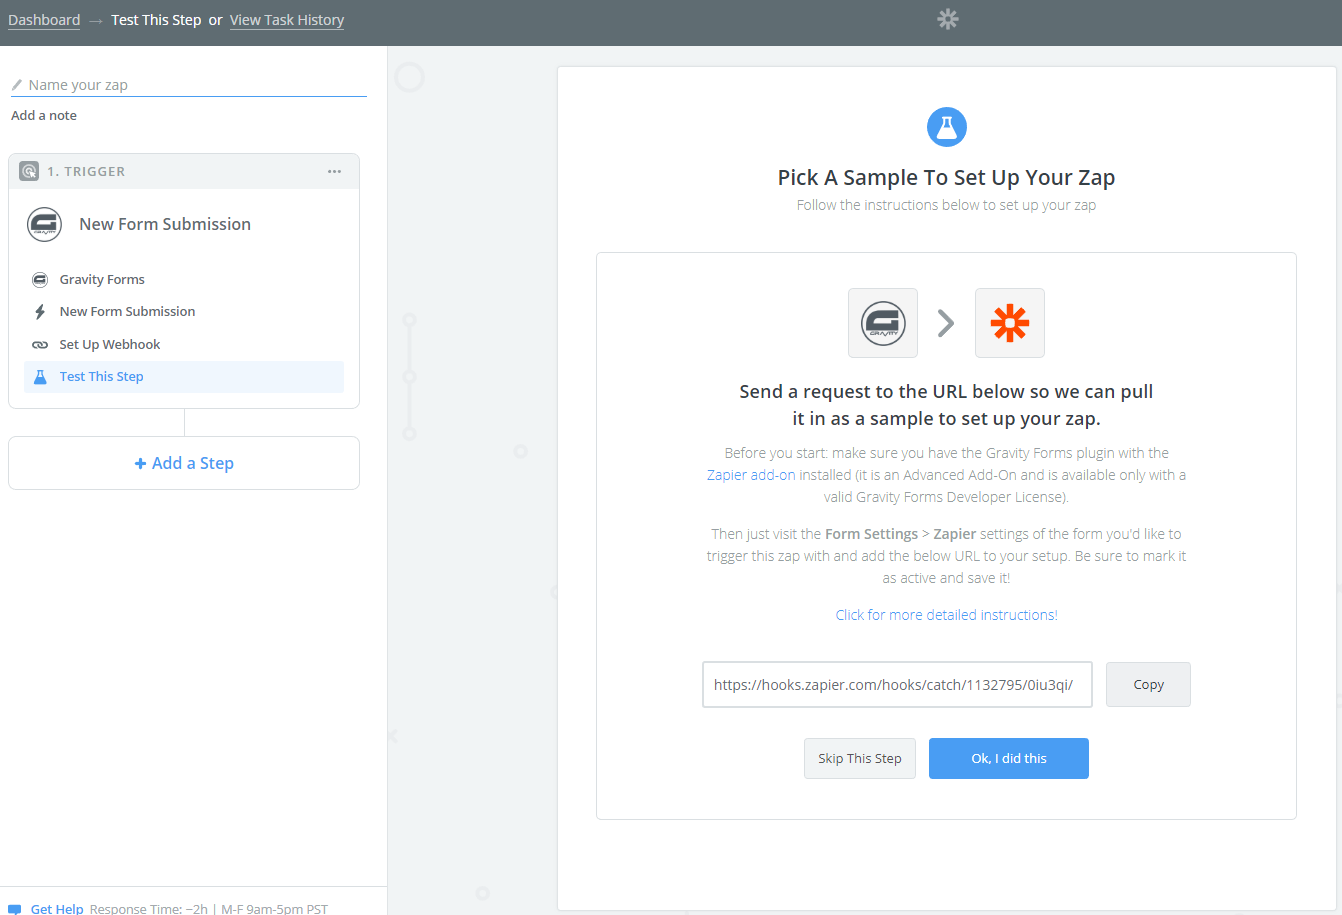
With Zapier, you can create automations that perform actions based on triggers. A trigger, in this case, would be a submission on one of your Gravity Forms. Here’s what that looks like in Zapier’s app builder.
What happens after the trigger is up to you. It can be almost anything you like (within the limits of whatever tools you’re linking together).
So how can you use these two powerful tools together? Here are four powerful ways to use Gravity Forms and Zapier.
1. Back Up Critical Information
The data submitted by your customers and leads isn’t just nice to have. In many cases, this information is critical to the success of your business. Losing it would cost you time, money, and a lot of stress. So it’s smart to backup your form data in an alternate location to protect yourself from catastrophe.
For instance, imagine a hacker gains access to your web host and wipes your website. Anything in your WordPress database would be lost, including your Gravity Forms submissions.
Could you manually export your Gravity Forms data? Absolutely. But those exports are only as current as the last export. You could still lose critical information between your last backup and the catastrophic event.
An easy way to ensure that you always have your form submissions is to create a zap that transfers your data from Gravity Forms to another source the moment it appears. Everything will be synced in multiple locations so you’ll never truly lose it.
Here’s what that might look like for you:
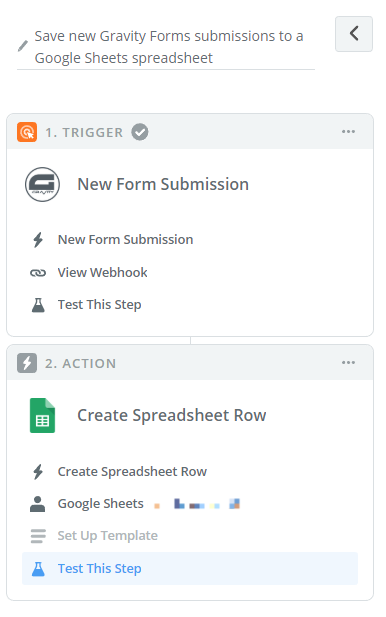
Where should you put your data? That depends on your needs. You might transfer it to a customer relationship tool like Salesforce, Pipedrive, or Insightly. You might transfer file uploads to a cloud service like Google Drive or Dropbox. Or might drop in a simple Google Sheet.
2. Transfer Data to Other Tools
Your WordPress dashboard is only designed to affect the look and substance of your website. It’s not a workspace. If you need to manipulate your form submission data, you’ll want to first pull it into a more appropriate tool.
For instance, let’s say each form submission represents a task for you or your team. You’ll want to transfer the submission data to a project management tool like Trello, Asana, or Wrike. You could configure a zap to create a new card/file/task, transfer and populate the data, and assign it to the right person.
Here’s an example of how that might work:
A marketing agency needs information from new customers before they can get started, so they ask customers to fill out a form as part of their onboarding. Once the form is submitted, a zap creates a Trello card and assigns it to Joe, the digital marketing specialist. The zap also puts the card in the right column, populates it with the customers’ data, and sets a due date.
Naturally, this kind of workflow works with countless applications. You might transfer your data to a marketing automation tool like Pardot or Hubspot, a CRM like Zoho or Salesforce, or an accounting tool like FreshBooks or Xero. You have countless options!
3. Automate Basic Tasks
If you took a hard look at the tasks you perform every day, you’d probably find several that could be automated. You may even know of some of those tasks already, but (like a lot of businesses) aren’t willing to pay a monthly fee for another subscription product just to handle one small task.
Fortunately, you gain a lot of flexibility when you pair Zapier and Gravity Forms together. You just have to be creative.
For example, let’s say you have a number of tasks on your plate whenever you sign a new customer. You have to create new customer profiles in Xero, Help Scout, and Zoho, add the customer to your onboarding sequence in Drip, create a folder in Dropbox, and – just to show some good will – follow the customer on Twitter.
That’s a lot of apps, browser tabs, copying and pasting!
You can eliminate much of that work with a Gravity Form. Simply create a new Gravity Form on a page of your website for you and your team with all of the information you have on your customers. Then create a zap for each of the services you use and connect them to the form.
This will reduce a majority of your surfing, typing, and pasting. For instance, a single name field on the form would be used to name each customer profile and the Dropbox folder.
That’s just one example of how you can automate lots of tasks across multiple tools with some clever zaps. As you can imagine, there are a million tasks you can automate if you get creative!
4. Keep People Notified
Even if you don’t need Zapier to automate much for you, you may want to notify your team about recent form submissions. This is useful if you expect your team to take action whenever someone completes a form.
Gravity Forms is already set up to email people for each form submission. You can configure email notifications within each form’s settings. You might notify key people or send an email to a shared inbox.
If your team uses Slack, we have you covered there too. Our Pro Add-Ons (available to anyone with a Pro or Elite license) includes the Slack Add-On that integrates seamlessly with your Slack workspace.You can also create a zap that notifies your Slack team when a user submits a form. You can even drop all of the submission data into a Slack comment.
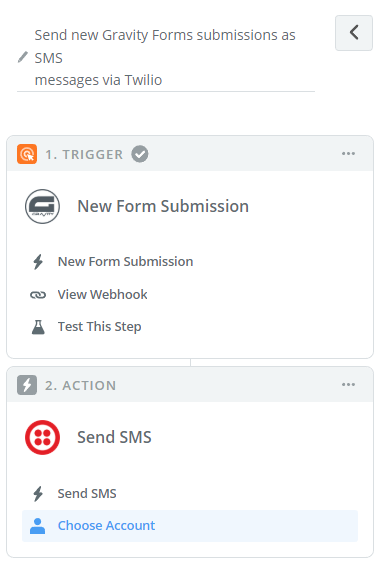
If Slack isn’t part of your toolbox, you can also use Zapier to send SMS messages via Twilio, MessageBird, or Zipwhip. These tools are great if you need to call leads right away, even if you aren’t near your desk.
Get Started with Gravity Forms and Zapier
Ready to take advantage of Gravity Forms and Zapier?
First, you’ll first need to open a Zapier account. The free account lets you build five zaps, but each zap can only include two steps. We have no doubt you’ll want to upgrade once you see the power of a zap in action.
Second, you’ll need to install our Zapier Add-On. It installs like every other Add-On. (Read our installation guide if you’ve never installed an Add-On before.) There is nothing to set up once the Add-On is installed.
Your final step is to create a zap that automates a particular task based on a Gravity Form submission. Learn more here: Gravity Forms and Zapier: How to Connect Your Forms to 1,000+ Apps.
If you can’t make a zap to force two tools to work together, consider using two zaps in a chain. For instance, you might send Gravity Form submissions to Google Sheets before sending it to your tool of choice.
A little creativity can create a lot of productivity!


