Whether you are offering in-person or online courses, providing your students with a quick and easy way to sign up for a course is a must. With Gravity Forms, you can create powerful course registration forms for your WordPress website, helping to boost registration numbers and cater to your exact form requirements.
In this article, we’ll discuss the benefits of using Gravity Forms for your course registration forms, and the many features that our form builder provides. We will then walk you through how to get started with your very first course registration form. Let’s jump in…
Who Can Benefit From A Course Registration Form
Before we dive deep into how to use Gravity Forms to create a course registration form, let’s talk about who can benefit from having one on their website.
A course registration form can be used by:
- Any school or university that offers online classes or in-person learning.
- Businesses that use courses, classes, workshops, and other educational material as the primary source of income.
- Mentors, consultants and coaches who sell courses on top of coaching services or mentorships.
How Gravity Forms Can Help You Create Course Registration Forms
If you’re already a Gravity Forms customer and need to create a course registration form, you don’t have to download a different plugin and go through the time-consuming process of setting everything up. You can simply use our form builder!
Here’s why you should use Gravity Forms for your course registration forms…
Different Field Types
Gravity Forms has all the necessary form fields that you need to create a course registration form. You can add text fields, address fields, radio buttons, checkboxes, and many more, to make it easy for your potential students to select which class or course they want to take.
Multi-Page Forms
Long forms can have a negative impact on your form conversion rate. To increase the chances of your visitors completing the forms, you can create a multi-page form. Gravity Forms makes it easy to add page breaks to your form. Your forms will appear shorter and your visitors will be more inclined to finish them.
Integration With CRM and Email Marketing Platforms
Gravity Forms integrates with several CRM and email marketing platforms. This means you can easily add your students to your CRM database or to your email list so you can provide them with necessary information about their class or course.
Integration With Payment Gateways
If you want to take payment for your courses, you can easily do so thanks to integration with different payment providers. Gravity Forms integrates with PayPal, Stripe, Square, Mollie, and many other payment providers.
Other Notable Features
Aside from the above, Gravity Forms also includes the following features:
- The ability to save and continue filling out your form from where you left off
- File upload field so your students can upload documents
- Built-in SPAM protection methods
- The ability to limit and schedule forms depending on when you’re actively enrolling students and how many students you can enroll into a program
- Conditional logic to make your forms even more powerful and have more control over a form’s behavior
How to Create a Course Registration Form With Gravity Forms
Now that we’ve covered what makes Gravity Forms a great choice for your course registration forms, let’s take a look at how you can create one for your school, university or course website.
Note: If you’re not yet a Gravity Forms customer, head on over to our pricing page to check out our licenses and select the one that’s best suited for your needs.
Step 1: Create Your Form
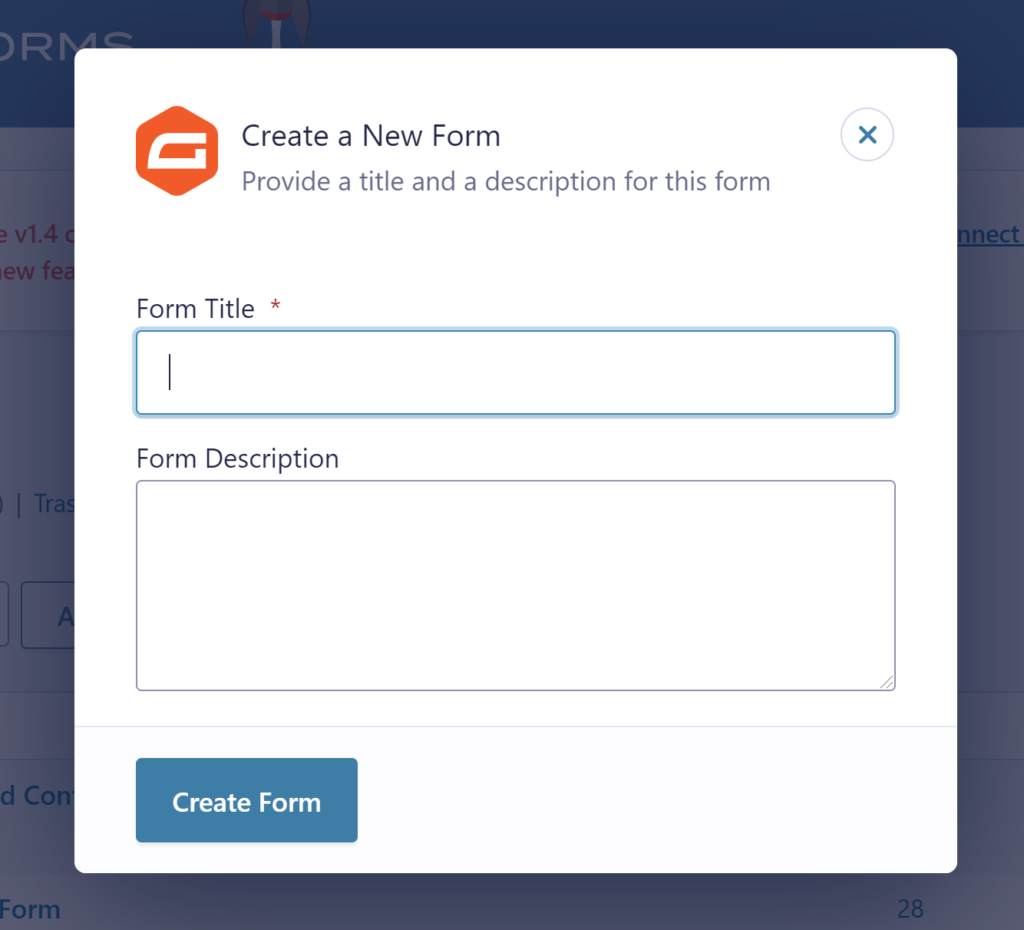
First things first: you’re going to need to create a new form. To do so, go to Forms > New Form. Enter a form title and press Create Form.
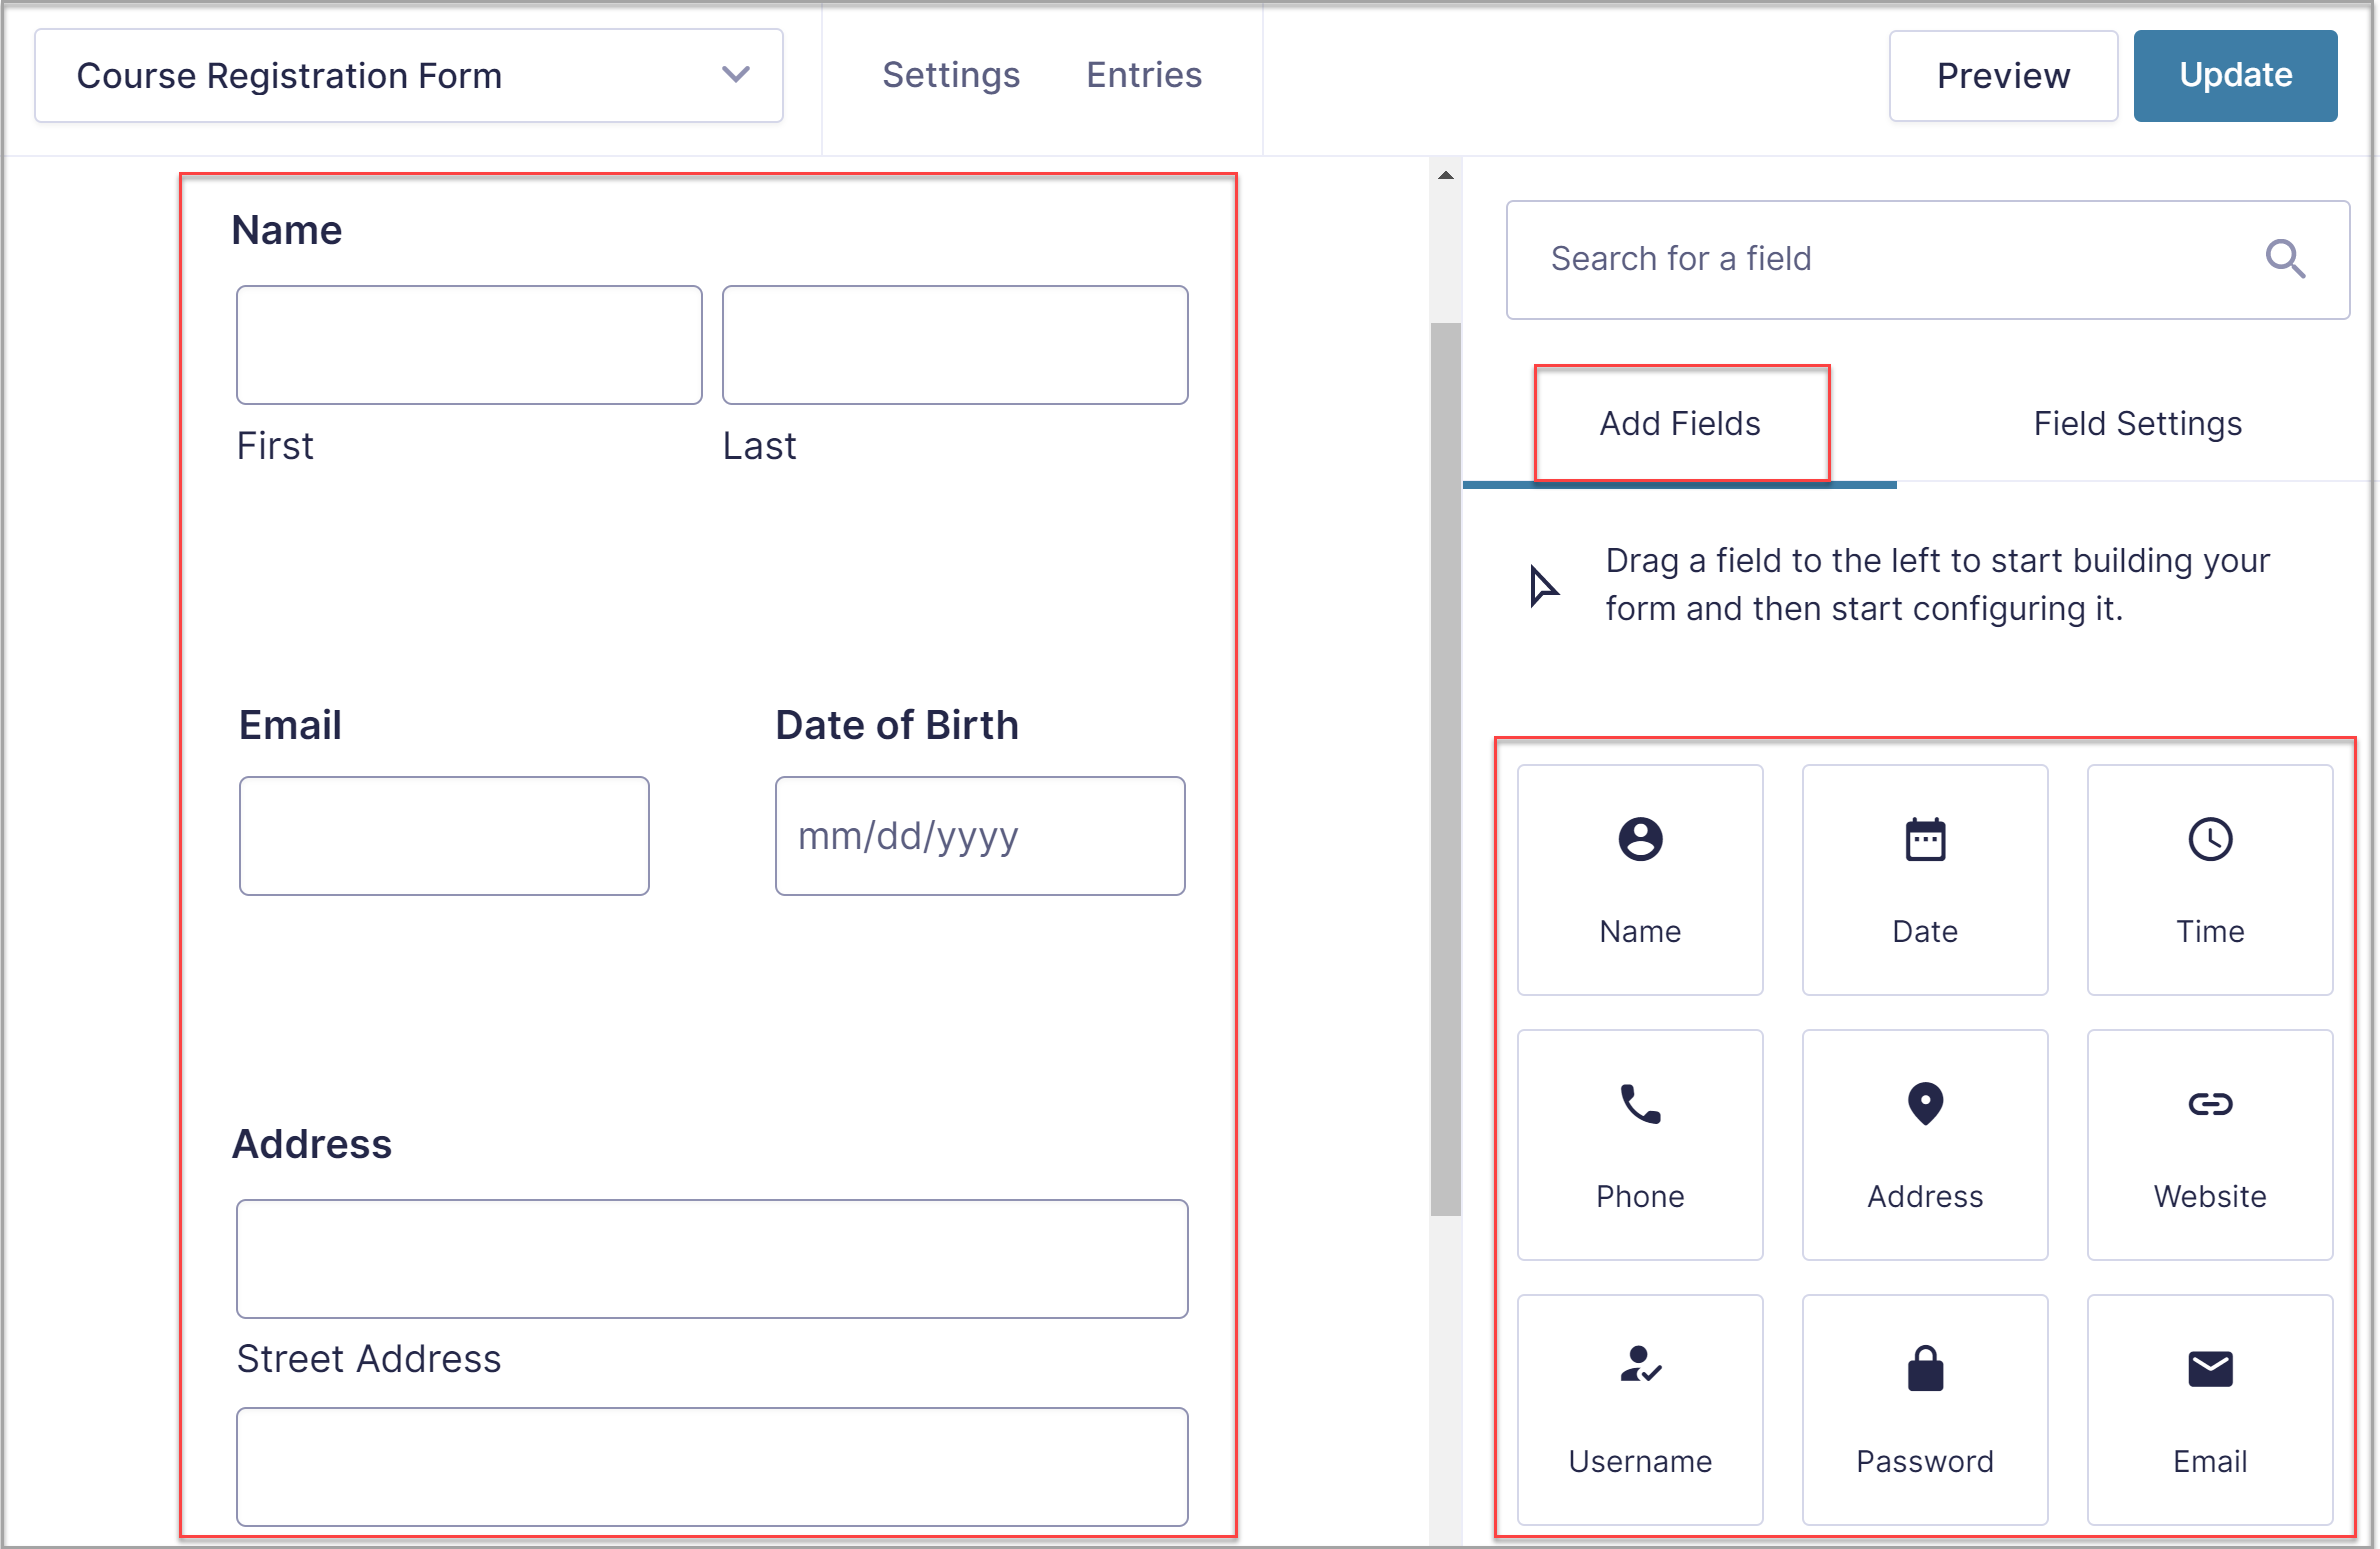
 Now you can start adding fields to your form. We’ll start off by adding the fields for the student’s information. Click on Advanced fields and add Name, Date, Address, and Email fields.
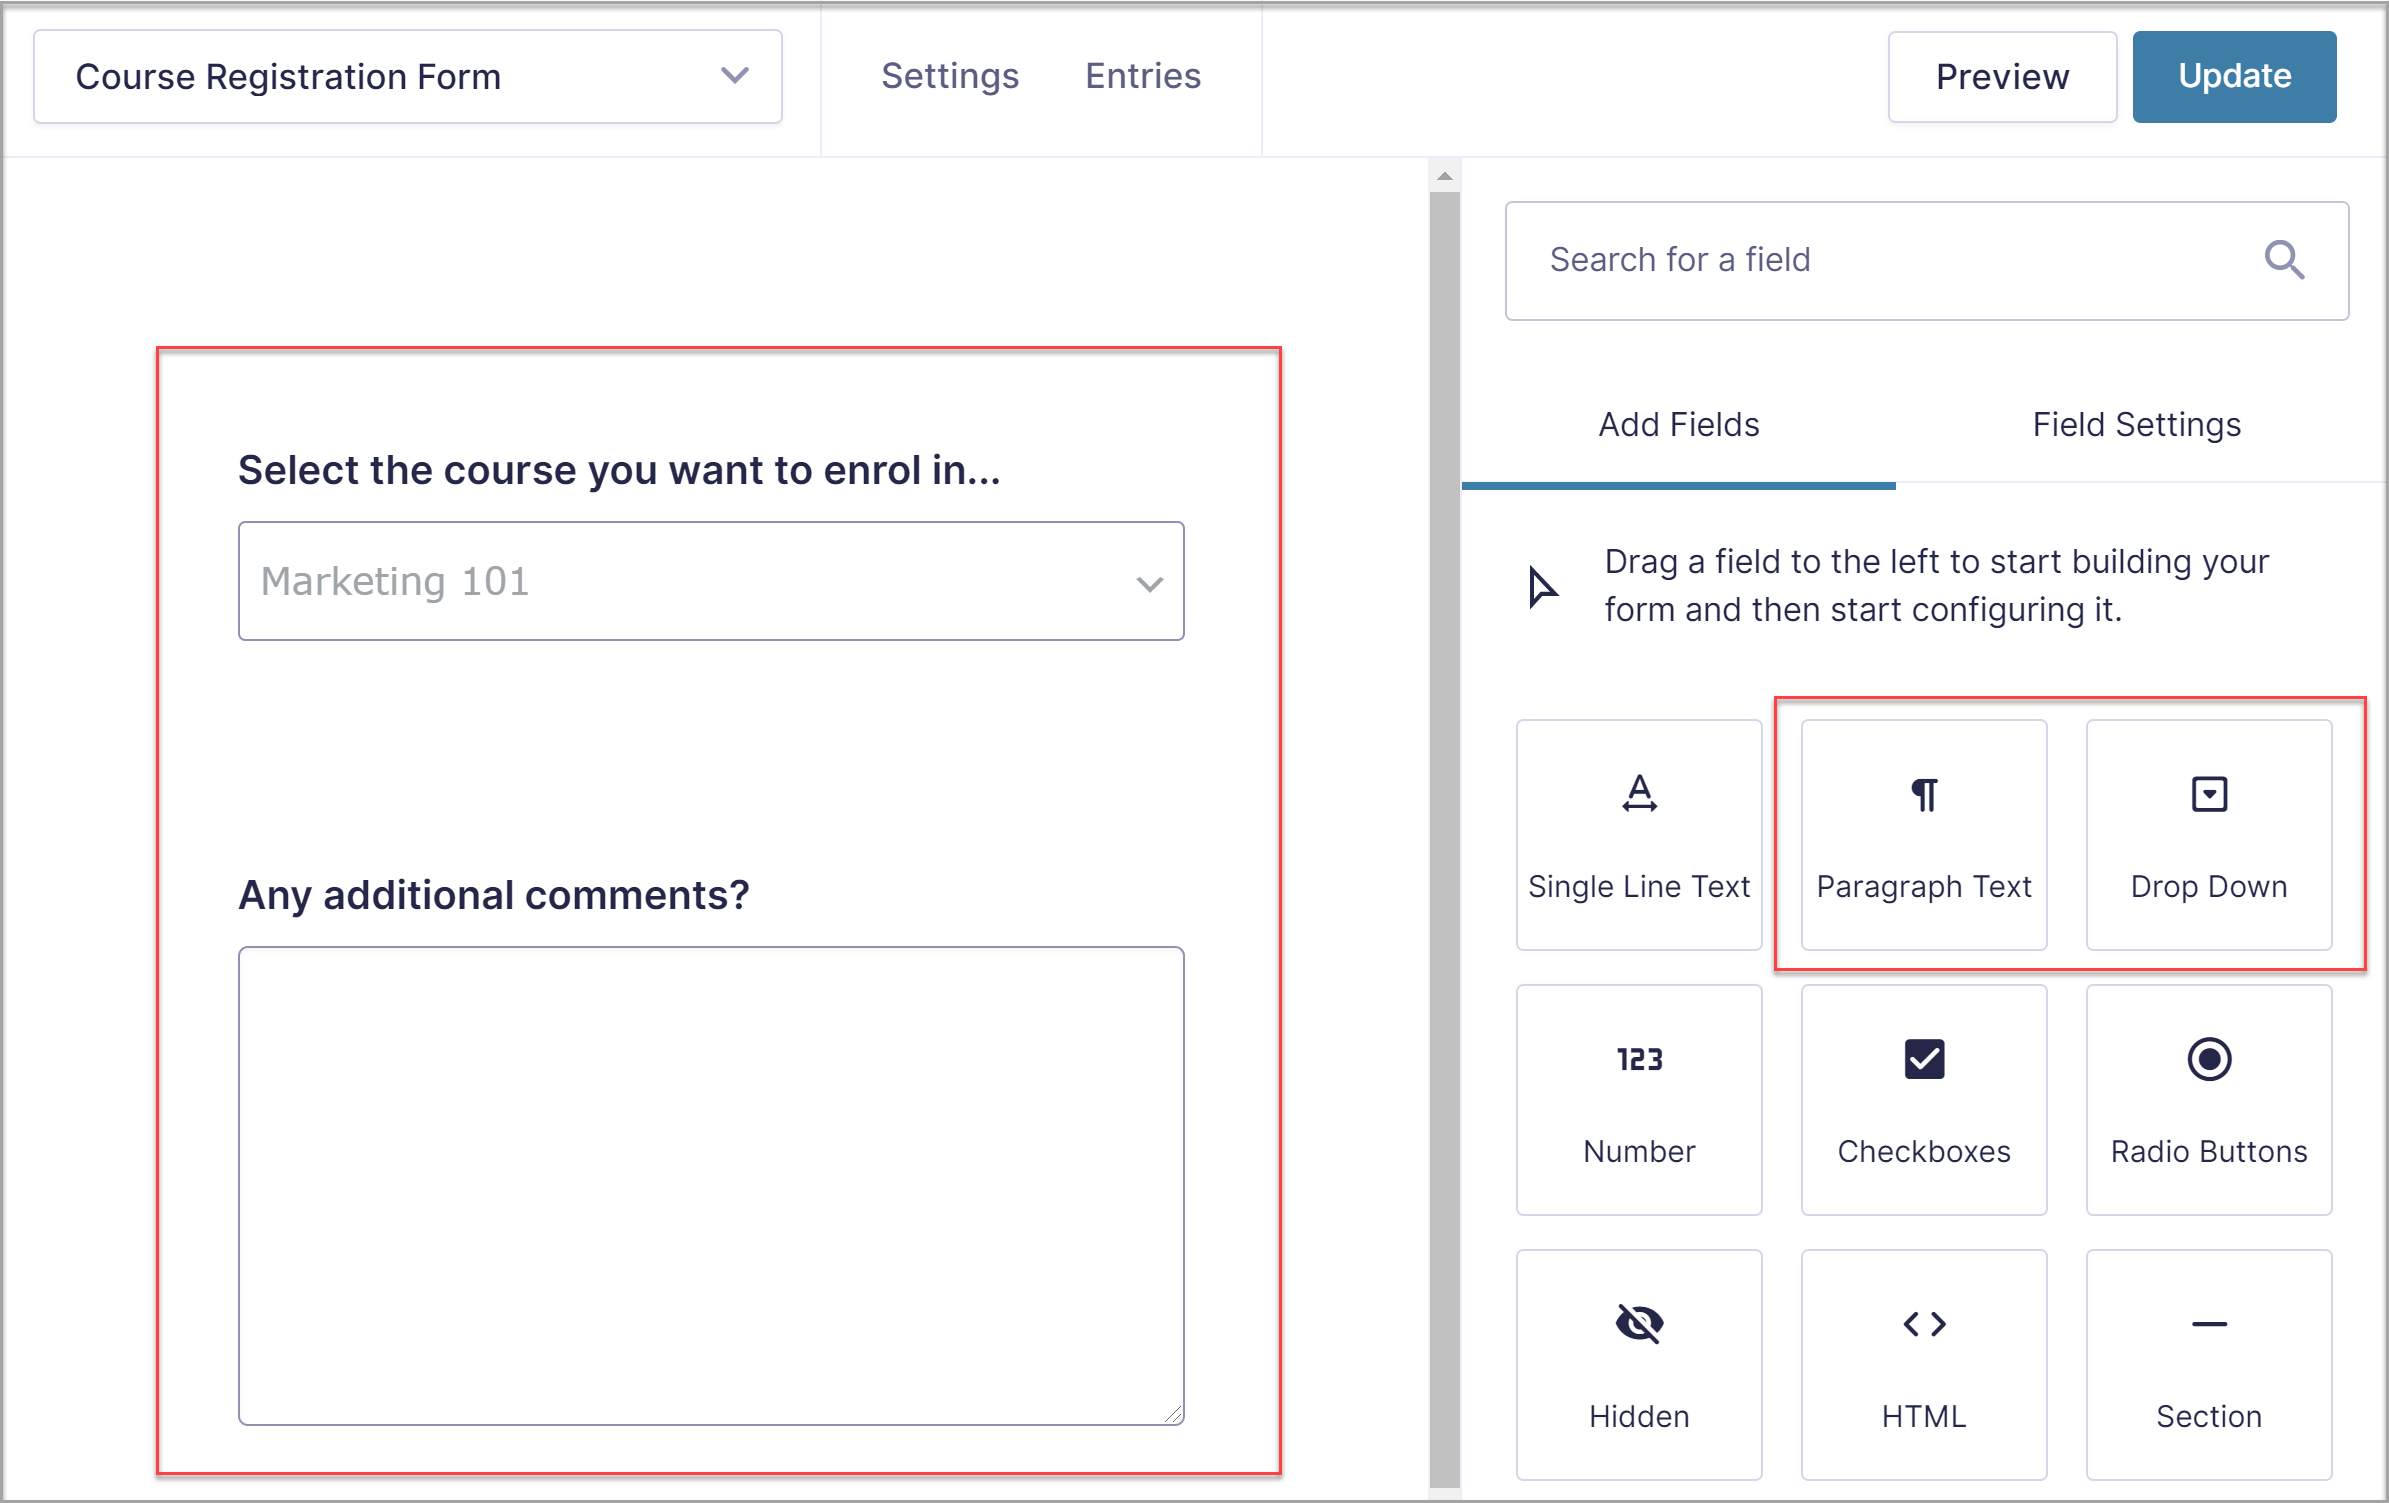
 Aside from those, I’ll also add a drop-down field that allows students to select which course they want to enroll on and a paragraph field so they can enter any additional comments with their application.
 Clicking the Settings icon for each field allows you to customize the field. You can create a new field label and add a description, set the field as ‘required’ as well as customize where the labels are placed. If needed, you can also enable conditional logic to have more control over how the fields behave.
When you’re done adding fields and configuring each field, click on Update. You can also preview the form to see how it looks.
Step 2: Configure Form Settings
Once you’ve created the form, you need to configure form settings. Go to Settings > Form Settings. Here, you can enable the ability for your visitors to save the form and continue filling it out later as well as enable anti-spam features to ensure only legitimate enrollments come through.
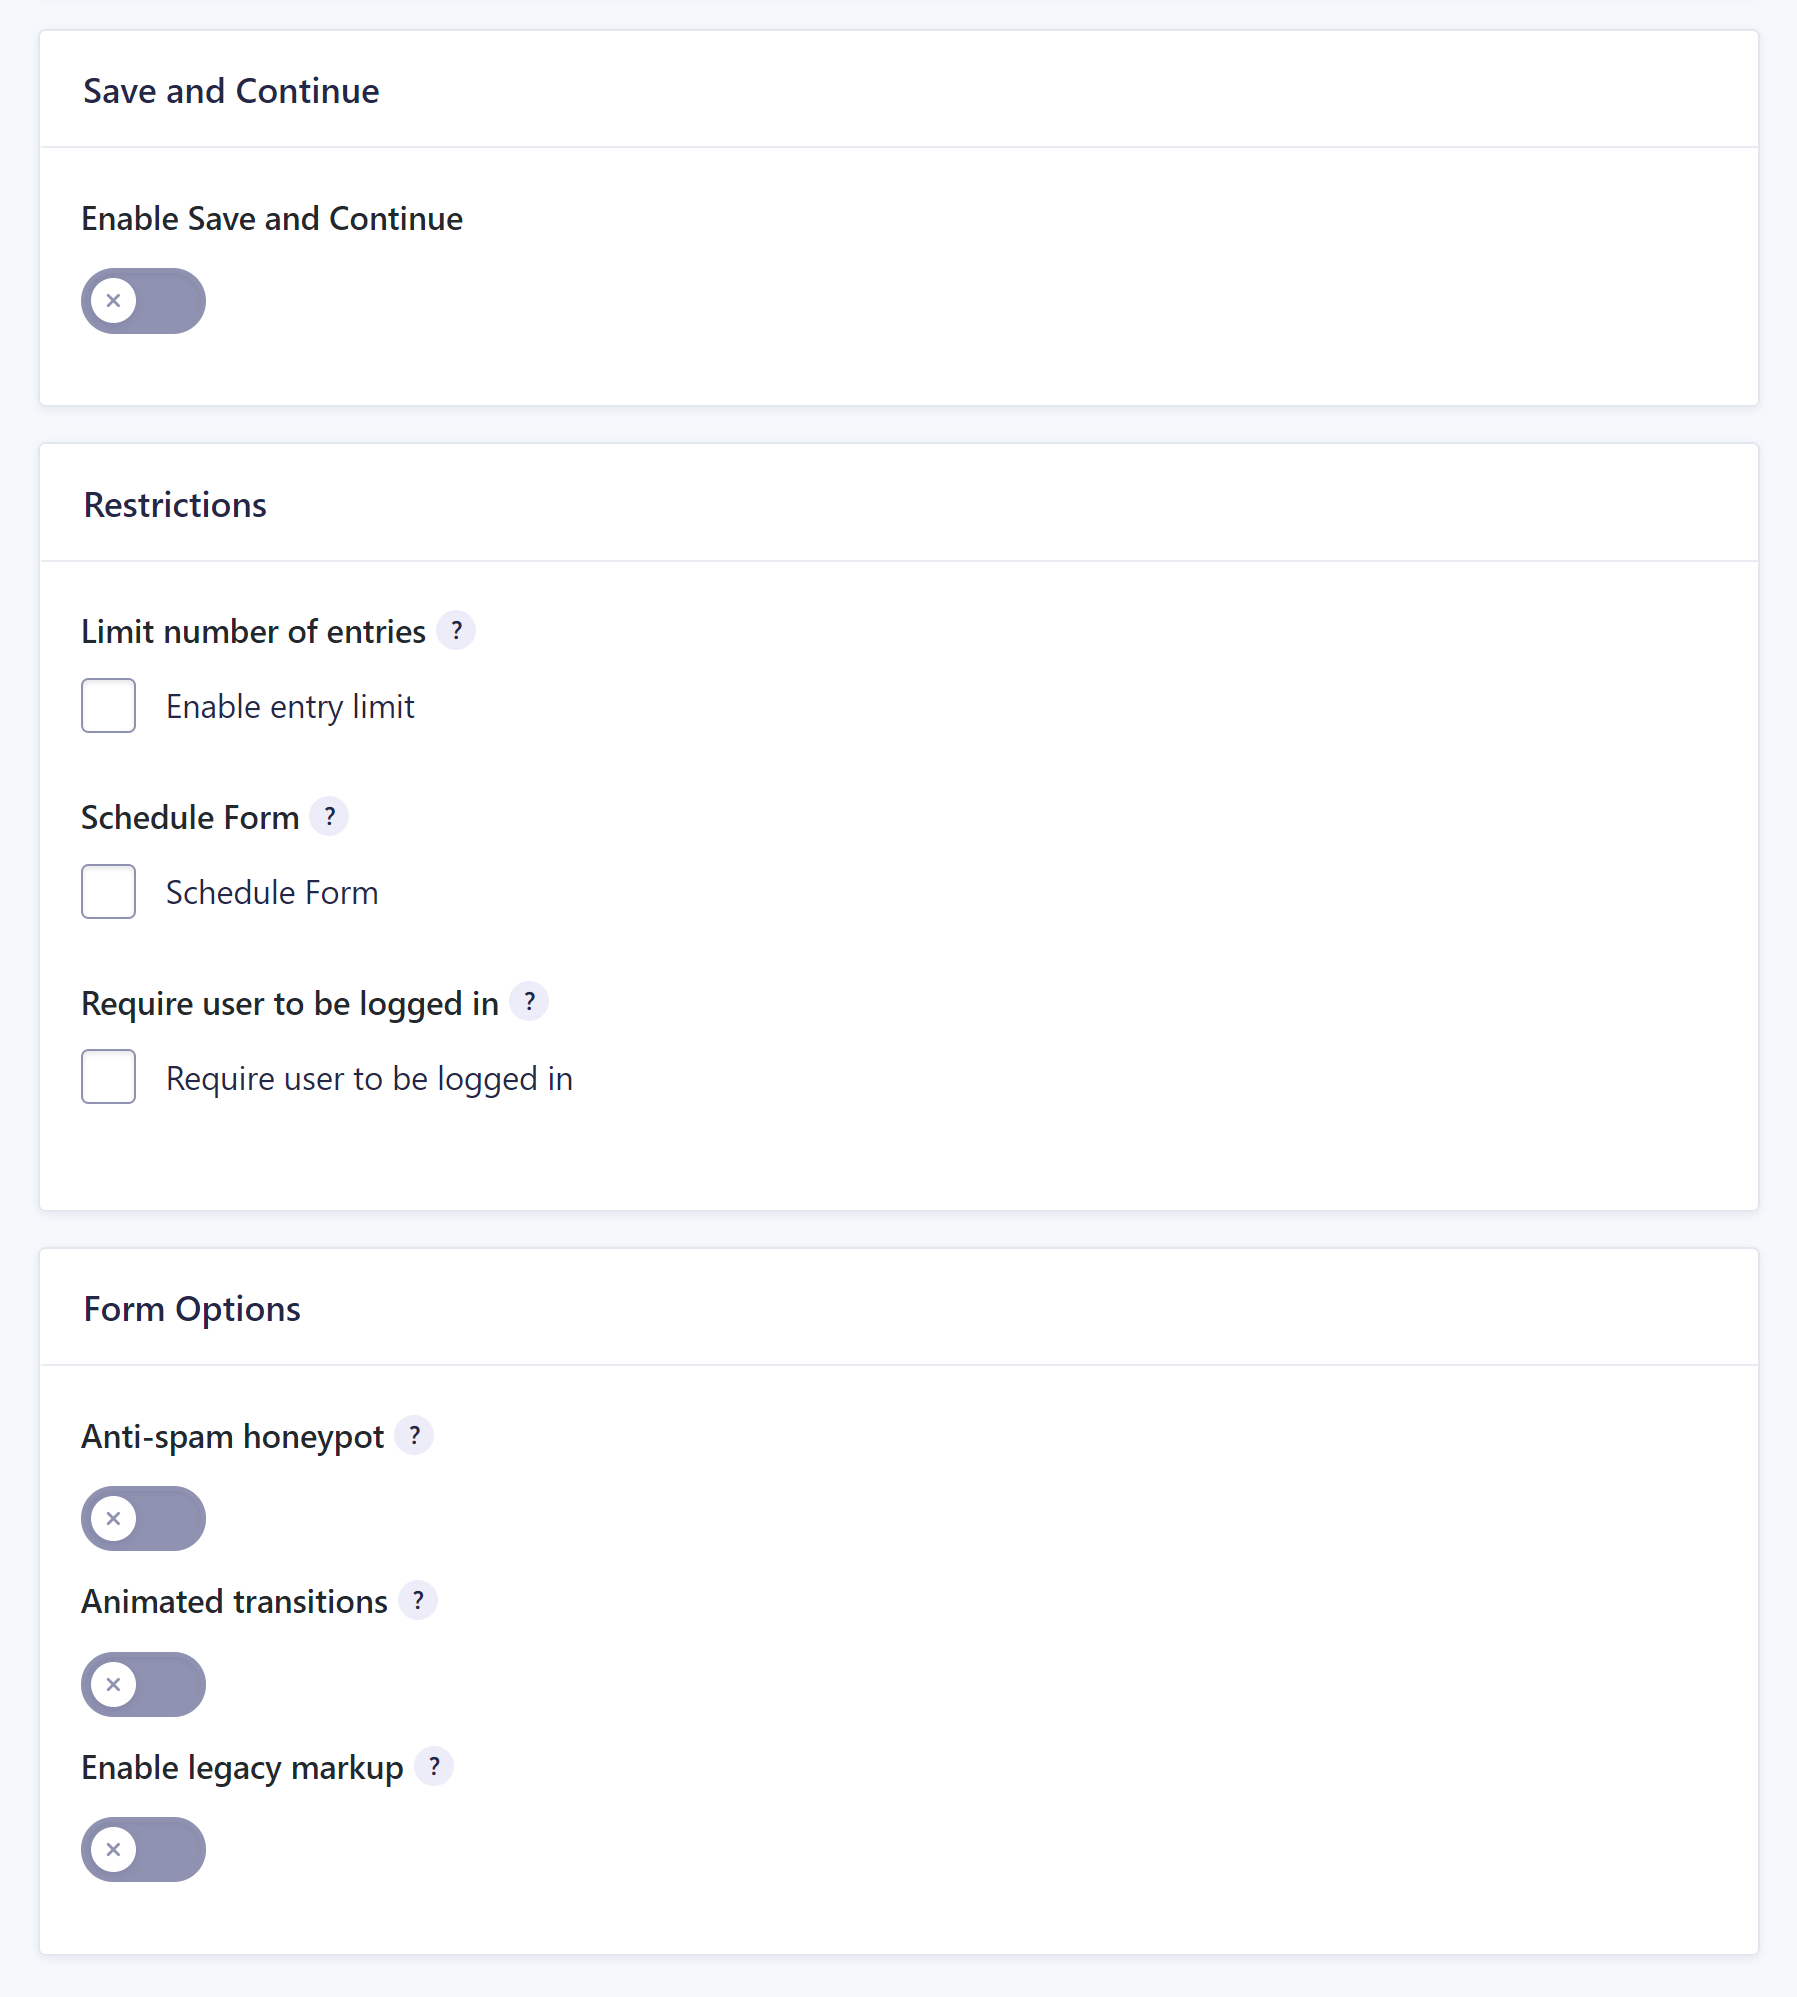 You can also limit the number of submissions or schedule your form to display only during certain dates. When you’re done, click Save Settings.
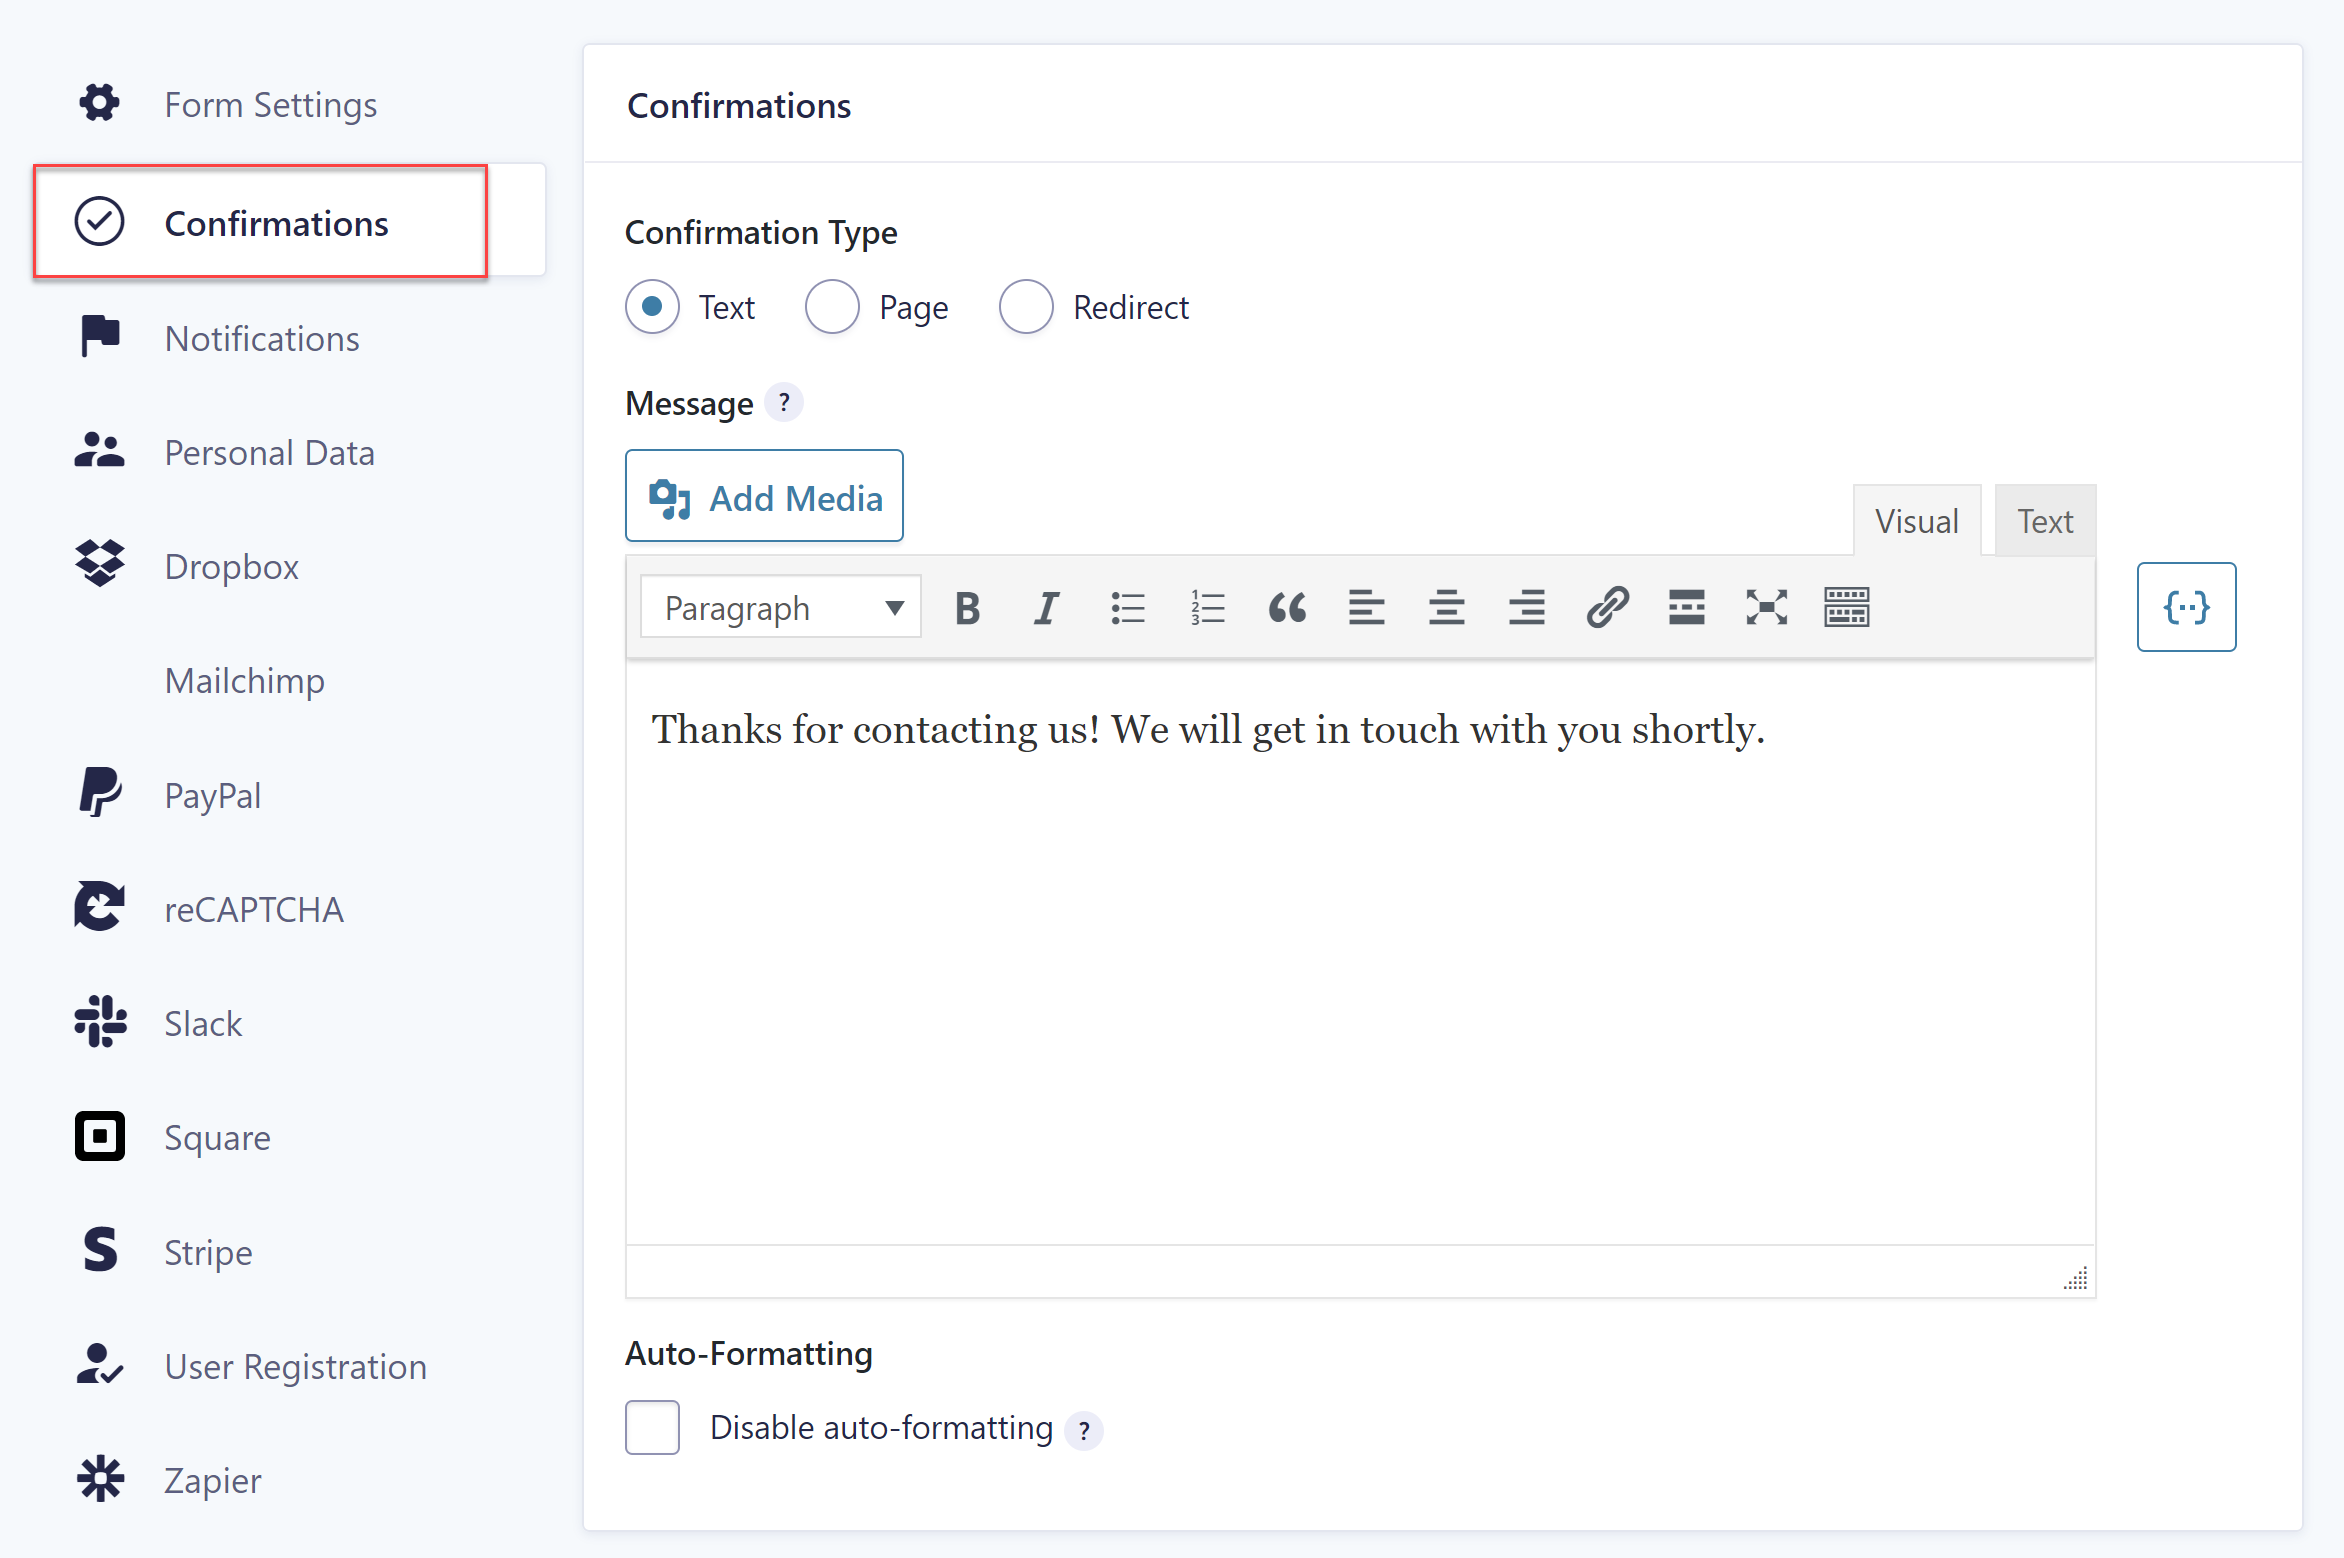
It’s also a good idea to set up form confirmations and form notifications. To do this, go to Settings > Confirmations. You can edit the default confirmation to display a message that the form has been successfully submitted or you can create a new confirmation and customize it to your liking.
 To set up notifications, go to Settings > Notifications. By default, a site admin will get a notification on new form submissions.
However, you should also create a notification that will be sent to the students. You can use it to provide them with a list of next steps or how they can access the course.
To create a new notification, click on Add new. Name it Student Notification and set the type to Select Field. Then, set the field to the email field from your form.
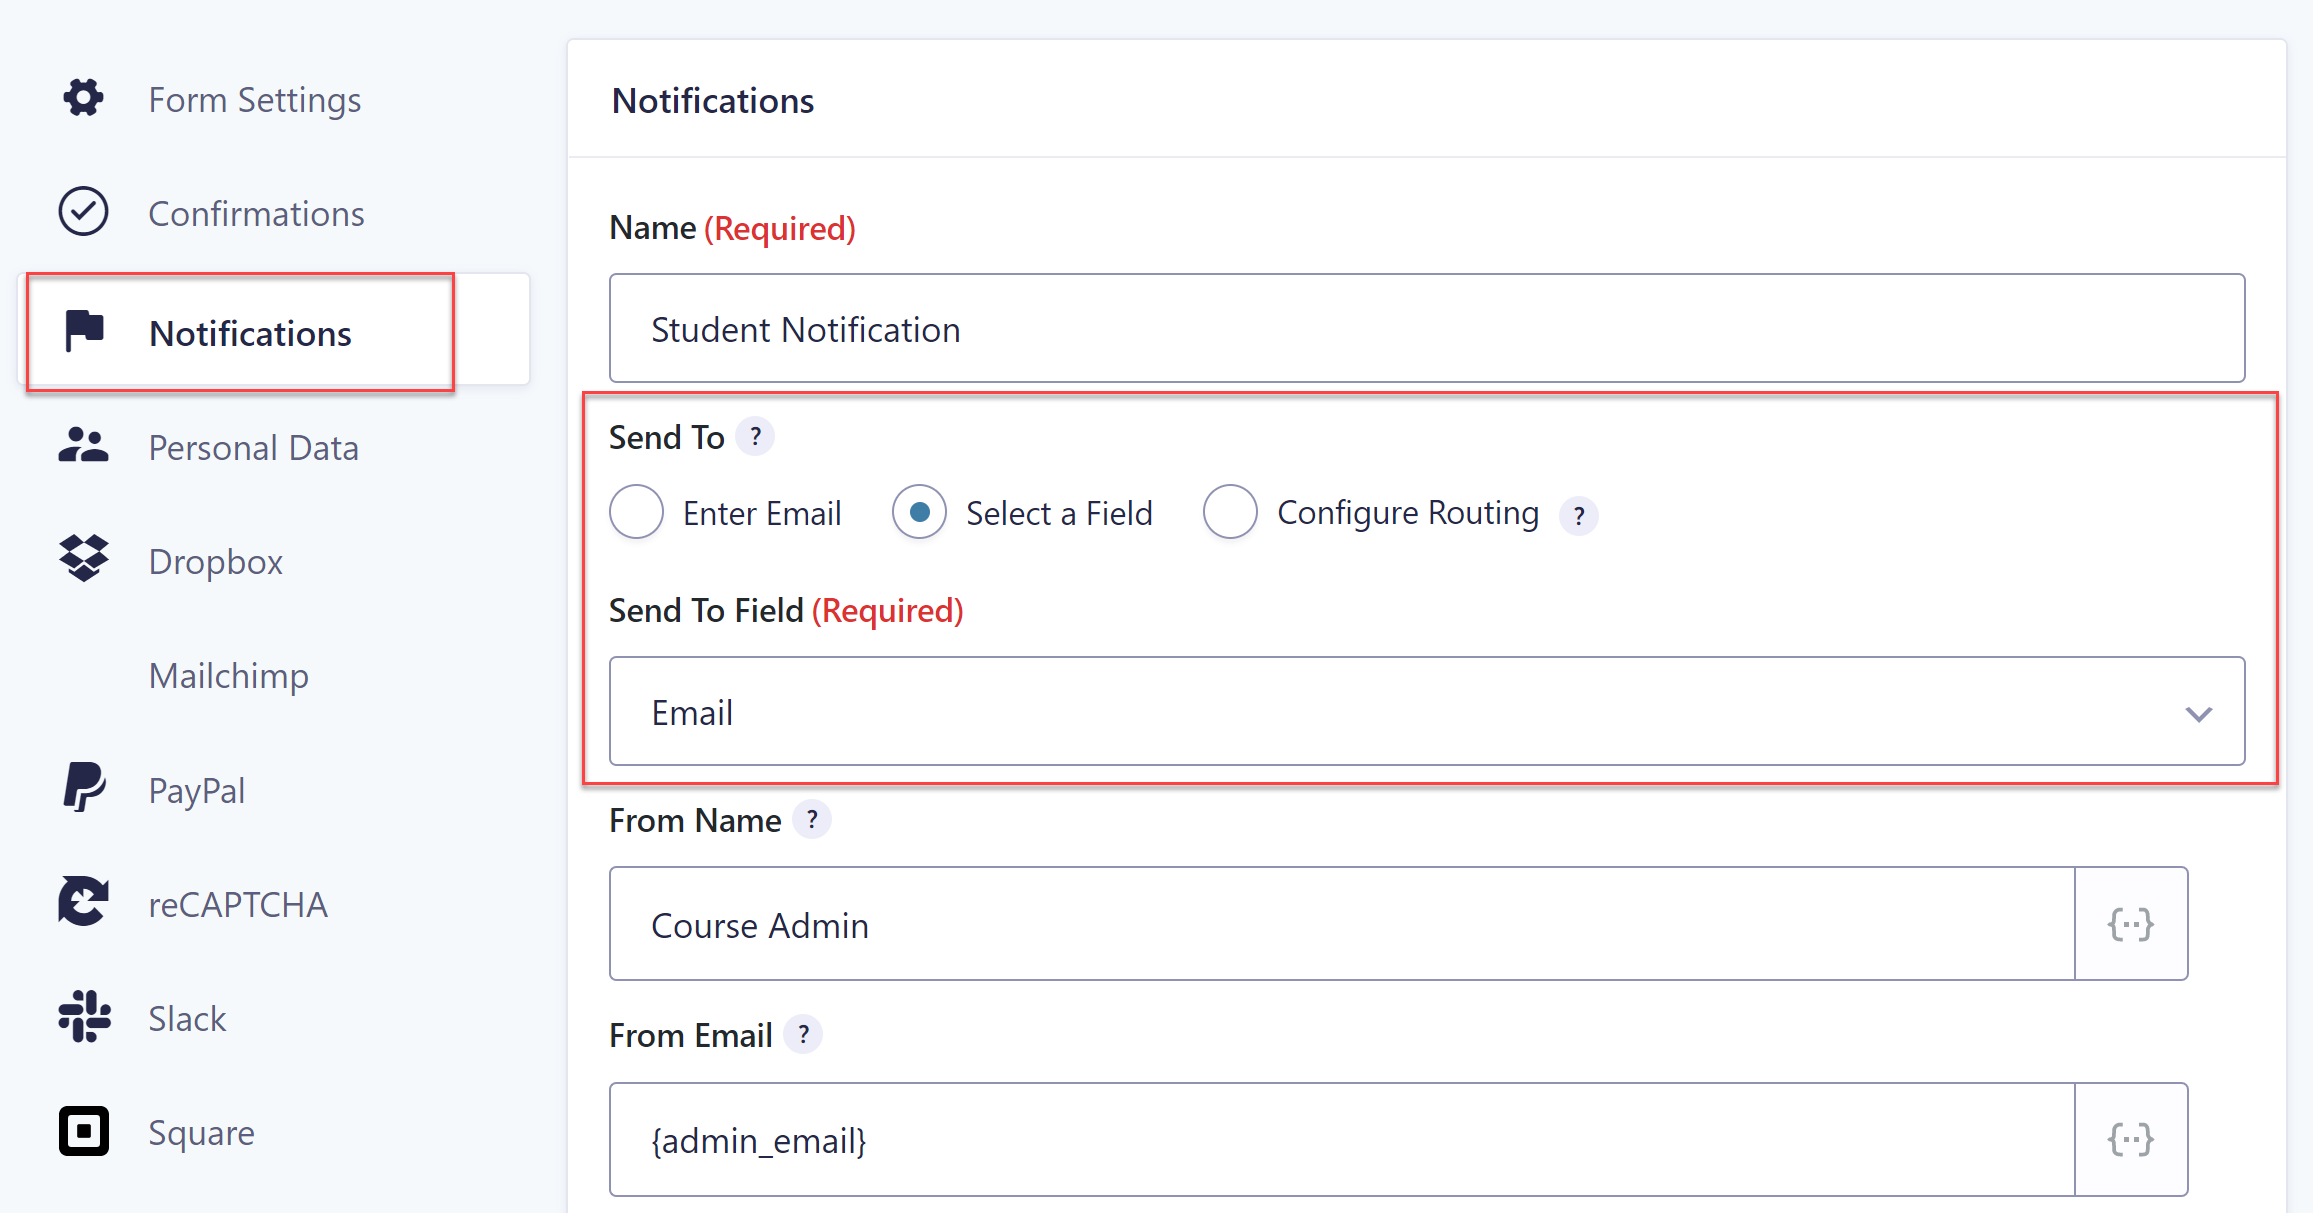 You can customize the name that will display in the From field as well as the subject and the contents of your message. When you’re done, click on Save Settings.
Step 3: Publish Your Form
The last step is to publish the form on a page on your site. To do this, go to Pages and either select one of your existing pages or add a new one. Then, in the editor, add the Gravity Forms block and select your Course Registration Form. Publish the page and you’re done!
How To Take Payments For Your Course With Gravity Forms And Square
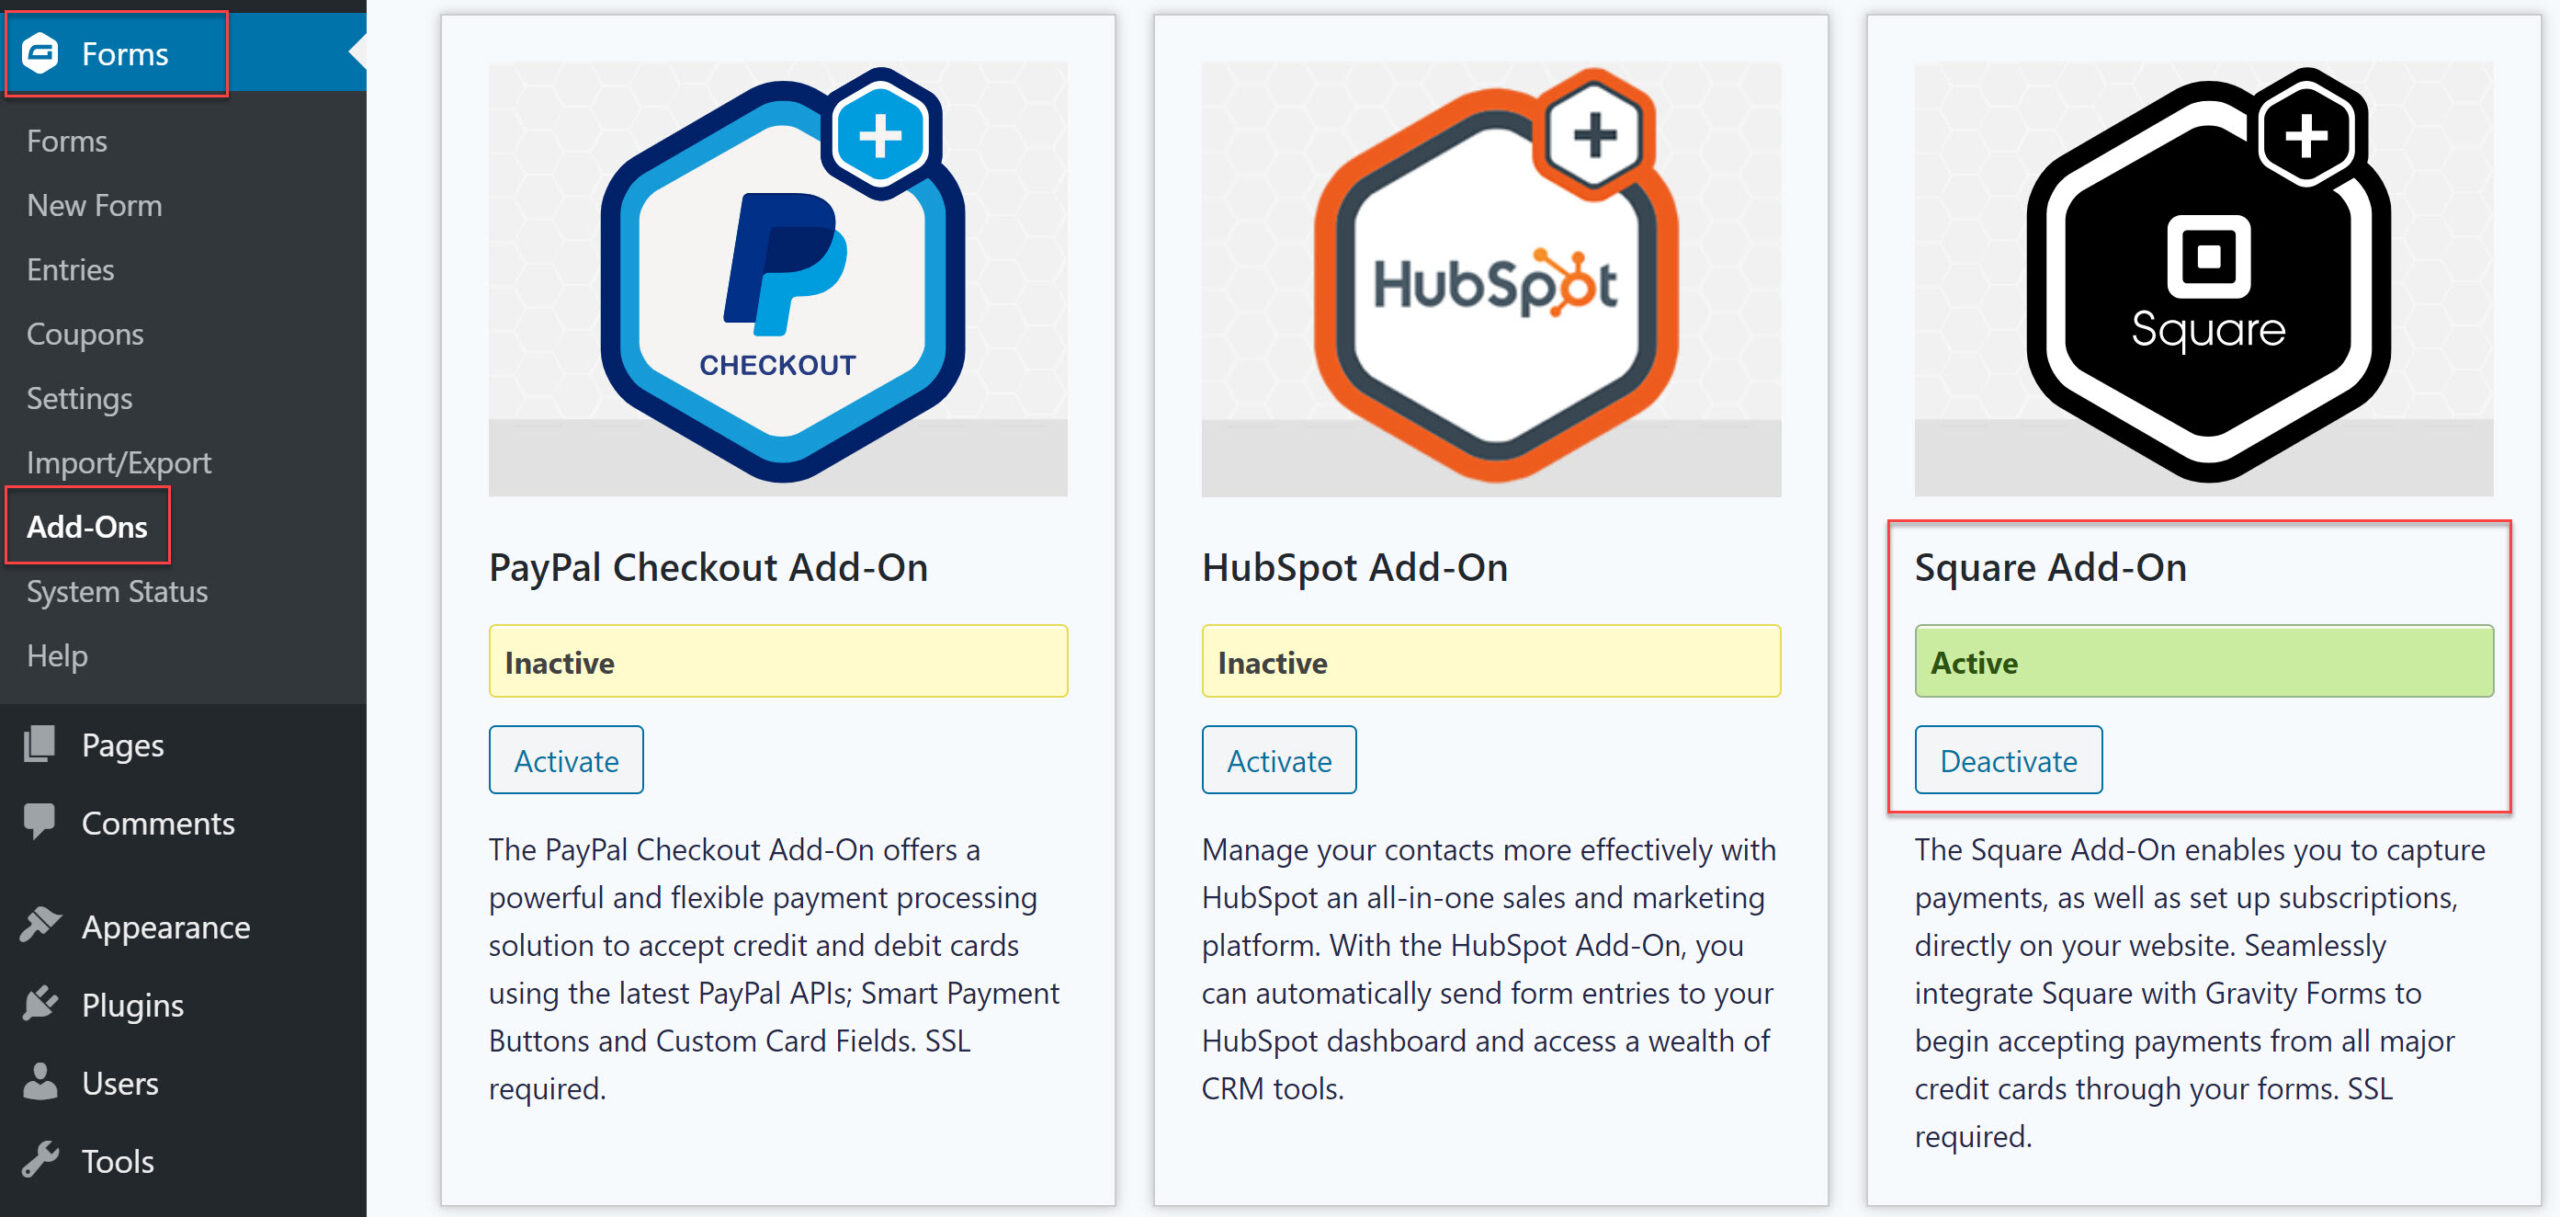
 As mentioned earlier, if you want to take payments for your courses, you can easily do so. First, go to Forms > Add-Ons and enable a payment Add-On. In this example, I’ll activate the Square Add-On.
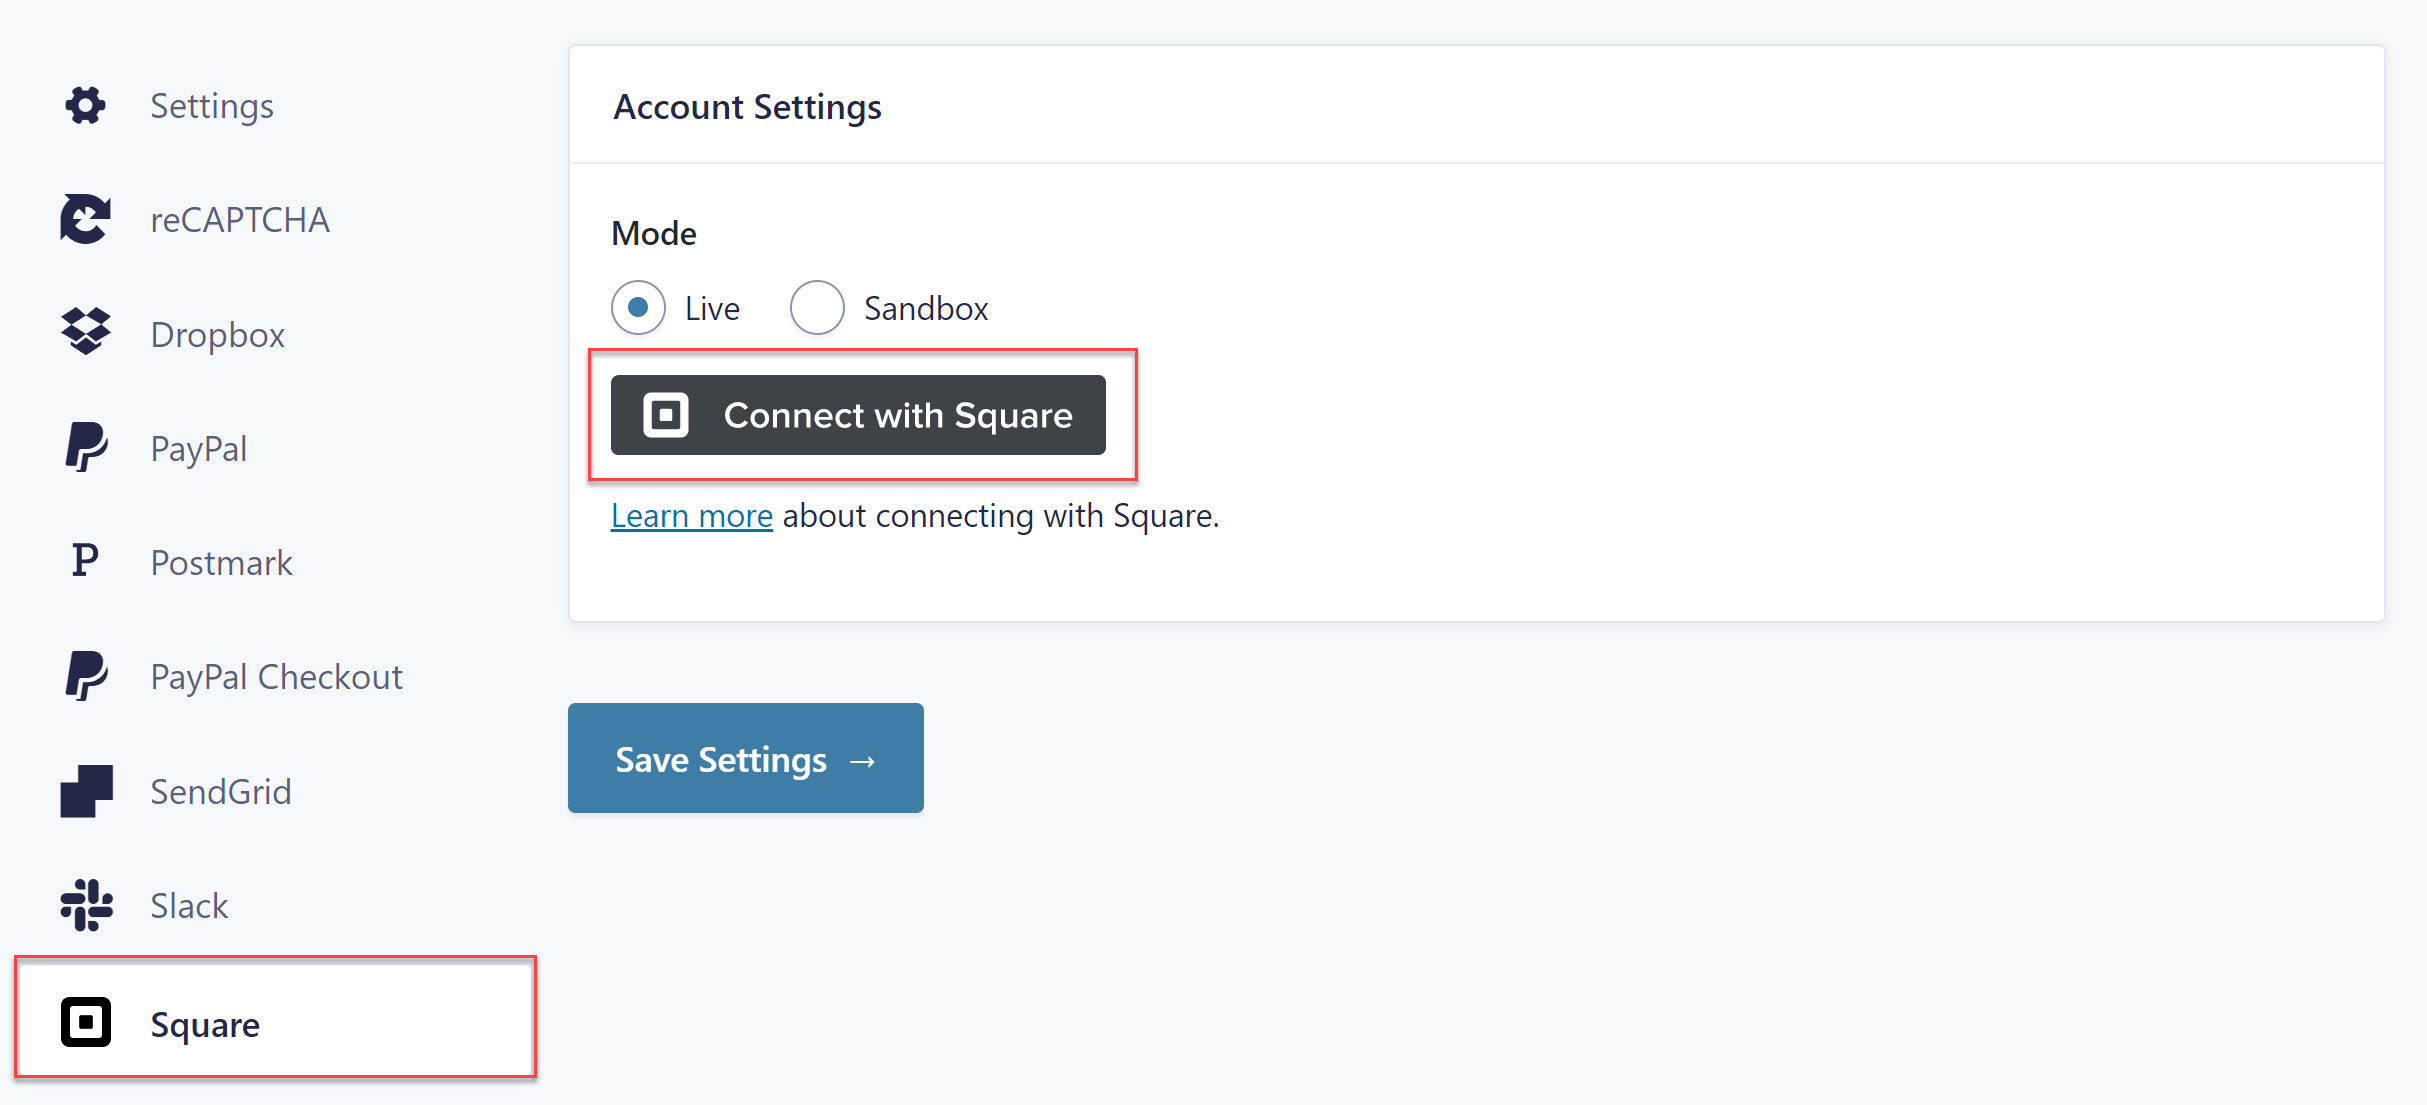
 Then, go to Forms > Settings > Square and connect your Square account. Click on the Connect with Square button and follow the prompts to authenticate your website with Square.
 After you have authenticated your website, you’ll be brought back to your WordPress dashboard. You’ll be able to see your business location and if you have multiple locations listed in Square, there will be a drop-down allowing you to select the correct one.
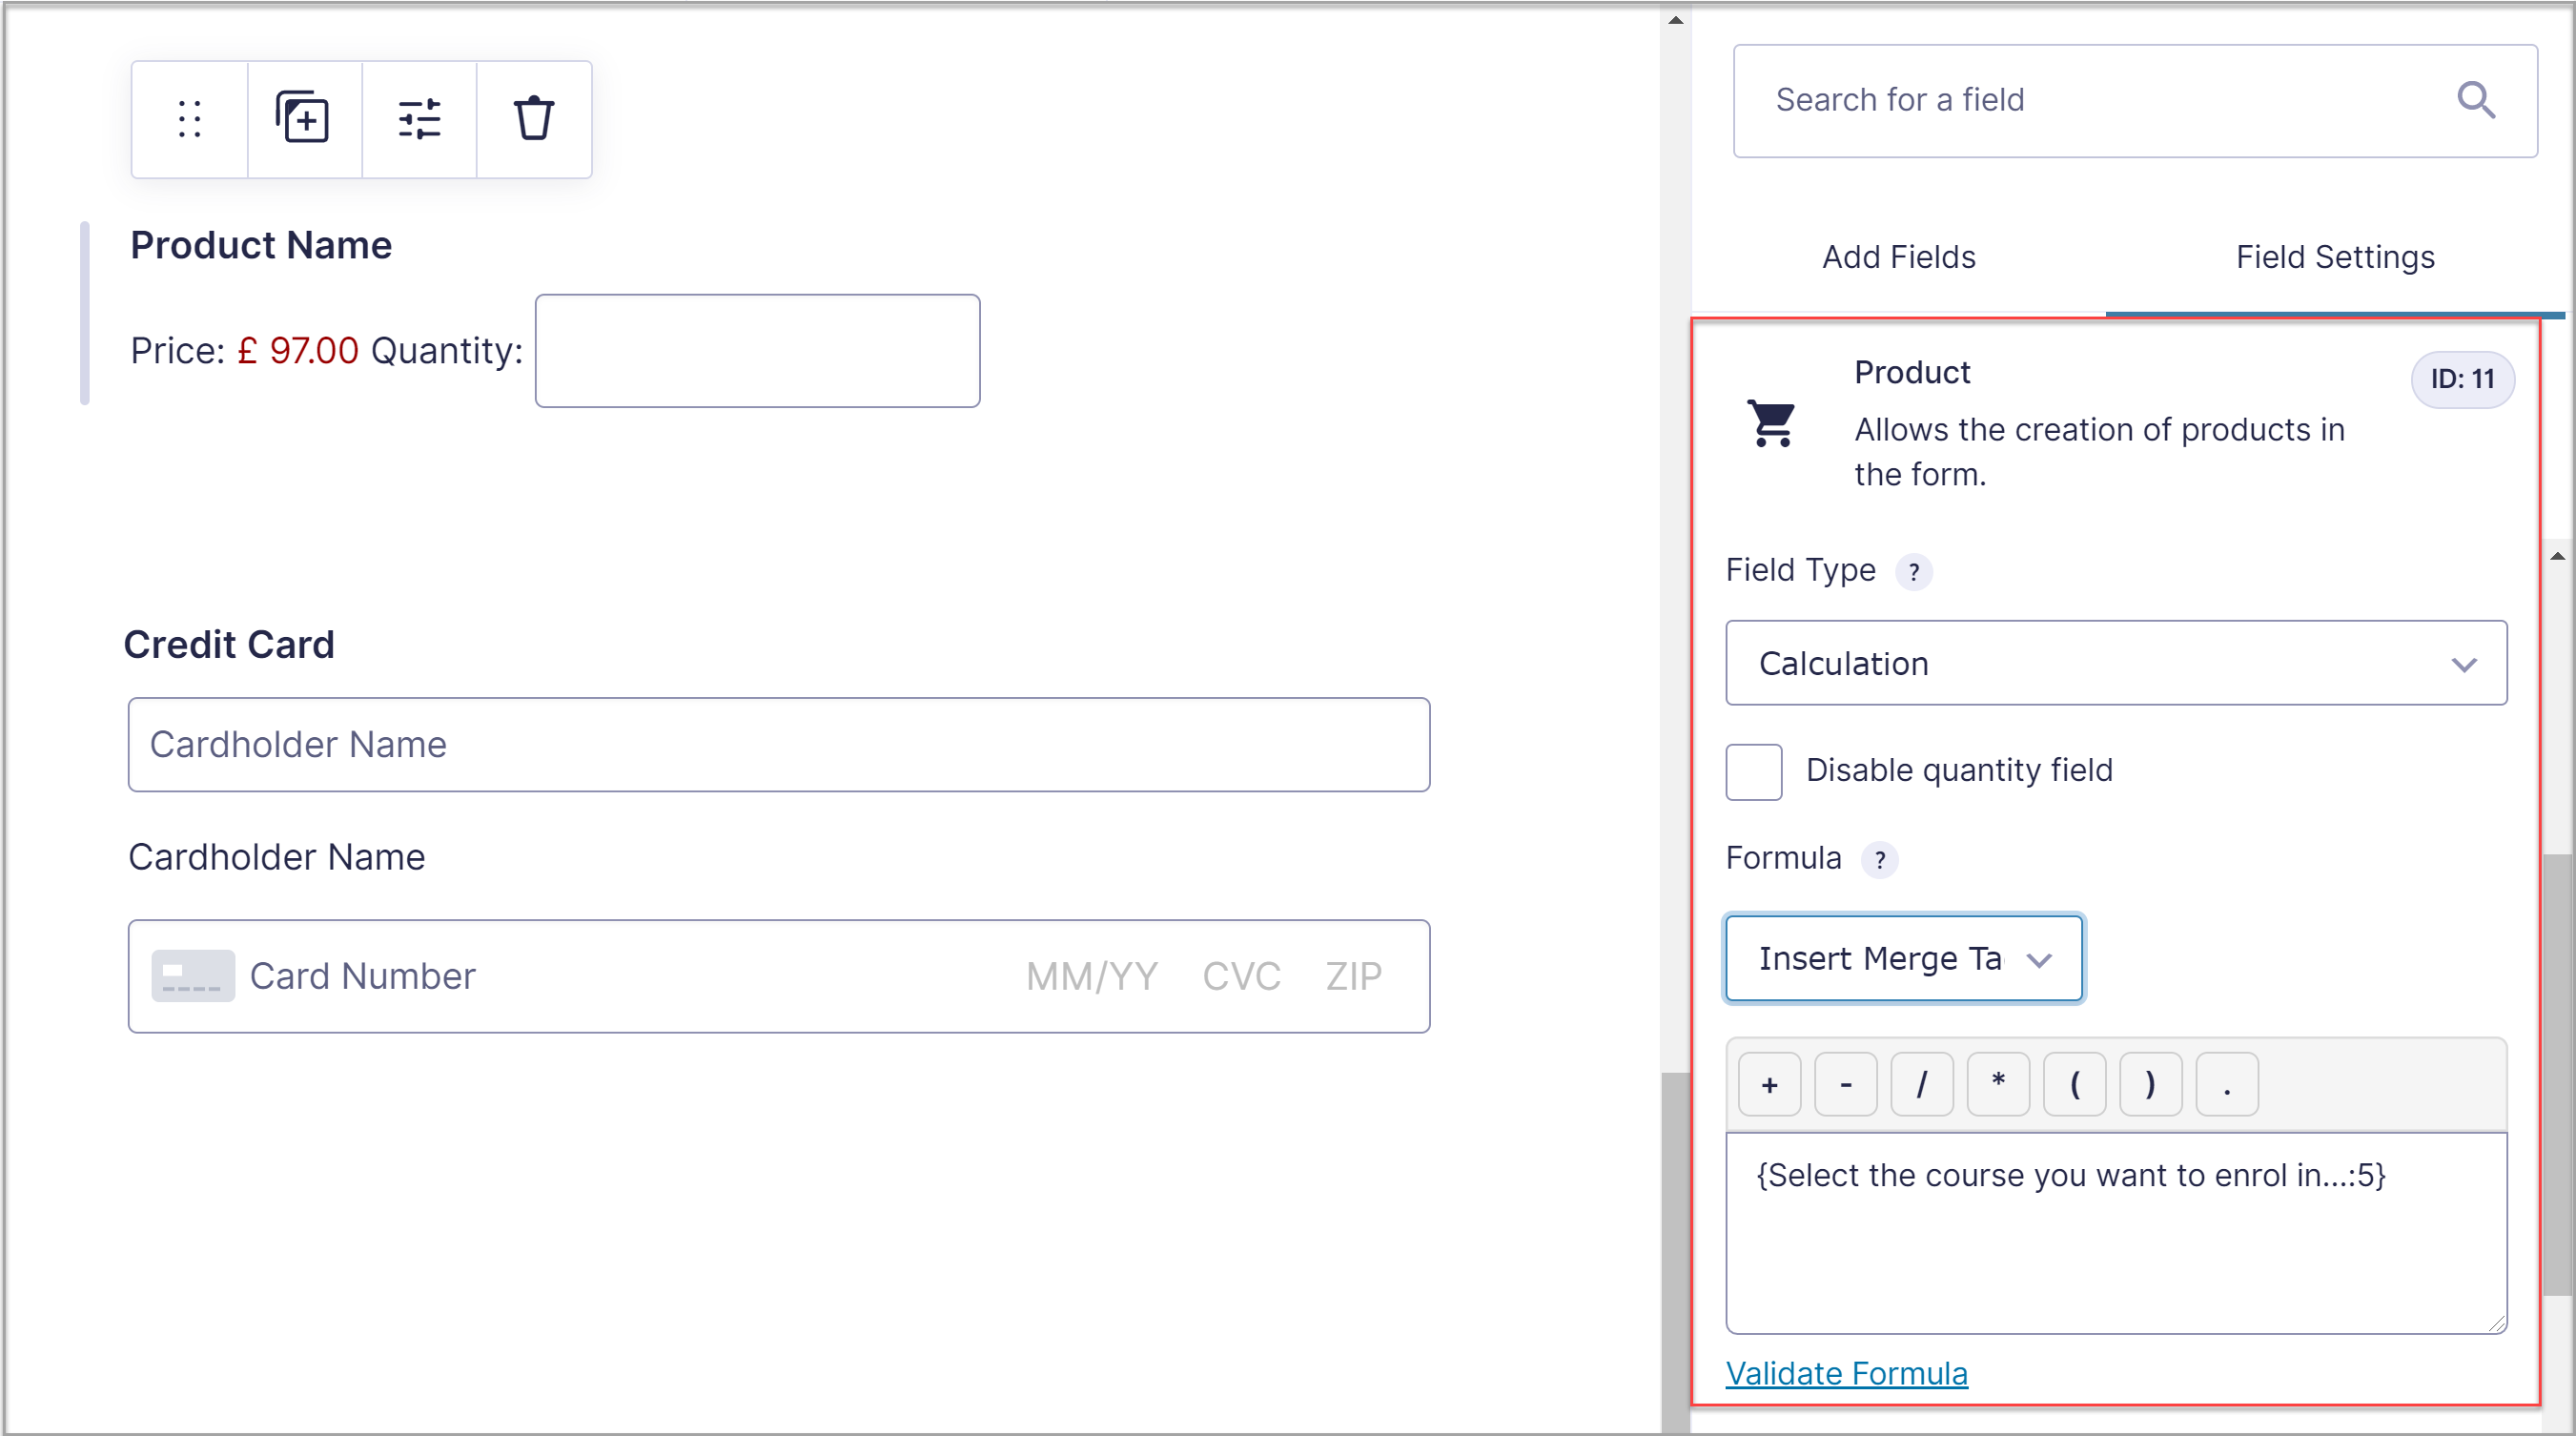
The next step is to add Square to your course registration form. Go back to your form, scroll down to the Pricing Fields and first add the Product field.
If you have a single course, you can set the field type to Single Product. Enter the name for the course and the price. If you have multiple courses, like in our example, you can set the field type to Calculation and then set it to automatically populate based on the choice made in the appropriate field. In our case, this field is set to ‘Select the course you want to enroll in’.
 Then, add the Square field to your form and click on Update.
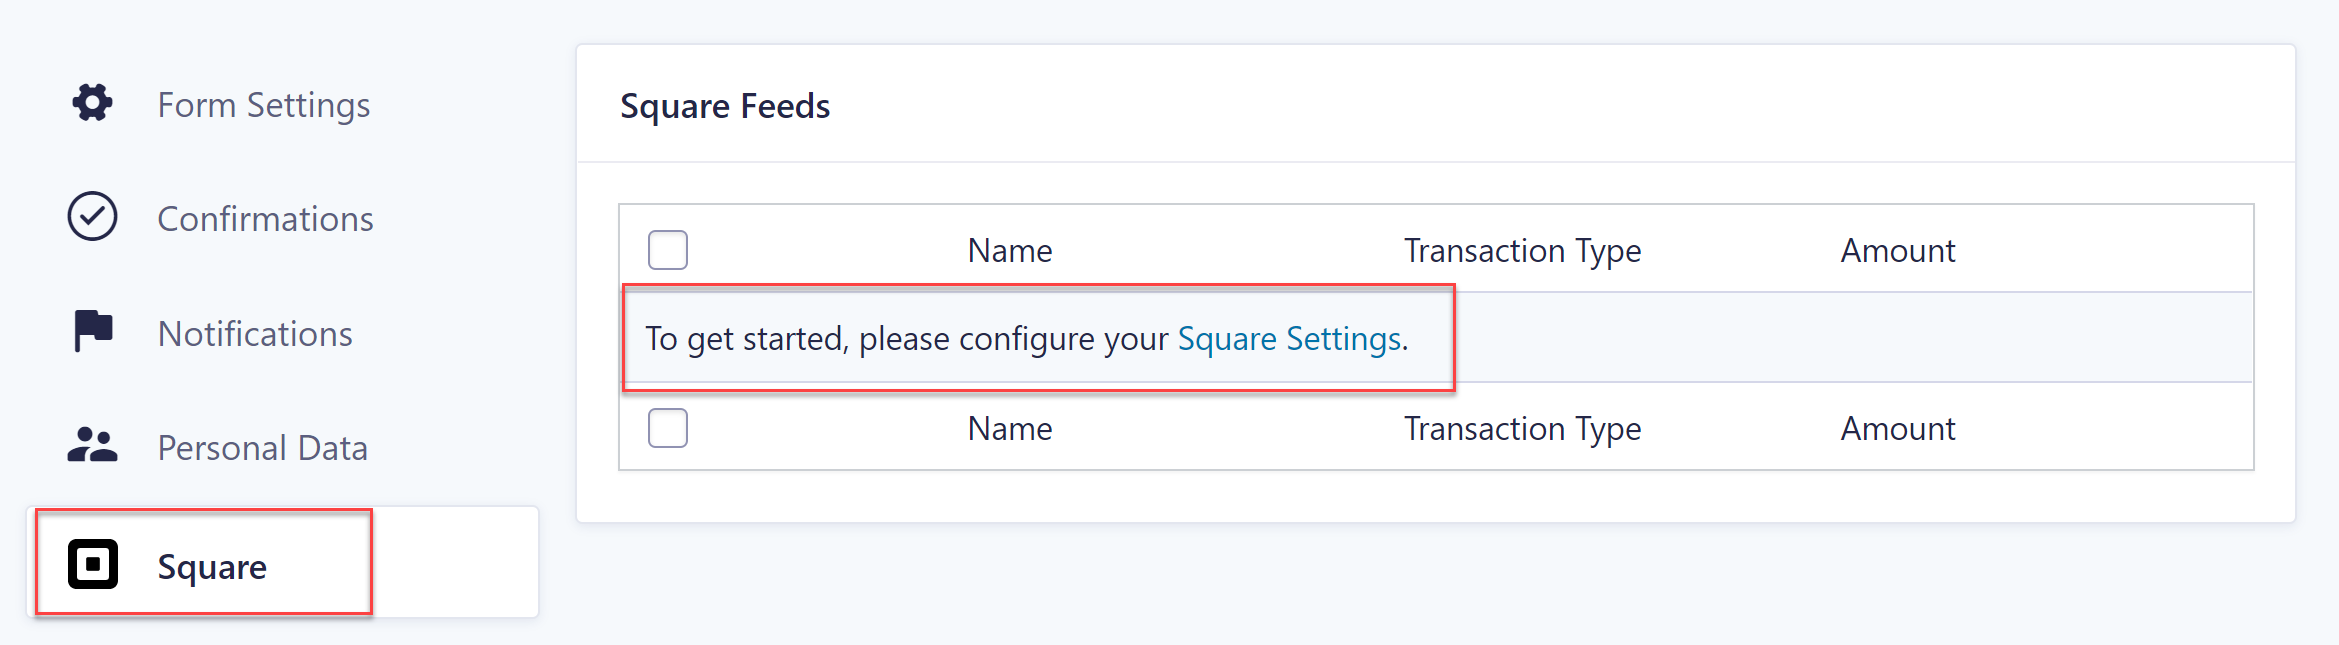
The last step is to add a Square Feed to your form. To do so, click on Settings > Square and configure the Square Settings.
For more information on how to take payments through your course registration form with Square, check out the Gravity Forms Documentation.
Square Promotion – Free Processing for up to 180 Days
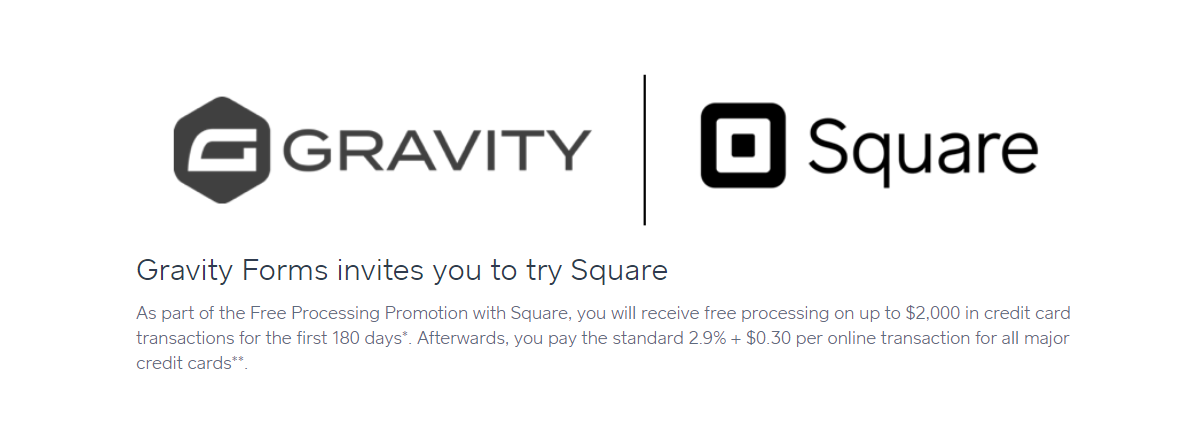 Gravity Forms and Square are offering a great promotion for all new Square customers – free processing fees for up to 180 days.
As part of the ‘Free Processing Promotion’ with Square, all new Square customers will receive free processing on up to $2,000 in credit card transactions for the first 180 days. (Afterwards, you will pay the standard Square fees for all transactions).
To take advantage of this promotion, simply sign up for a Square account using this link.
Don’t Have Gravity Forms Yet?
If you don’t have Gravity Forms or the Square Add-On, don’t worry. You can still test out everything in this article for free inside your own personalized Gravity Forms demo and see why Gravity Forms is the top choice for WordPress sites worldwide.
Already in love? Purchase our premium WordPress form plugin today!

If you want to keep up-to-date with what’s happening on the blog sign up for the Gravity Forms newsletter!
"*" indicates required fields