

Gravity Forms is a feature-rich and highly extendable plugin. As a stand-alone plugin, you can create beautiful, stylish, and advanced forms. However, working in conjunction with other third-party plugins, Gravity Forms can quickly become the backbone of any website.
In this case study, we look at how Gravity Forms uses Gravity Forms and GravityView to power our community platform. We discuss how the plugins work together to collect and display data on the front end of the Gravity Forms website. And we also consider some of the form features used to ensure a smooth submission process.
This case study has been written especially to demonstrate how the Gravity Forms plugin has been used in a real-life situation, and to give insight into what this impressive solution can do. Let’s get started…
The Gravity Forms Community Platform: A Background
The Gravity Forms community platform has two main functions.
- Accepting submissions for new third-party add-ons from developers.
- Displaying the add-ons for Gravity Forms customers to browse.
These community add-ons, created by developers across the globe, extend the functionality of the Gravity Forms plugin, and enable our customers to create unique forms, specific to their individual needs.
To be clear, the third-party add-ons are separate from the official Gravity Forms add-ons. However, they are very important, as they contribute to the Gravity Forms ecosystem, and make our plugin the most flexible and extendable forms solution on the market.
Therefore, it is vital that the community platform is well managed, user-friendly, and easy for our customers and developers to navigate. Let’s find out how we make that happen…
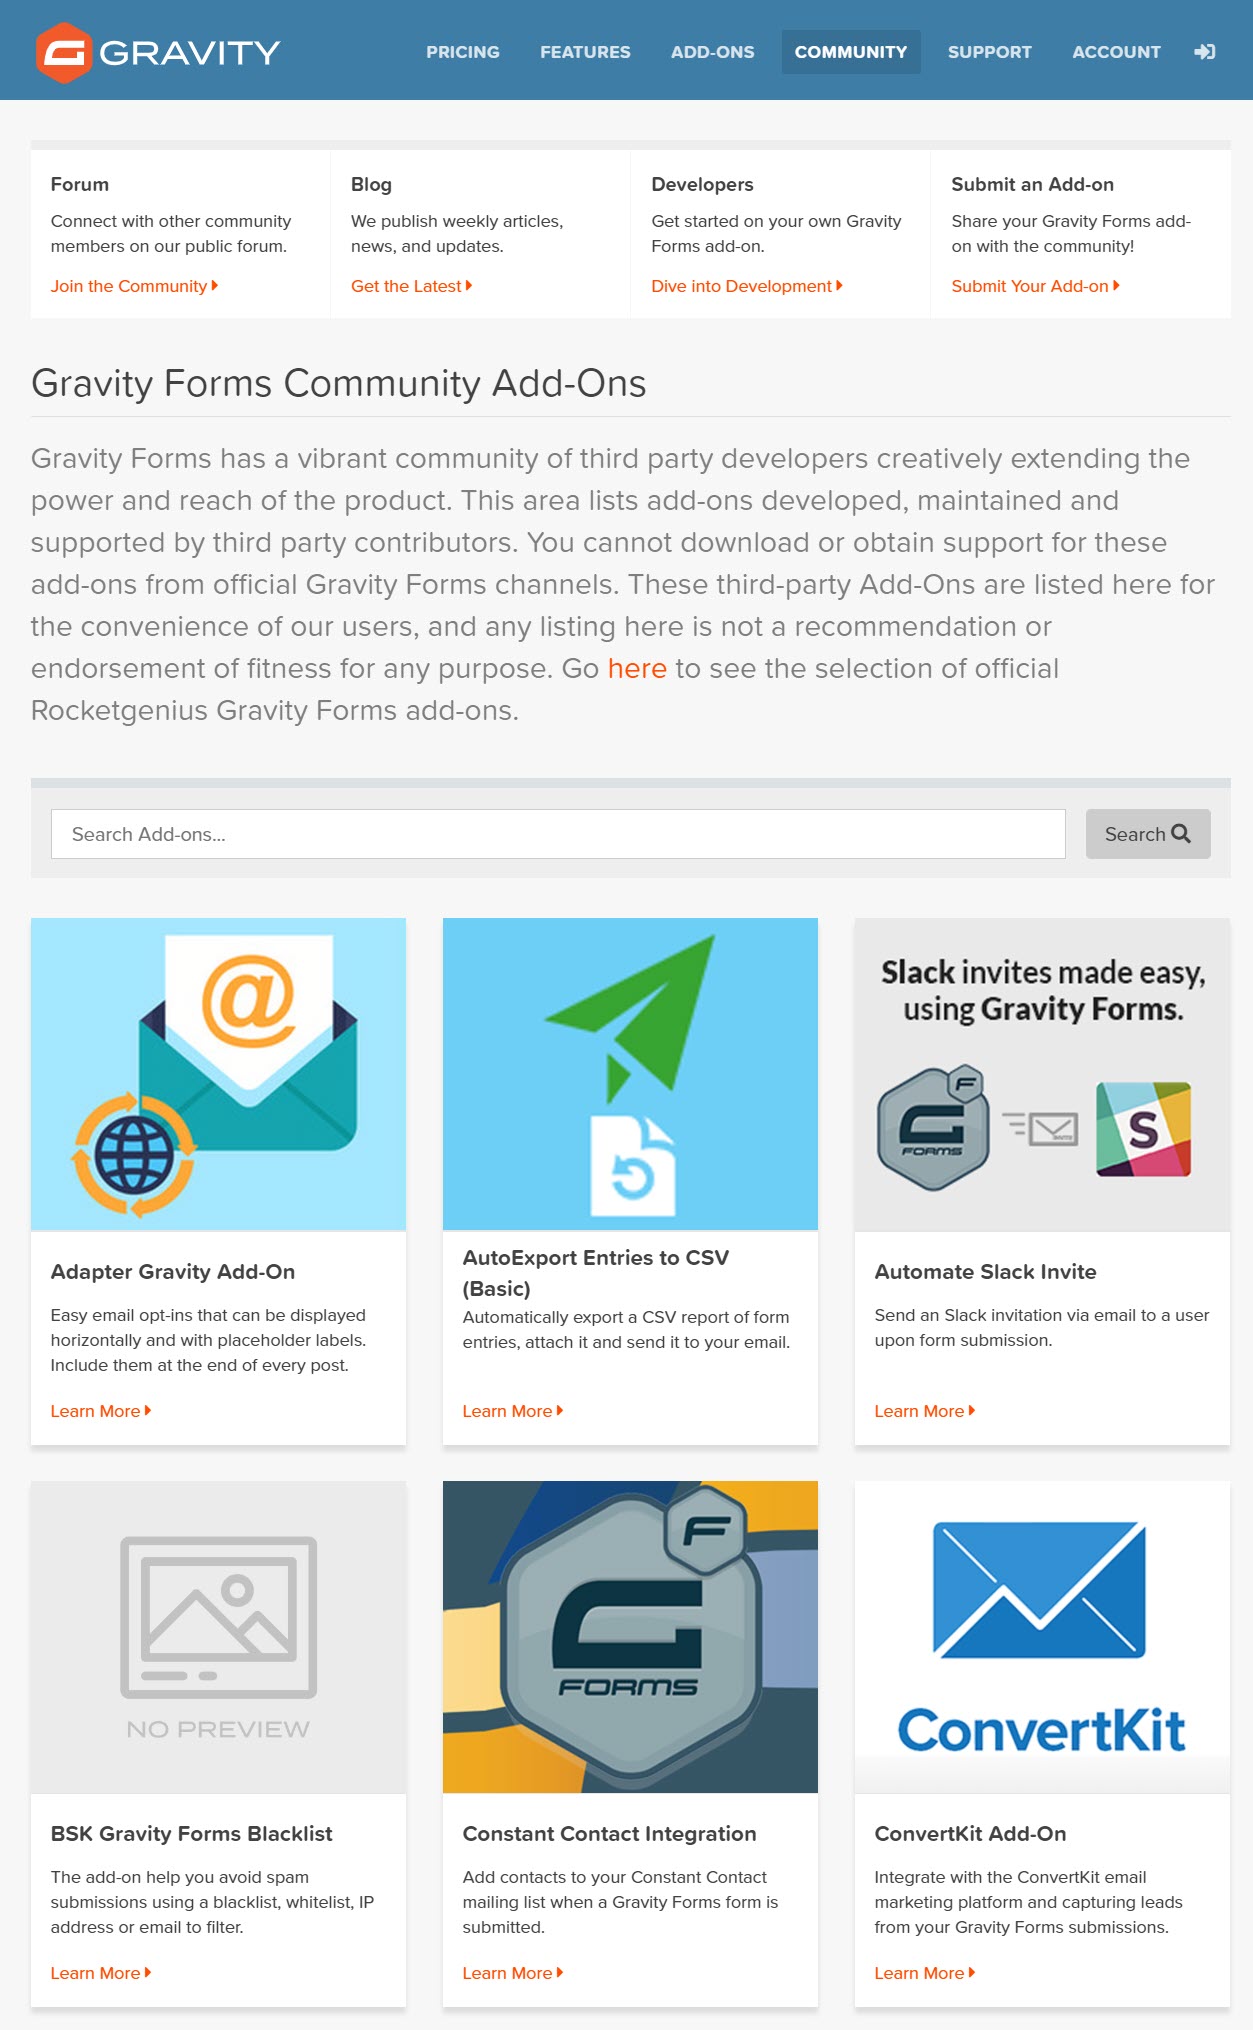
How the Community Platform Works
Gravity Forms works in conjunction with GravityView to enable data to be easily collected and displayed. In short…
- Gravity Forms collects data through the developer/add-on submission forms.
- GravityView displays it on the Gravity Forms website.
So let’s take a look at each stage of the process to see how it breaks down…
The Form(s)
The third-party ‘Submit an Add-On’ form is actually made up of two different forms that each collect different information…
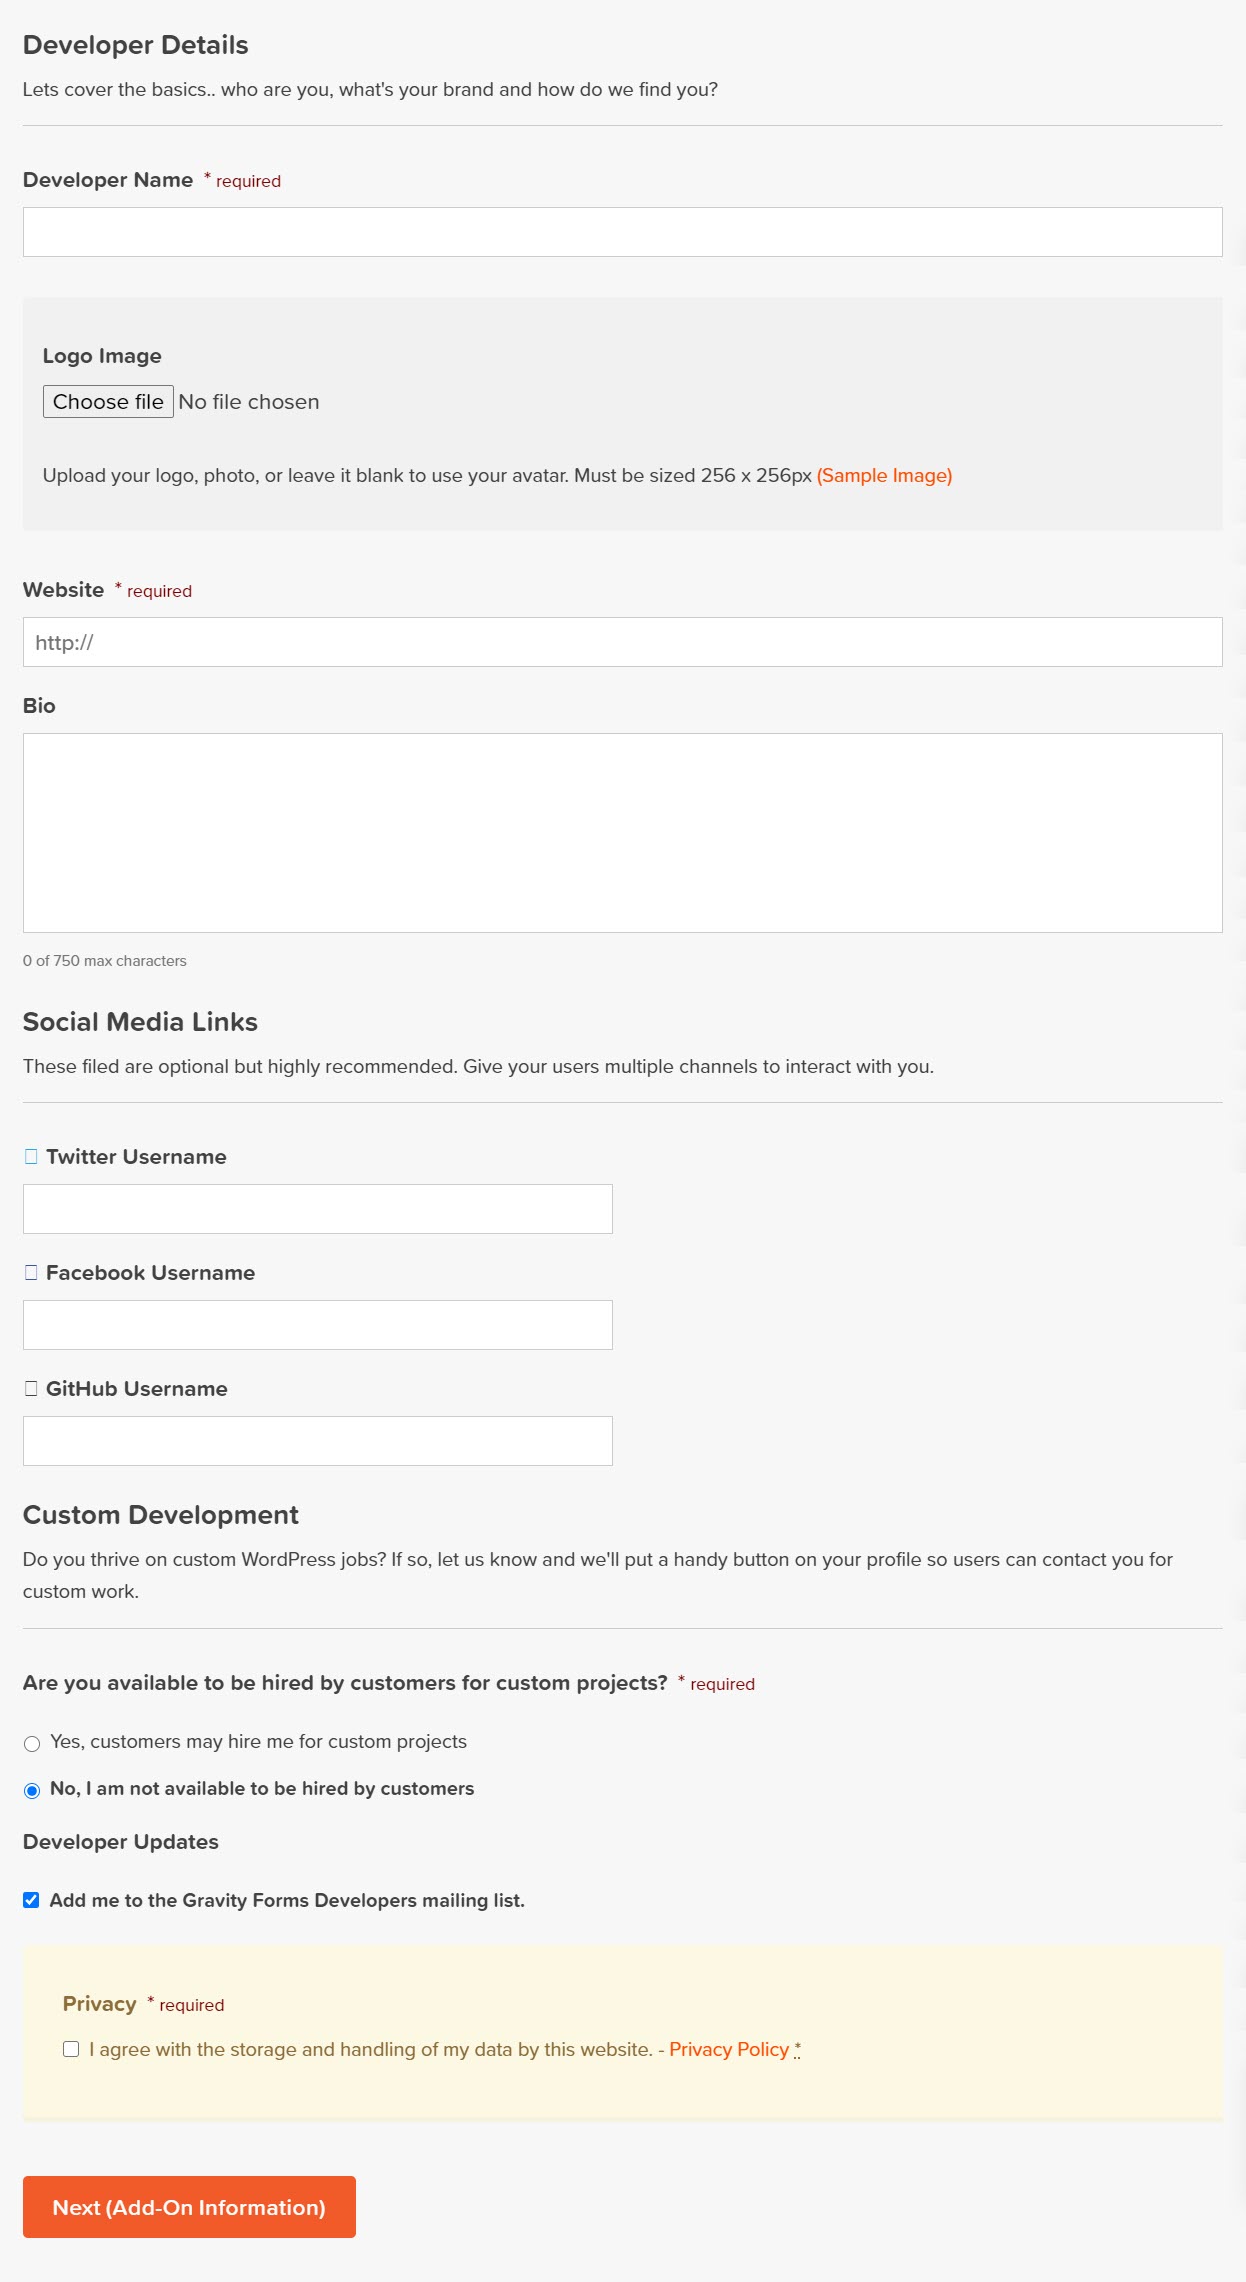
Form 1 – Developers Details
The first form collects information about the developers themselves. This includes…
- The Developer’s Name
- A Logo
- A Bio
- Website URL
- Social Media Profiles
Once submitted and approved, this info will be displayed on the developer’s ‘profile page’ on the front end of the Gravity Forms website, and will be used to help customers find out about the developer, as well as access their contact details.
Let’s take a look at the form…
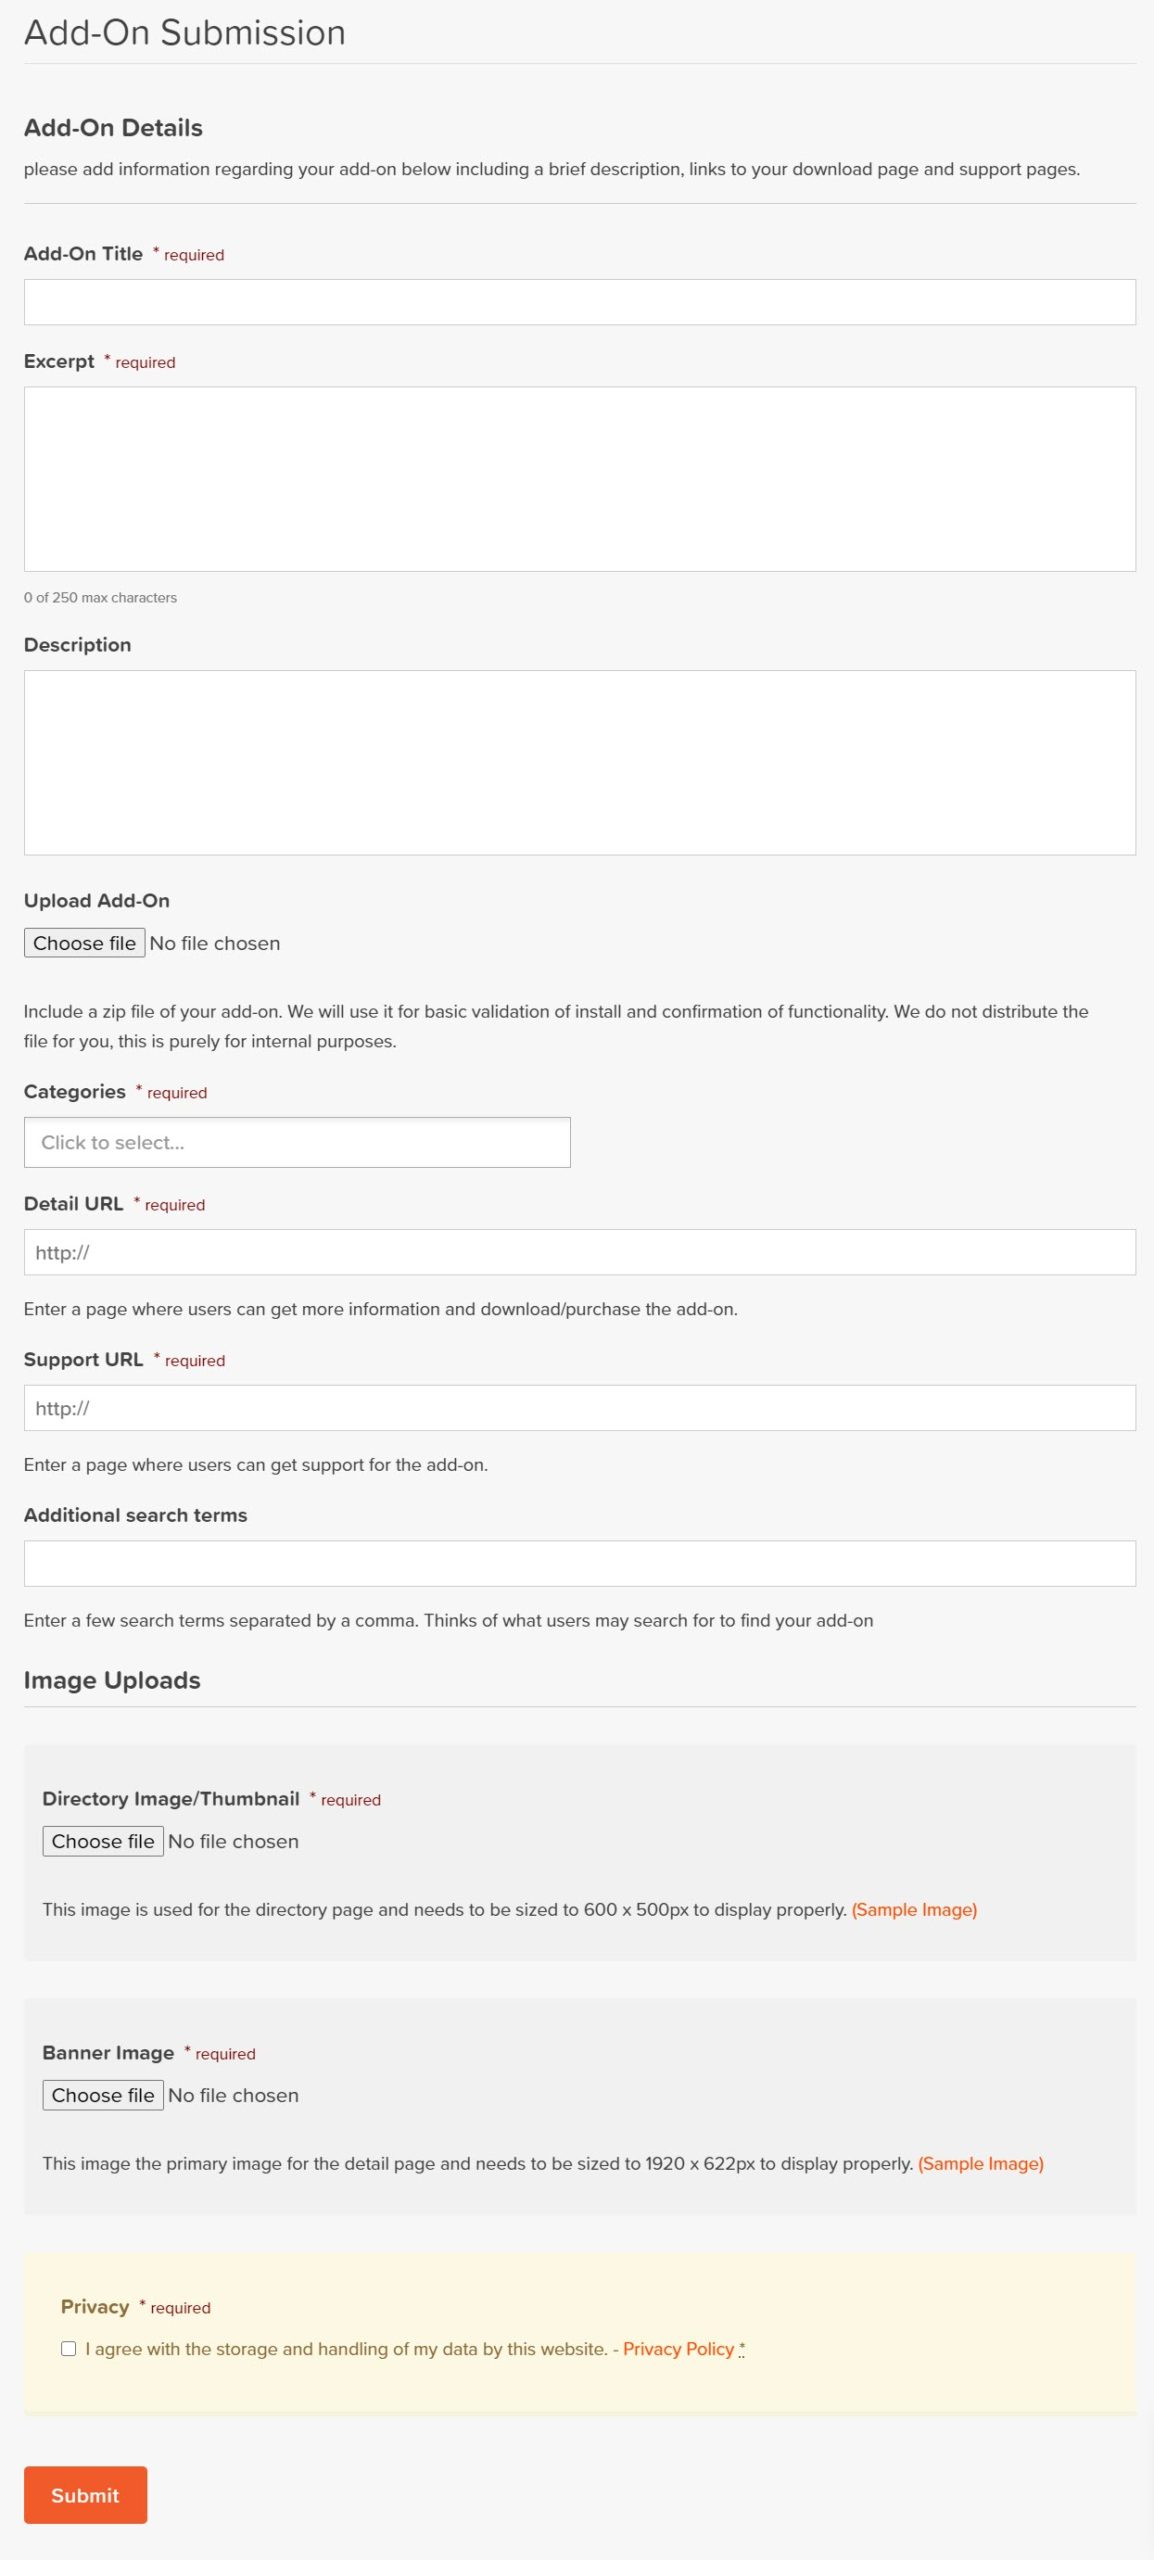
Form 2 – Add-On Submission
After a developer has completed the first form, the second form will now be displayed. Here users will be asked for details about the add-on that they would like to submit, and asked to upload the add-on itself. Data collected includes…
- Name of the Add-On
- Description and Excerpt
- The Add-On (in a zip file)
- A Details URL (for more details of the add-on) and a Support URL
- Images (a thumbnail image of the add-on for the third party add-ons’ directory page and a banner image for the specific add-on’s individual page).
Here’s the form…
Again, once submitted and approved, the information provided about the add-on is published on the front end of the Gravity Forms website.
Other Form Features
When creating the forms, the Gravity Forms team included a number of key features and fields to ensure a user-friendly experience and that all the necessary data is collected. These include…
- Custom Code
- Required Fields
- File Upload Fields
- Privacy Policy
Let’s have a closer look at each of these in turn…
Custom Code
Gravity Forms uses custom code to determine which of the two forms to display to each user. To view either form, first a developer needs to be signed into their Gravity Forms account.
Custom code will then identify if the user has already registered as a developer. If no submissions have previously been made, the developer registration form will be displayed. However, if already signed up as a developer, only the add-on submission form will be visible.
By tailoring the experience to match a user’s previous behavior on the site, the Gravity Forms team ensures that they won’t receive duplicate submissions, and developers can easily submit multiple add-ons, without having to repeat the registration process.
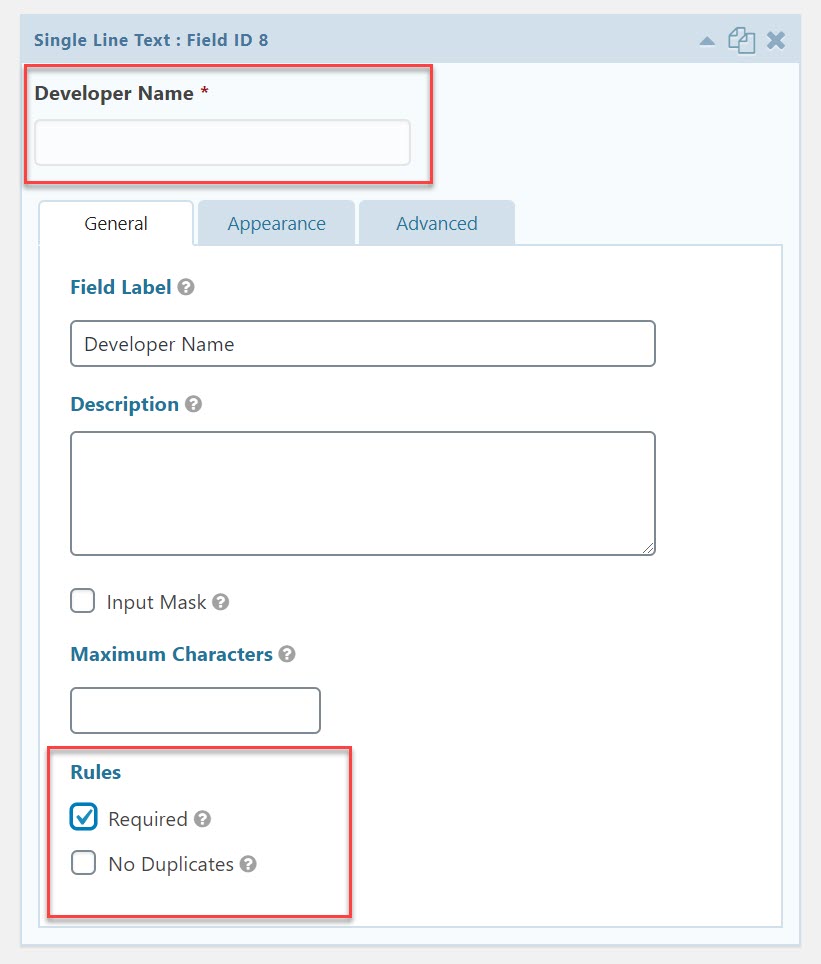
Required Fields
A number of the key form fields have a ‘required’ tag. These fields have to be completed before a developer can submit each form. This ensures forms aren’t submitted missing key information that the Gravity Forms team need to check as well as display on the community front-end pages.

Required fields are an easy feature to enable. Within the Form Editor, simply open the settings of the form field you want to make ‘required’. Then scroll down to the bottom of the field settings and under Rules, select Required.
Upload a File
The forms have multiple file upload fields, asking developers to upload…
- A Logo
- A Banner
- A Thumbnail Image for the Add-On
- The Add-On file
The uploaded images will then be displayed on the front end of the website. Uploading a logo or file is again a quick and easy feature to implement on a form. To do so, within the Form Editor, simply select the File Upload form field…
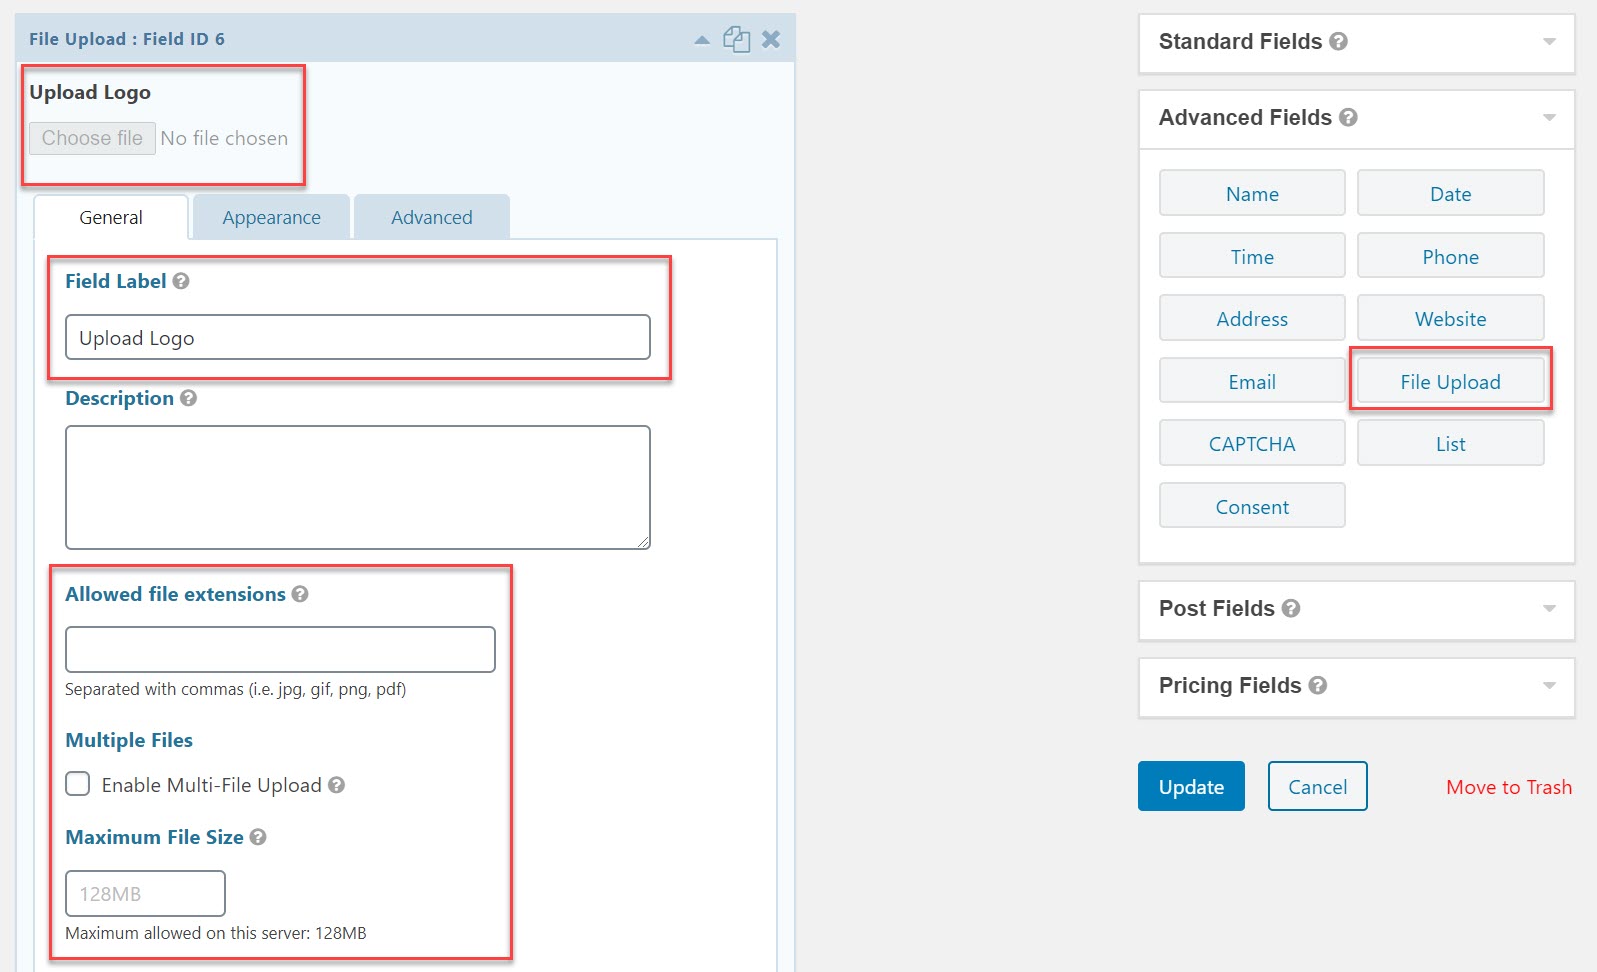
Within the field settings, you can also select to allow multiple file uploads, or limit form options like file extensions and file size.
Privacy Policy

To submit the forms, the privacy field has to first be checked by the developer. By clicking on Privacy Policy, developers can also open and read the Gravity Forms policy before agreeing to the terms.
To enable this on your website, you first need to have your own privacy policy written up by an attorney. For more details on the importance of a privacy policy and how to get one, check out this article Why You Need a Privacy Policy if you are Using a Contact Form.
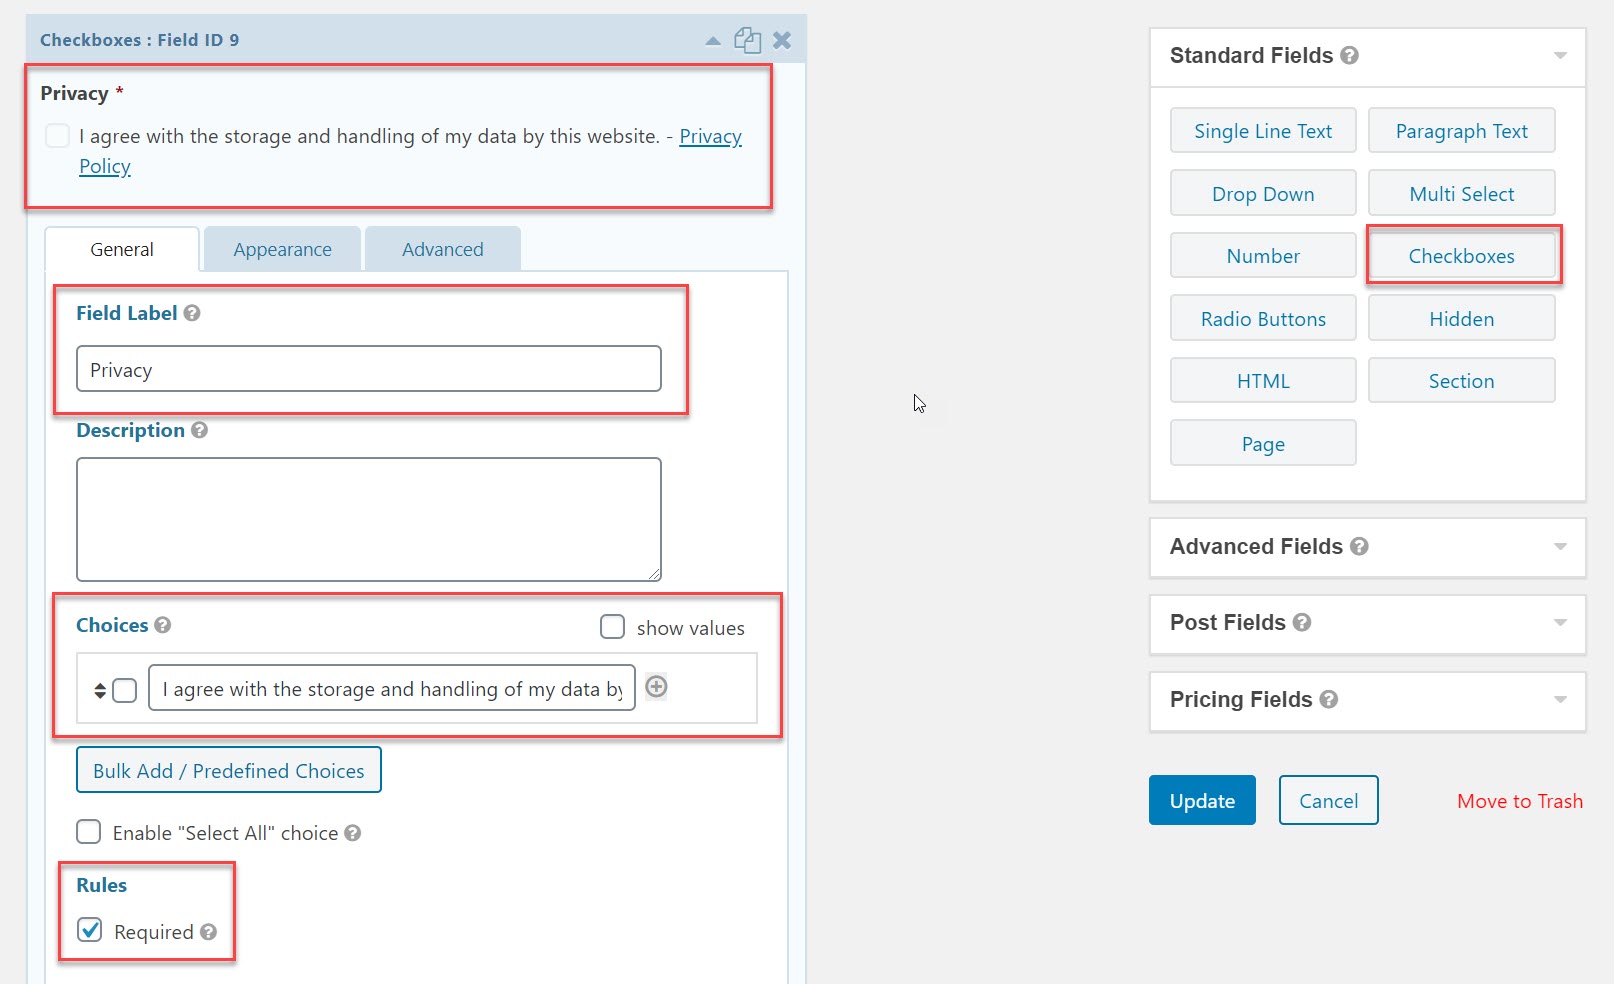
There are a couple of ways to create a Privacy Policy form field for your form. If you want to copy the above option, within the Form Editor, select Checkboxes. Rename the field Privacy, and then under Choices, delete two of the three checkboxes. In the remaining checkbox add a statement and link to your privacy policy like this…
I agree with the storage and handling of my data by this website. – <a href=”https://www.gravityforms.com/privacy/” target=”_blank”>Privacy Policy</a>
Don’t forget to mark the field as required and check the link when you preview the form.
However, since creating this form, Gravity Forms released the Consent field, specifically to enable users to give their consent to your privacy policies.
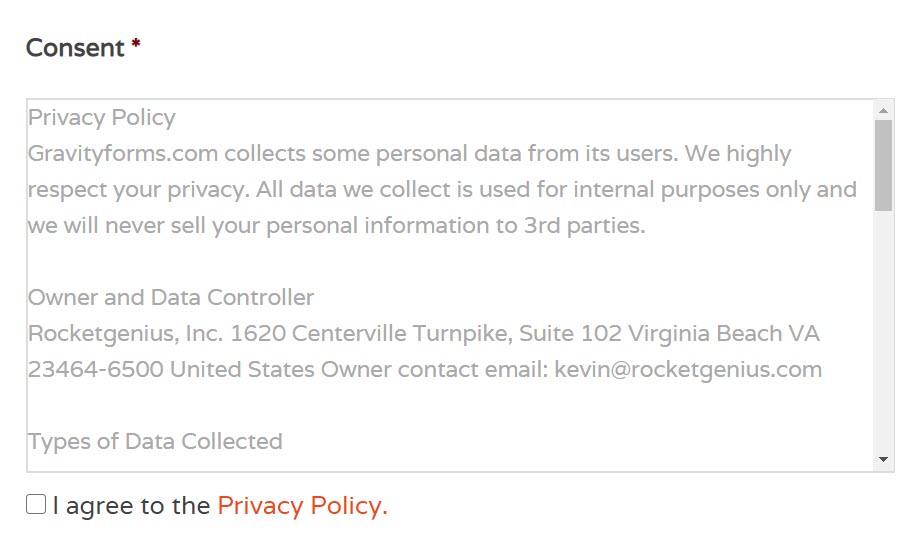
The Consent field, found in the Form Editor under Advanced Fields, allows you to display your Privacy Policy within the form, so users can scroll through and read the policy without having to leave the page. If you wish, you can also choose to link out to your Privacy Policy page using HTML (as we showed above).
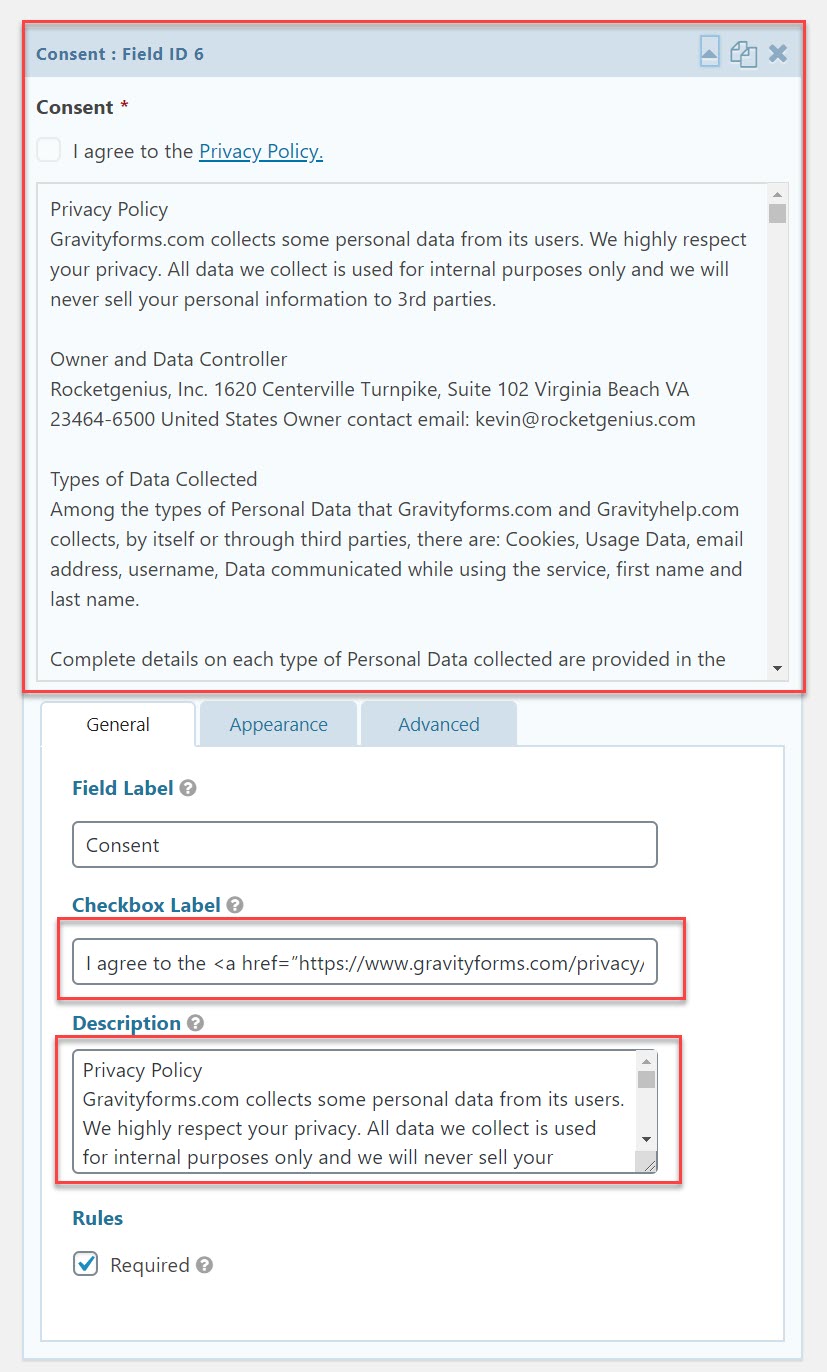
The benefit of using the Consent field is that when a form entry is processed, the field will record the consent title and description, as was displayed at the time of submission. This allows you to alter the form and consent details at any time, without affecting the record of what exactly previous submissions had agreed to.
Integration with GravityView
As already mentioned, GravityView enables the data collected by the Gravity Forms plugin to be easily presented on the front end of the website.
GravityView is a third-party add-on that takes form submissions and displays the data in ‘Views’ for users to browse. In the case of the community platform, data entries are displayed in three different key Views.
The main add-on directory view…
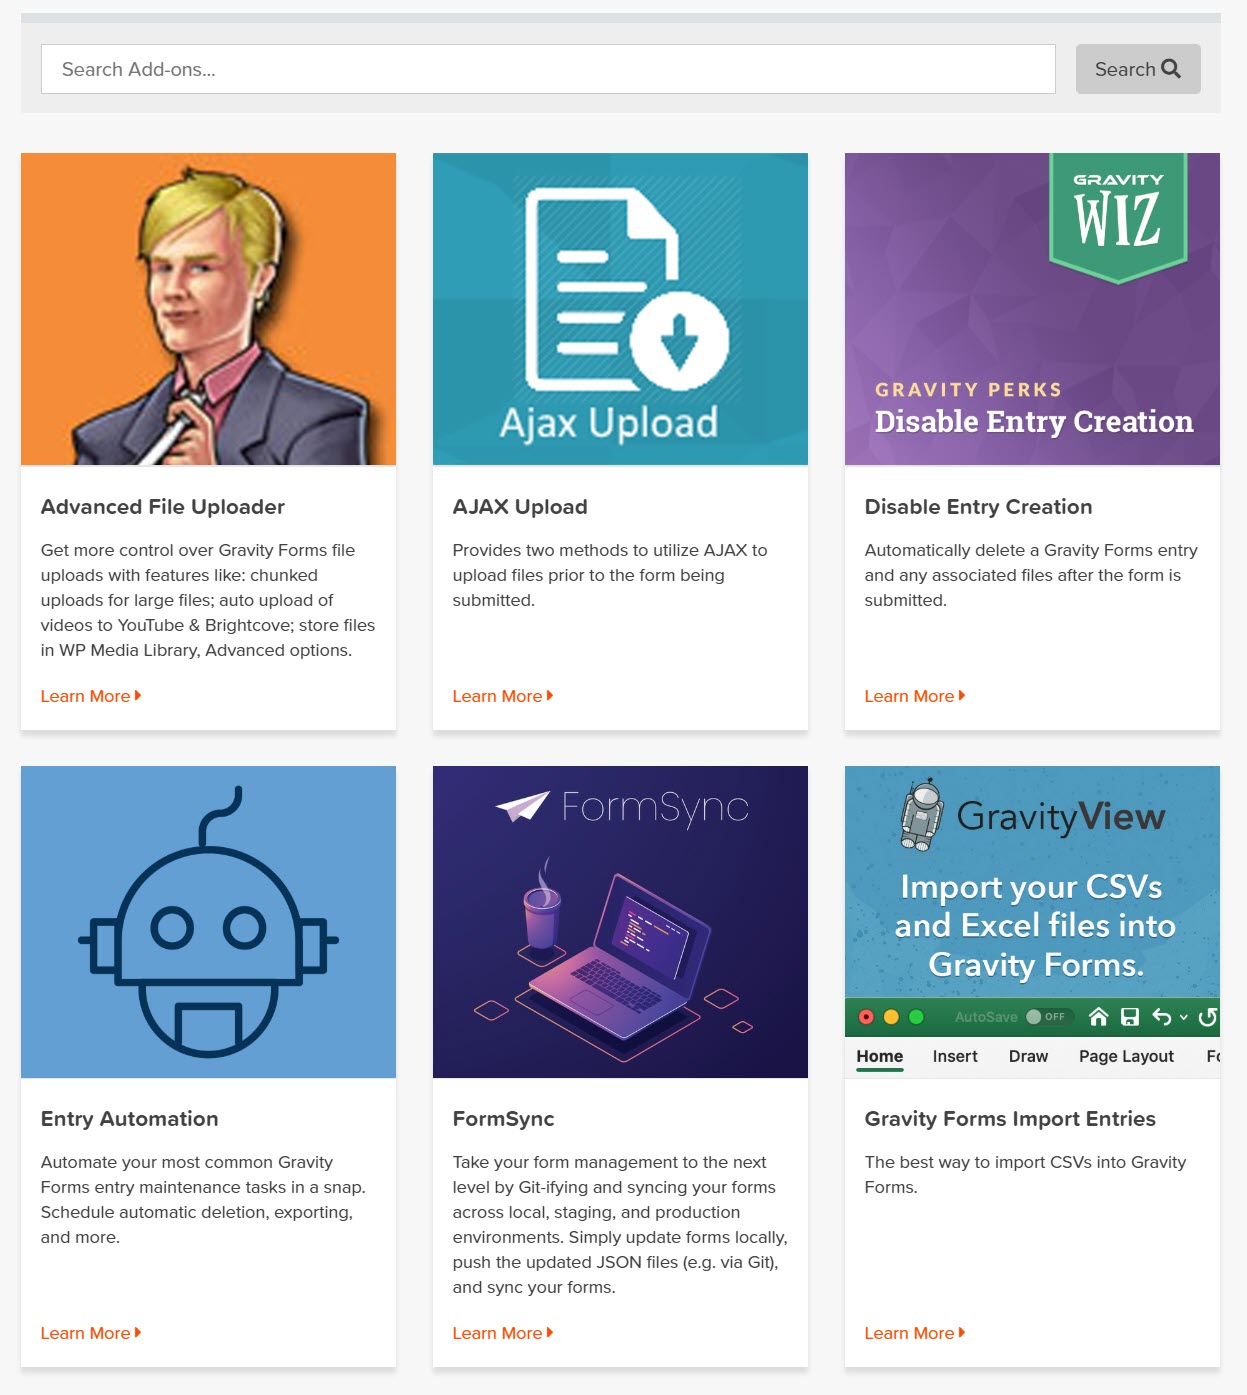
Individual add-on pages/views…

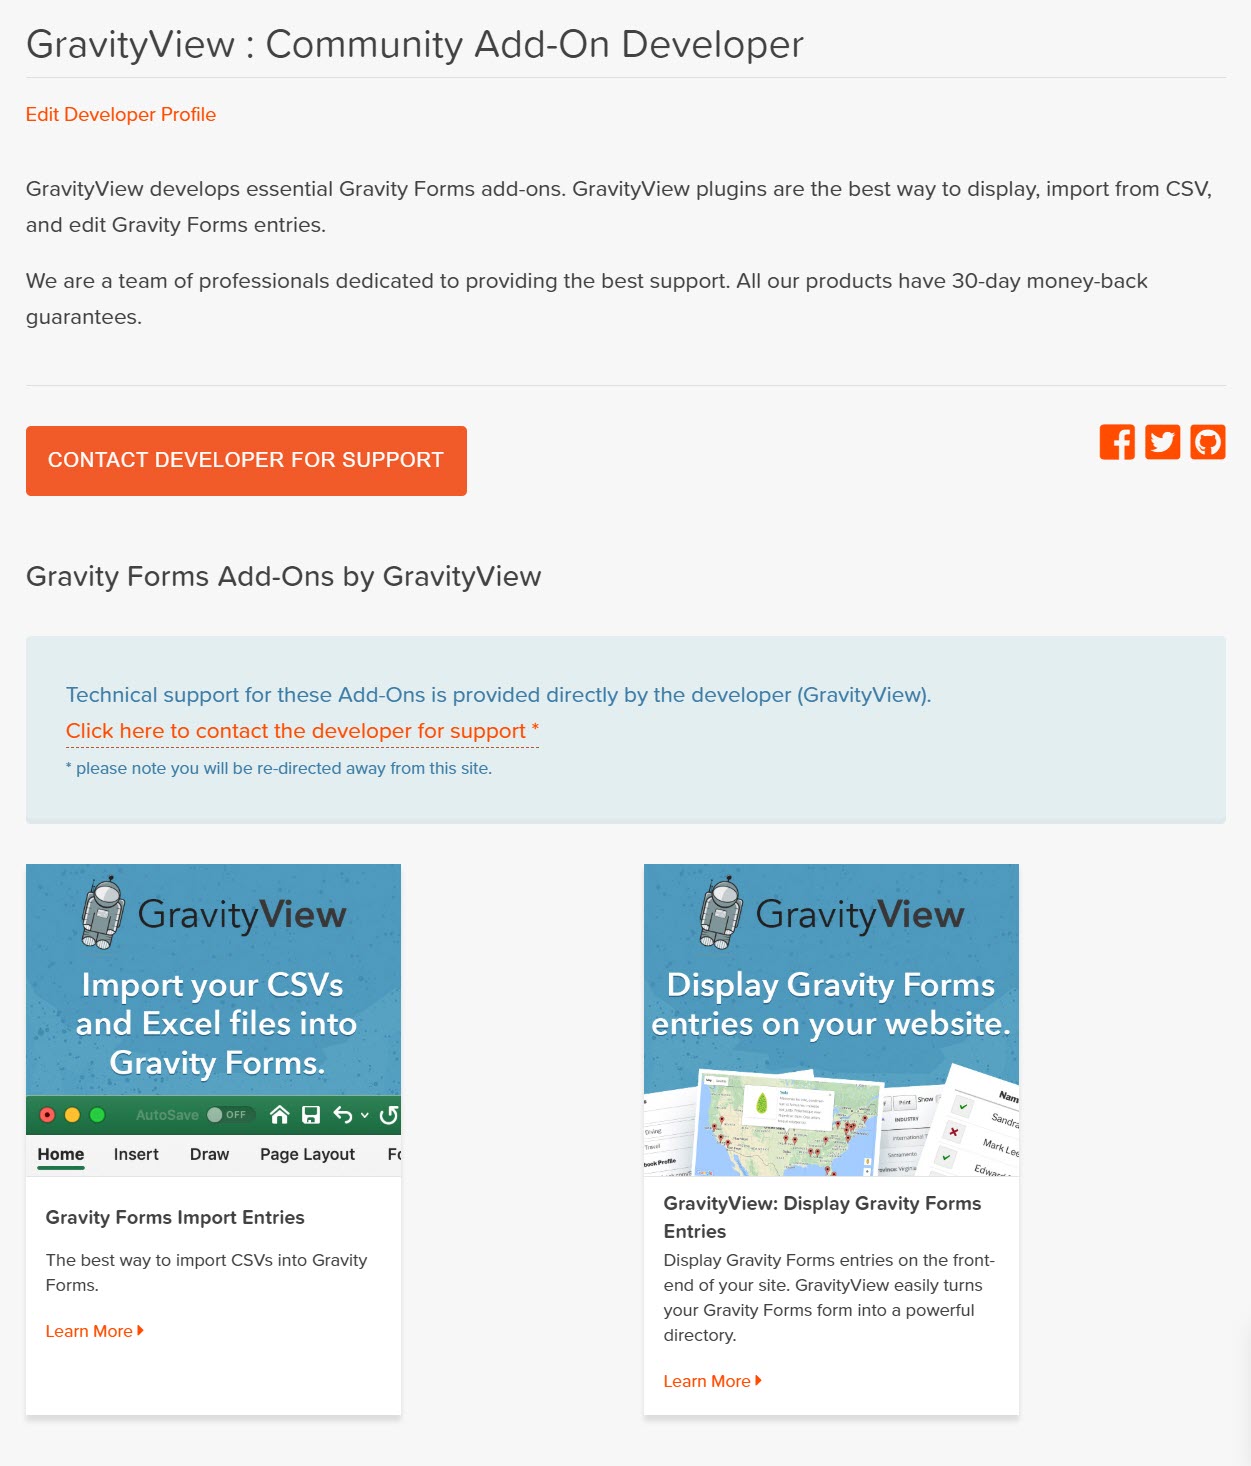
Individual developer profile pages/views…
Within the directory, customers can search add-ons, and then click through to view detailed information about an add-on and the developer who created it.
GravityView also allows users to edit their information on the front-end – on the community platform a developer can open their own profile page and make any changes needed (eg – alter social media usernames, or update their bio).

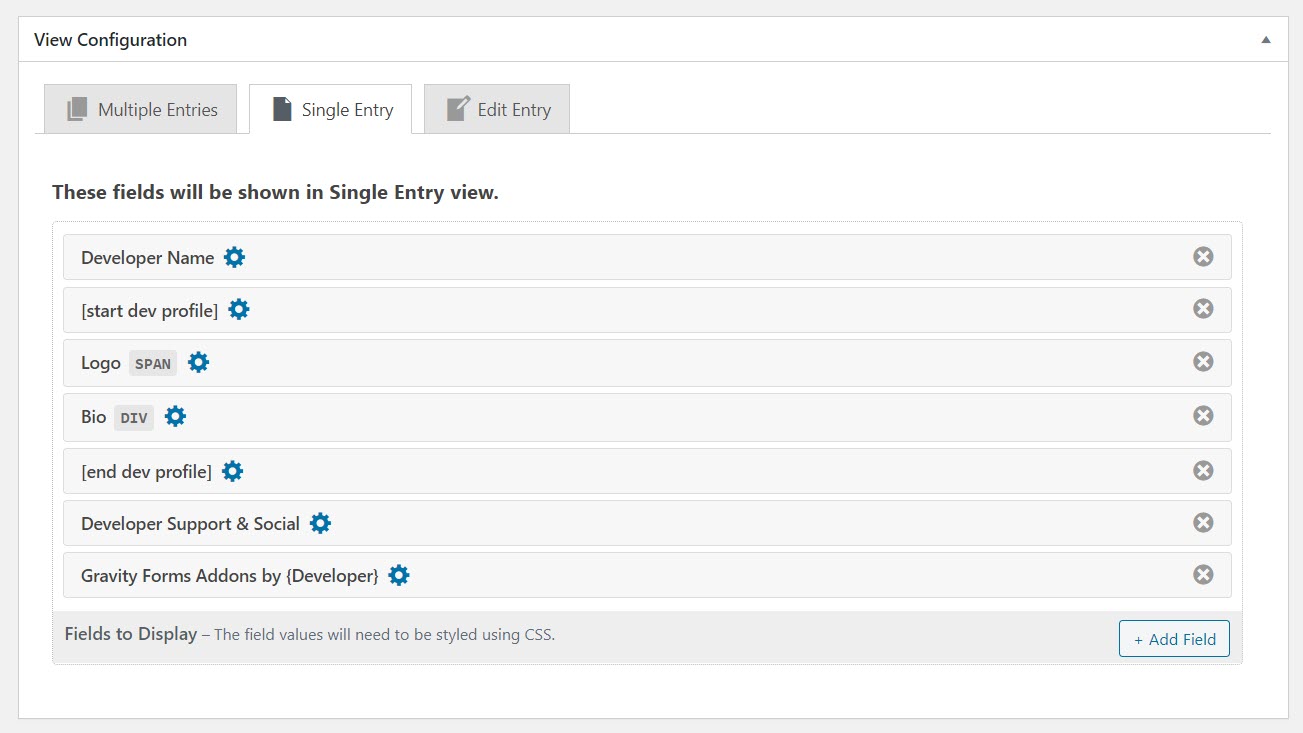
Within the WordPress dashboard, you can customize your Views to only display specific form fields. Here you can see the data entry fields that have been chosen by the Gravity Forms team to be shown on each individual developer profile page…
When each form is submitted, the Gravity Forms team checks the application and add-on, and then can either approve or reject applicants. If approved, GravityView then automatically displays the form data on the community platform, saving the team hours of time inputting the data manually.
Final Thoughts
The community platform is an integral aspect of the Gravity Forms ecosystem. Using Gravity Forms, alongside GravityView, we ensure that our community platform works for both our developers and our customers.
So if you want to collect and display data entries on your WordPress website, then check out Gravity Forms and GravityView today!
Have you created a custom form with Gravity Forms that you would like to feature in a case study on our blog? If so, please get in contact – we’d love to hear from you!

If you want to keep up-to-date with what’s happening on the blog sign up for the Gravity Forms newsletter!
"*" indicates required fields


