Do you need to schedule events using forms on your WordPress site but don’t want to manually view entries to add them to Google Calendar? In this article, we’ll outline how to automatically send your form entries directly to Google Calendar using Gravity Forms and Zapier.
Getting Started
Before we can begin, you’ll want to make sure you have the following:
- Gravity Forms
- The Gravity Forms Zapier Add-On.
- A Zapier account.
- A Google Calendar account.
Next, you’ll want to configure your form to send the entries to Zapier. As this is fairly standard across all forms that use Zapier, we won’t bother you with the boring details. If you need more information on sending form entries to Zapier, take a look at our Zapier Add-On documentation.
Configuring Zapier and Google Calendar
At this point, you should have your form details being sent to Zapier. Now, we just need to take that data within Zapier and send it to Google Calendar. In this section, we’re assuming you’ve already created a Zap within Zapier to receive the form entries. If not, you’ll want to review our documentation on connecting Gravity Forms to Zapier.
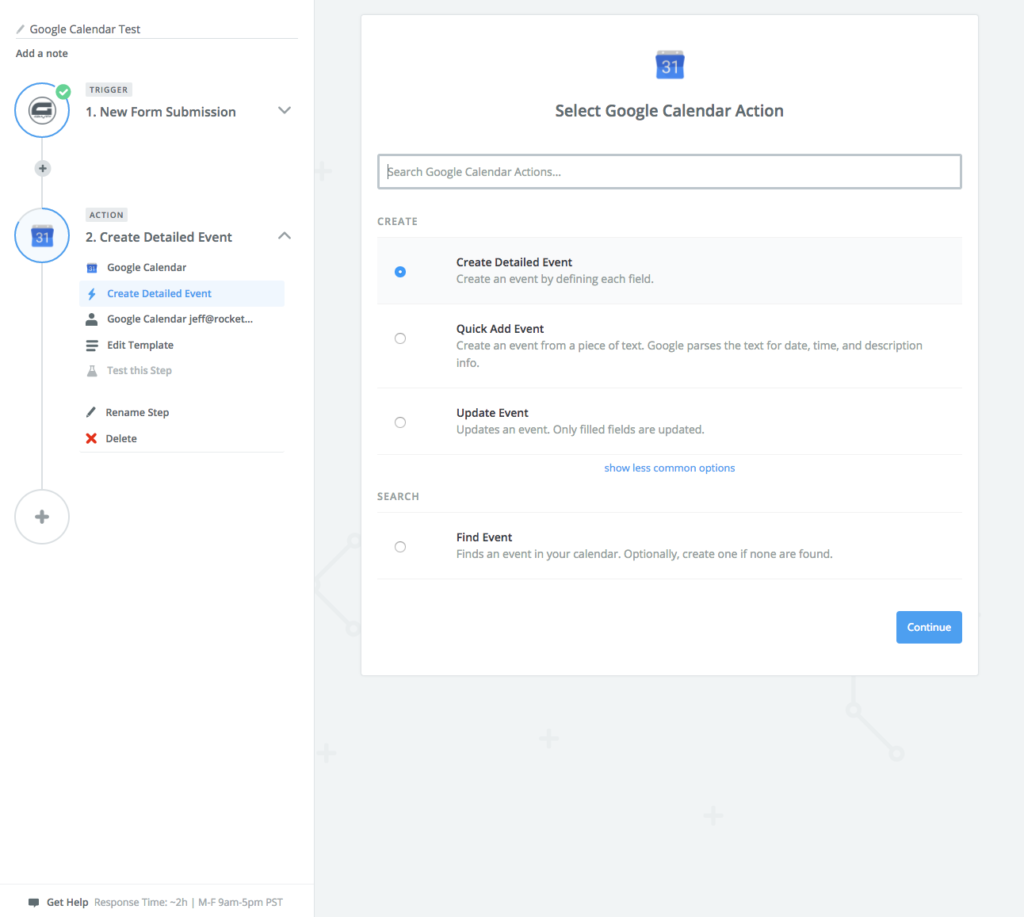
- From within the Action step of your Zap, you’ll be prompted to select an Action App. Search for Google Calendar and select it to use Google Calendar as your action.
- Next, you’ll need to configure the action that will be performed on Google Calendar. For the purposes of this example, select Create Detailed Event.
- Upon selecting Google Calendar as your action app, you’ll be prompted to connect a Google Calendar account. If you don’t already have one set up, add the account that you want to use and select it.
Configuring the Google Calendar Action Template
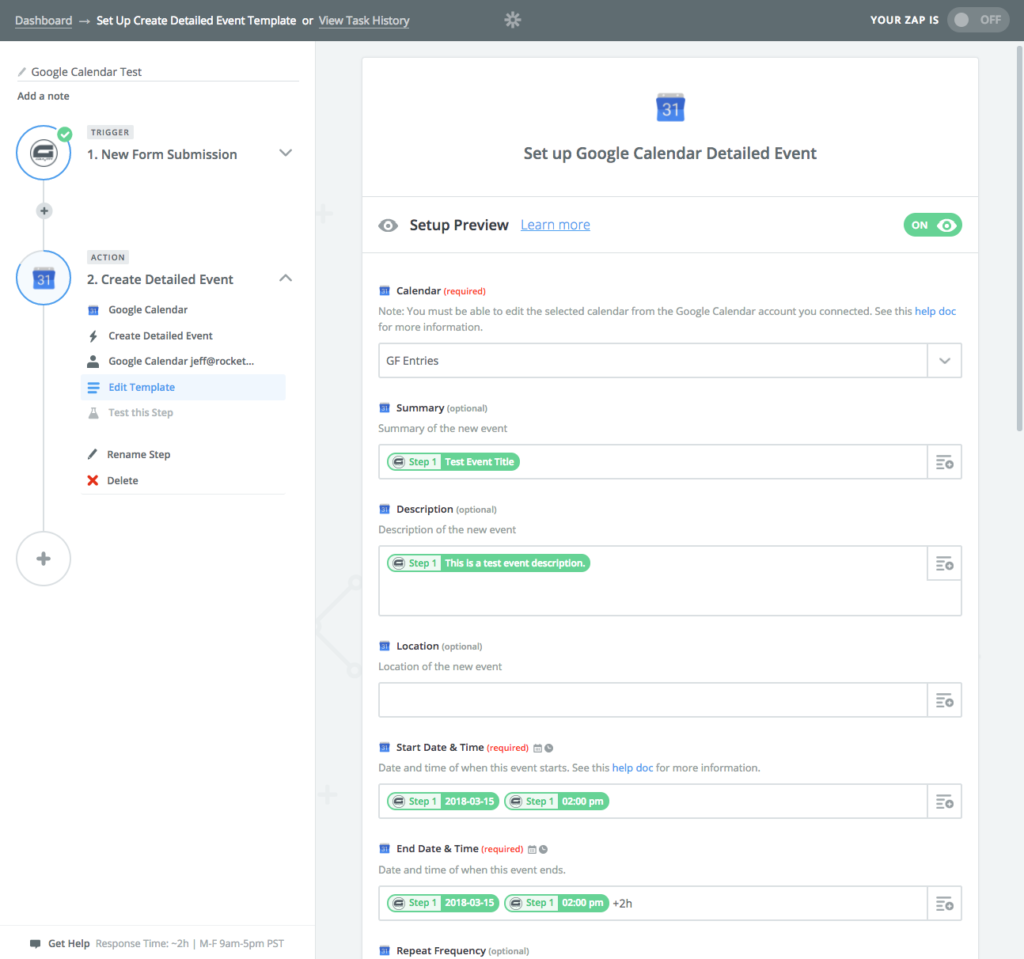
The action template tells Zapier what to do with the submitted form data. Simply put, you’re mapping your form fields to data inside Google Calendar. Here’s how you’ll set it up:
- First, select your calendar that you want to update. Unless you’ve created multiple calendars, you’ll typically just select the calendar labeled with your email address.
- So that you know what the calendar event actually is, you’ll want to fill in the Summary field of the template. Essentially, this will be the name of the event. For example, if you want users to fill out the summary when submitting the form, a Single Line Text field is a good option. Then, just map the field to this value in your Zap.
- Sometimes, you need an extended description to better describe what the calendar event is about. Use the Description setting in the template to map the description to your desired form field. A Multi-Line Text field is usually a good option for this.
- Next up is the Start Date & Time. Inside this template setting, select the Date Field that you’re collecting on your form, add a space to separate the items, then add the Time Field. If you only want to set the date, just select the Date Field without the time.
- The End Date & Time template field also needs to be completed to create the action. Inside this field, you can set the end date to be relative to the start date by adding +Xh to the end of the time, with a space between the date field and the additional string. For example, if you wanted to set the end date to 2 hours from the start date, add +2h to end of the template field.If you don’t need an end time, you’ll still need to add something since this is a required template field. Just configure it the same as your Start Date & Time field.
There are several other optional fields in the template that you can add if you have the need for them. Feel free to look through the template and set the fields to any other applicable items that you may have.
Finishing Up
After saving your Zap and enabling it, be sure to submit your form a few times to ensure that it’s working properly. If not, you might need to make a few adjustments based on your own particular needs.
If you weren’t already familiar with Zapier before this article, it’s a great time to start looking a little deeper into it. You can use Zapier for a multitude of things such as sending your form entries to Google Sheets, modifying rows in Google Sheets, and much more. With the Zapier add-on, the possibilities are endless!
Are you doing something awesome with Gravity Forms and Google Calendar? Drop us a comment below. We’d love to hear about it!