Are you looking for Zoho CRM integration with WordPress? Well look no further! Keeping track of your clients, customers, and potential leads on your website is easy with Gravity Forms and the Zoho CRM Add-On.
As a business owner, your clients and customers are the lifeblood of your business. Without them, you wouldn’t really have a business — more an expensive hobby. But every client and customer begins as a lead. And it’s your job to nurture those leads and follow up with them at the right time to convert them into paying clients and customers.
That’s where Customer Relationship Management software comes in. There are many CRM platforms out there to choose from. One such platform is Zoho CRM and in today’s post, we’ll explain why you need a CRM for your business, explore the Zoho CRM Add-On for Gravity Forms, and share how to integrate Zoho CRM with Gravity Forms.
Why You Need A CRM For Your Business
As mentioned earlier, a CRM platform or software helps you nurture leads and convert them into paying customers. But a good CRM will go further than that. A good CRM platform will also help you reach your customers not only via email but also by phone, social media, and live chat. This means it’s easier to follow up with your leads and reach them using their preferred contact method.
In addition to that, your CRM should also have automation features that make it easy to send the right message at the right time to the right lead. This increases your conversion rate and ultimately leads to more profit in your business.
Lastly, a good CRM will have detailed reports that empower you to make smarter business decisions. You should be able to see all your sales at a glance as well as see trends and predictions and track the key performance indicators that matter the most.
Luckily, Zoho CRM has all that and more, making it the perfect choice for Gravity Forms customers.
Zoho CRM Integration with WordPress: An Introduction
Zoho CRM is an all-in-one CRM platform geared for businesses of all sizes. It offers a plethora of features that allow you to stay on top of your leads and follow up with them throughout all stages of their customer journey.
You can easily convert your offline process into customer journey stages and create powerful workflows that are fully automated. This frees up your time so you can focus on other tasks in your business.
Key features include:
- Real-time notifications when customers interact with your business
- Omni-channel communication
- Create automated workflows
- Assign leads to your team members
- Integration with Google Ads
- And more
The best part about Zoho CRM is that you can get started for free. The free plan is perfect if you have 1-3 users and only need the basic CRM features. Paid plans start at $20/mo.
Zoho CRM Add-On Features
With the Gravity Forms Zoho CRM Add-On, you can easily send leads collected with Gravity Forms into your Zoho CRM account. Here are the key features of the Zoho CRM Add-On for Gravity Forms.
- Create Zoho CRM Contacts — whenever someone submits a form on your site, the add-on will create a contact in your Zoho CRM account.
- Update Zoho CRM Contacts — if a contact already exists, the add-on will update it within your Zoho CRM account.
- Create Zoho CRM Sales Leads — whenever a form is submitted, the add-on can create a new sales lead and automatically assign it to the new contact.
- Support for Conditional Logic — you can implement conditional logic on any fields on your form, ensuring that new leads or contacts are created only when certain conditions have been met.
And with that out of the way, let’s take a look at how you can integrate Zoho CRM with Gravity Forms.
Getting Started With Zoho CRM Add-On And Gravity Forms
For this tutorial, you’ll need Gravity Forms installed on your website. Zoho CRM is available with a Pro or an Elite license, so make sure that you have the correct license before proceeding.
Watch this video or read on to get started…
1. Install Zoho CRM Add-On

The first thing you need to do is install the Zoho CRM Add-On on your site. You can do this by logging into your WordPress dashboard and going to Forms > Add-Ons. Scroll down the page until you locate the Zoho CRM Add-On and click Install > Activate. The add-on will then be installed on your site.
For more in-depth information on how to get started with the Zoho CRM Add-On, check out the Gravity Forms Documentation.
2. Sync Gravity Forms with Zoho CRM
The next step is to configure the add-on so it syncs with your Zoho account. To do this, go to Forms > Settings. Once the Settings page loads, click on the Zoho CRM tab towards the bottom of the list.
Click on the blue button prompting you to connect your Zoho CRM account. Enter your account email and password and then grant Gravity Forms access to your Zoho account.
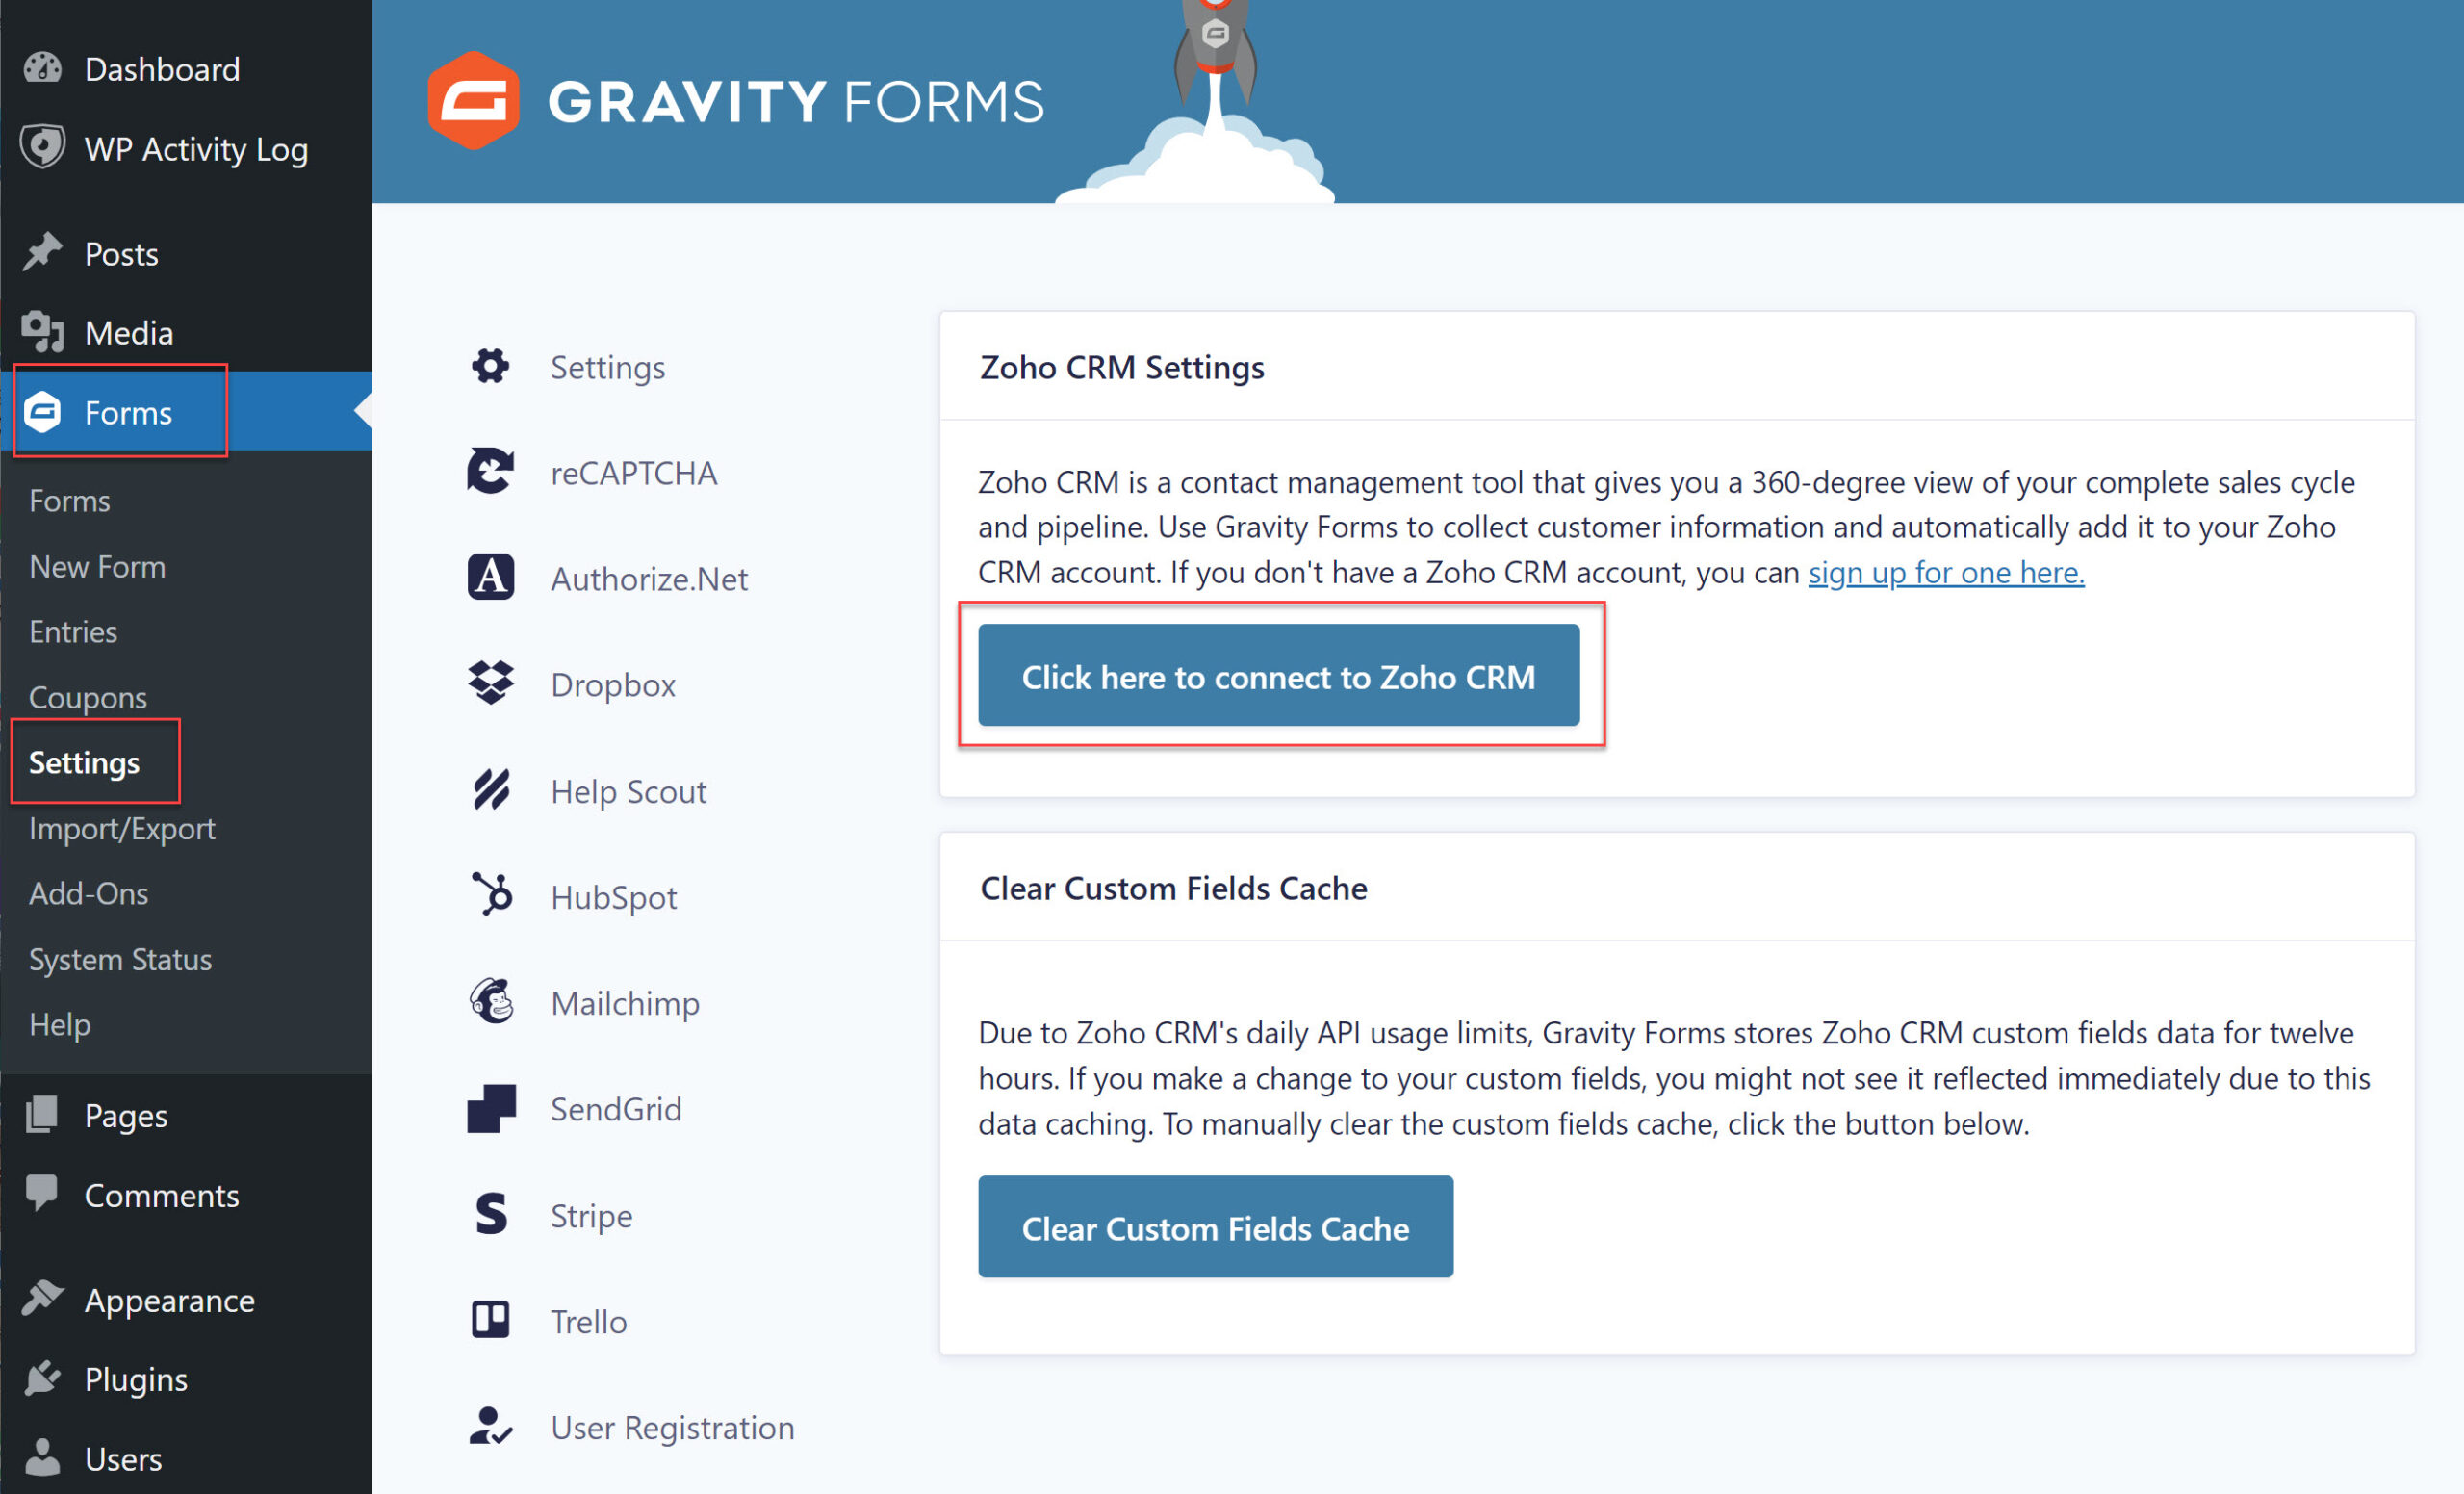
You’ll then need to choose the authentication method and after that, you’ll be redirected back to your WordPress dashboard. You should see a notification that the connection was successful.
3. Create Your Lead Generation Form
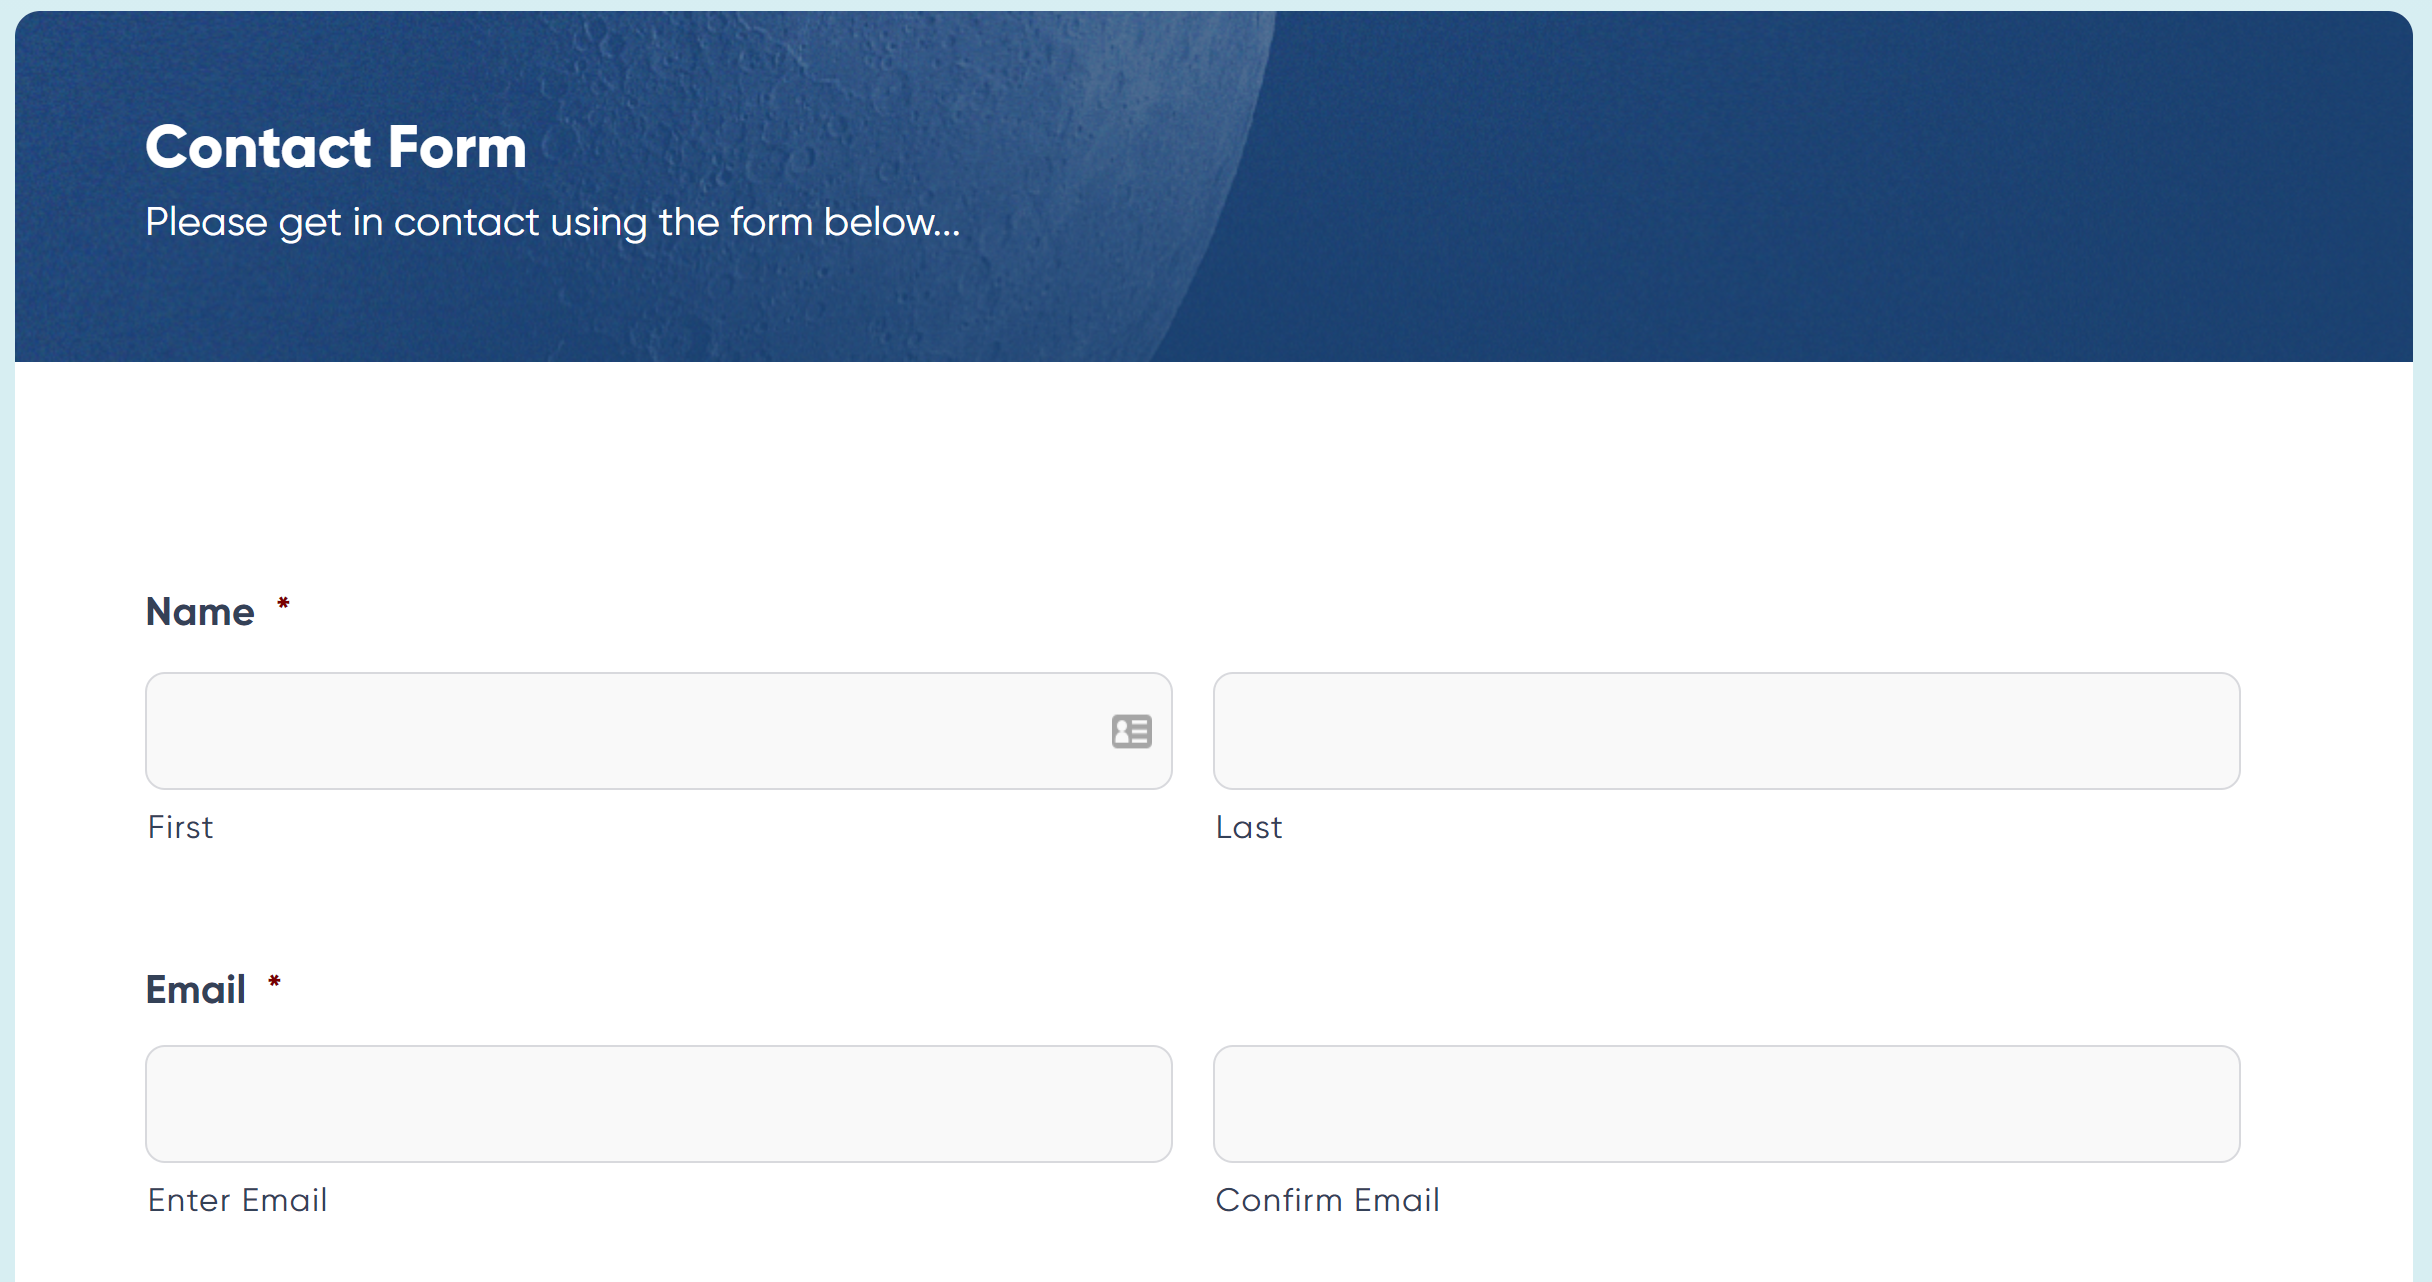
Now that the add-on is active, it’s time to create your lead generation form. You can do this in two ways. The first way is to create your form from scratch by going to Forms > New Form. Name your form and then use the drag and drop builder to add the form fields you’ll need. A few recommendations include:
- First and last name
- Email address
- Phone number
- Preferred method of contact
- Message field
You can also add more fields to customize the form for the needs of your business.
If you don’t want to create a form from scratch, you can start with a premade form template from our form template library. All you have to do is download the form in .JSON format and save it to your computer.
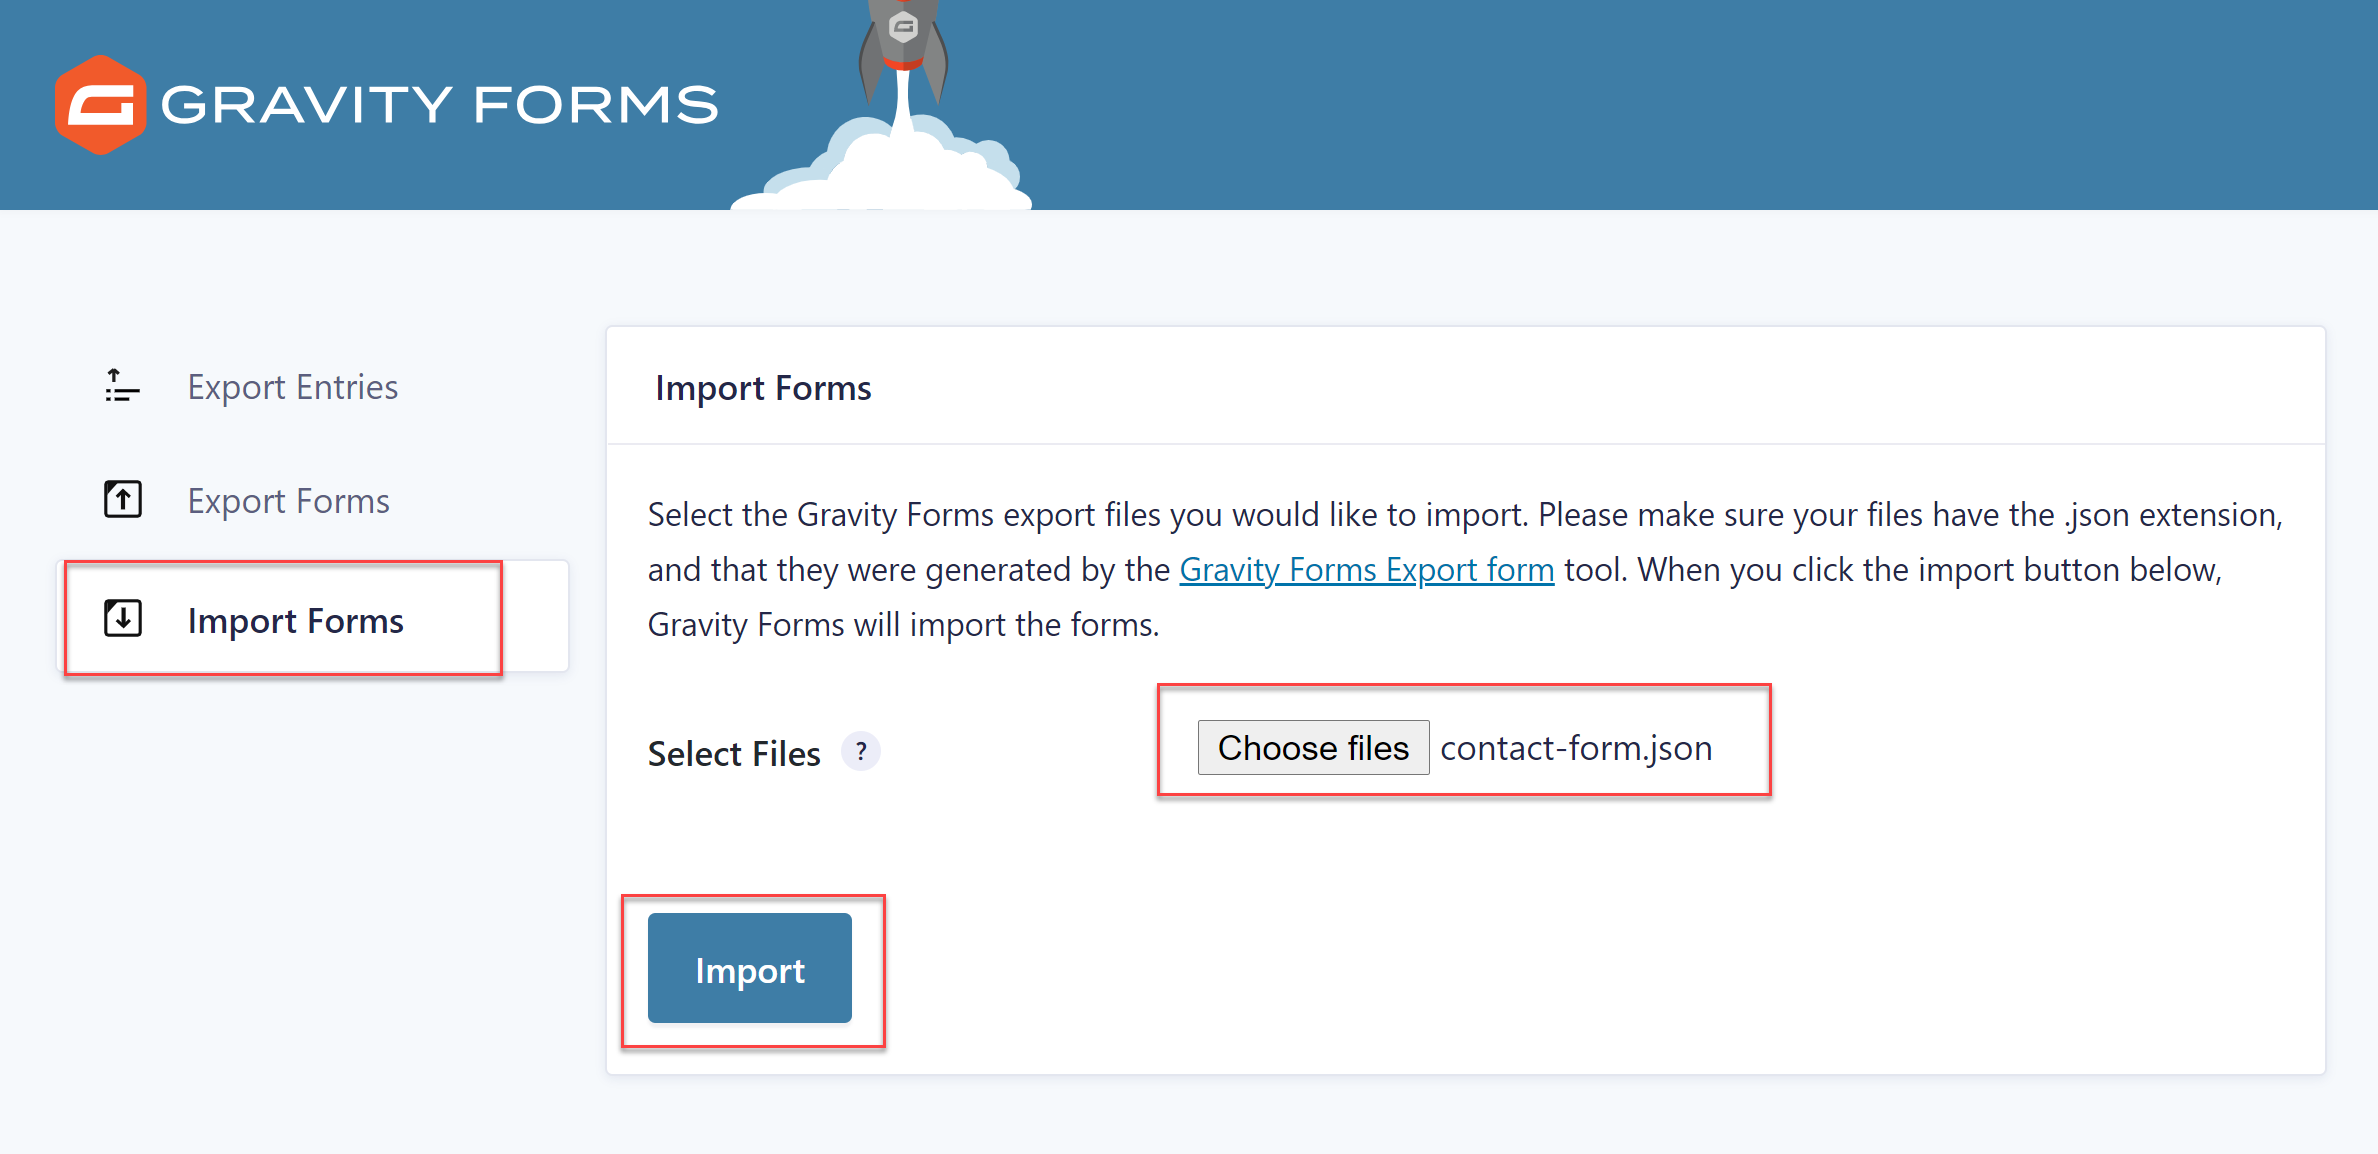
After that, go back to your WordPress dashboard and click on Forms > Import/Export. Select the Import tab and select the form template you’ve downloaded. Press Import and wait for the form to finish importing.
You can then customize the form with your choice of fields to ensure it meets your business needs. For more information on getting started with your first form, check out this article – How to Create a Form in WordPress.
4. Create a Zoho Form Feed
Next, you need to create a form feed for the add-on so the leads collected via Gravity Forms get sent to your Zoho CRM account.
Within the form editor, click on Settings > Zoho CRM. You’ll see a message that you don’t have any feeds and a prompt to create one. Give the feed a name and then choose the action from the dropdown menu. As you can see, you can choose between creating a contact and creating a lead.
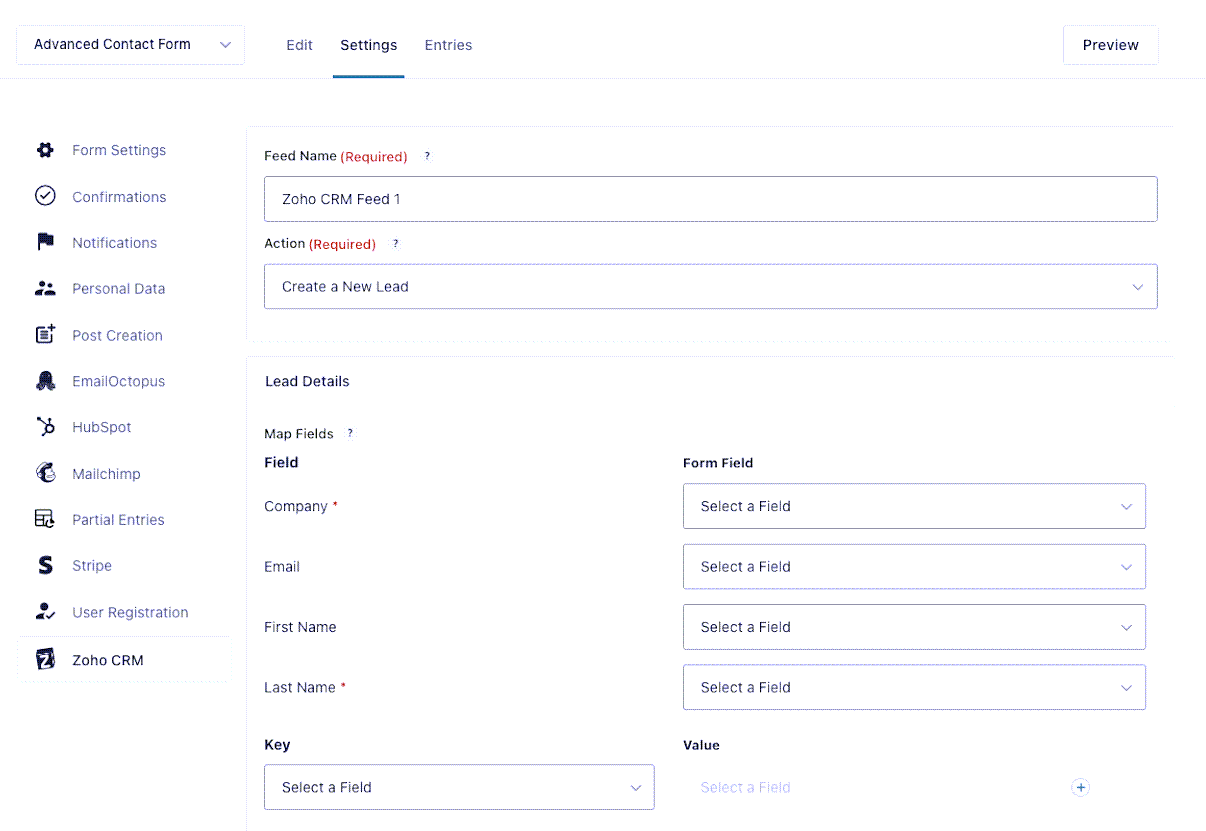
Once you’ve selected the action, you can configure the fields that will get pulled into your Zoho CRM account.
You can assign a Lead Owner, Lead Score, Lead Source, and more. This is useful so you can have as much information about your lead as possible so you can tailor messages and campaigns to their interests. In addition to that, you can specify whether the lead is in approval or workflow mode and create tasks for every new lead.
Lastly, you can configure conditional logic on the form so that leads are exported only if they match a certain condition. For example, if you have a general contact form that allows them to select why they’re contacting you, you can set up a condition that exports leads only if they indicate an interest in your services or products.
When you’re done configuring the feed, click on Save Settings to ensure your changes are saved. Then embed the form in a page or post of your website, and publish!
Don’t Have Gravity Forms Yet?
If you don’t have Gravity Forms yet, don’t worry. Sign up for a free personalized demo of Gravity Forms for a spin and test out all of the features of our plugin.
Play around with the drag and drop builder and build a form from scratch or explore the add-ons to see how you can get even more functionality out of your forms.
Oh, and don’t forget to explore premade form templates to see what kind of forms you can create with Gravity Forms.
Already in love? Purchase our premium WordPress form plugin today!
Newsletter
If you want to keep up-to-date with what’s happening on the blog sign up for the Gravity Forms newsletter!
"*" indicates required fields