

Managing business workflows, reducing ‘busy-work’, and ensuring easy team collaboration is essential as your company grows. Using a solution like Airtable allows you to create a single source of truth, connecting your data, workflows, and teams, and supporting your business every step of the way.
In this article, we discuss how to connect WordPress to Airtable using Gravity Forms and Zapier, enabling you to send any data collected via your website forms to your Airtable account. We look at the benefits of connecting WordPress and Airtable, the features of the Gravity Forms Zapier Add-On, which allows for the integration, and how to get started!
Let’s jump in!
Why Send Gravity Forms Data From WordPress to Airtable

Gravity Forms is a powerful form builder for WordPress, allowing you to collect a wide assortment of data via forms on your website. And Airtable is a powerful automation tool for businesses, enabling you to easily store, organize, and manage your data and processes. Together, Gravity Forms and Airtable are an effective weapon in your business arsenal!
There are several reasons why you’d want to connect WordPress to Airtable:
- Better organization — it can be hard to view and organize form submissions in the WordPress Admin. With Airtable you can organize your data however you want and view it in a variety of formats such as kanban boards or galleries.
- Turn form data into actionable tasks — once your form submission data is in Airtable, you can assign it to others on your team as well as assign due dates to make sure nothing falls through the cracks. You can group form entries by status, category, submission date, and more. And you can also link the table entries with other tables in your Airtable base.
- Have a backup for your form submissions — unfortunately, sometimes there is no avoiding a disaster no matter how careful you are. By sending your form submission data to Airtable, you can have a backup of important information even if something happens to your website.
Gravity Forms Zapier Add-On

To connect WordPress to Airtable and send form data to a Base, you’ll need to install the Gravity Forms Zapier Add-On. This add-on allows you to connect your forms with Zapier, which supports thousands of different apps and services and will enable you to sync your form entries with them.
Not only can you send your form data to any of those applications but you can also automate repetitive tasks and create workflows that free up your time so you can focus on other important tasks.
The Zapier Add-On will work with your existing forms as well as any new form you create with Gravity Forms. Simply install the add-on, connect your website with Zapier, and create the desired zap to send your form data to any app you want – in this case, Airtable!
In addition to that, there are dozens of premade zaps with Gravity Forms that you can use as a starting point or save time.
The Zapier Add-On is available with a Pro or Elite license so be sure to upgrade your plan if necessary.
How to Connect WordPress to Airtable Using the Gravity Forms Zapier Add-On
We will now run through how to connect your WordPress website to Airtable using Gravity Forms and Zapier. This tutorial presumes that you already have Gravity Forms installed, and an existing active form that you would like to connect with Airtable running on your WordPress website.
If you are yet to purchase Gravity Forms, head on over to the pricing page to make a purchase.
1. Install And Configure The Zapier Add-On
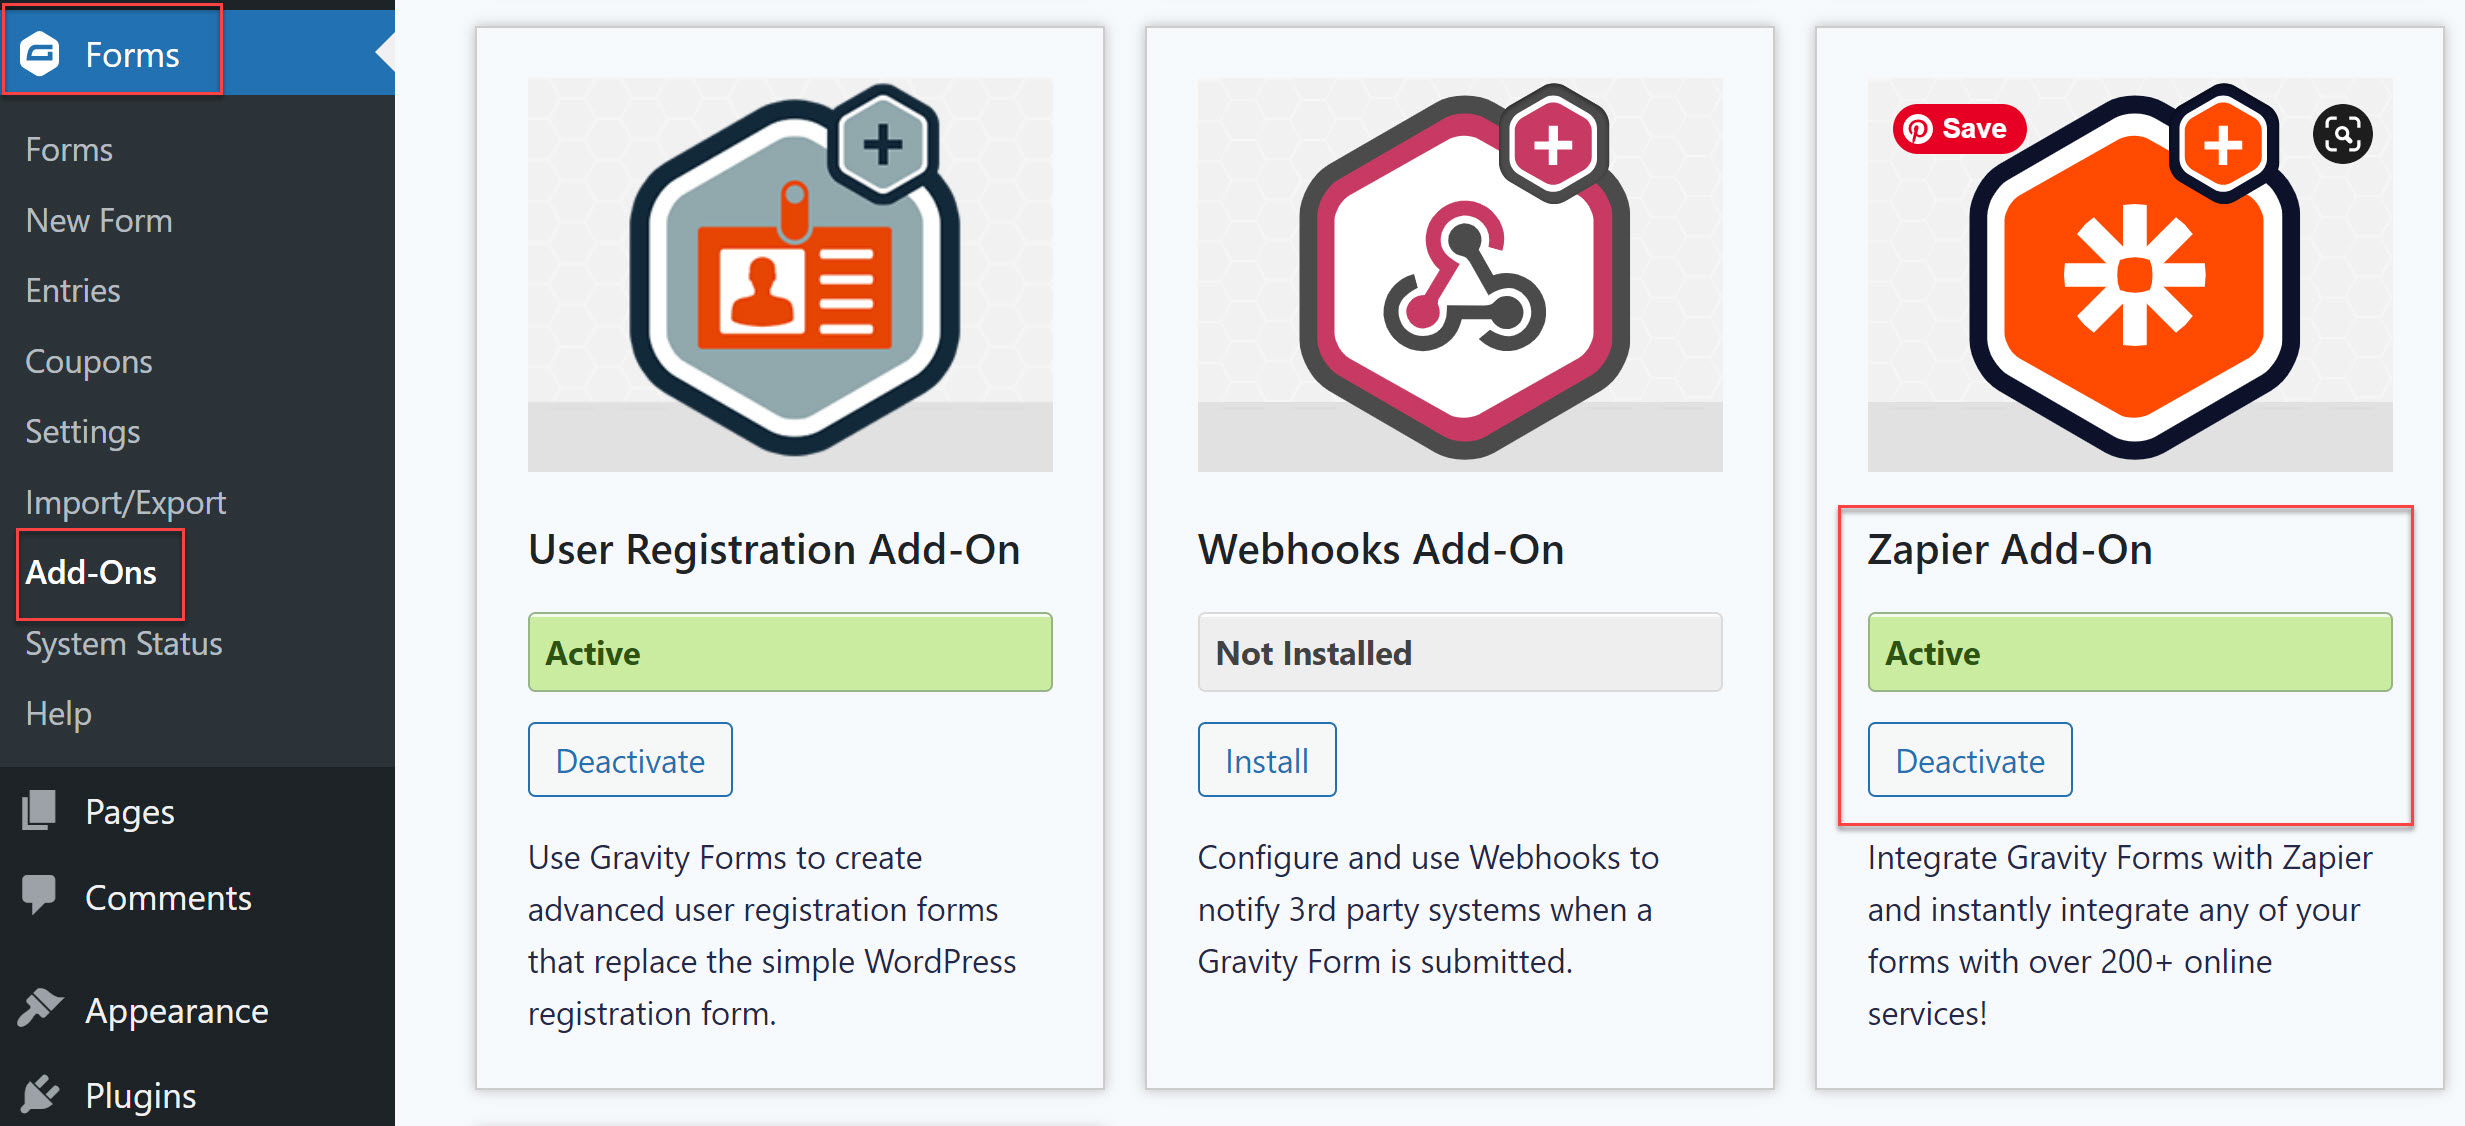
The first thing you need to do is to install the Zapier Add-On. Login to your WordPress dashboard and go to Forms > Add-Ons. Scroll down until you see the Zapier Add-On and click on Activate.
Then, go to Forms > Settings > Zapier to configure the add-on so it can send data to Zapier. Follow the instructions to enable REST API and generate your consumer key and consumer secret. Be sure to copy them somewhere as you’ll need to enter them during the Zap creation process.
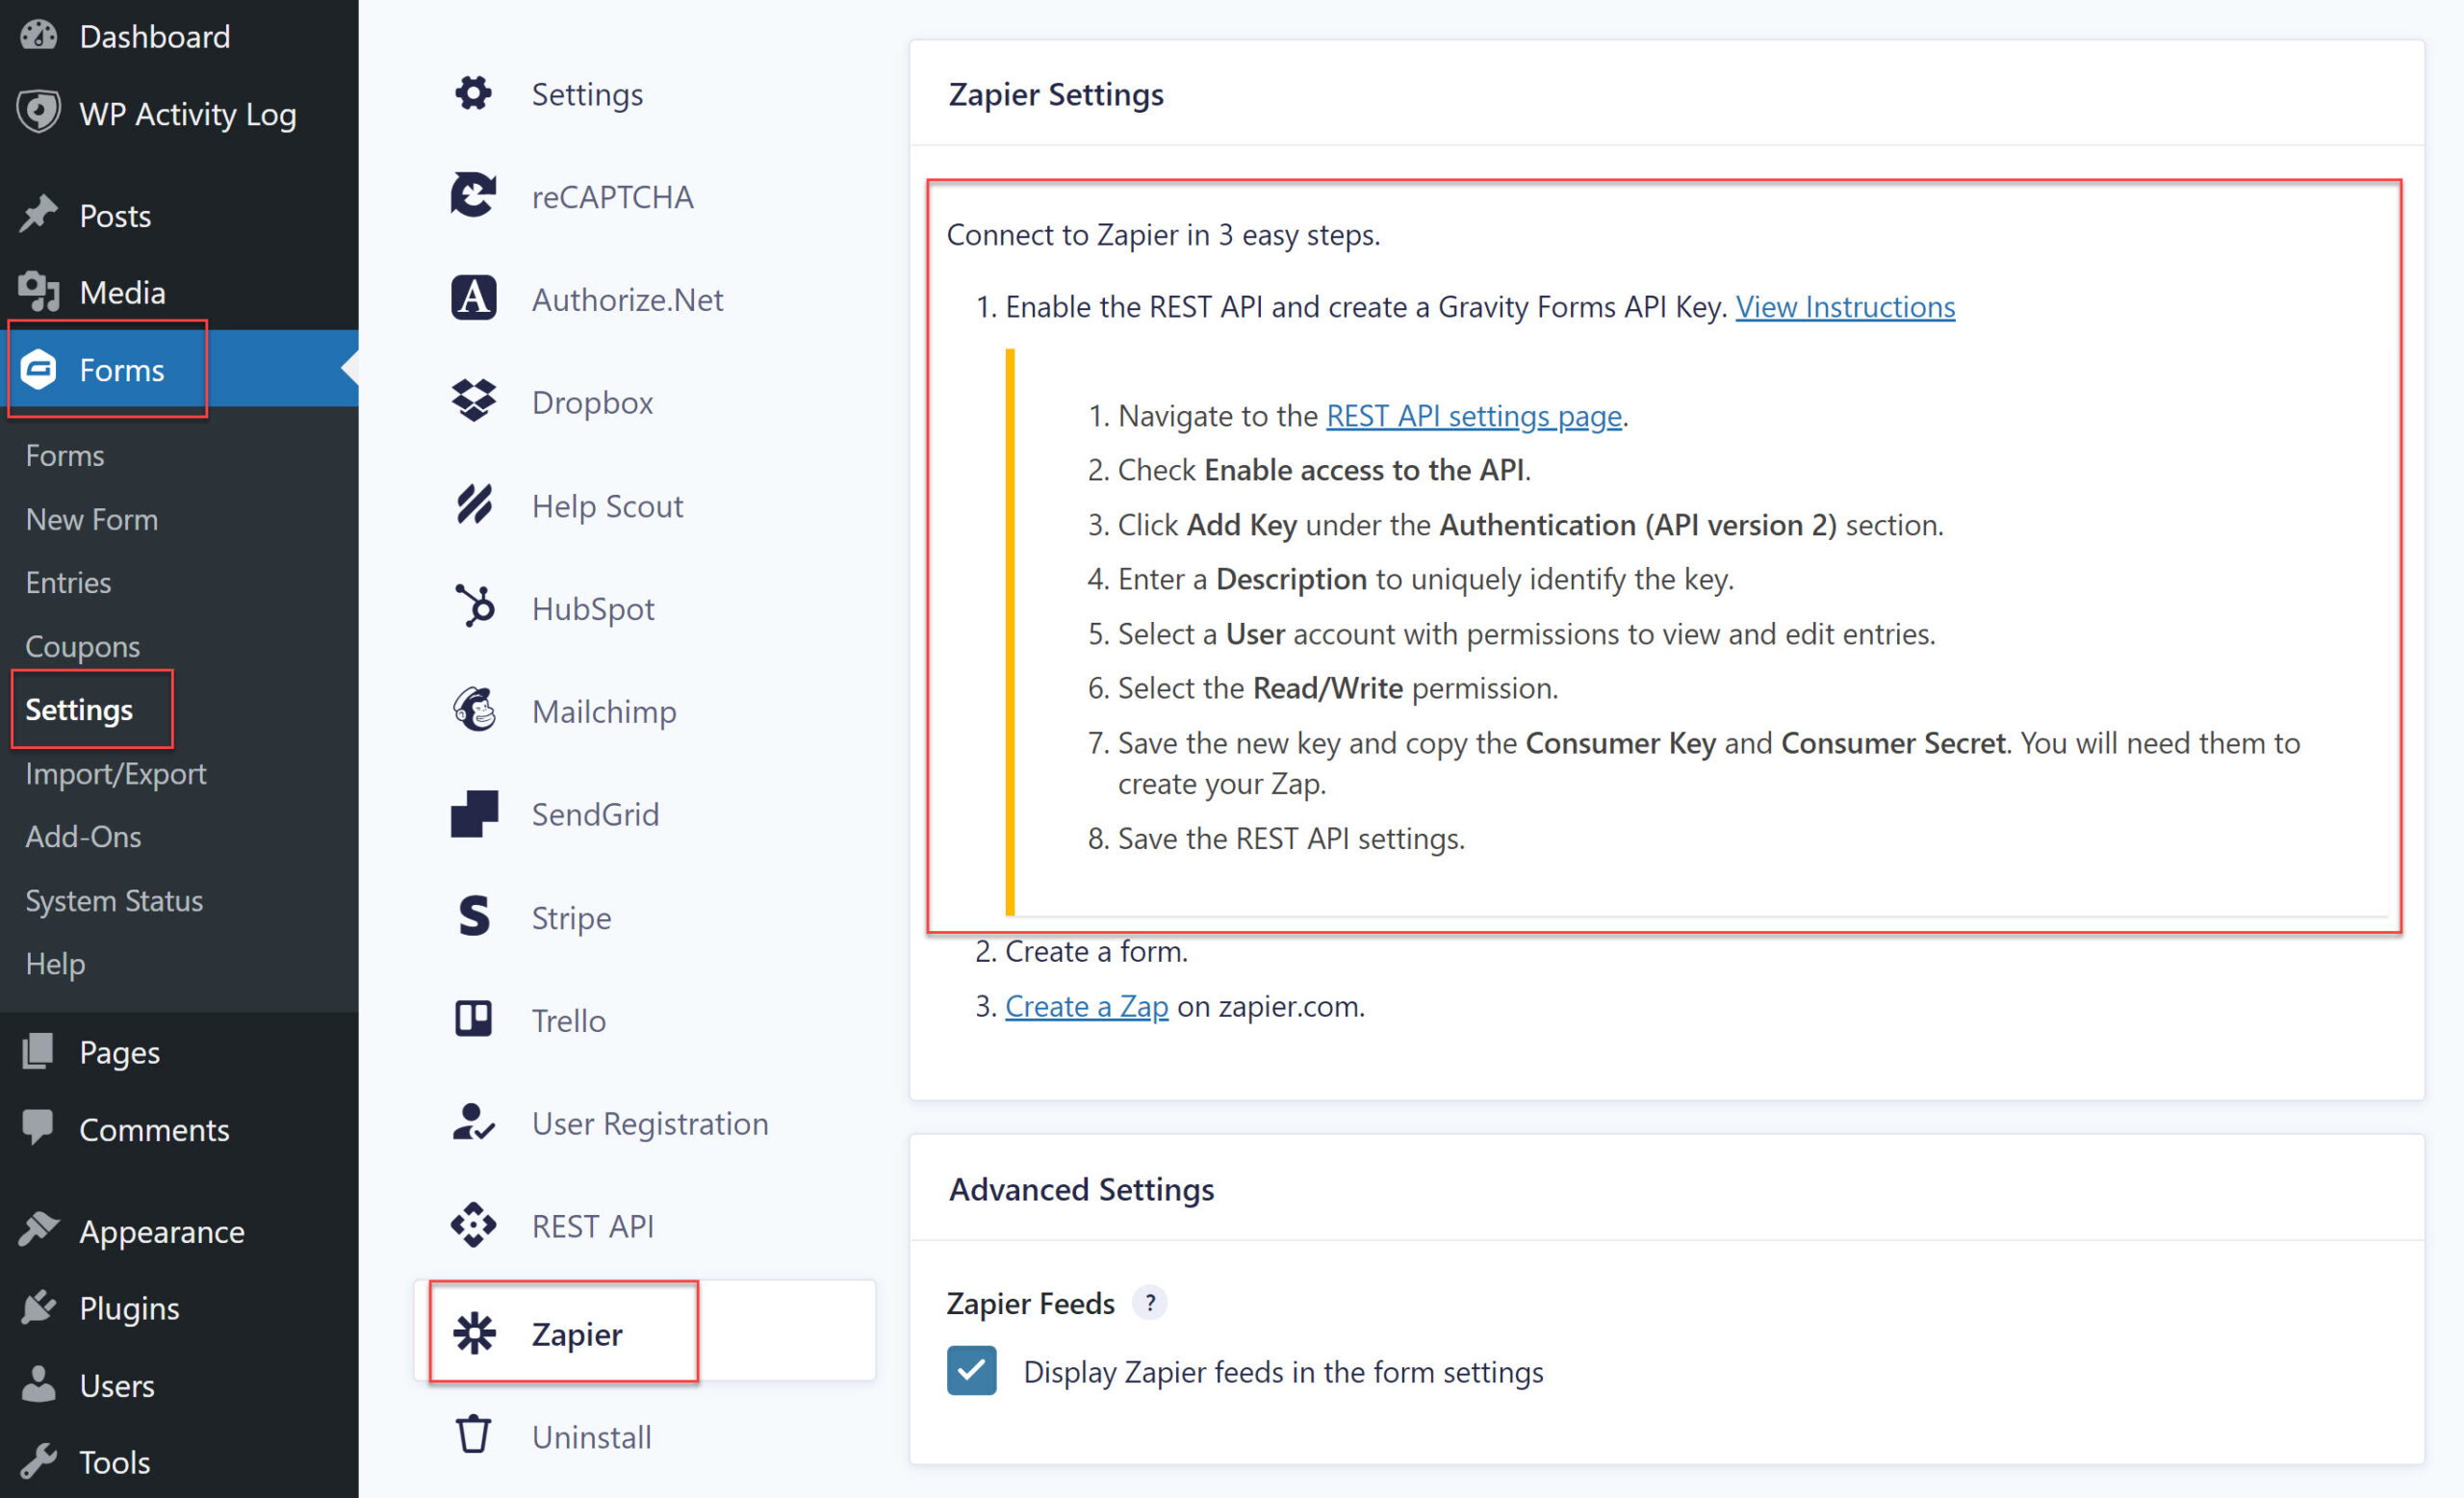
You can learn more about setting up the Zapier Add-On in the Gravity Forms documentation.
2. Create a Zap
Now that you’ve installed the Zapier Add-On, it’s time to create the Zap. If you don’t have a Zapier account, you should create one now – you can sign up for their free plan which allows you to create up to 5 zaps.
If you have a Zapier account, log in and click on Create Zap. This is a good choice if you’re familiar with Zapier and know how zap creation works. If you’re new to Zapier, use one of the existing zap templates to save time.
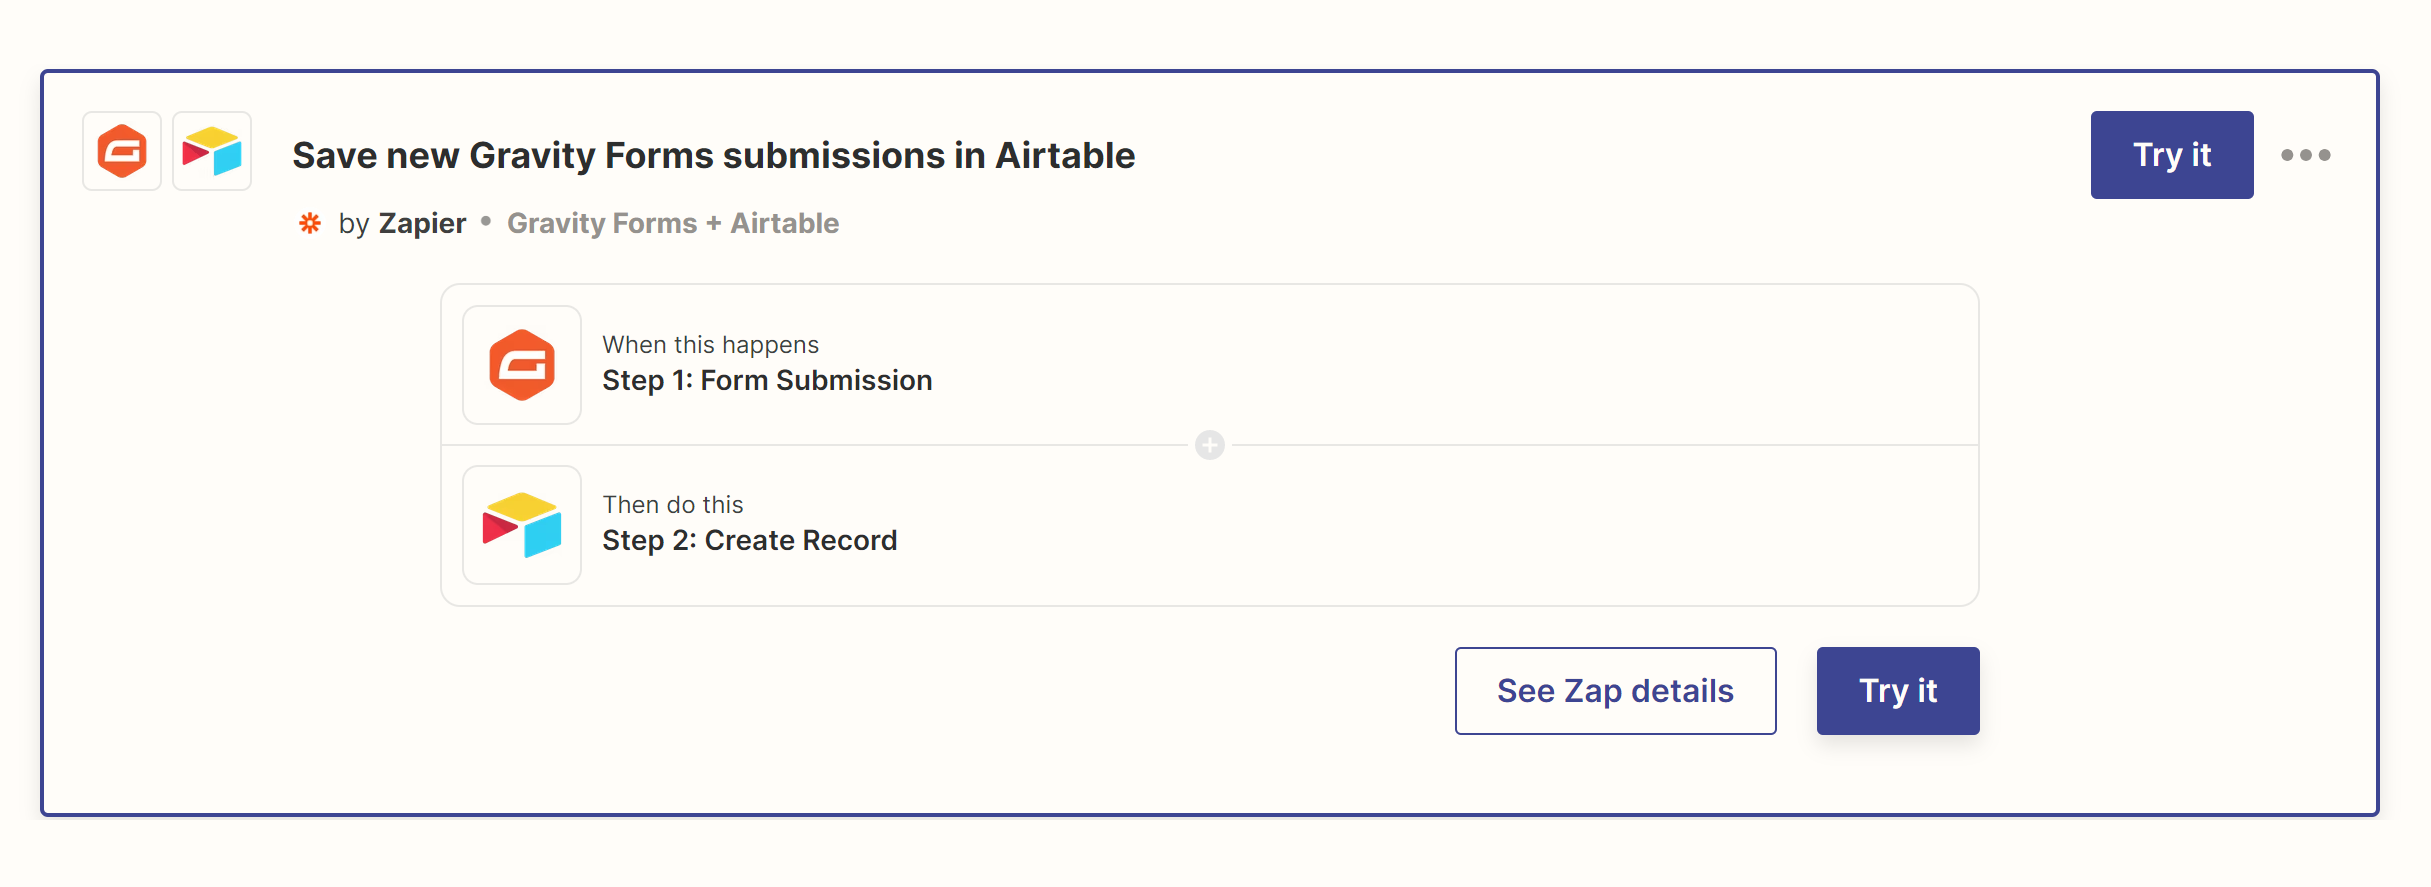
Simply go to the Gravity Forms integrations page and scroll down until you find Airtable integration. Click on the Try It button and you’ll then see the Zap editor where you can edit the zap.
3. Connect Zapier and Gravity Forms
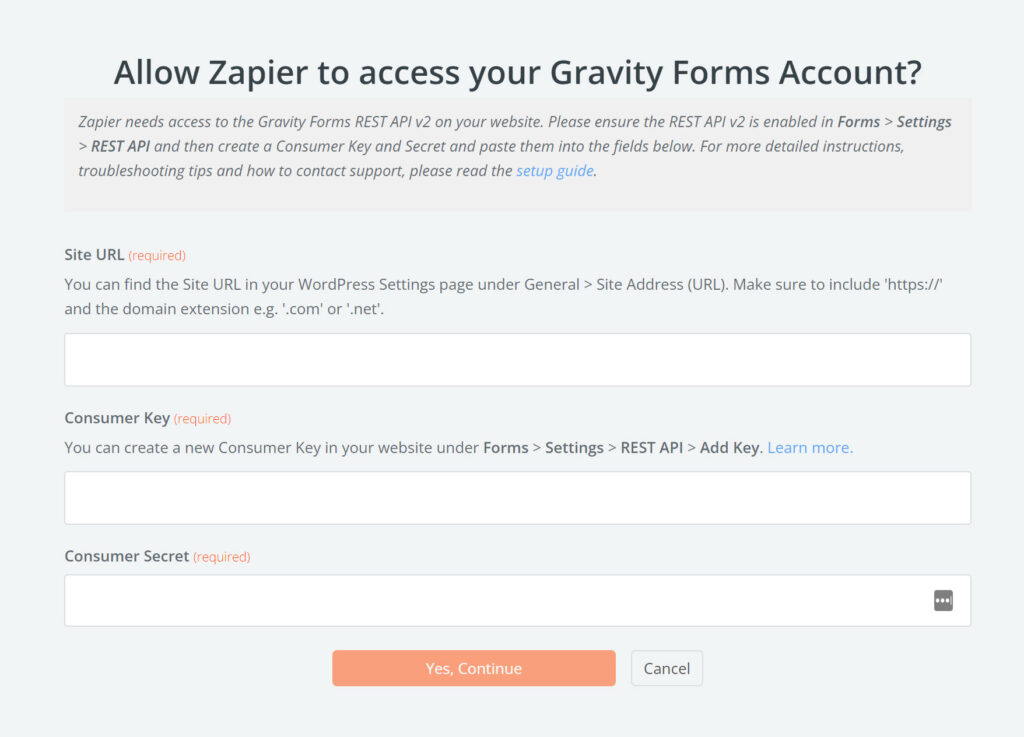
The first thing you’ll need to do here is to connect your Gravity Forms account. In other words, you’ll need to add your Consumer Key and Consumer Secret that you created in Step 1 of this tutorial. Paste those in as well as the URL for your website and then click Connect.
Once your Gravity Forms account is connected, click the Continue button to set up the trigger step. Start by choosing which form you’ll use to sync with Airtable.

You’ll then need to give it a name to that Gravity Forms knows where to send submissions. Press the Continue button and Zapier will test this part of the zap. This is done to ensure that the trigger is configured correctly and that your zap will work without running into any problems.
Once the test is complete, you’ll see a success message. Press the Continue button again to continue setting up the action step of the Zap.
4. Connect Zapier and Airtable
In this part, you’ll need to set up your Airtable account. First, connect your Airtable account with Zapier if you haven’t already. You’ll need to enter your API key to authorize Zapier to access your account and Airtable bases.
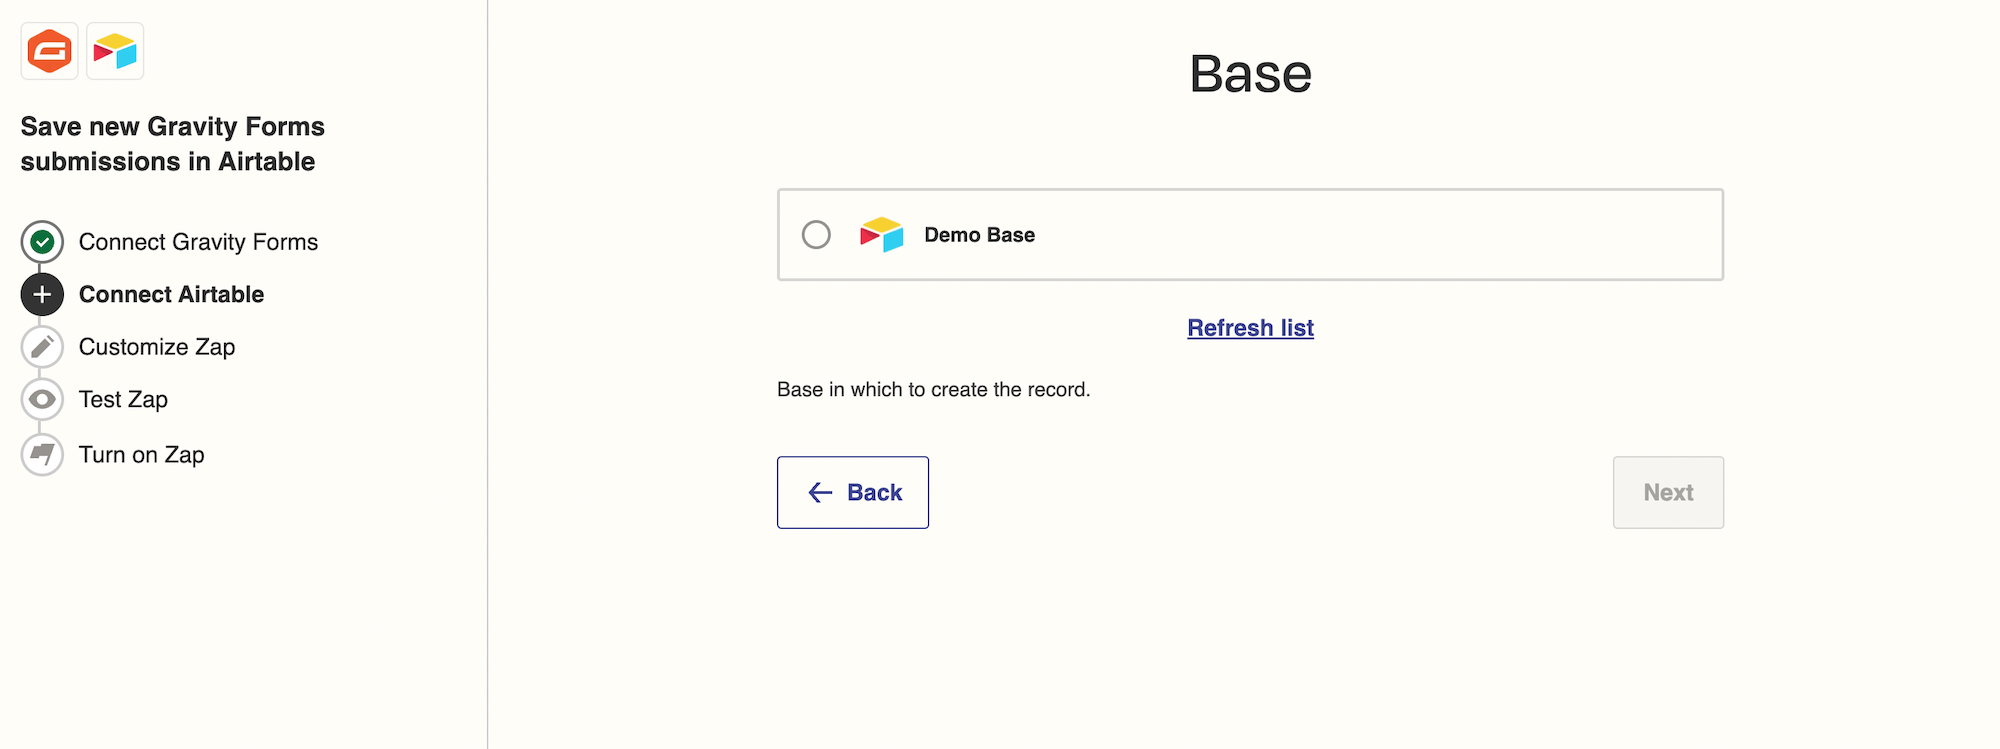
Once you’ve connected your Airtable account, it’s time to select the base and the table where your form submissions will be stored.
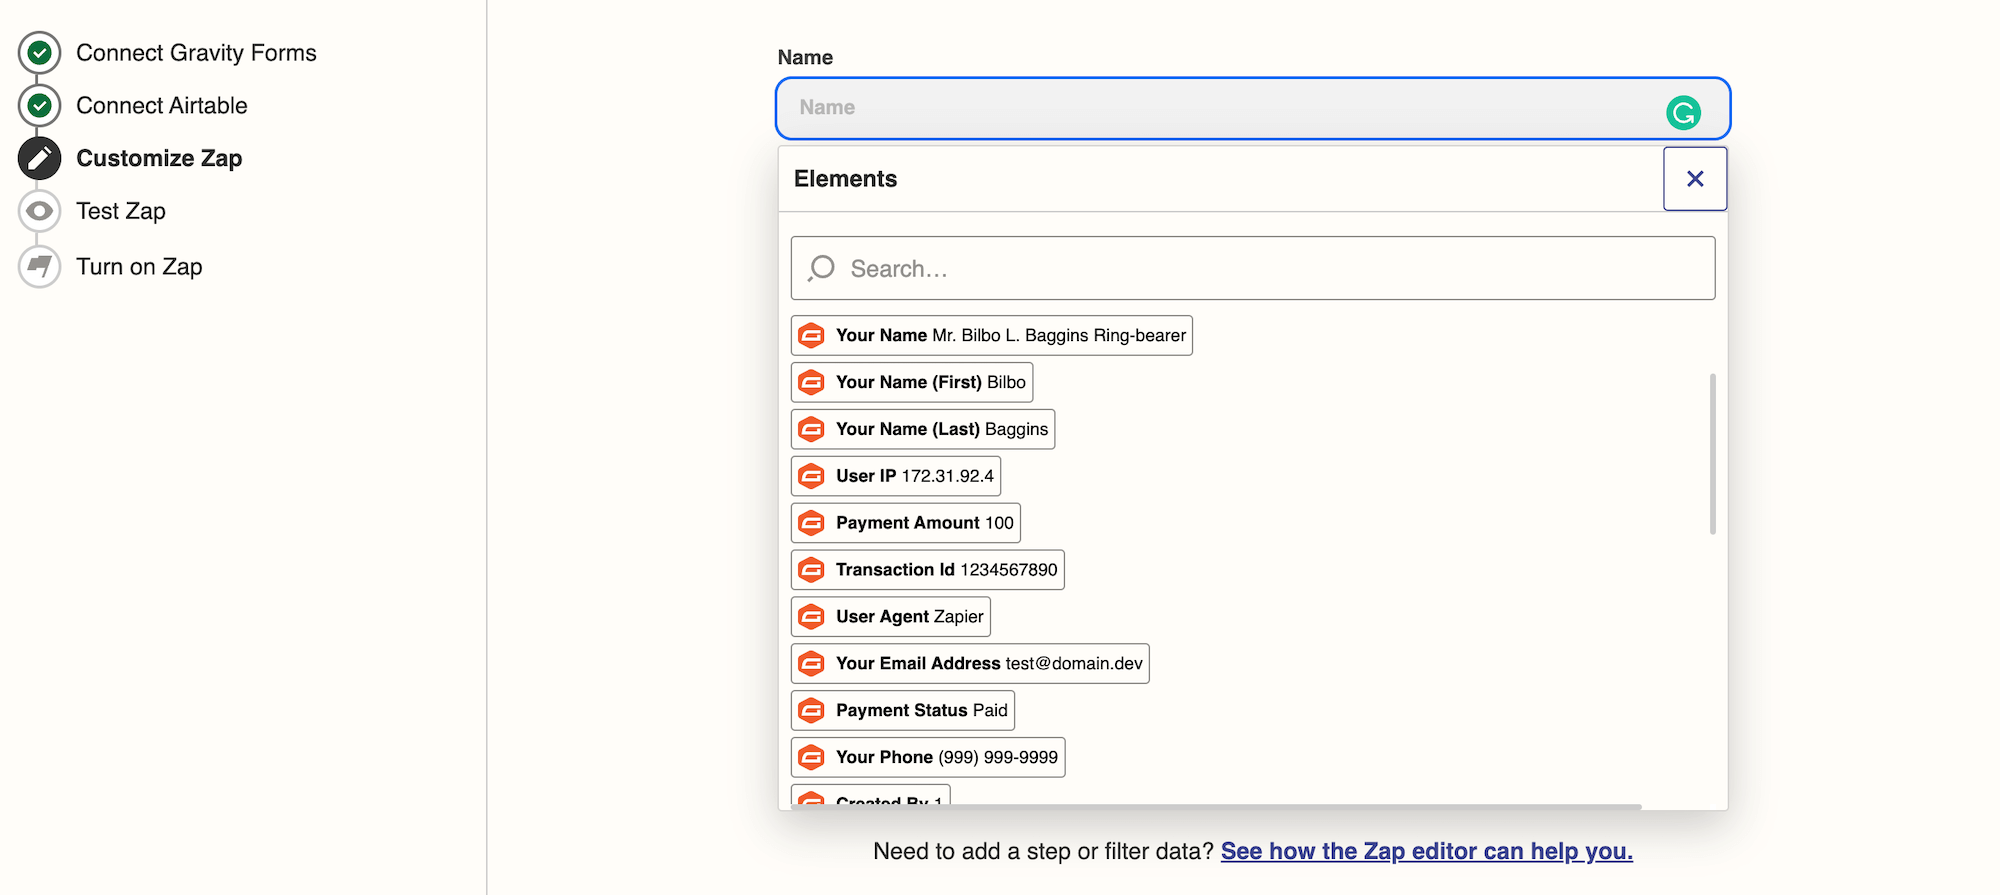
Next, be sure to specify which form fields you want to sync with Airtable and then click Next. In this part of the zap setup, you’ll specify the information that will be sent to your chosen Airtable base.
Once you’ve configured this step, click Continue. Similar to how it tested the trigger, Zapier will test that the action step of the zap was set up correctly.
5. Turn on the Zap
Once you get a success message, simply click Turn On Zap and you’re ready to start sending your form submissions to Airtable. The zap will trigger whenever someone submits this form.
If you have any additional forms that you’d like to sync with Airtable, simply repeat the steps above to create any additional zaps you might need.
Ready to Connect WordPress to Airtable?
The Gravity Forms Zapier Add-On makes it easy to send your form data to Airtable where you can organize it, assign submissions to your team members, add due dates to tasks, and more. If you want to learn more about using Zapier Add-On or Gravity Forms adn Zapier in general, the following resources will come in handy:
- Zapier Add-On
- Zapier Add-On Documentation
- This Month’s Featured Add-On… Zapier
- Gravity Forms Zapier Integrations
- 10 Ways to Supercharge Your Forms with Zapier
Don’t Have Gravity Forms Yet?
Still not using Gravity Forms? Give our plugin a spin with a free personalized demo to see why Gravity Forms is so popular with website owners worldwide. Have a go at building a form from scratch, use our drag and drop form builder, or install any of our add-ons to see how you can easily extend your forms.
Ready to get started? Purchase our premium WordPress form plugin today!
Newsletter
If you want to keep up-to-date with what’s happening on the blog sign up for the Gravity Forms newsletter!
"*" indicates required fields


