

Do you want to make sure your form’s notification emails avoid the dreaded spam folder and make it to recipients’ inboxes? Then this month’s featured add-on – SendGrid – might be just the ticket.
When you create a form with Gravity Forms, you’ll usually add some email notifications to go along with it. These could be notifications/confirmations that go to the form submitter, to yourself, or to other important users on your site.
By default, Gravity Forms will try to send these notification emails (called “transactional emails”) using the built-in WordPress mailing solution. However, the default WordPress mailing method can often be unreliable as some hosts will outright block it.
With the Gravity Forms SendGrid Add-On, you can use the SendGrid email service to send your emails instead, which offers a much more reliable solution for transactional emails.
In this post, we’re going to take a deeper look at the Gravity Forms SendGrid Add-On:
- Why you might want to use the SendGrid Add-On, along with some of its key features
- A step-by-step tutorial on how to set up and use the Gravity Forms SendGrid Add-On
Why Use SendGrid With Gravity Forms
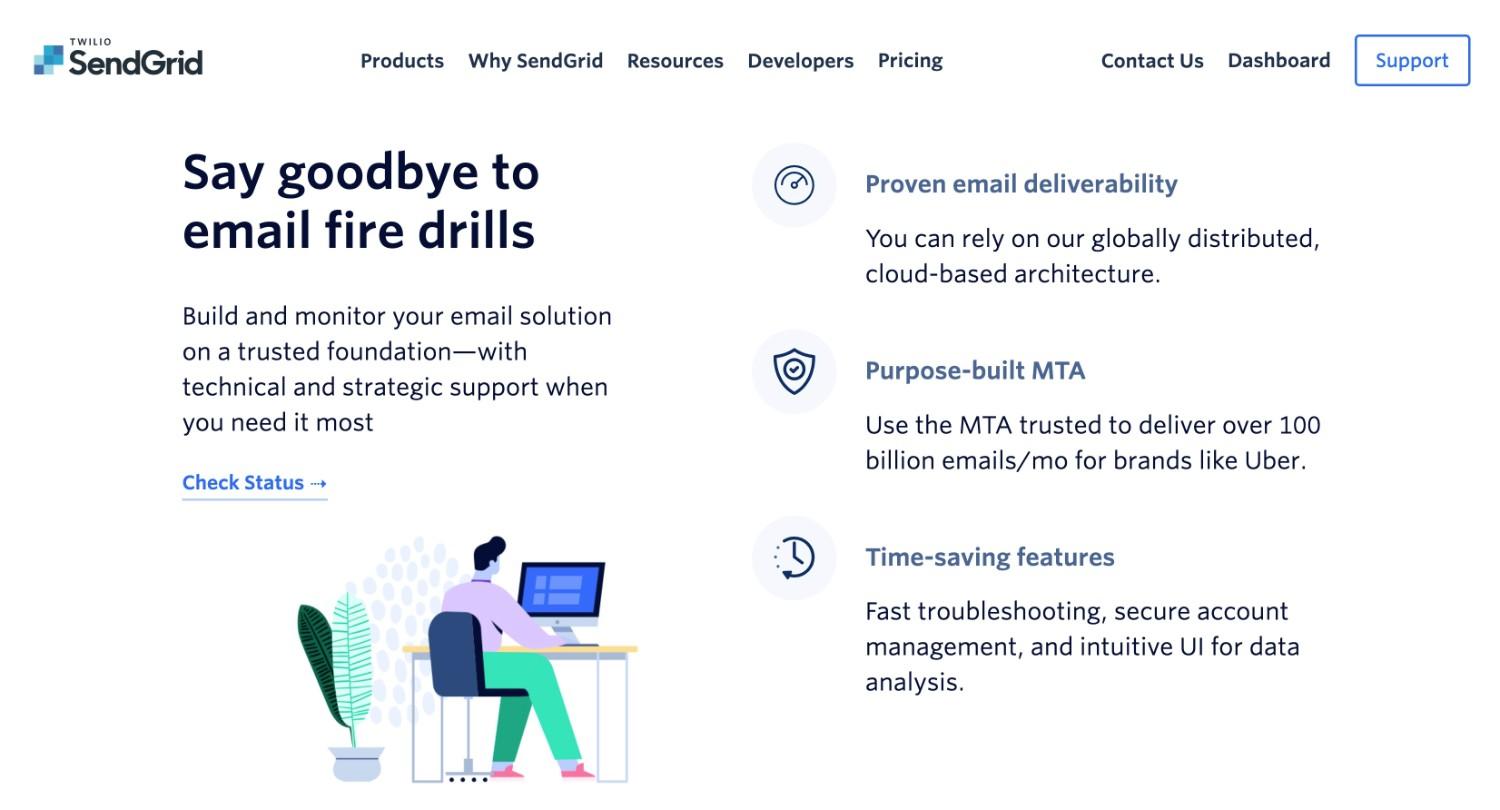
As we mentioned in the introduction, the main reason to use SendGrid with Gravity Forms is to improve the reliability of the form notification emails that your site sends.
SendGrid is primarily a transactional email service, which means it’s focused specifically on making sure the transactional emails that your site sends make it to recipients’ inboxes without bouncing or being flagged as spam.
With the Gravity Forms SendGrid Add-On, you get a few key features to integrate SendGrid with Gravity Forms:
- You can connect to SendGrid using its API, which offers the most reliable way of sending emails with SendGrid.
- You can enable SendGrid as your email sending service on a per-notification level. That is, you can use SendGrid for some email notifications but not others.
In terms of pricing, SendGrid offers a forever free plan that lets you send up to 100 emails per day, which should be enough for most WordPress sites.
If you want to keep your email sending numbers down, the Gravity Forms SendGrid Add-On’s ability to control the email sending service at the notification level can be really handy:
- You can use SendGrid to send emails to your users, where deliverability is essential.
- You can use the default WordPress email function to send emails to yourself. Because you’re sending these emails to yourself, you can manually set up a filter in your email client to avoid issues with spam.
How to Use the Gravity Forms SendGrid Add-On to Send Transactional Emails
Now that you know more about the SendGrid Add-On and how it can help your site, let’s go over how to set it up.
Here’s the basic high-level process – keep reading for full instructions on every step:
- Install the Gravity Forms SendGrid Add-On.
- Register for a free SendGrid account (if you haven’t done so already).
- Set up domain authentication in SendGrid (this is optional, but it will further improve email deliverability).
- Create a SendGrid API key for Gravity Forms.
- Add the SendGrid API key to the settings area of the Gravity Forms SendGrid Add-On.
- Enable SendGrid as the email service for one or more notifications.
1. Install the SendGrid Add-On
To get started, you’ll want to install the Gravity Forms SendGrid Add-On on your WordPress site.
The SendGrid Add-On is available on all Gravity Forms licenses – so, as long as you have an active Gravity Forms license, you’ll have access to the SendGrid Add-On.
If you don’t have an active license, you can purchase your Gravity Forms license here.
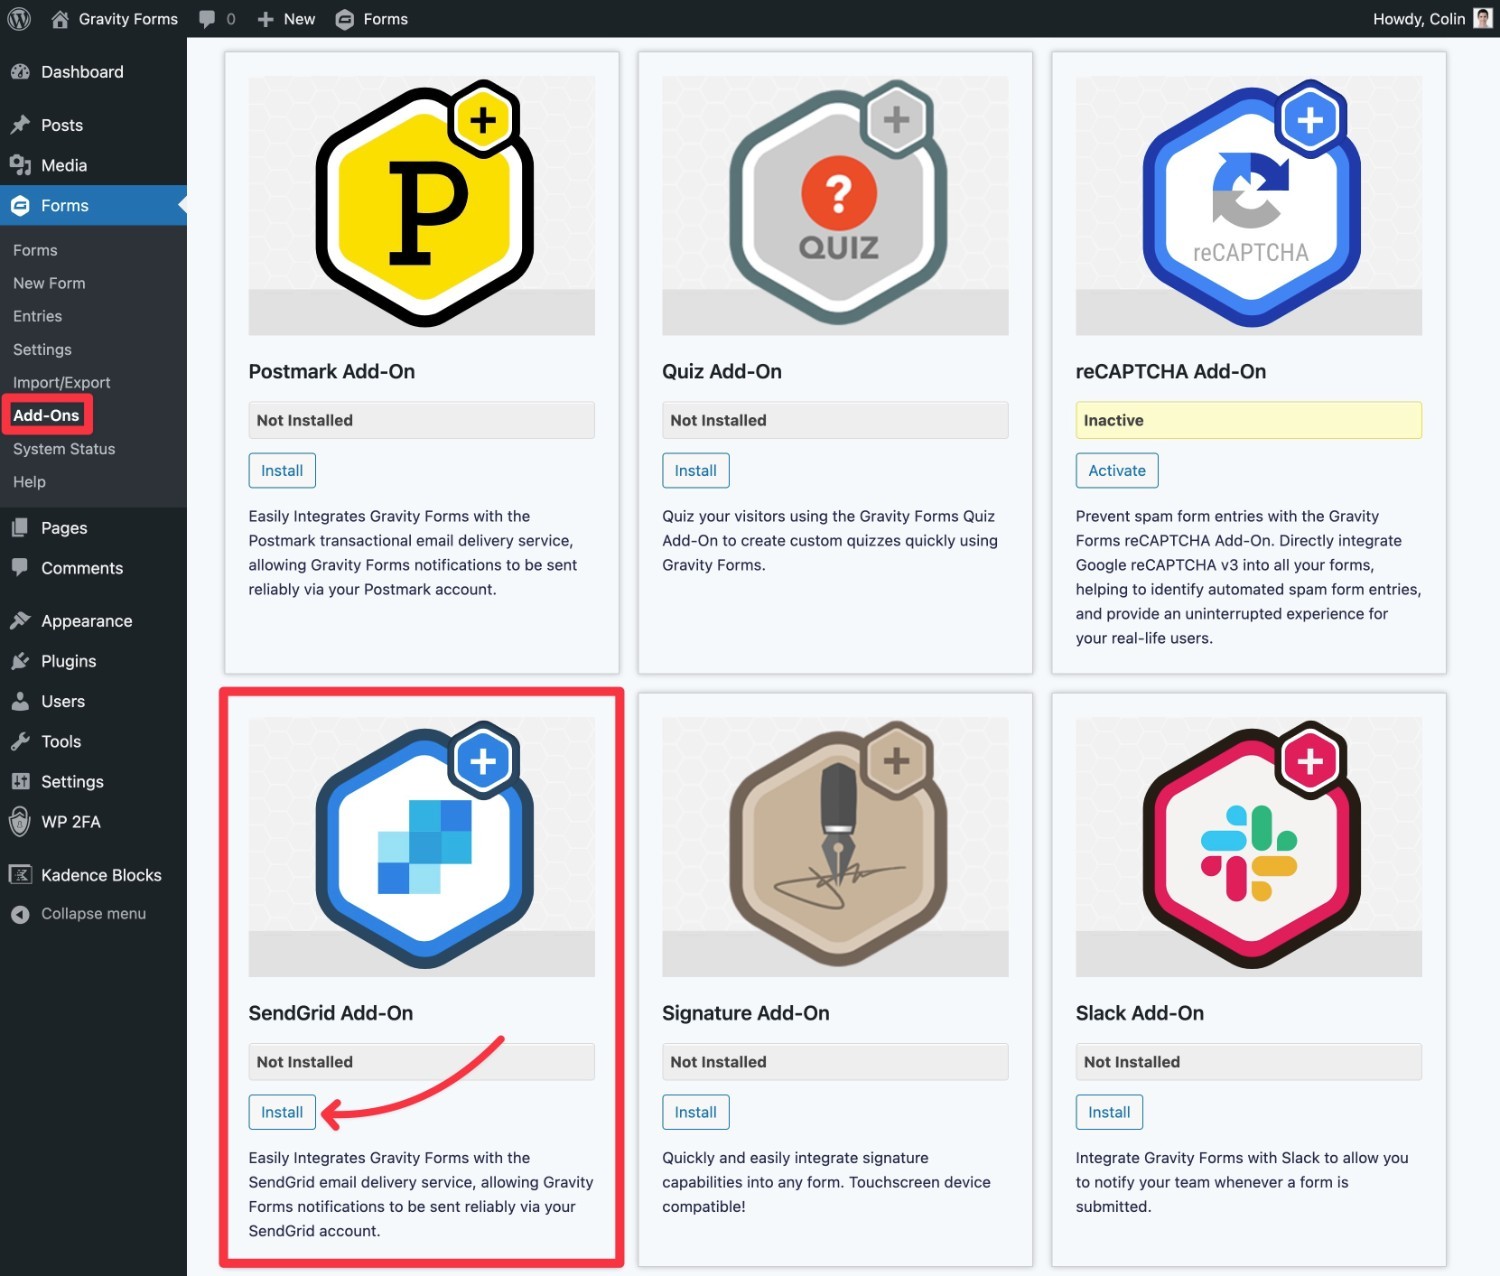
Here’s how to install the Gravity Forms SendGrid Add-On:
- Open your WordPress dashboard.
- Go to Forms → Add-Ons.
- Scroll down until you see the SendGrid Add-On.
- Click the Install button.
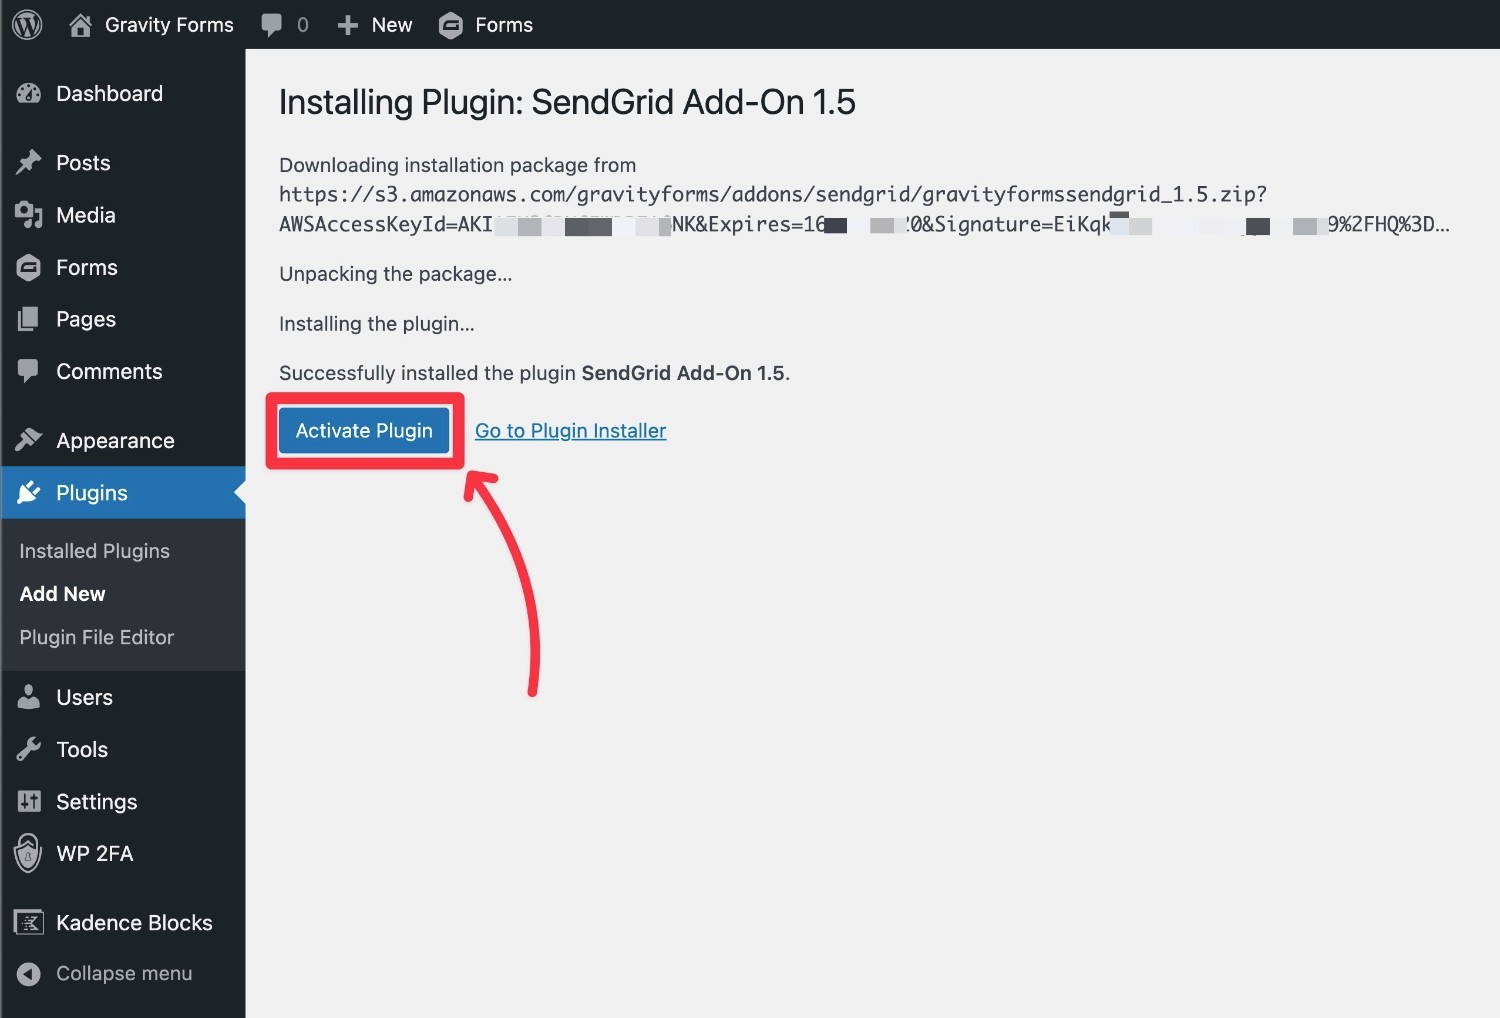
Gravity Forms will now install the add-on for you. Make sure to click Activate Plugin on the next screen to complete the process.
If you need a helping hand here, we have a full guide on how to install Gravity Forms Add-Ons.
2. Register for a Free SendGrid Account
Next, you’ll need to register for a SendGrid account (if you haven’t already done so).
Creating an account is free and does not require entering a credit card. SendGrid also offers a forever-free plan that lets you send up to 100 emails per day, which should be enough for many WordPress sites.
However, if you ever need to exceed the 100 emails per day limit, you will need to upgrade to a paid plan – starting at $19.95 per month for up to 50,000 emails per month.
3. Set Up Domain Authentication in SendGrid (Optional)
To further improve the deliverability of your emails, you’ll want to consider setting up Domain Authentication in SendGrid. This proves to SendGrid that you control the domain name from which you want to send emails.
While you can technically send emails without setting up Domain Authentication, there are a couple of drawbacks to not setting it up.
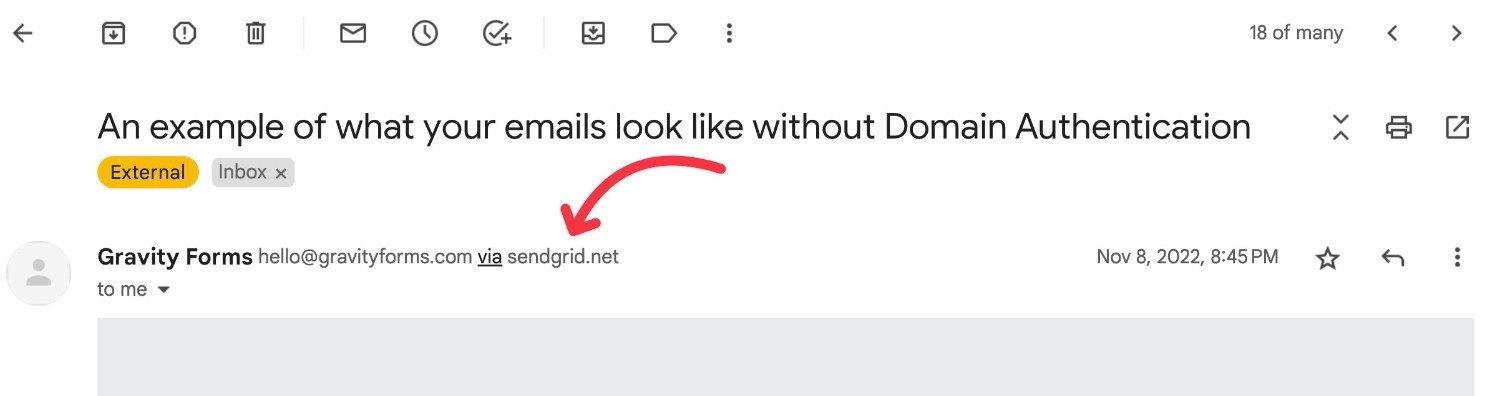
First off, your emails will show “via sendgrid.net” beside your notification’s From address in users’ inboxes. For example – “[email protected] via sendgrid.net” instead of just “[email protected]”.
Here’s what it might look like in Gmail:
Second, there’s an increased chance that your recipients’ email software might flag the emails as spam.
By setting up Domain Authentication, you can remove the “via sendgrid.net” part and make your emails look more trustworthy.
Here’s how to set up Domain Authentication in SendGrid:
- Open your SendGrid dashboard.
- Go to Settings → Send Authentication in the sidebar. Or, you can click this link to go straight to the page.
- Click the Authenticate Your Domain button.

Alternatively, if you know that you’ll only send from a single “From” email address, you can also do the Verify a Single Sender option. This is a bit simpler to set up because all you need to do is click the link in a verification email. However, it doesn’t offer as much flexibility and verification as setting up full Domain Authentication.
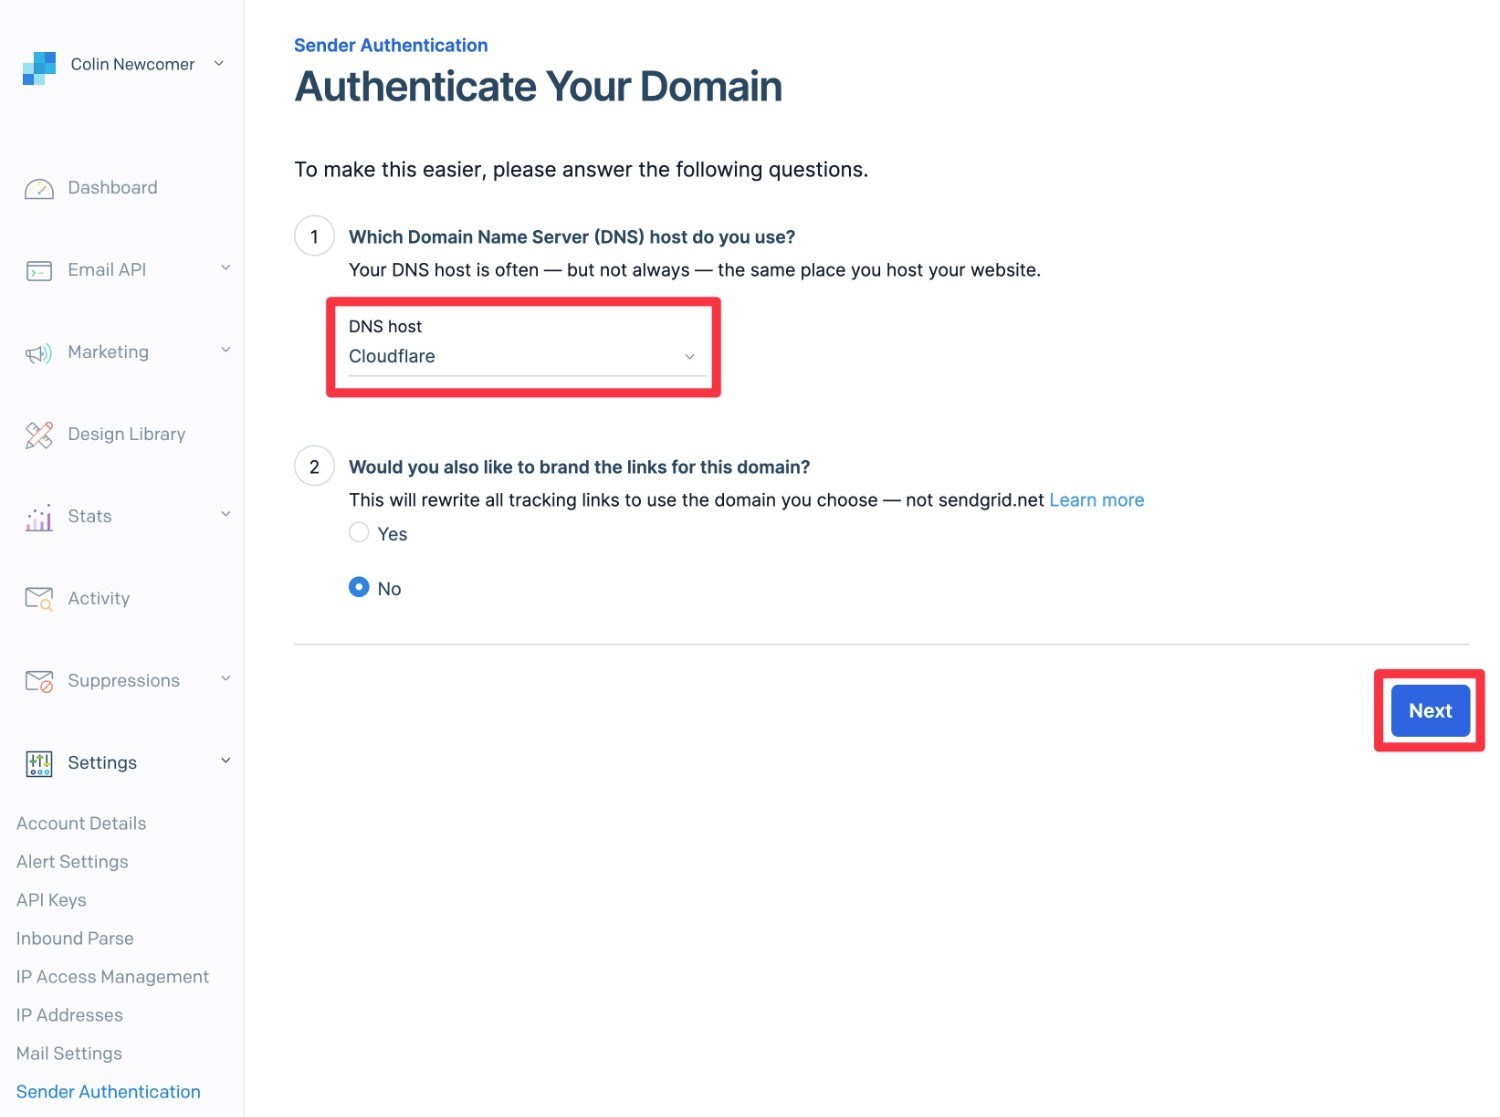
On the next screen of the Domain Authentication setup process, you can choose your DNS provider to see specific instructions or choose the Other Host (Not Listed) option.
For example, if you’re using Cloudflare, you would choose the “Cloudflare” option.
There’s also an option to brand the tracking links in your emails. However, you can usually leave this set to No.
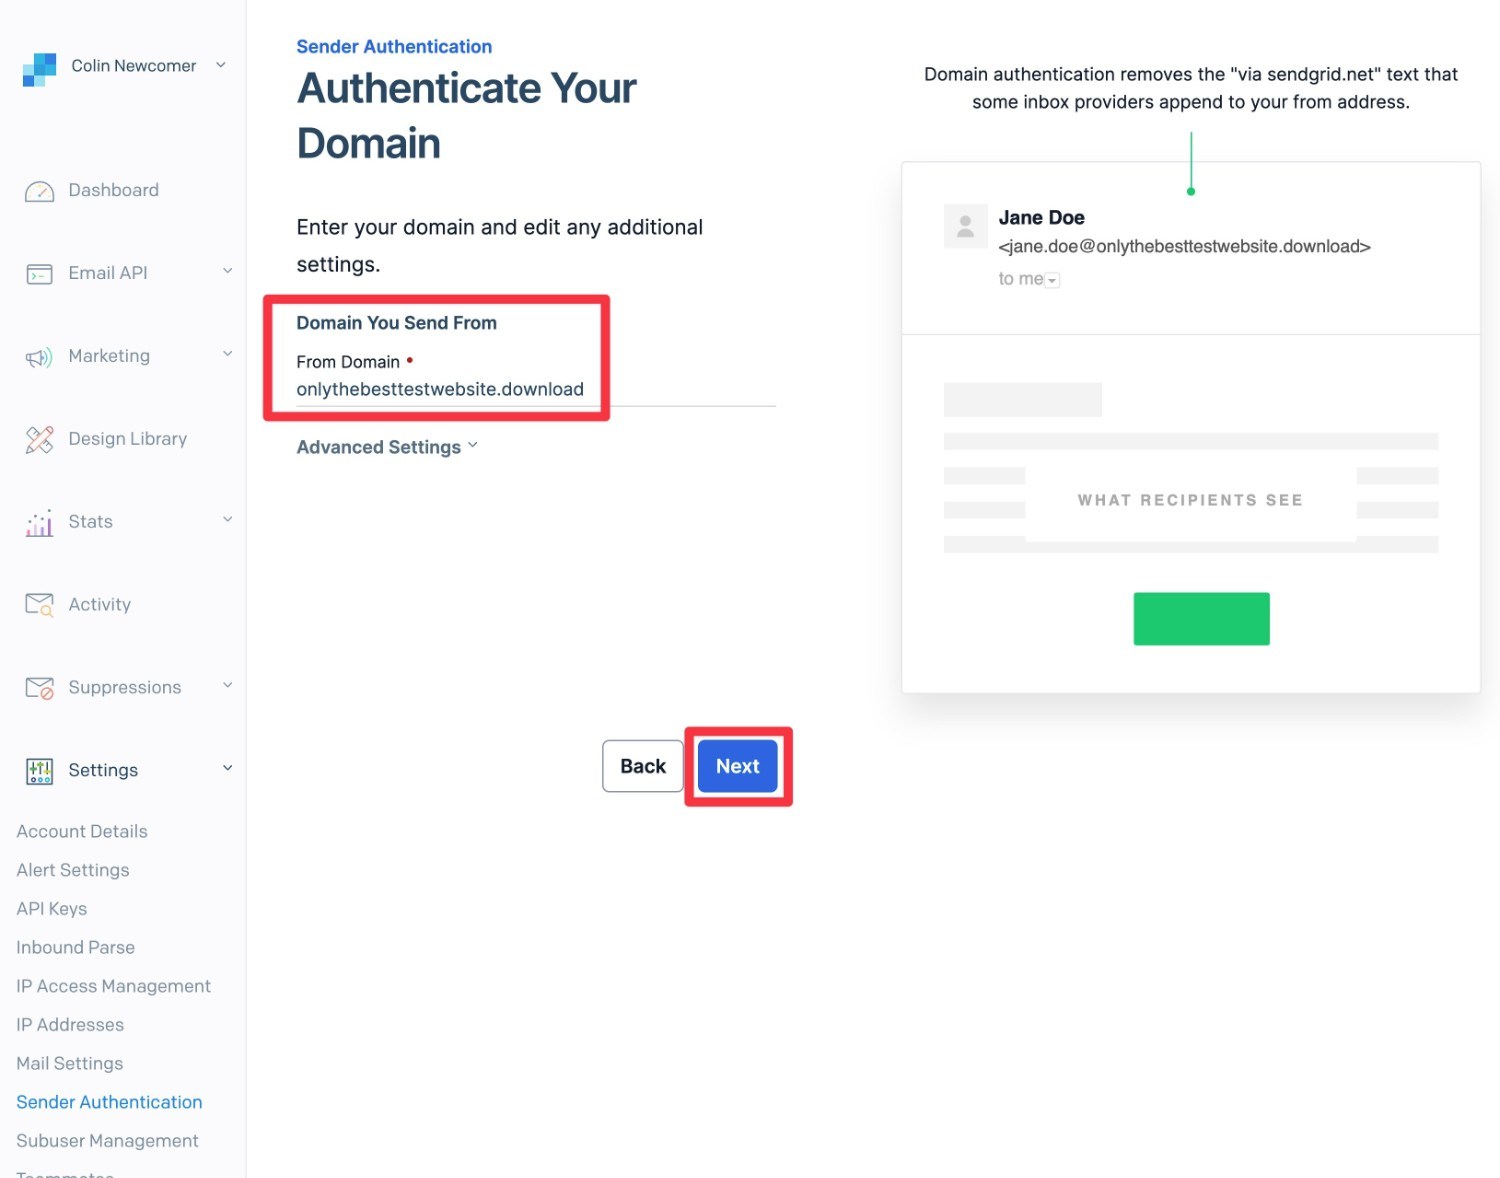
On the next screen, you’ll need to enter the domain from which you’ll be sending emails with Gravity Forms.
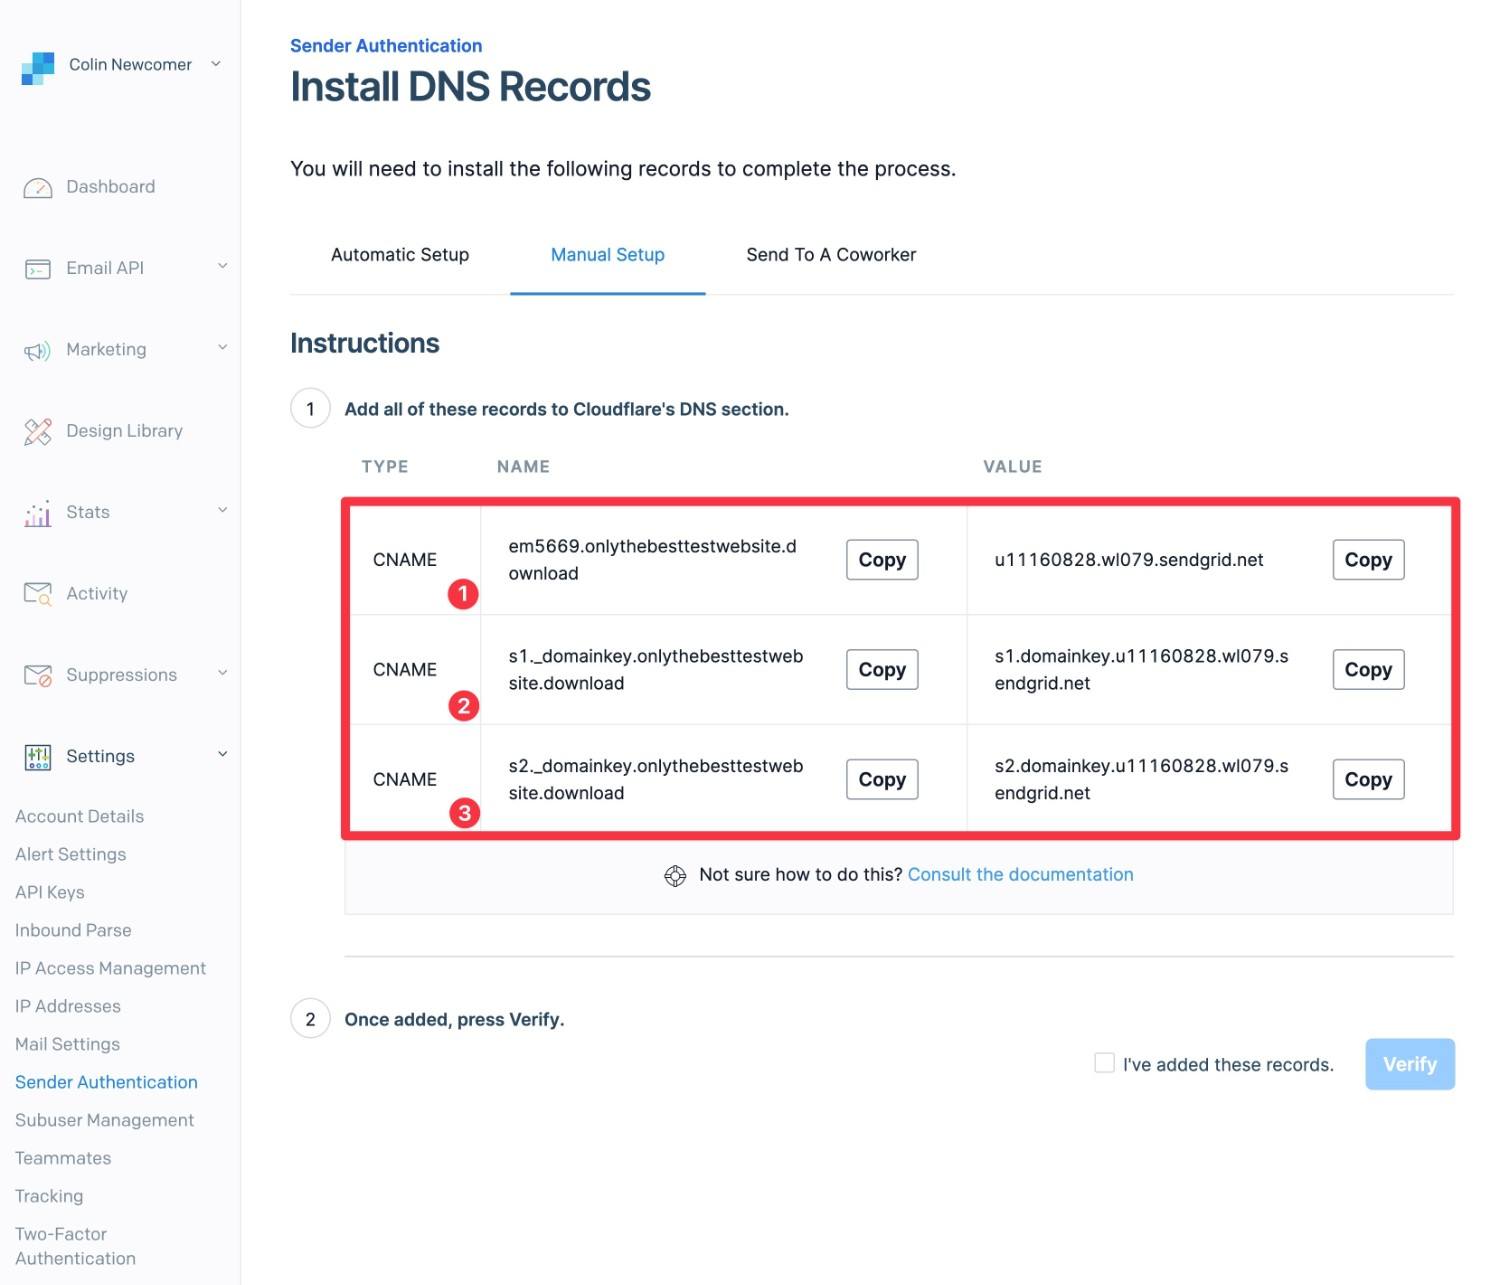
Finally, you’ll be prompted to add some DNS records to your domain. You’ll do this wherever you’re managing your domain’s DNS – typically this is your web hosting service or your domain registrar. Or, it could be a service like Cloudflare.
Here’s what it looks like to add these records to Cloudflare:
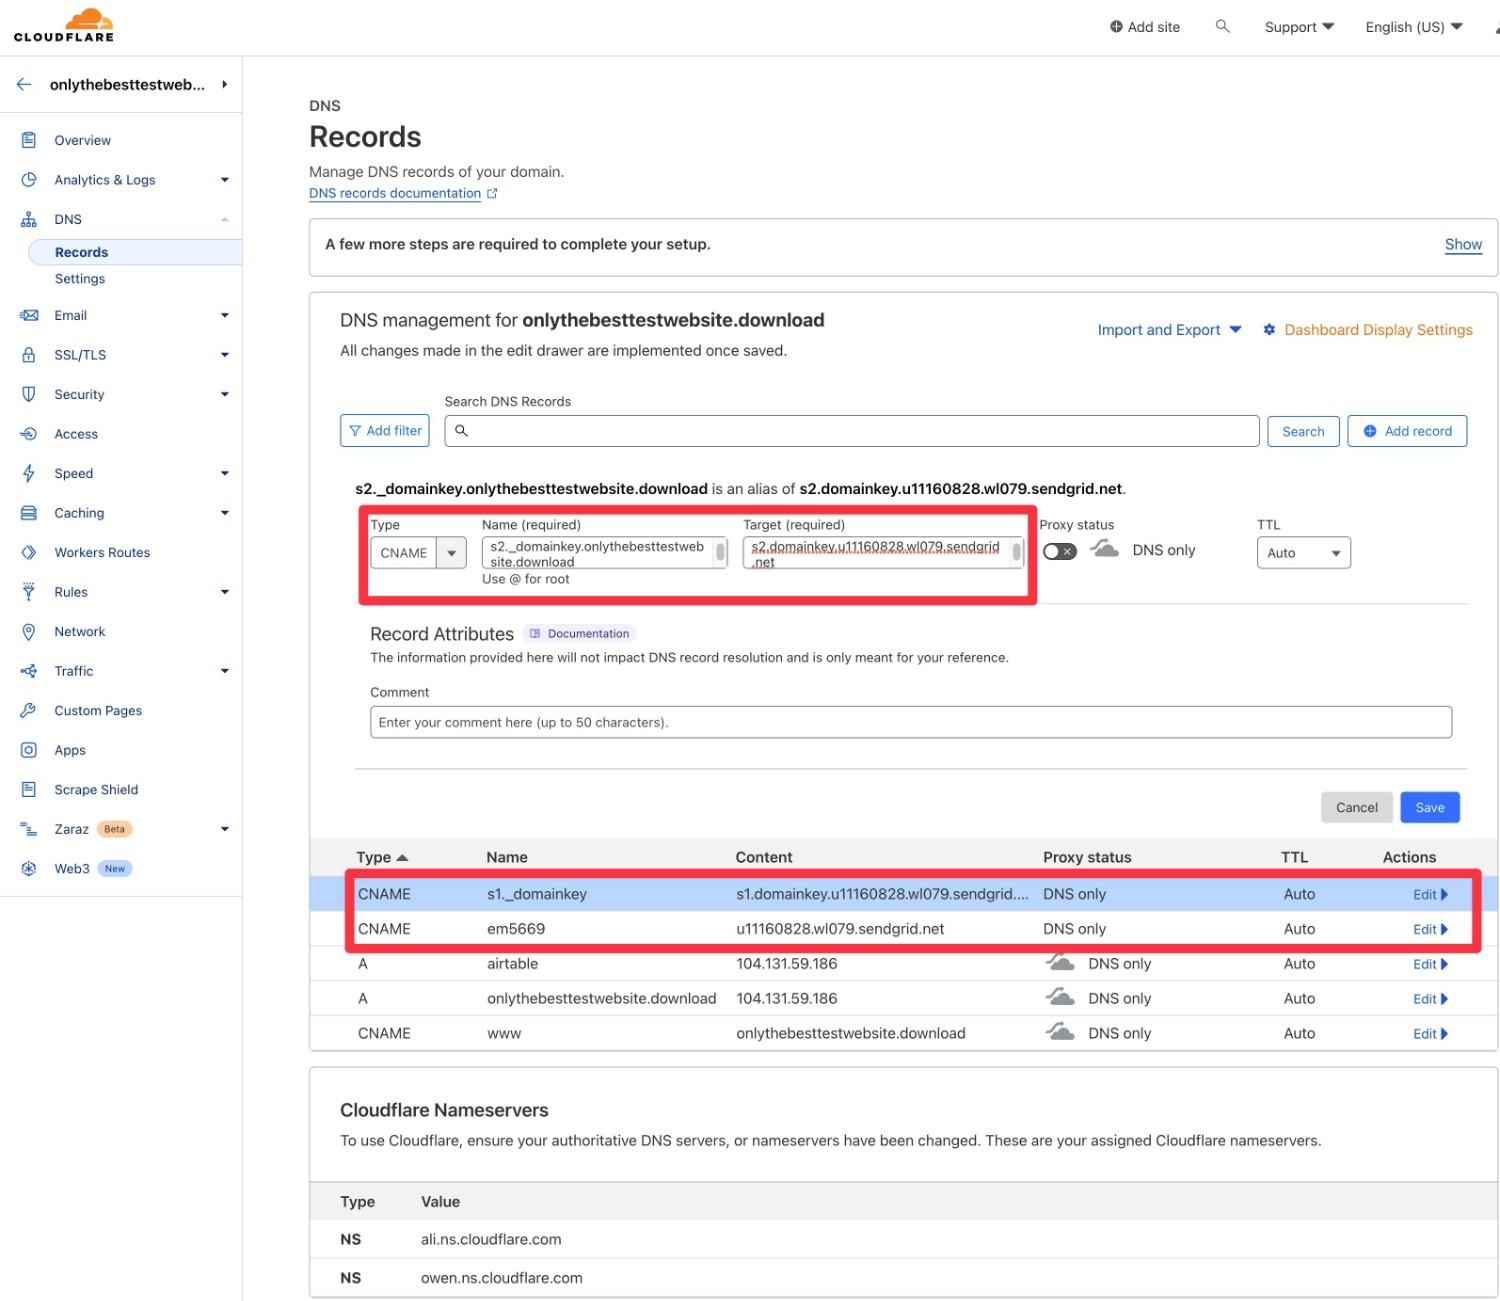
Once you’ve added the records, go back to the SendGrid interface and…
- Check the box for I’ve added these records.
- Click the Verify button.
If you did everything correctly, you should see a message that says “It worked”.
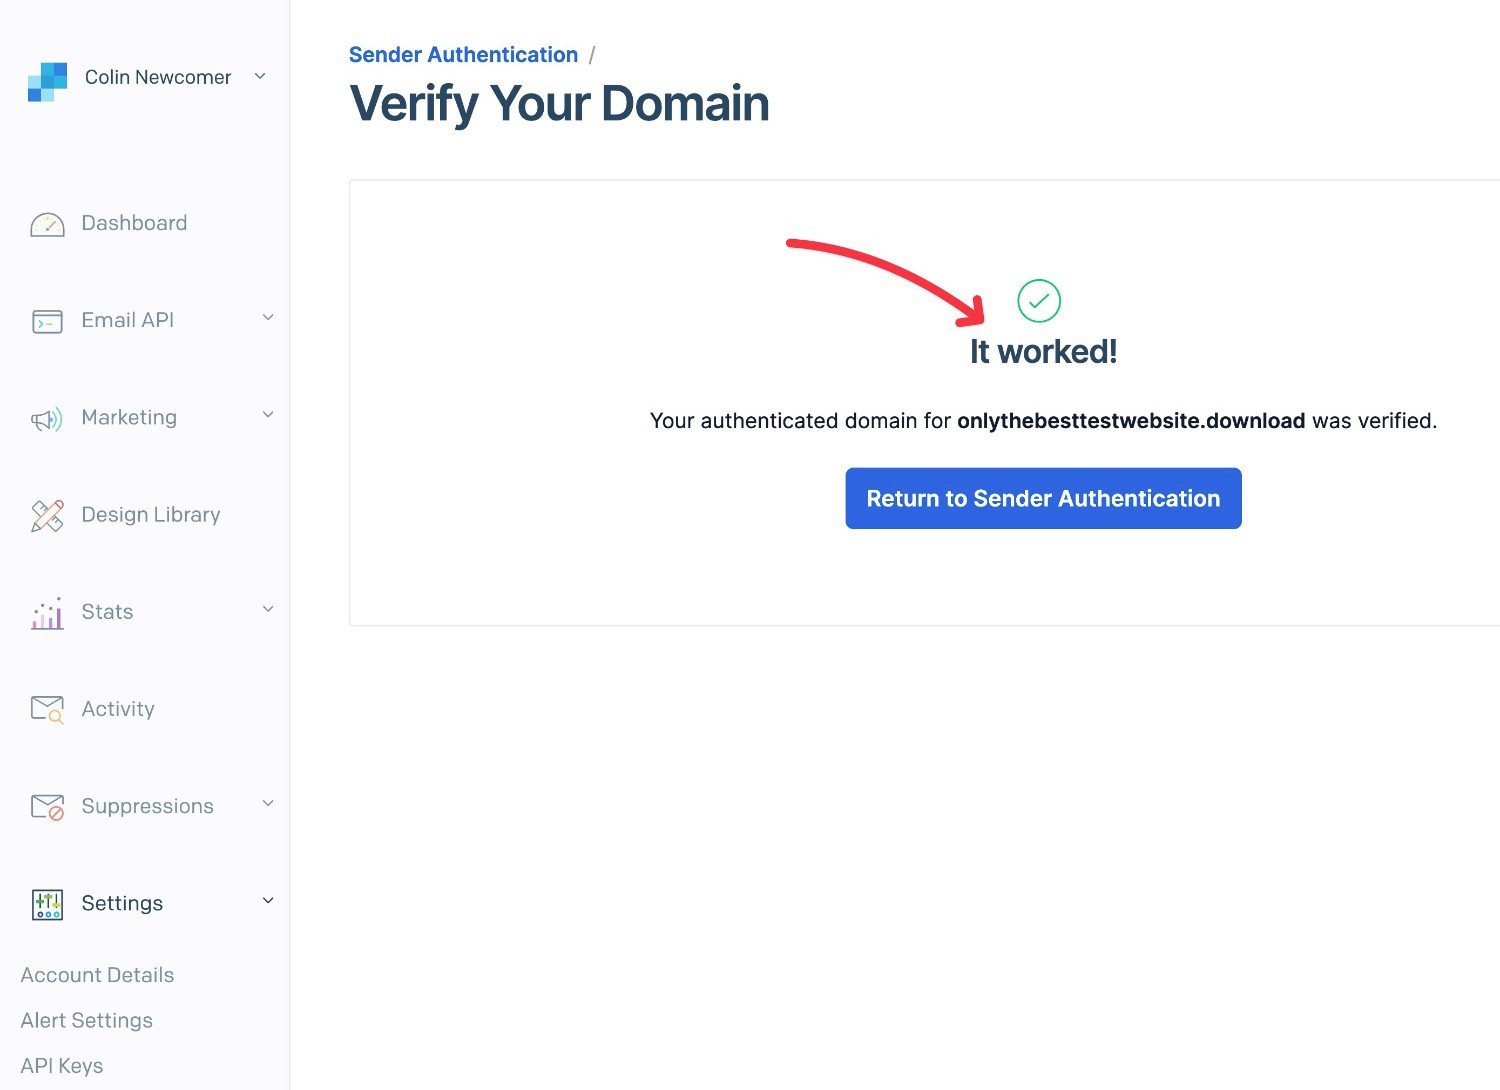
That’s it! You’re all finished with SendGrid Domain Authentication for Gravity Forms.
To see these steps in more detail, you can check out the SendGrid Domain Authentication help article.
4. Create a SendGrid API Key
Next, you’ll want to create a SendGrid API key for Gravity Forms, which is what allows your WordPress site to send its emails via SendGrid.
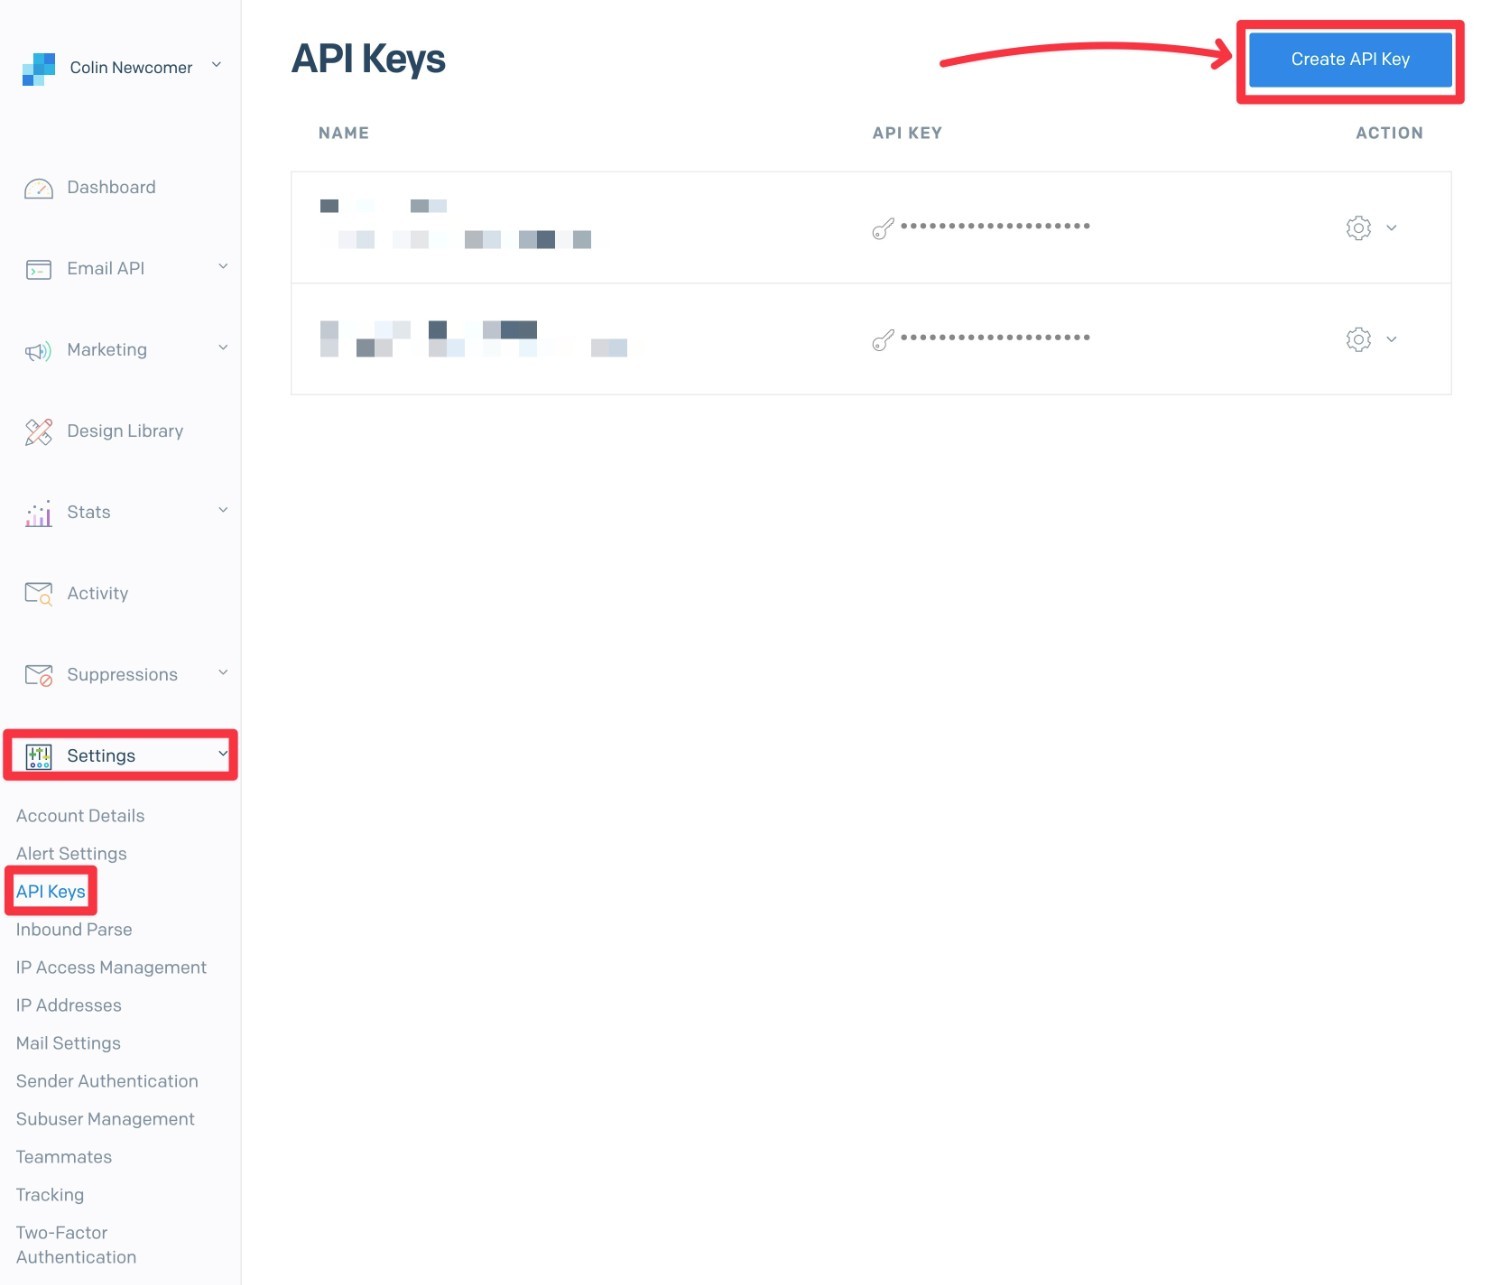
You can click this link to go straight to the API key page. Or, you can go to Settings → API Keys in the menu on the left side.
Once you’re in the API keys area, click the Create API Key button to create a new API key:
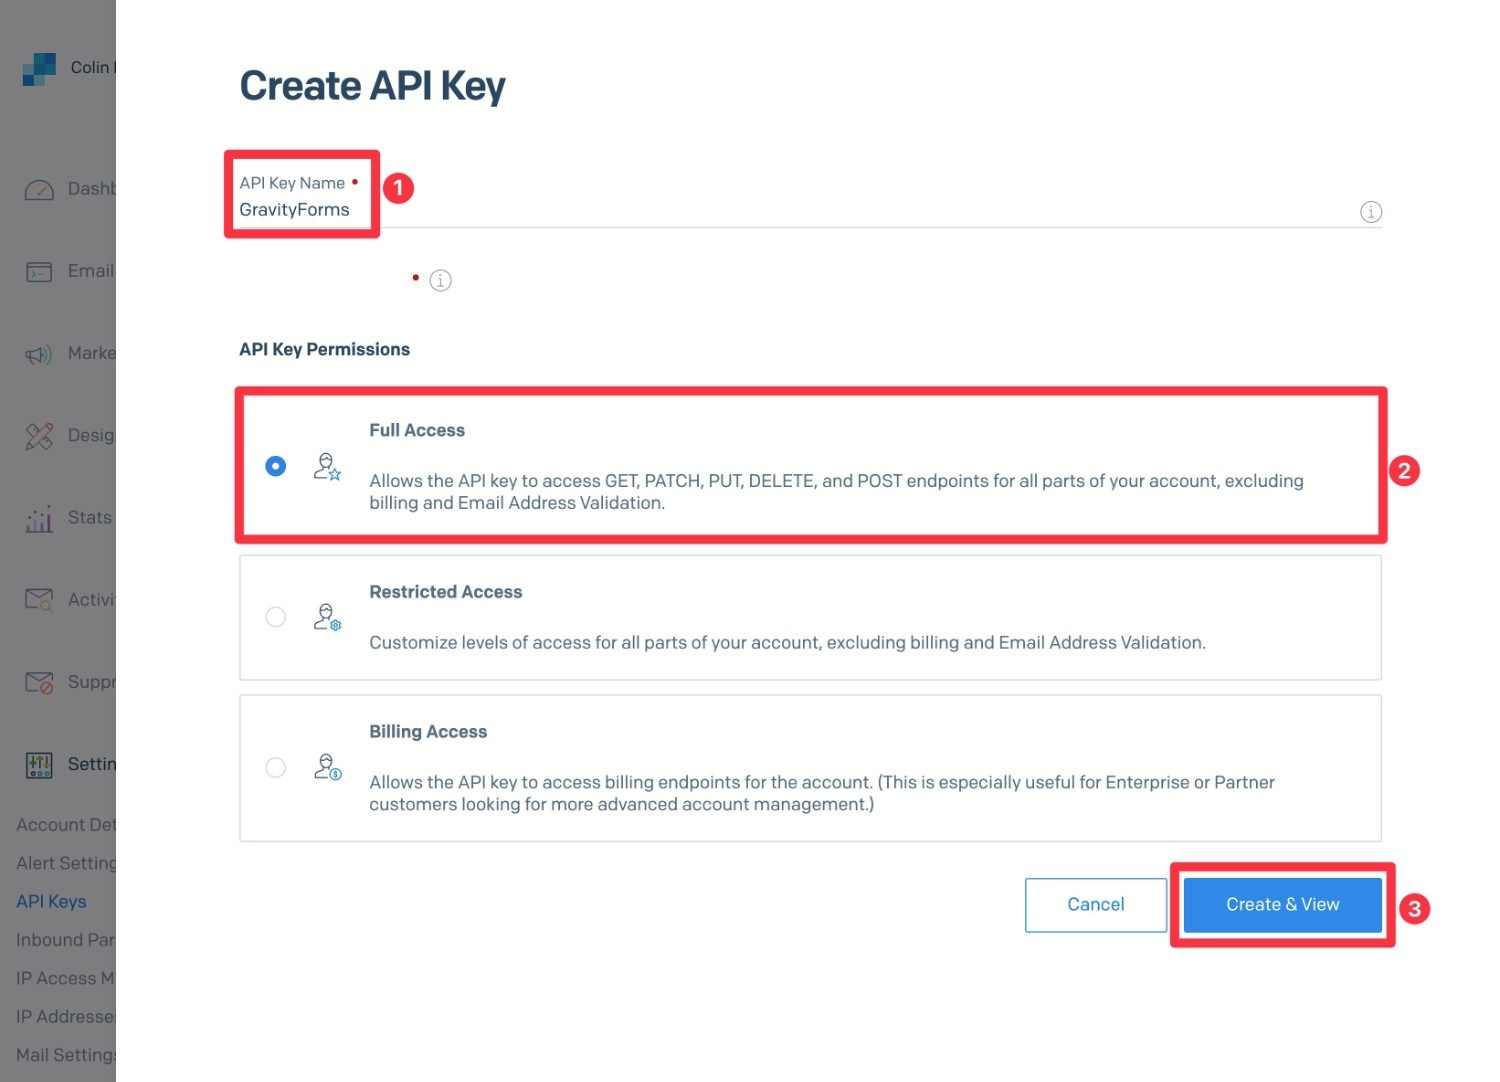
In the next interface, do the following:
- Give your API key an internal name to help you remember it – e.g. “GravityForms”.
- Select Full Access in the API Key Permissions section. You can also use restricted access as long as you enable the Mail Send permission.
To finish things out, click the Create & View button.
SendGrid will now show your API key in a popup. Copy this API key to a safe place because SendGrid will only show it one time and you’ll need it in the next step.
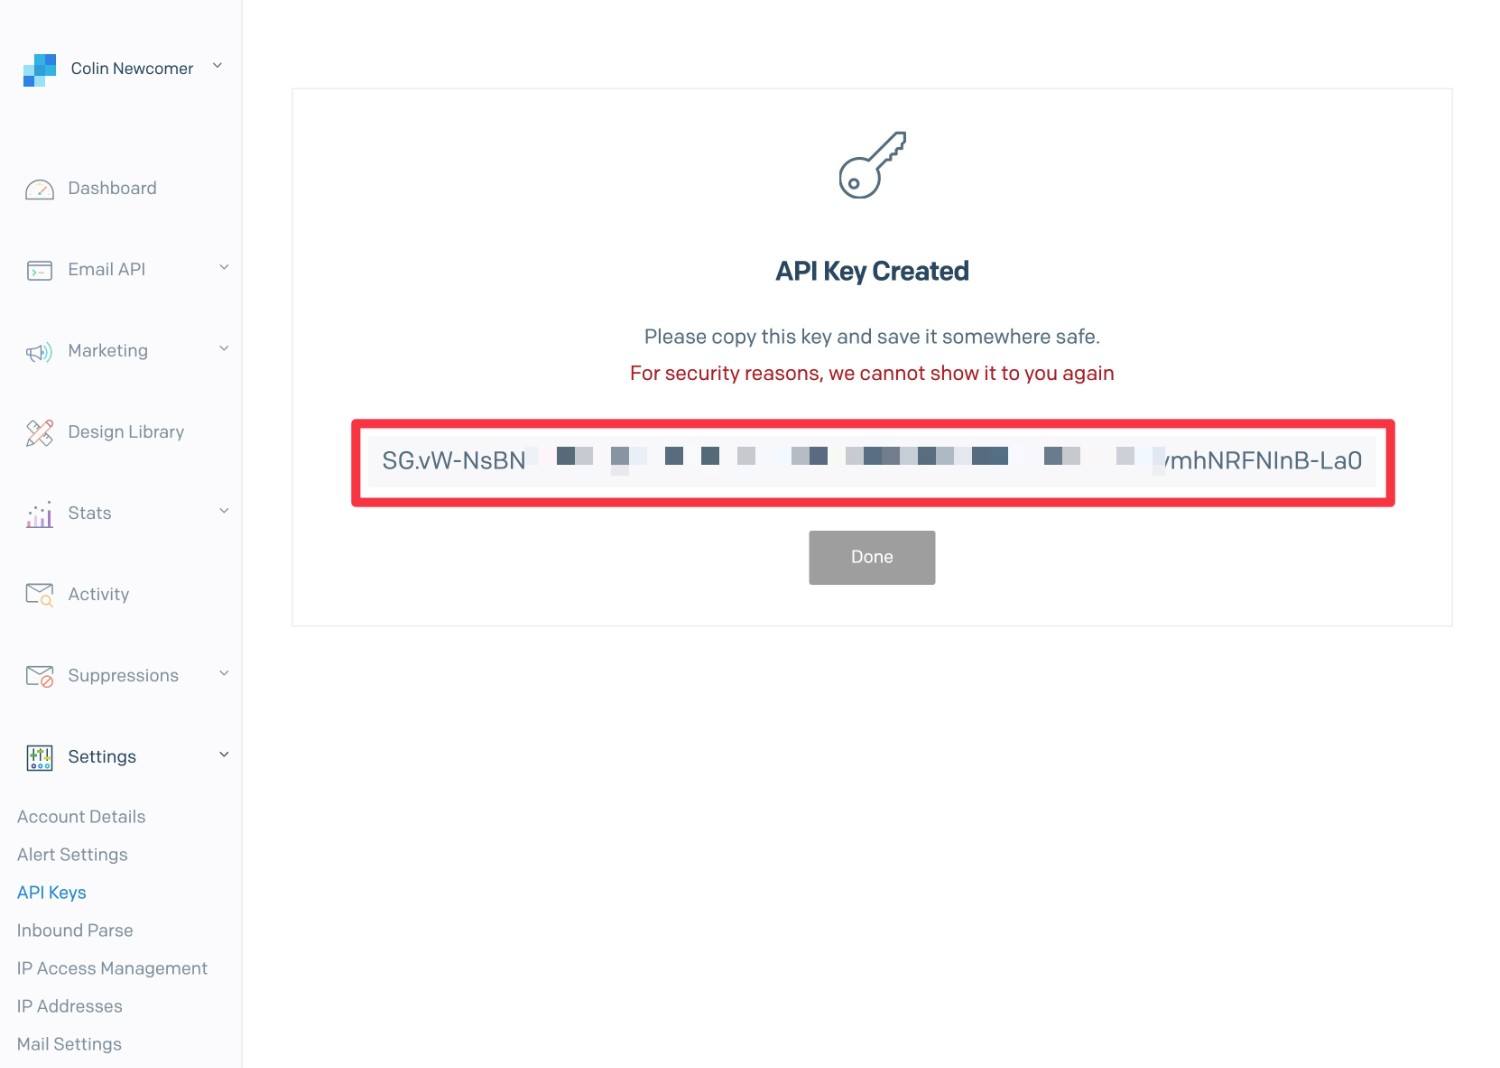
If you accidentally close the popup without saving your API key, you can just repeat these steps to create a new API key.
5. Add the SendGrid API Key to the Gravity Forms Settings
Once you have your SendGrid API key, you need to add it to the Gravity Forms SendGrid Add-On settings area:
- Open your WordPress dashboard.
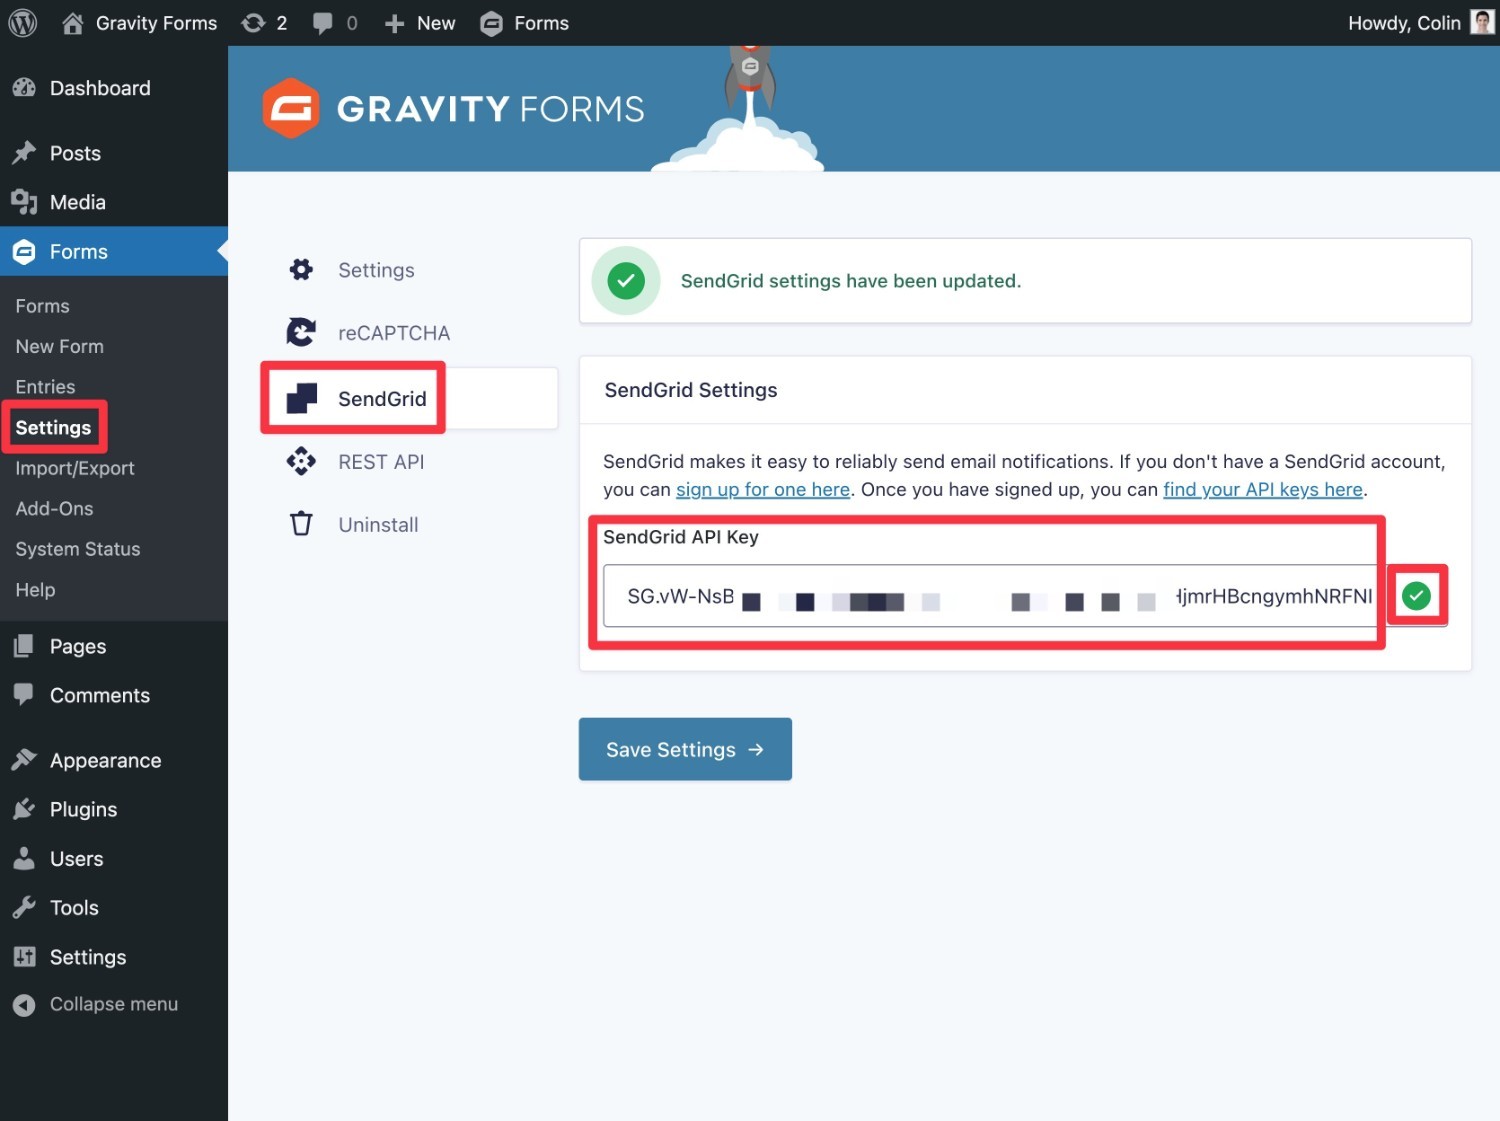
- Go to Forms → Settings → SendGrid.
- Paste your SendGrid API key into the SendGrid API Key box.
- Click the Save Settings button.
If Gravity Forms was able to successfully connect to SendGrid, you should see a green check mark appear next to the API key after saving the settings.
6. Configure Email Notifications to Use SendGrid
To give you more flexibility, Gravity Forms lets you choose your email sending service at the notification level.
To finish things out, all you need to do is enable SendGrid for the notifications where you want to send your emails with SendGrid.
Here’s how:
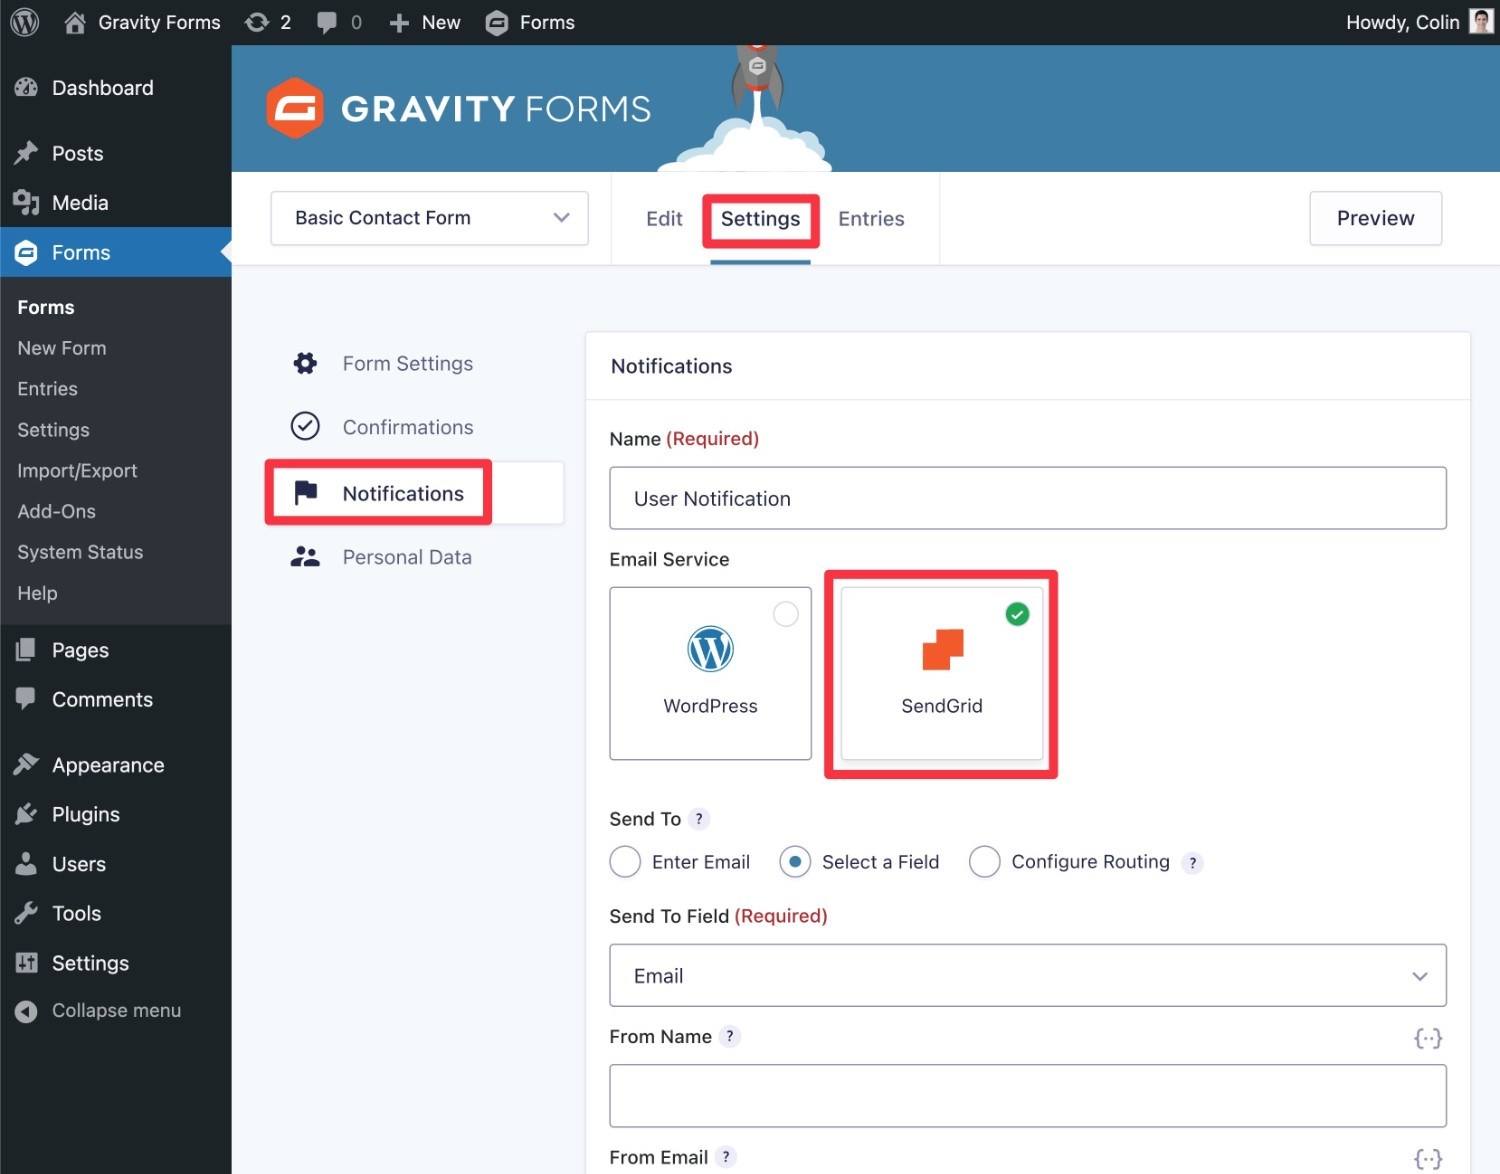
- Open the editor for a form with an email notification that you want to send using SendGrid.
- Go to Settings → Notifications in that form.
- Edit an existing notification or create a new notification.
- Choose the SendGrid option under the Email Service heading.
- Save the settings for the notification.
If you set up SendGrid Domain Authentication, you can set the From Email to any email from your domain name.
If you set up single sender verification instead, make sure to choose the exact email address that you verified in SendGrid.
And that’s it! Gravity Forms will now send this email notification using SendGrid.
To send other email notifications with SendGrid, repeat the process to set up the email service for each notification.
Try the Gravity Forms SendGrid Add-On Today
If you want to be confident that your form notifications will make it to recipients’ inboxes, the Gravity Forms SendGrid Add-On is a great option to consider.
Because SendGrid lets you send up to 100 emails per day for free, most WordPress sites will be able to benefit from SendGrid’s improved reliability without needing to pay anything (or even enter a credit card).
The Gravity Forms SendGrid Add-On is available on any Gravity Forms license, including the Basic license. All you need to do is install the add-on on your site and follow this tutorial to start sending your form notifications with SendGrid.
If you don’t have a Gravity Forms license yet, purchase your license today to set up your first form.

If you want to keep up-to-date with what’s happening on the blog sign up for the Gravity Forms newsletter!
"*" indicates required fields


