Email marketing is one of the most powerful tools in your business’s arsenal. You can use it to drive sales, gather reviews and testimonials, send out customer satisfaction surveys, and more. But those strategies only work if you have an effective way of capturing email addresses in the first place. The good news is that this is easy when you use Gravity Forms!
AWeber is one of the best-known names in the email marketing industry, used by over 100,000 small businesses. If you run a business website, you too can use Gravity Forms and AWeber to create a seamless lead generation system.
Read on to find out exactly how these tools work and how you can use them to make email marketing a breeze…
An Introduction to AWeber

AWeber offers several tools to help you create effective email marketing campaigns:
- Email Templates – AWeber has hundreds of professionally designed email templates for you to work from. You can also build and save your own templates to create a consistent, branded experience for your subscribers.
- Segmentation – This lets you divide your mailing list into sub-groups called segments so you can create personalized marketing campaigns for them. For example, if someone purchases a specific product, you can add them to a segment and send them campaigns about similar products.
- Tags – You can use tags to add distinguishing information to subscribers’ profiles and create new segments. For example, if you have multiple newsletter landing pages, you might use tags to mark which form a person submitted. You can then use this information to send them campaigns related to the specific landing page they used to sign up.
- Automation – AWeber makes it easy to automate both individual emails and multi-email campaigns. This includes abandoned cart recovery emails and other automated ecommerce emails.
- A/B Split Testing – This lets you test multiple variations of an email campaign to determine what version gets the most engagement. For example, you might create two different subject lines to find out which one gets the highest open rate.
- Advanced Analytics – AWeber tracks every interaction someone has with your emails, allowing you to understand who’s opening your emails and what they’re doing with those emails. You can view this information in several different styles of charts and graphs, whatever works best for your business.
Plus there are loads of ways to connect AWeber to other marketing and customer-related tools. One that’s especially useful for WordPress users is the Gravity Forms AWeber Add-On.
Simplify Lead Generation with the Gravity Forms AWeber Add-On
Gravity Forms is a powerful form plugin for WordPress. Boasting an assortment of built-in features, an extensive ecosystem of integrations, and an extremely intuitive drag-and-drop interface, creating lead generation forms with Gravity Forms is a quick and easy process.
The Gravity Forms AWeber Add-On connects Gravity Forms and AWeber, and has all of the features you need to automatically organize your subscribers’ information in AWeber when they sign up.
Features include:
- Easy Integration – Connect Gravity Forms to AWeber in a few clicks and easily configure forms to send subscriber information directly to AWeber.
- Custom Fields – Map custom fields from your forms to custom fields in AWeber, ensuring that all of your subscriber data is sent and properly organized.
- Tags – Use merge fields or static values to populate the AWeber tags for each form submission.
- Conditional logic – Conditional logic can be used to make sure that only qualified leads are sent to AWeber. For example, you can set conditions to ensure that only users who have given their consent end up on your email list.
These features make it easier to manage and understand your audience within AWeber and build personalized campaigns to help boost engagement.
How To Set Up the Gravity Forms AWeber Add-On
If you’re already a Gravity Forms customer you can get started with the Gravity Forms AWeber Add-On in just a couple of minutes. If you’re not already using Gravity Forms you’ll first need to purchase Gravity Forms and install it on your WordPress website.
From there, you can set up the Gravity Forms AWeber Add-On in five simple steps:
1. Install the Add-On
Log into your WordPress dashboard and select Forms > Add-Ons from the sidebar menu.
This opens the Gravity Forms Add-Ons library. Here, scroll down until you see the AWeber Add-On and click the Install button.
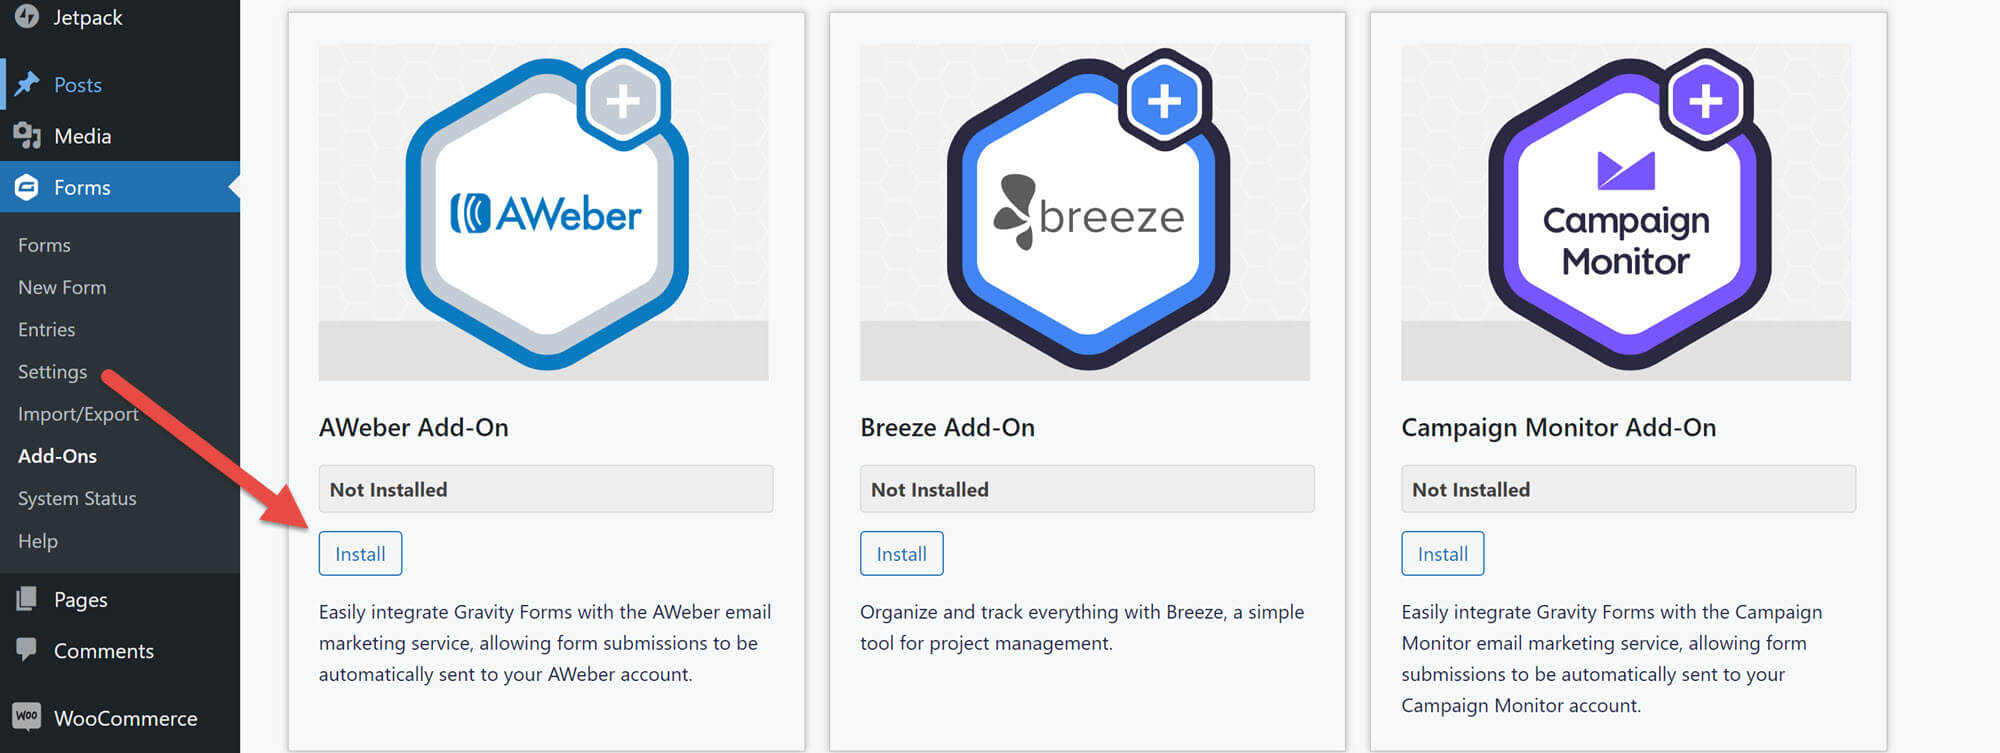
WordPress will unpack the add-on in a few seconds. Click the Activate button when it appears.
2. Connect to Your AWeber Account
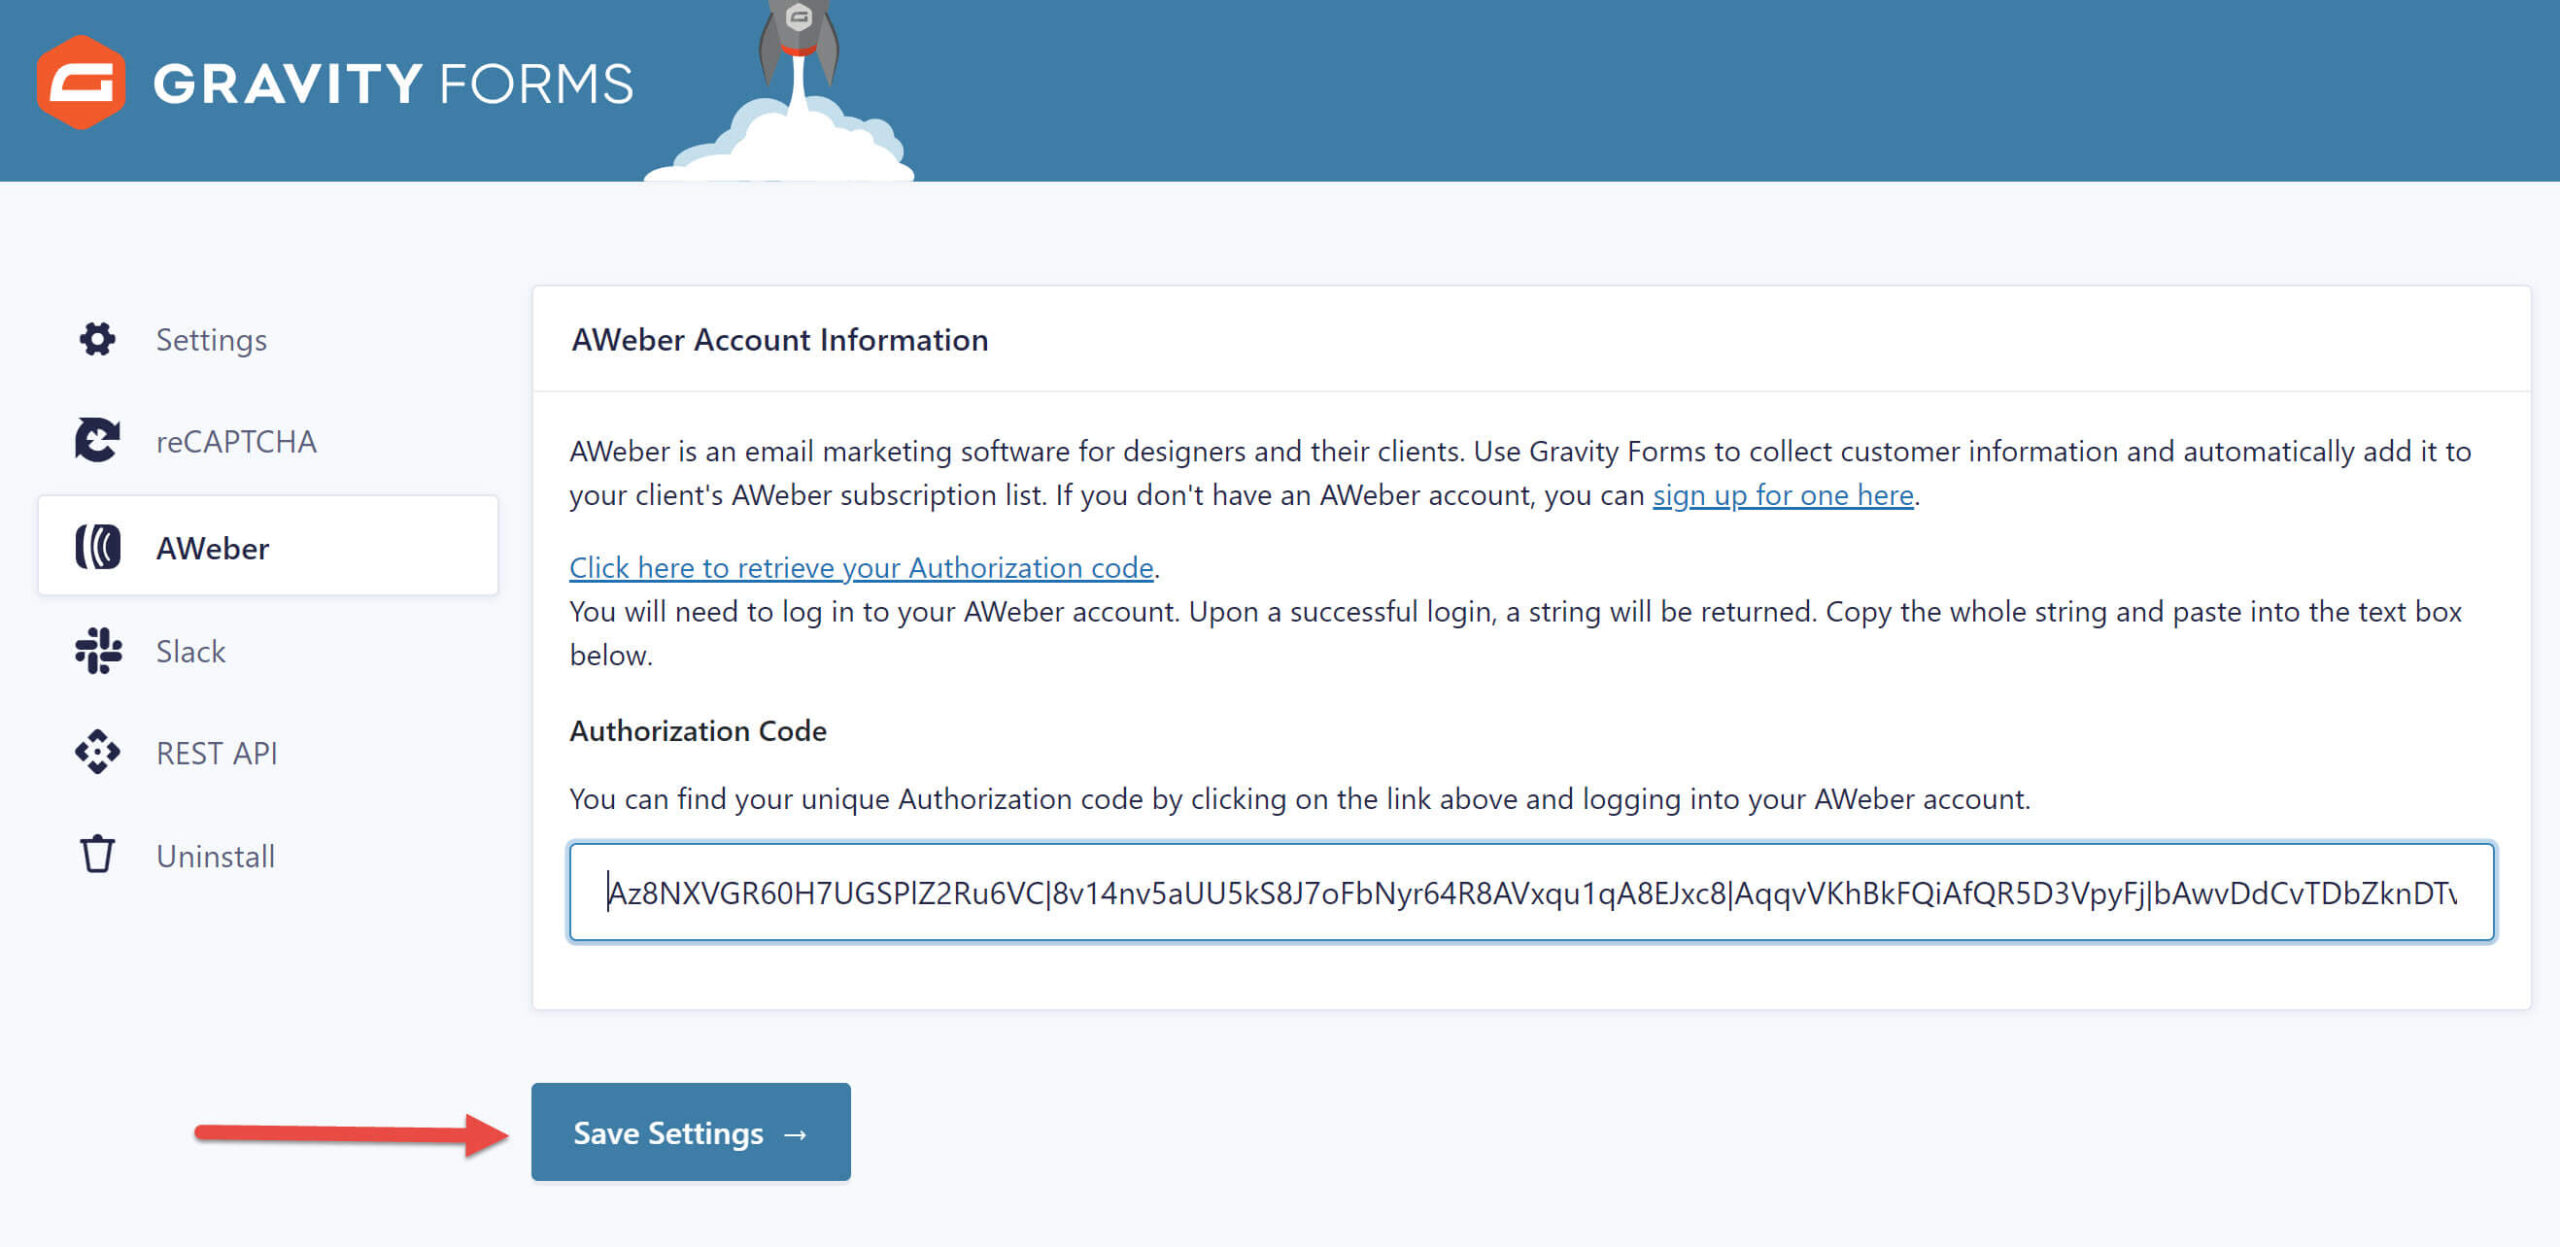
Now that you’ve installed the Gravity Forms AWeber Add-On, head to the Settings area of Gravity Forms and select AWeber. This opens a page where you can enter your AWeber Authorization code.
To get this code, click the link that says Click here to retrieve your Authorization code.
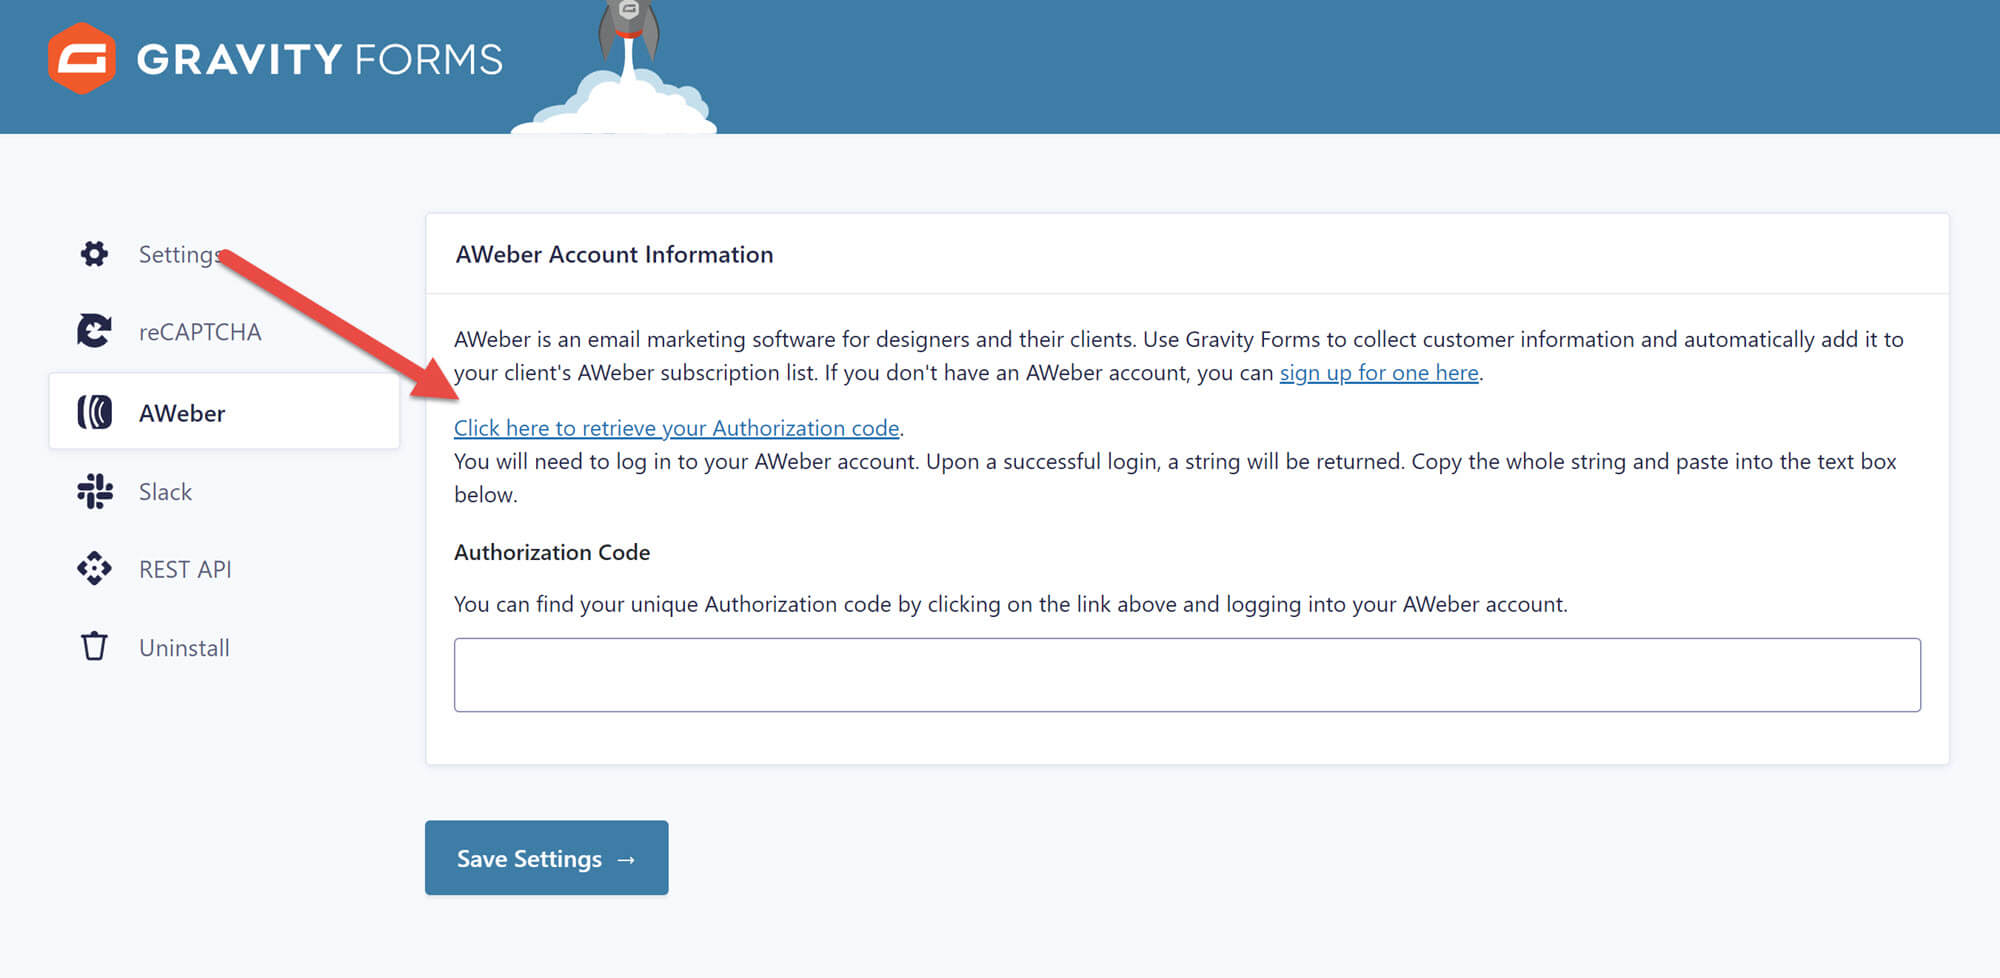
You’ll now be asked to log into your AWeber account where you can retrieve your authorization code. Return to the AWeber Settings area of Gravity Forms and paste the code into the box, then click Save Settings.
3. Create a Form
You can connect the AWeber Add-On for Gravity Forms to any existing form, but for the purposes of this tutorial, we’re going to look at how to create a new form.
First, select Forms > Add New and enter a name and description for your form in the pop-up that appears.
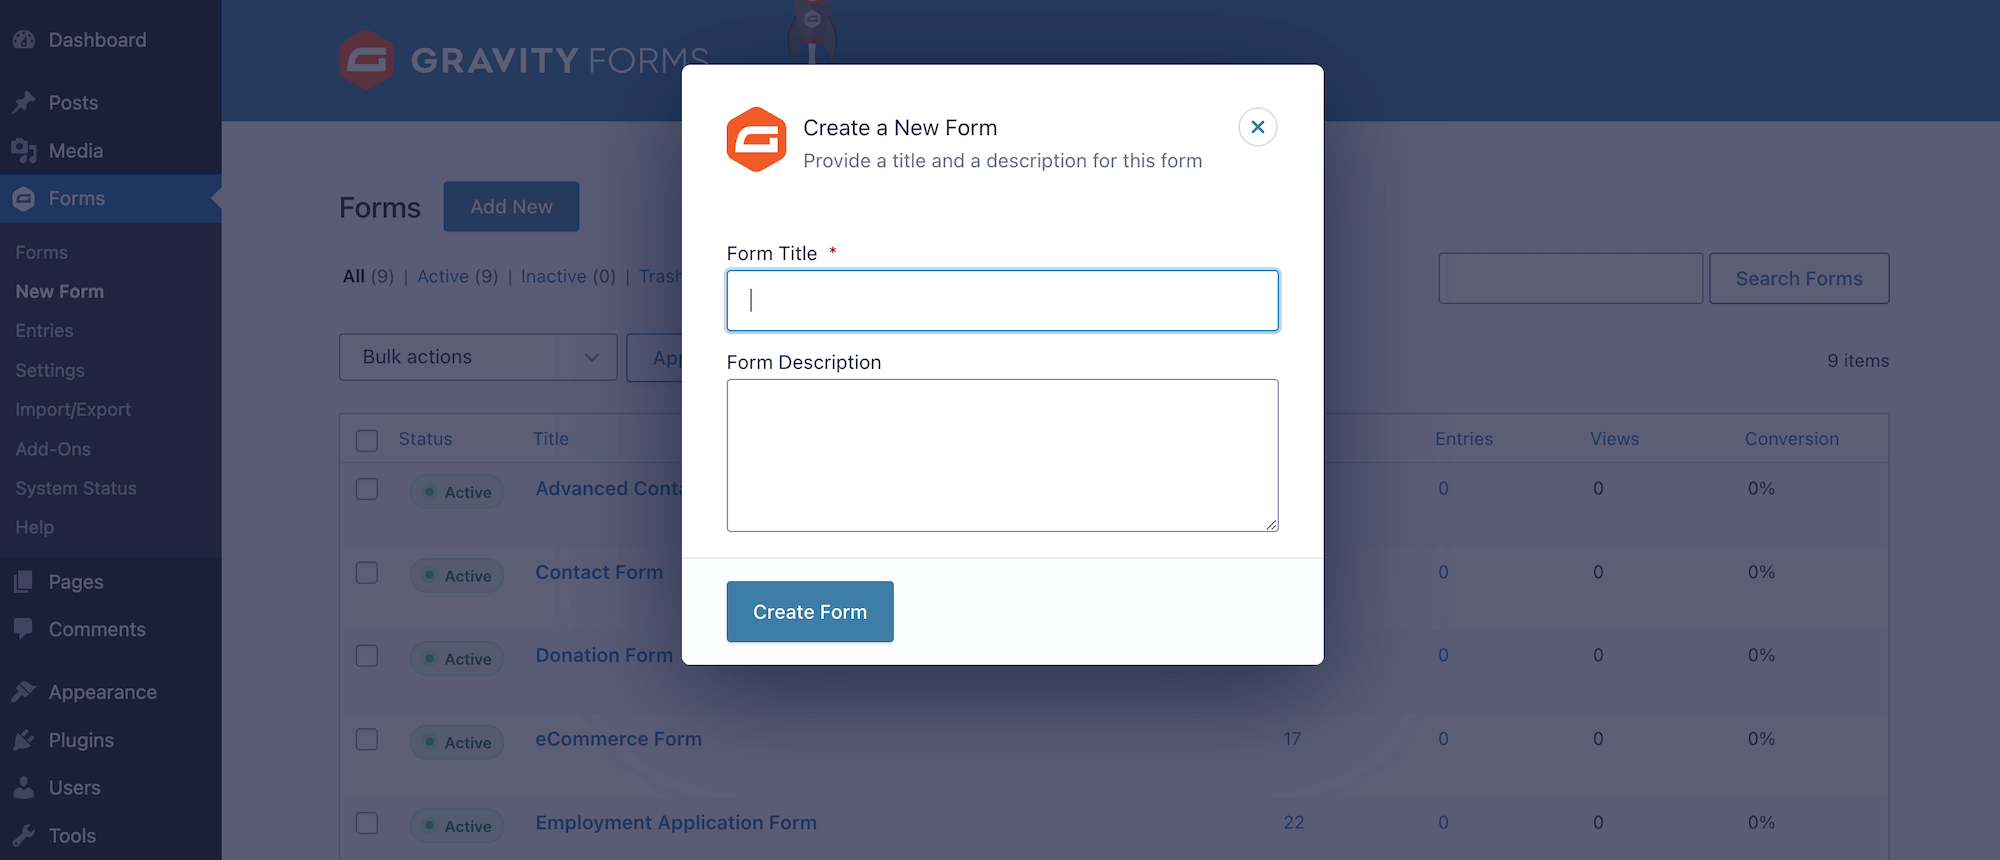
When you’re happy with the information you’ve entered, click Create Form to open the form editor. This is where you can design the form by dragging form fields from the right sidebar into the central area of the editor. You can move the fields around at any time to change the order by dragging them up or down the screen.
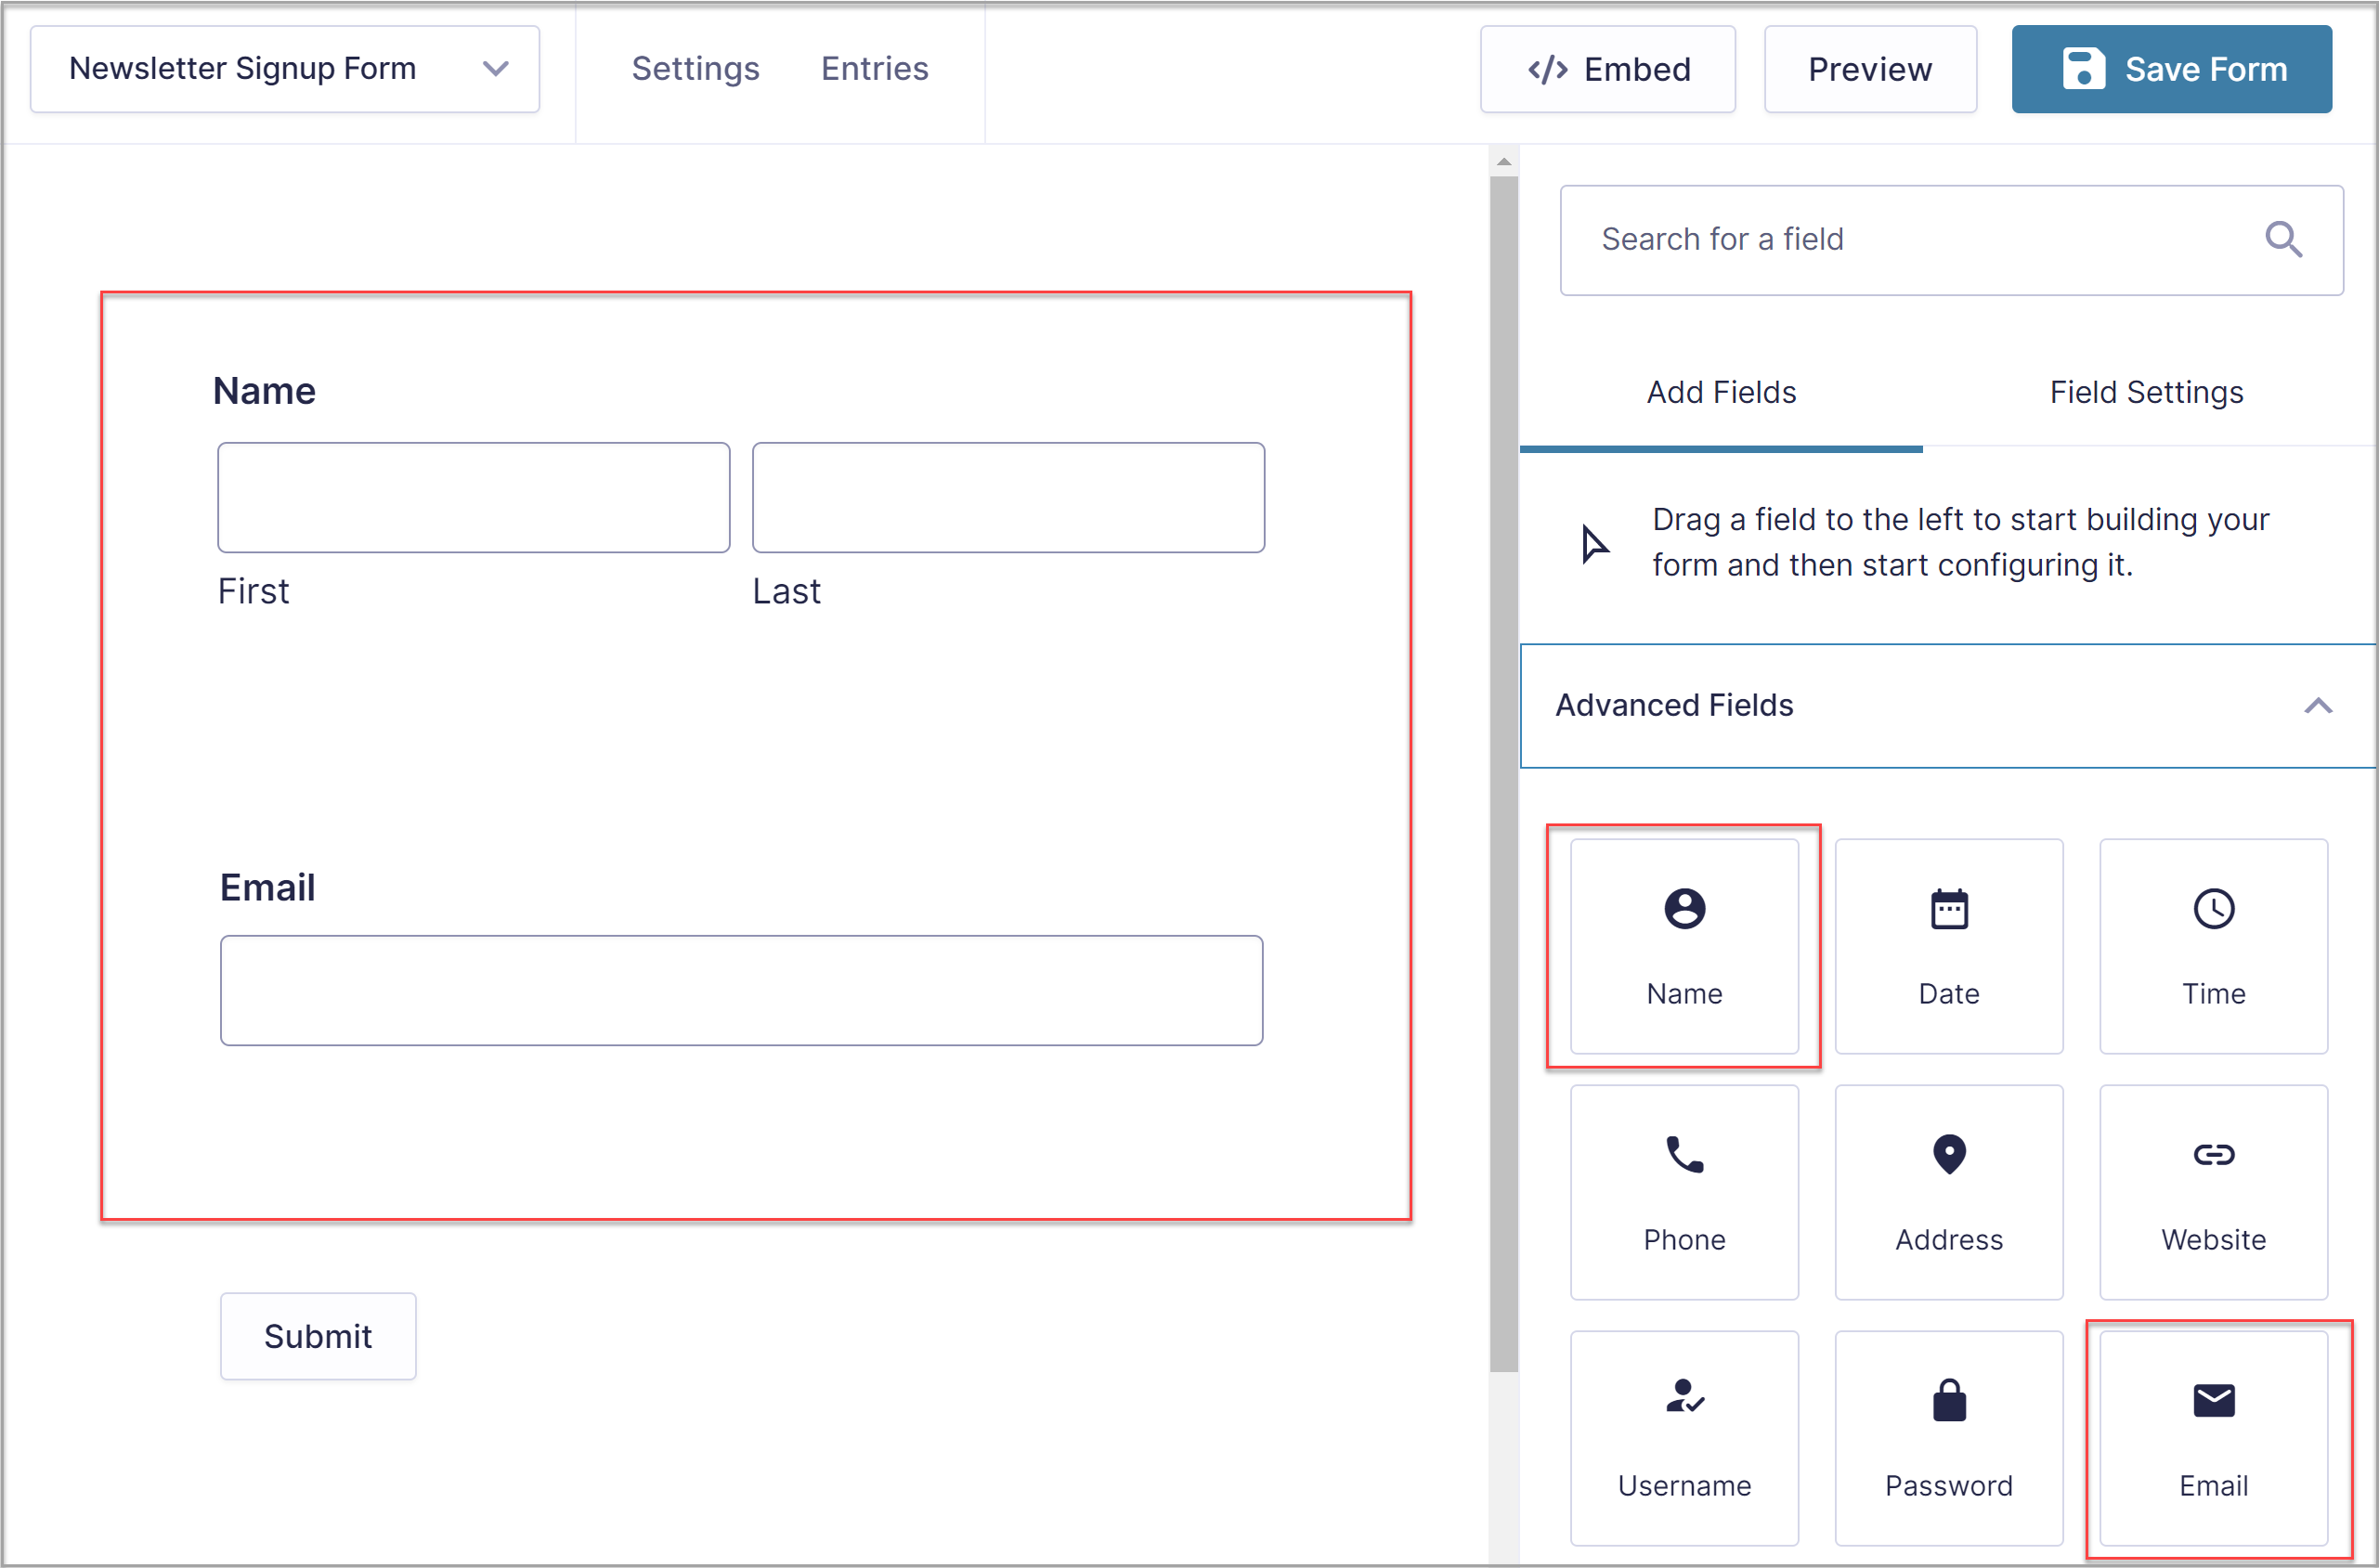
You can add as many fields as you need, but if you’re creating a newsletter signup form, we recommend sticking to the basics: name and email address. You might even want to create a newsletter signup form that only requires an email address to make things really easy for potential subscribers.
4. Connect Your Form to AWeber
To connect your form to AWeber, you need to create a feed. To do so, hover your mouse over the Settings link at the top of the editor and then click AWeber > Add New.
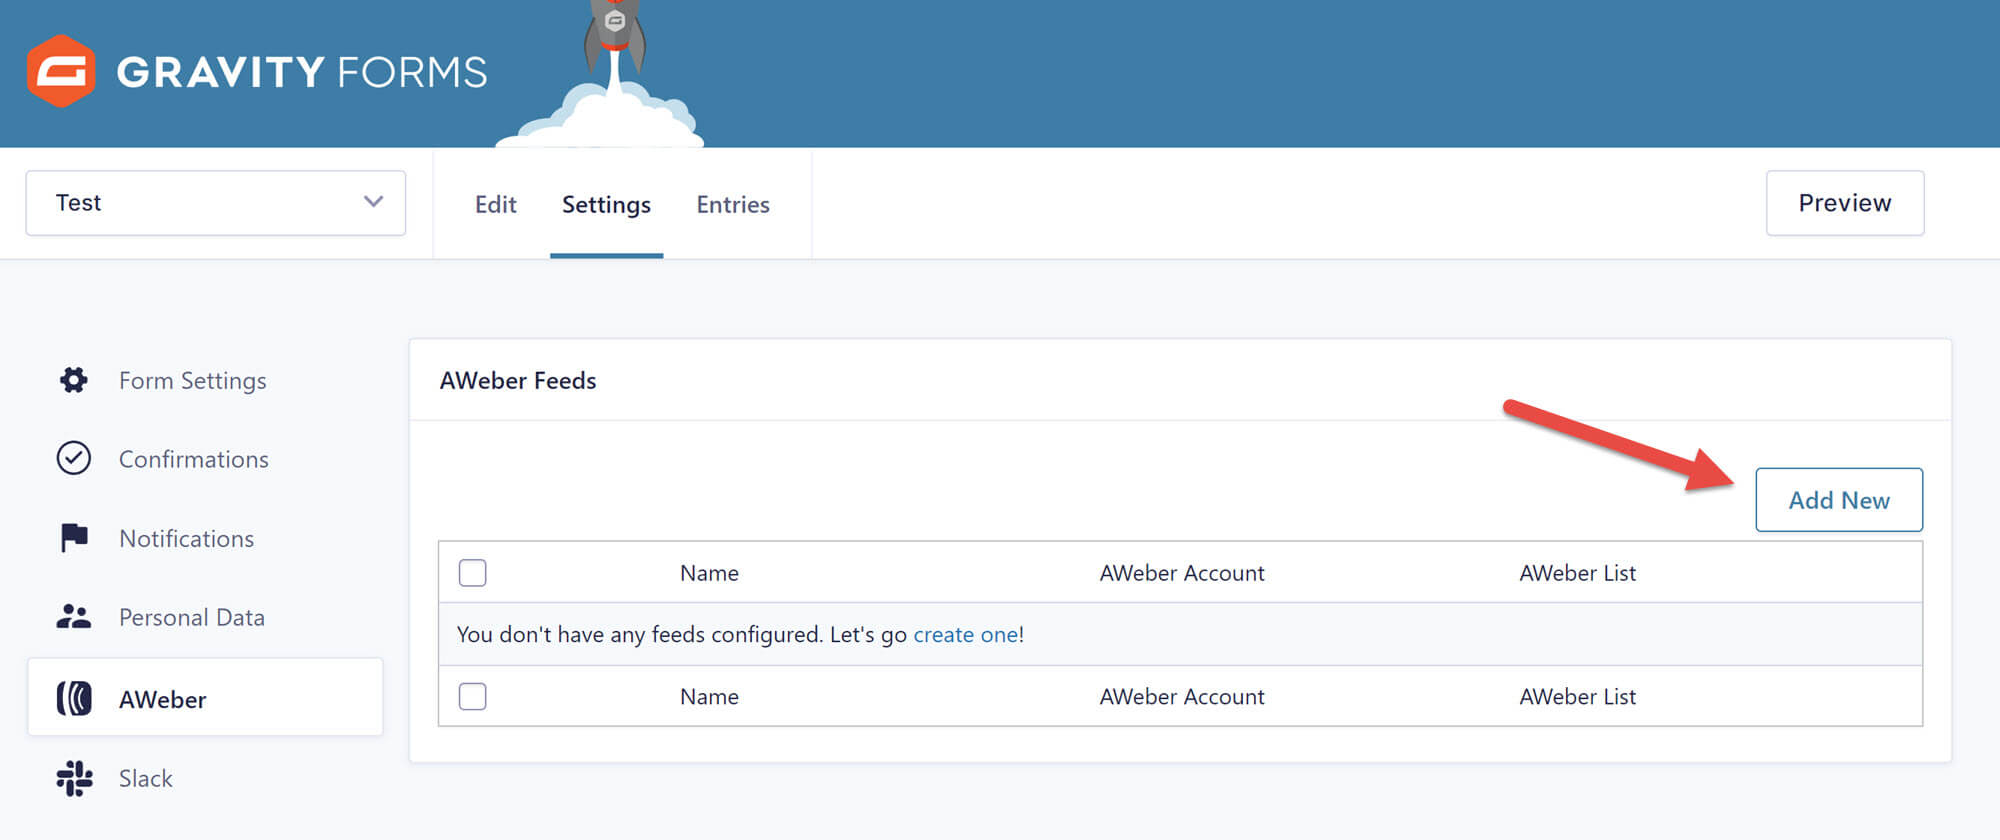
Enter a name for your feed and choose the AWeber list that you would like to send form data to. This will reveal all of the configuration options for the feed.
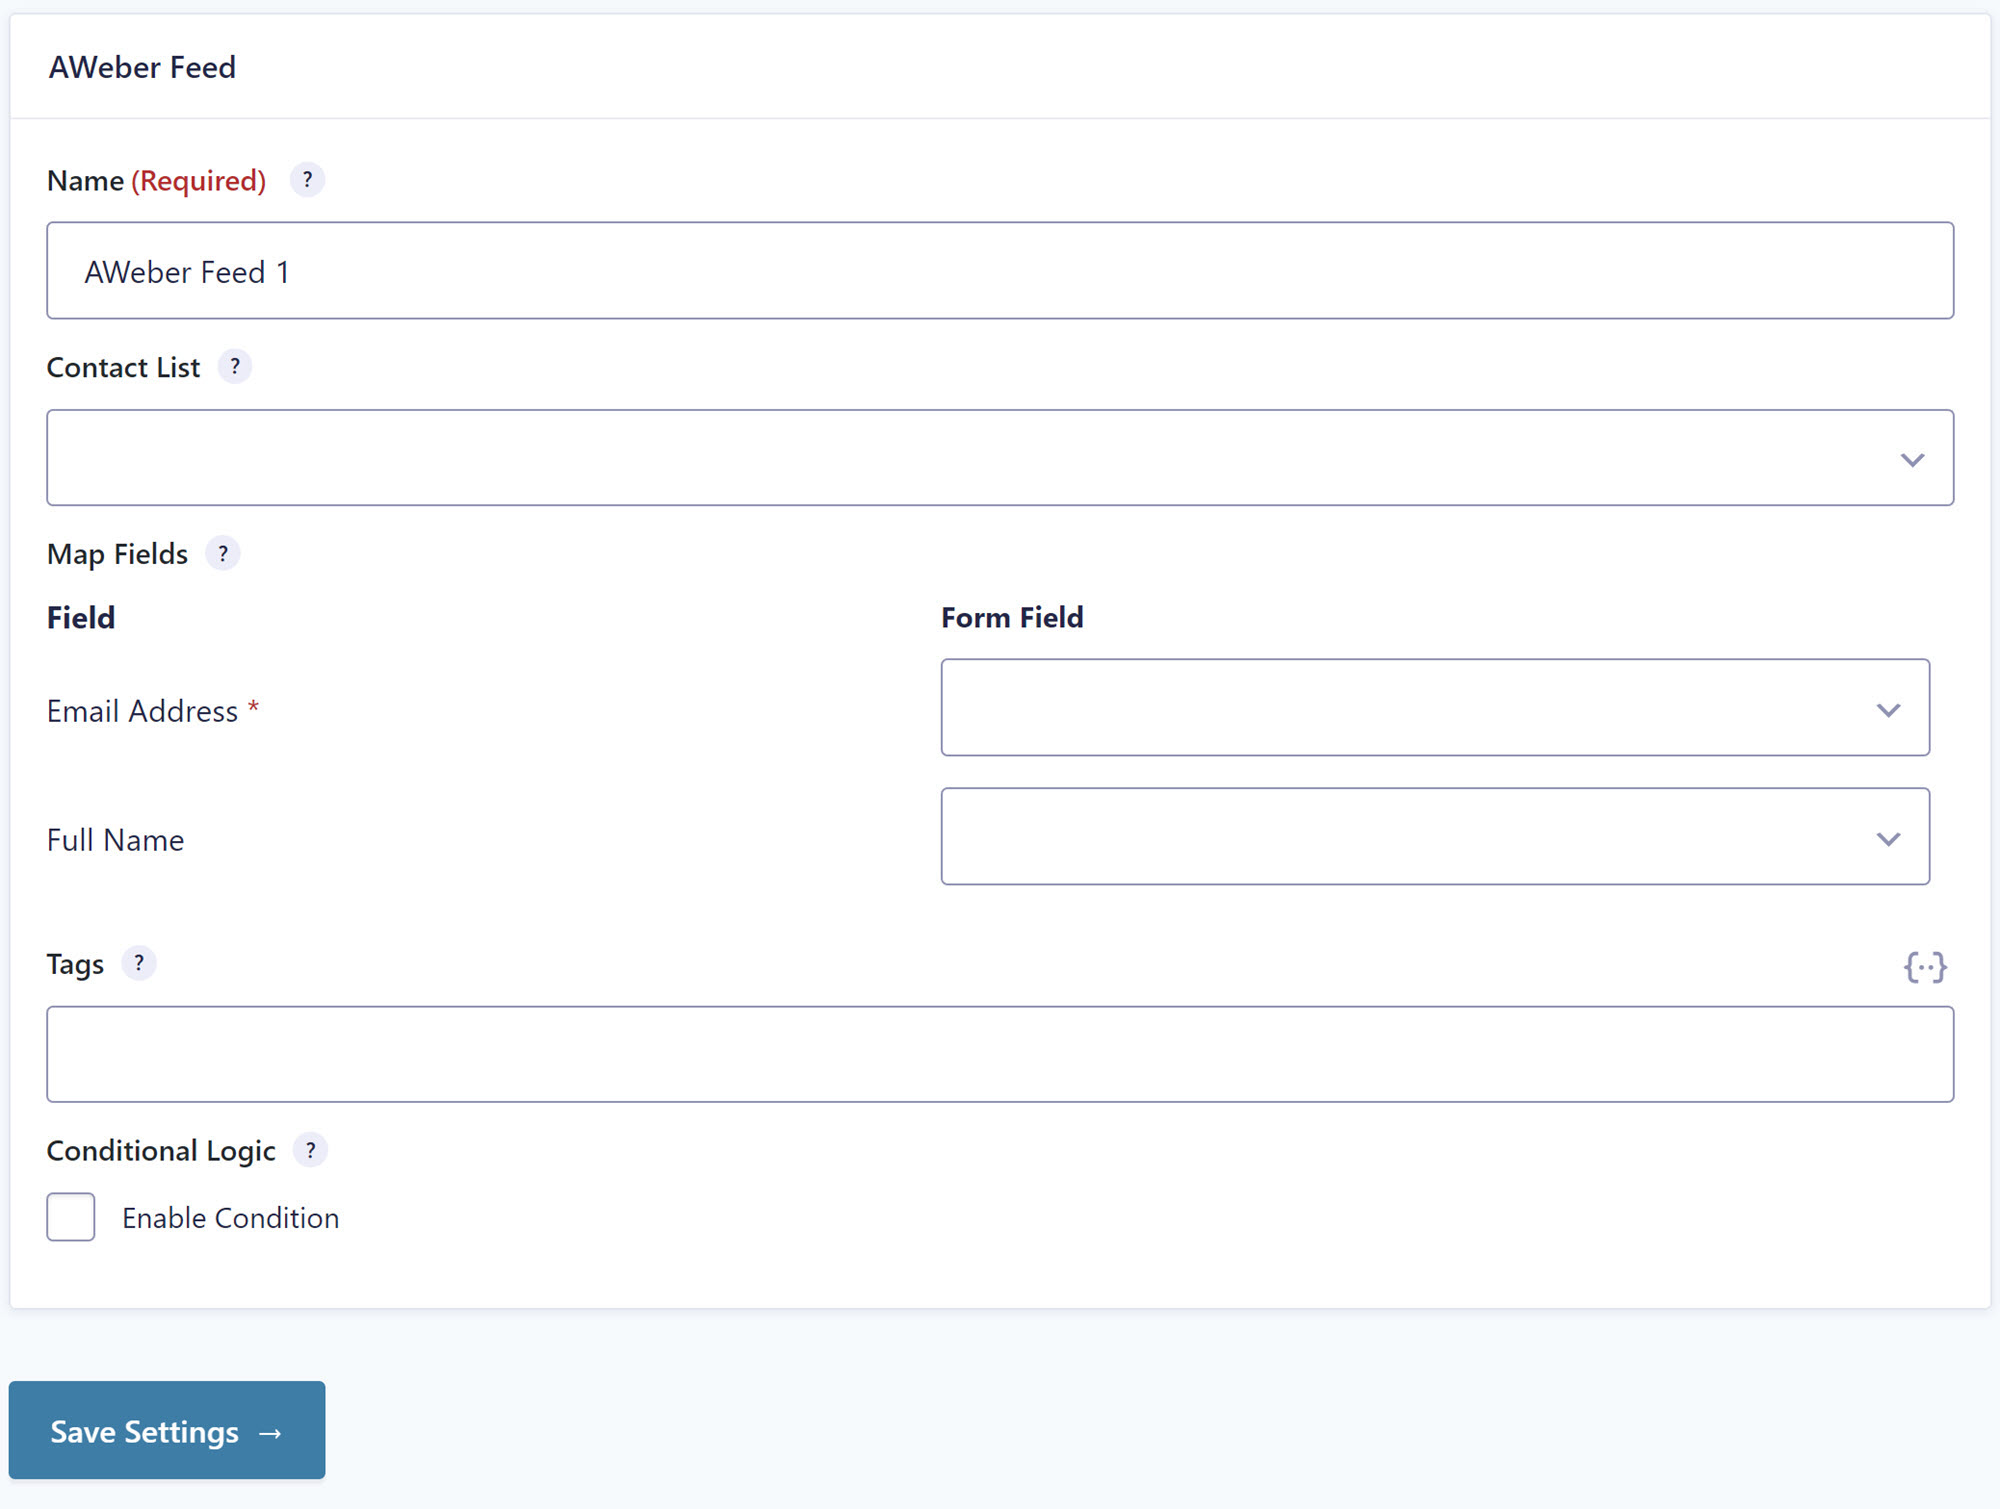
There are three things you can do here:
- Map fields to your AWeber fields so subscriber information is entered correctly in AWeber.
- Add tags to be assigned to subscribers who complete this form.
- Set up conditional logic to specify when information should be sent to AWeber.
When you’ve done configuring the settings, click Save Settings.
5. Embed the Form
Your final task in setup is to embed the form in a page or post on your site. To do this, click the Embed button near the top right corner of the editor.
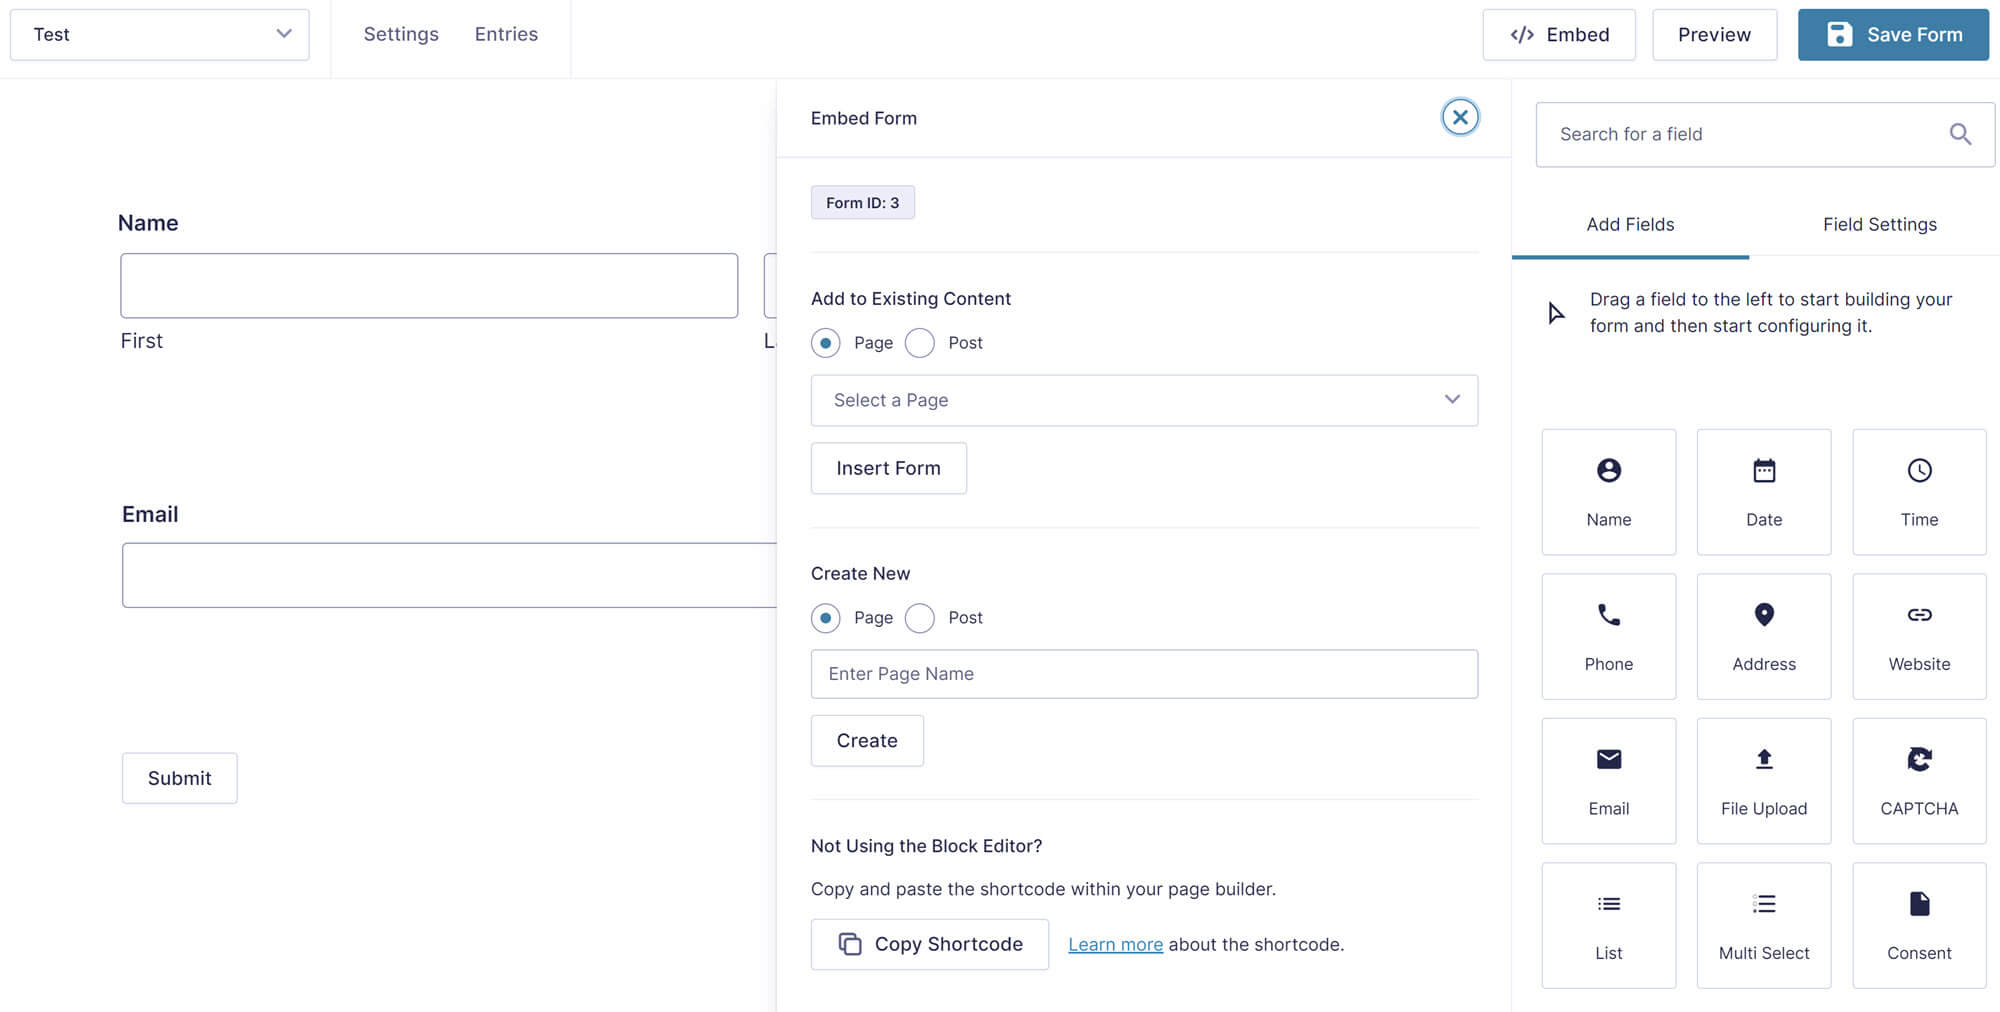
This opens a menu with three options:
- Add to Existing Content – Choose a post or page, click Insert Form, and the page will open with a new Gravity Forms block. You can then move the block (form) to fit in with the design of your page.
- Create New – Decide if you want to create a new post or page, give it a title, and click Create to generate a wholly new page/post with the Gravity Forms block ready to go. You can then build your content around the form.
- Copy Shortcode – If you’re using the Classic Editor or a page builder, you can click Copy Shortcode. Then navigate to the page where you want to publish the form and paste the shortcode where you want your form to appear.
Once you’ve got your form published, Gravity Forms will start sending your subscribers’ information to AWeber right away!
Need More Help Setting Up?
Check out the Gravity Forms AWeber Add-On Documentation to learn more about creating a feed, setting up conditional logic, and other ways to use this add-on to manage your subscribers’ information.
Don’t Have Gravity Forms Yet?
You’ve got nothing to worry about! You can purchase Gravity Forms and get the plugin set up on your WordPress site in a matter of minutes.
And if you want to try it before you buy it, check out our free demo of Gravity Forms.

If you want to keep up-to-date with what’s happening on the blog sign up for the Gravity Forms newsletter!
"*" indicates required fields