Behind the Build: How We Integrated the Gravity Forms Theme Framework with Stripe’s Payment Element
Carl Hancock
•
Published:
•
Updated:
In the world of online payments, seamless integration and a smooth user experience are crucial for businesses. Gravity Forms and Stripe offer powerful tools that can enhance the functionality and security of payment systems.
In this article, we will explore one aspect of the integration of these two tools: styling. By leveraging the capabilities of Gravity Forms’ newly launched theme framework and the flexibility of Stripe’s Payment Element, the Gravity Forms Product team was able to create a seamless integration, allowing businesses to provide a streamlined payment experience for their customers.
We’ll start by briefly going over what the Gravity Forms theme framework and Stripe Payment Element are. We will then go into details about the integration, looking at some challenges our Product team had to overcome and the decisions we made.
Let’s dive in…
What is the Gravity Forms Theme Framework?
At the most basic level, the theme framework is the system within Gravity Forms that controls form styling and appearance. It was introduced in version 2.7.0 and provides a foundation for creating and customizing form themes.
At the heart of this framework is the CSS API, which is a collection of native CSS custom properties that can be overridden to change the look and feel of the form. Here are a few examples of these custom properties:
--gform-theme-font-family
Specifies the font family that will be used for all text on a form.
--gform-theme-control-background-color
Specifies the background color for form controls (i.e. inputs, textareas, selects, etc…)
--gform-theme-control-color
Specifies the text color inside form controls.
--gform-theme-control-border-color
Specifies the border color for form controls.
There are hundreds of custom properties available in the CSS API to control various aspects of form design such as font, colors, spacing, borders and more. These properties also support customization of different element states such as hover, focus and disabled.
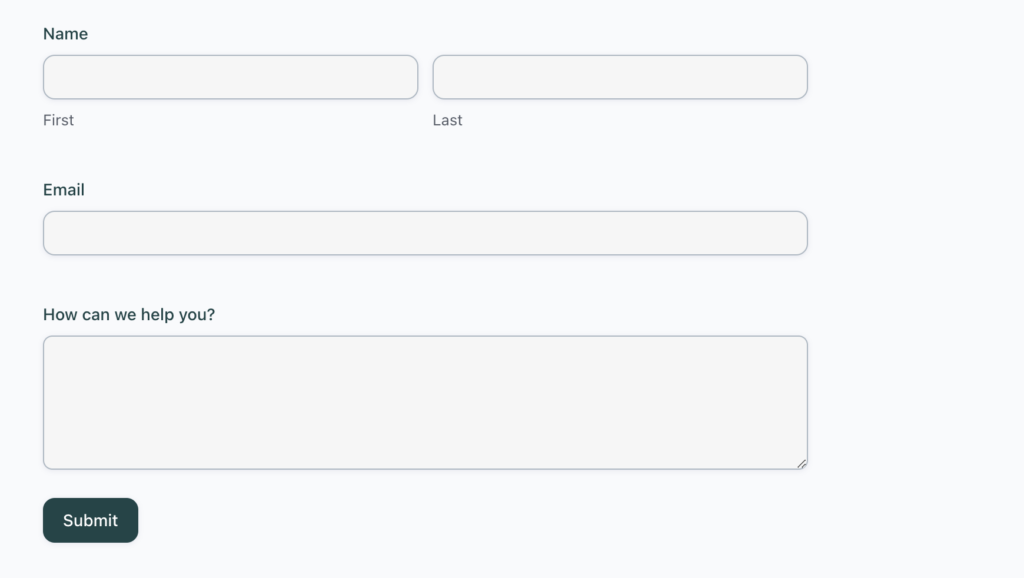
To change the way a form looks, one must simply override one or more of these properties and all elements of the form will be adjusted accordingly. For example, the following code snippet:
Would result in a form looking like this:
But you don’t need to be a developer in order to style forms, those days are over! Form styles can be easily changed without code via the Block Editor.
What is the Stripe Payment Element?
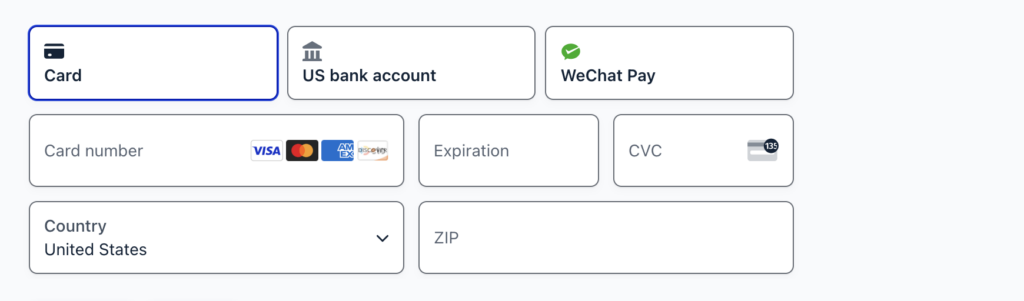
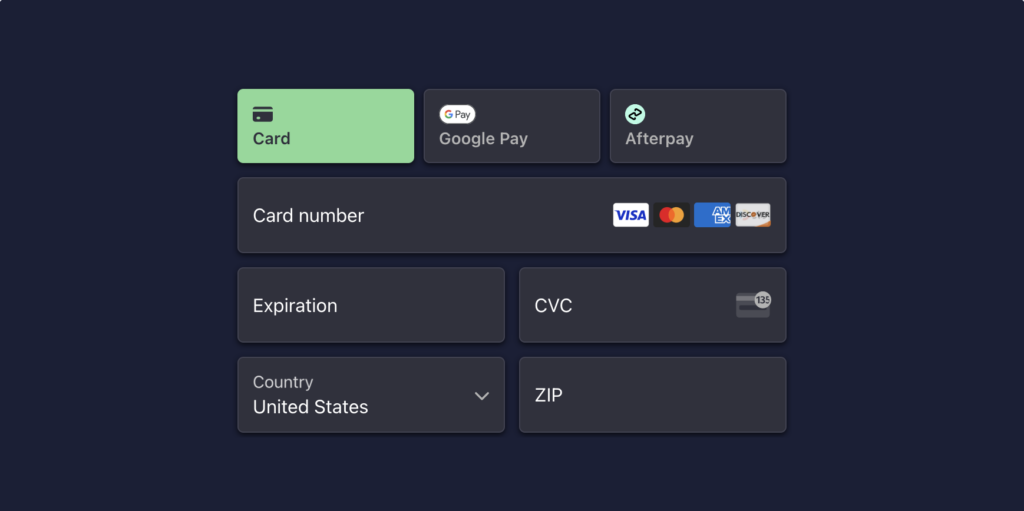
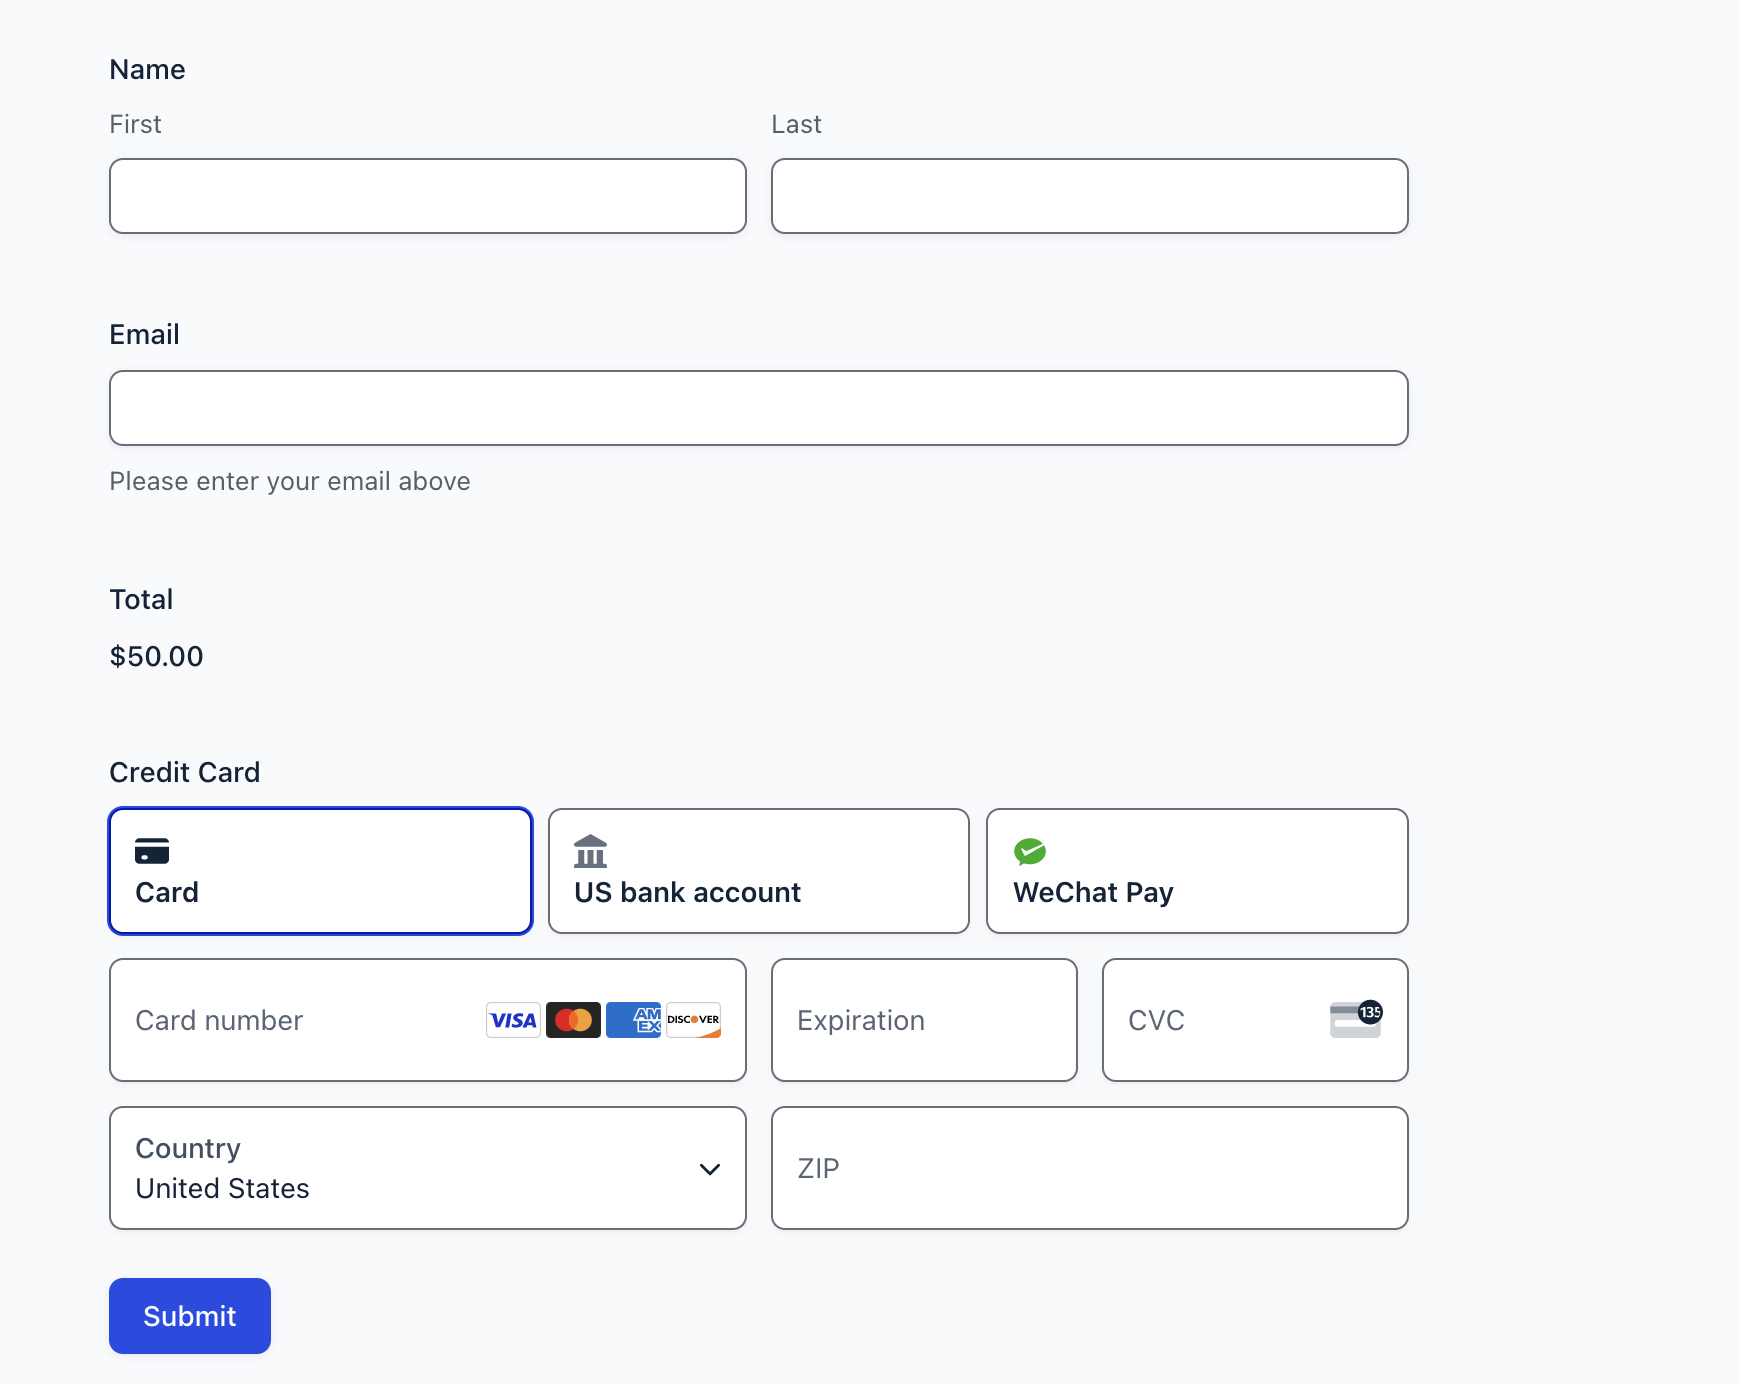
Stripe’s Payment Element is a user interface component provided by Stripe that enables developers to embed payment forms directly into their web applications.
Here is a screenshot of what a typical Payment Element form looks like:
The Payment Element is packed with features, here are some of our favorites:
It is PCI-compliant out of the box, so it is very easy for developers to create a secure payment solution by simply using Stripe’s API and embedding the Payment Element into their apps, plugins and checkout pages.
It integrates seamlessly with Stripe’s backend infrastructure, allowing businesses to accept credit card payments, Apple Pay, Google Pay, Bank transfers, and many other payment methods.
It has a very powerful and flexible theming API, allowing its look and feel to be completely customized.
Its APIs are easy to use and understand, and they are very well documented.
Our challenge: Style the Payment Element to look like a native part of Gravity Forms. How did we do it?
Starting from the Beginning
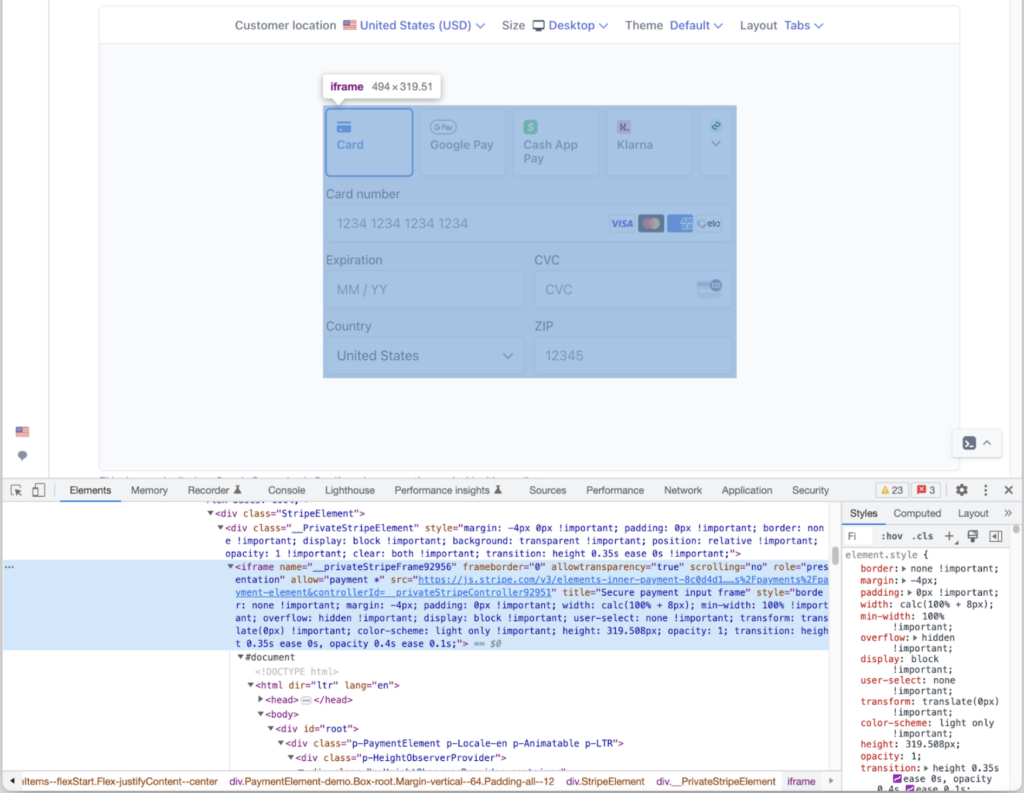
Looking closely at how the Payment Element is rendered on the page, it lives inside an iframe tag.
Placing the Payment Element inside an iframe is one of the reasons Stripe can ensure PCI compliance, however, it also creates a challenge for developers as standard CSS can’t be used to style elements inside iframes.
To get around this limitation, Stripe created the Elements Appearance API. Through this powerful and flexible API, the Payment Element can be completely customized to match the environment around it.
Let’s take a quick look at how this API works…
The Elements Appearance API is based on three concepts that can be applied by themselves or in combination with each other.
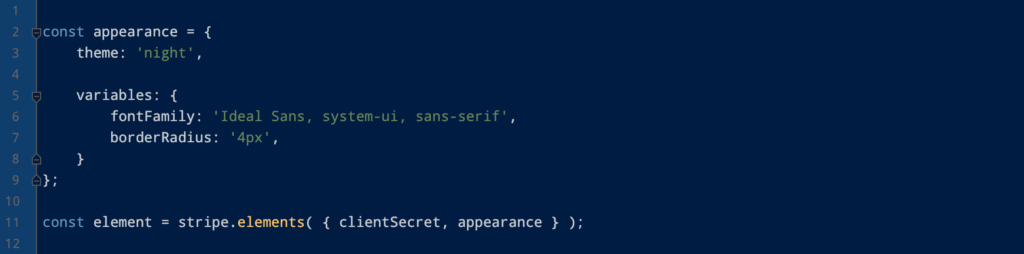
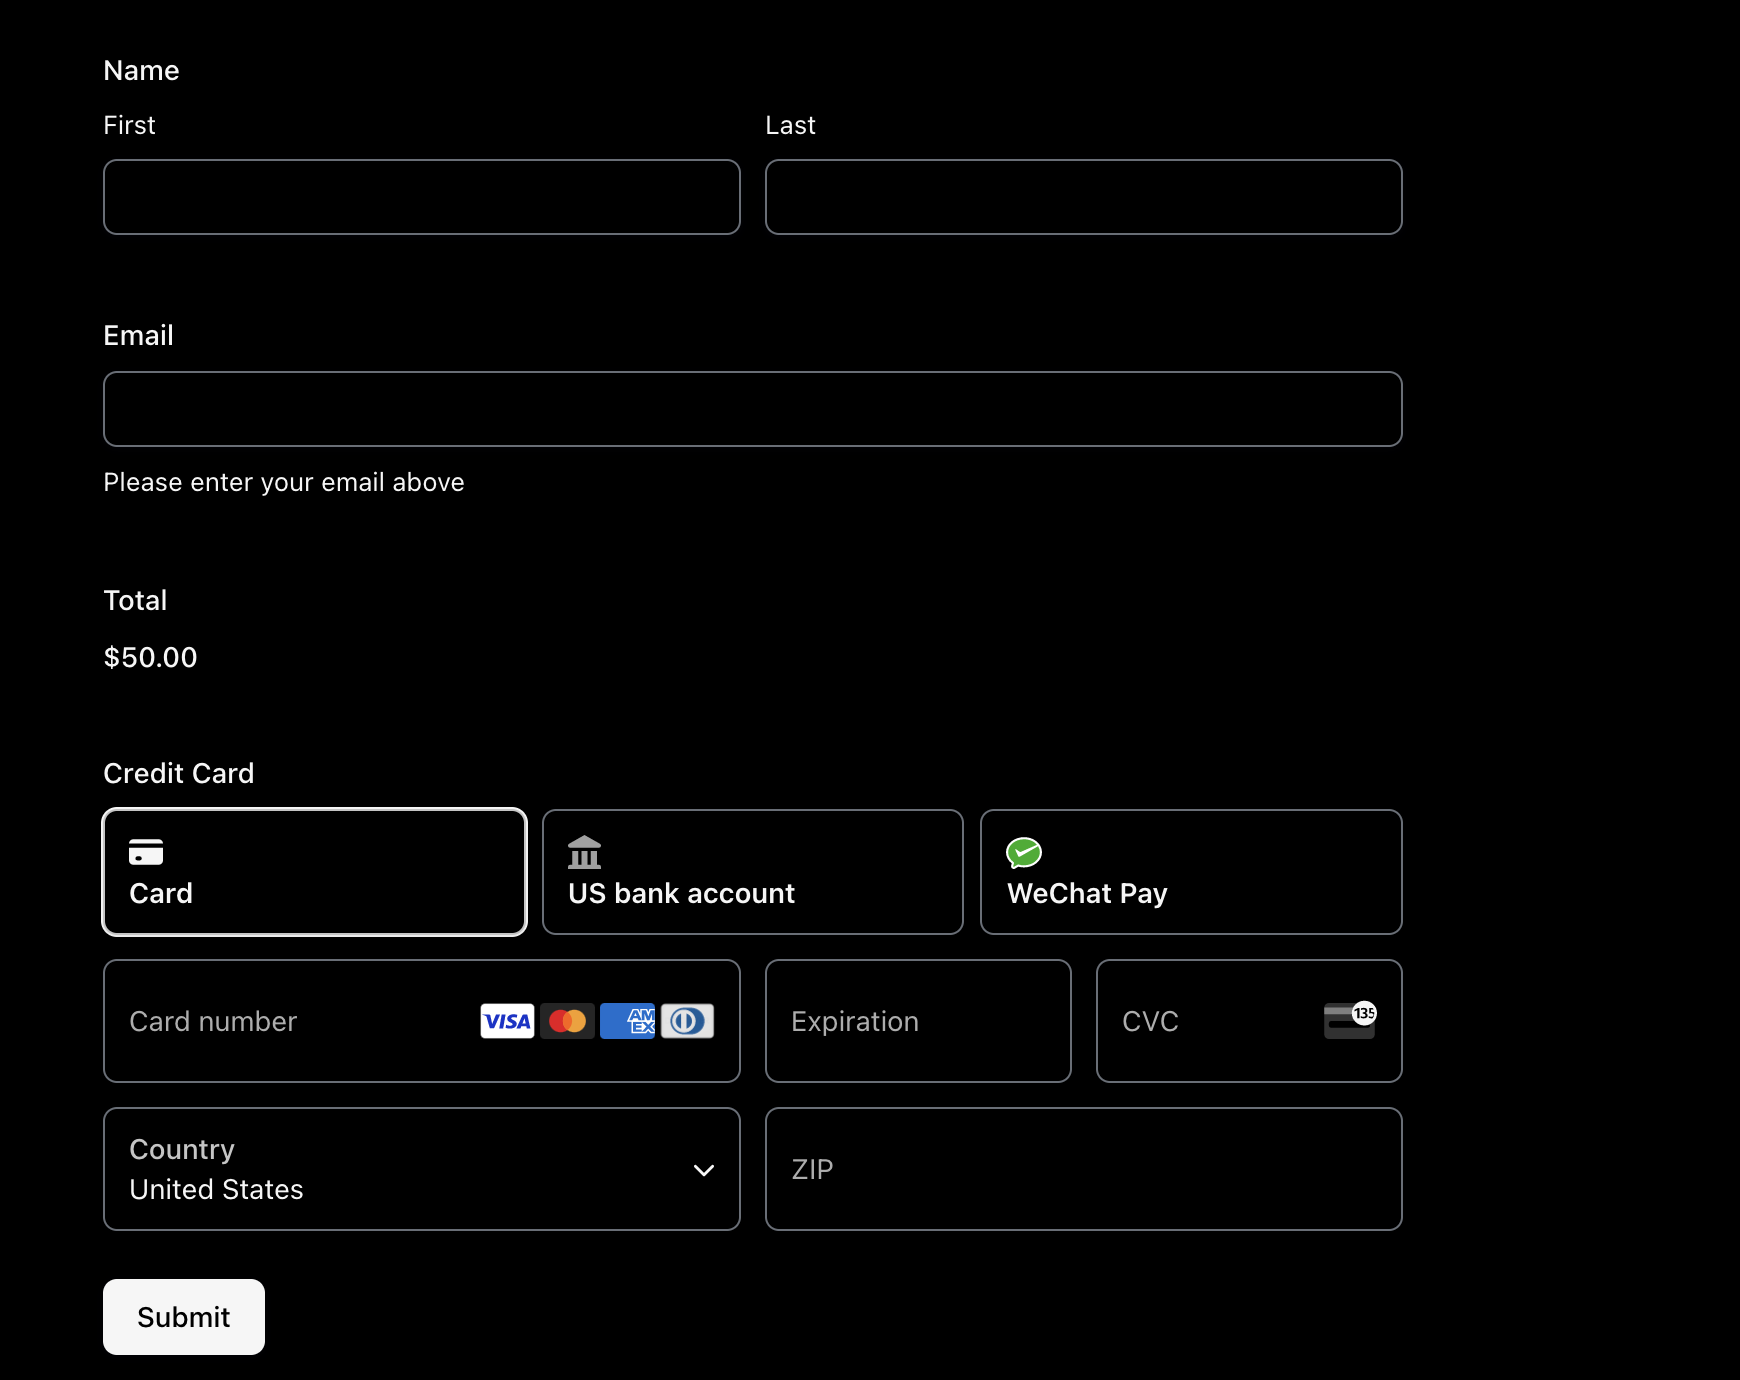
Theme: When creating the Payment Element, a “theme” can be specified to provide a basic look and feel for the elements. Here is how the “night” theme looks, along with the code required to specify the theme:
Variables: To further customize the theme, a set of predefined variables can be used. In the following snippet, the font family and border radius are updated using variables.
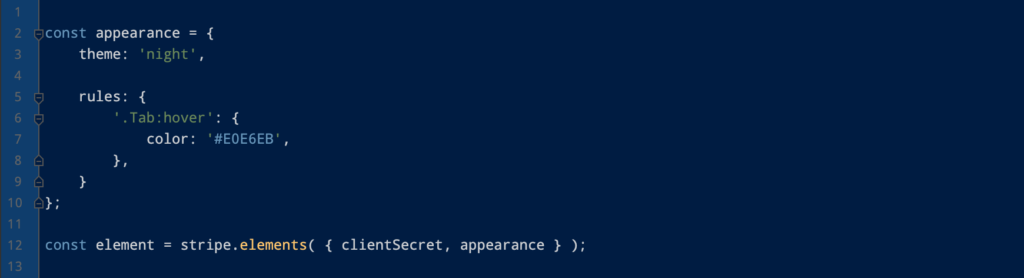
Rules: These are CSS-like selectors, where you can specify your own CSS, allowing granular customization of individual components. For example, to change the hover color of the Tab element, the following can be used.
Note: Not every CSS property can be used here. Every class has a set list of supported properties. Visit Stripe’s documentation to learn more.
Connecting the Dots
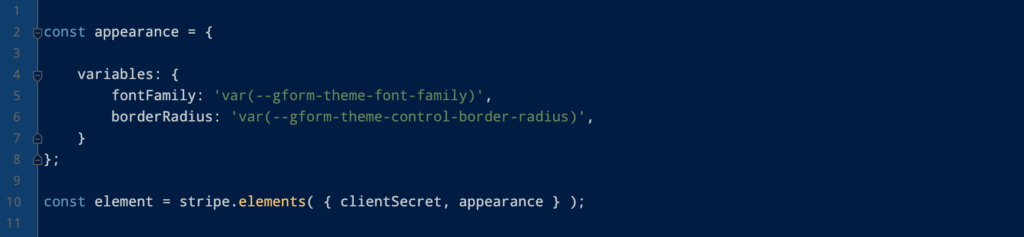
Now that we know how the Elements Appearance API works, the next step is to find a way to map Gravity Forms’ theme framework CSS properties to the Element Appearance API’s variables and rules definition.
Something like the following would be ideal:
However, since the Payment Element is within an iframe, these Gravity Forms CSS properties are not accessible. We need to find a way to dynamically evaluate these properties and use the resulting values instead of the property name.
Luckily, browsers have the CSSStyleDeclaration object that can do exactly that.
Here is how this works…
First, use the native getComputedStyle() method to return a CSSStyleDeclaration object for our form.
Then, use the getPropertyValue() method to convert each property name into its computed end value.
Now we have all the pieces in place to make this work. All we need to do is map the right Gravity Forms properties to the appropriate Stripe Appearance API variables and rules.
Mapping Gravity Forms CSS Properties to Stripe’s Variables and Rules
Most of Stripe’s variables were straight forward to map and Gravity Forms had an obviously appropriate CSS property for it. However, some elements were a little trickier.
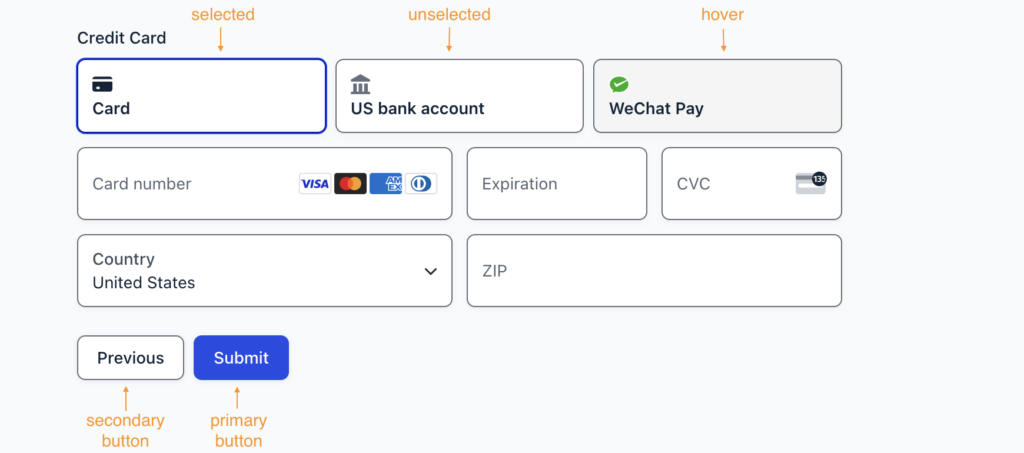
The Tab element, for example, gave us some headaches. This is the element that allows users to switch between payment methods. It has a selected, unselected and hover state, and it is not quite like any other native Gravity Forms element. We had to improvise and decided to use the secondary button styles for Tabs. To style the selected Tab, we used the primary button background color. See screenshot below:
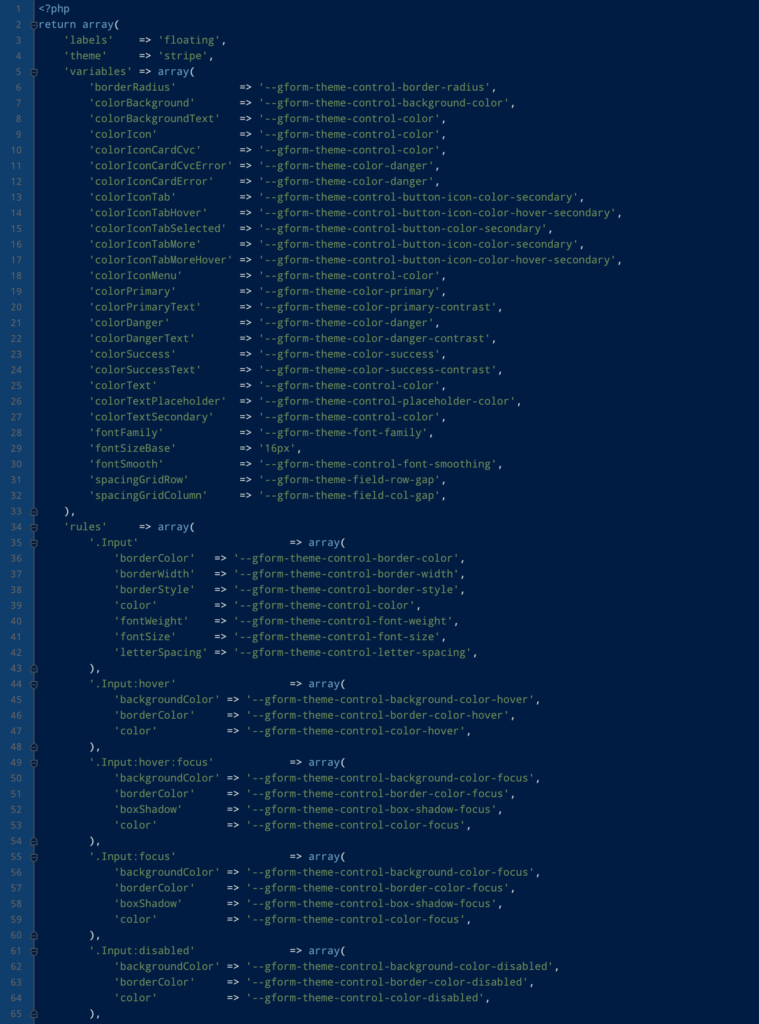
After mapping all basic variables to their appropriate Gravity Forms custom properties, and creating rules for each complex element in Stripe’s Payment Element, end ended up with the following array:
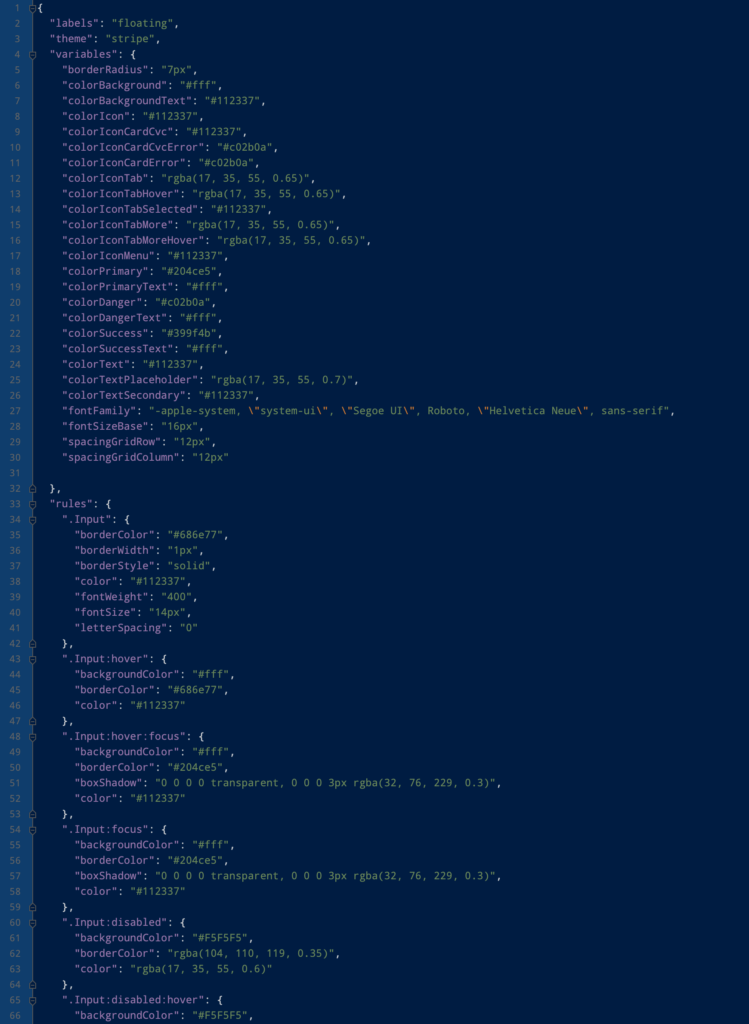
Finally, we use the technique described above to loop through all Gravity Forms property names in the array above and convert them into their computed values. The result is a Javascript object that is ready to be consumed by the Element Appearance API.
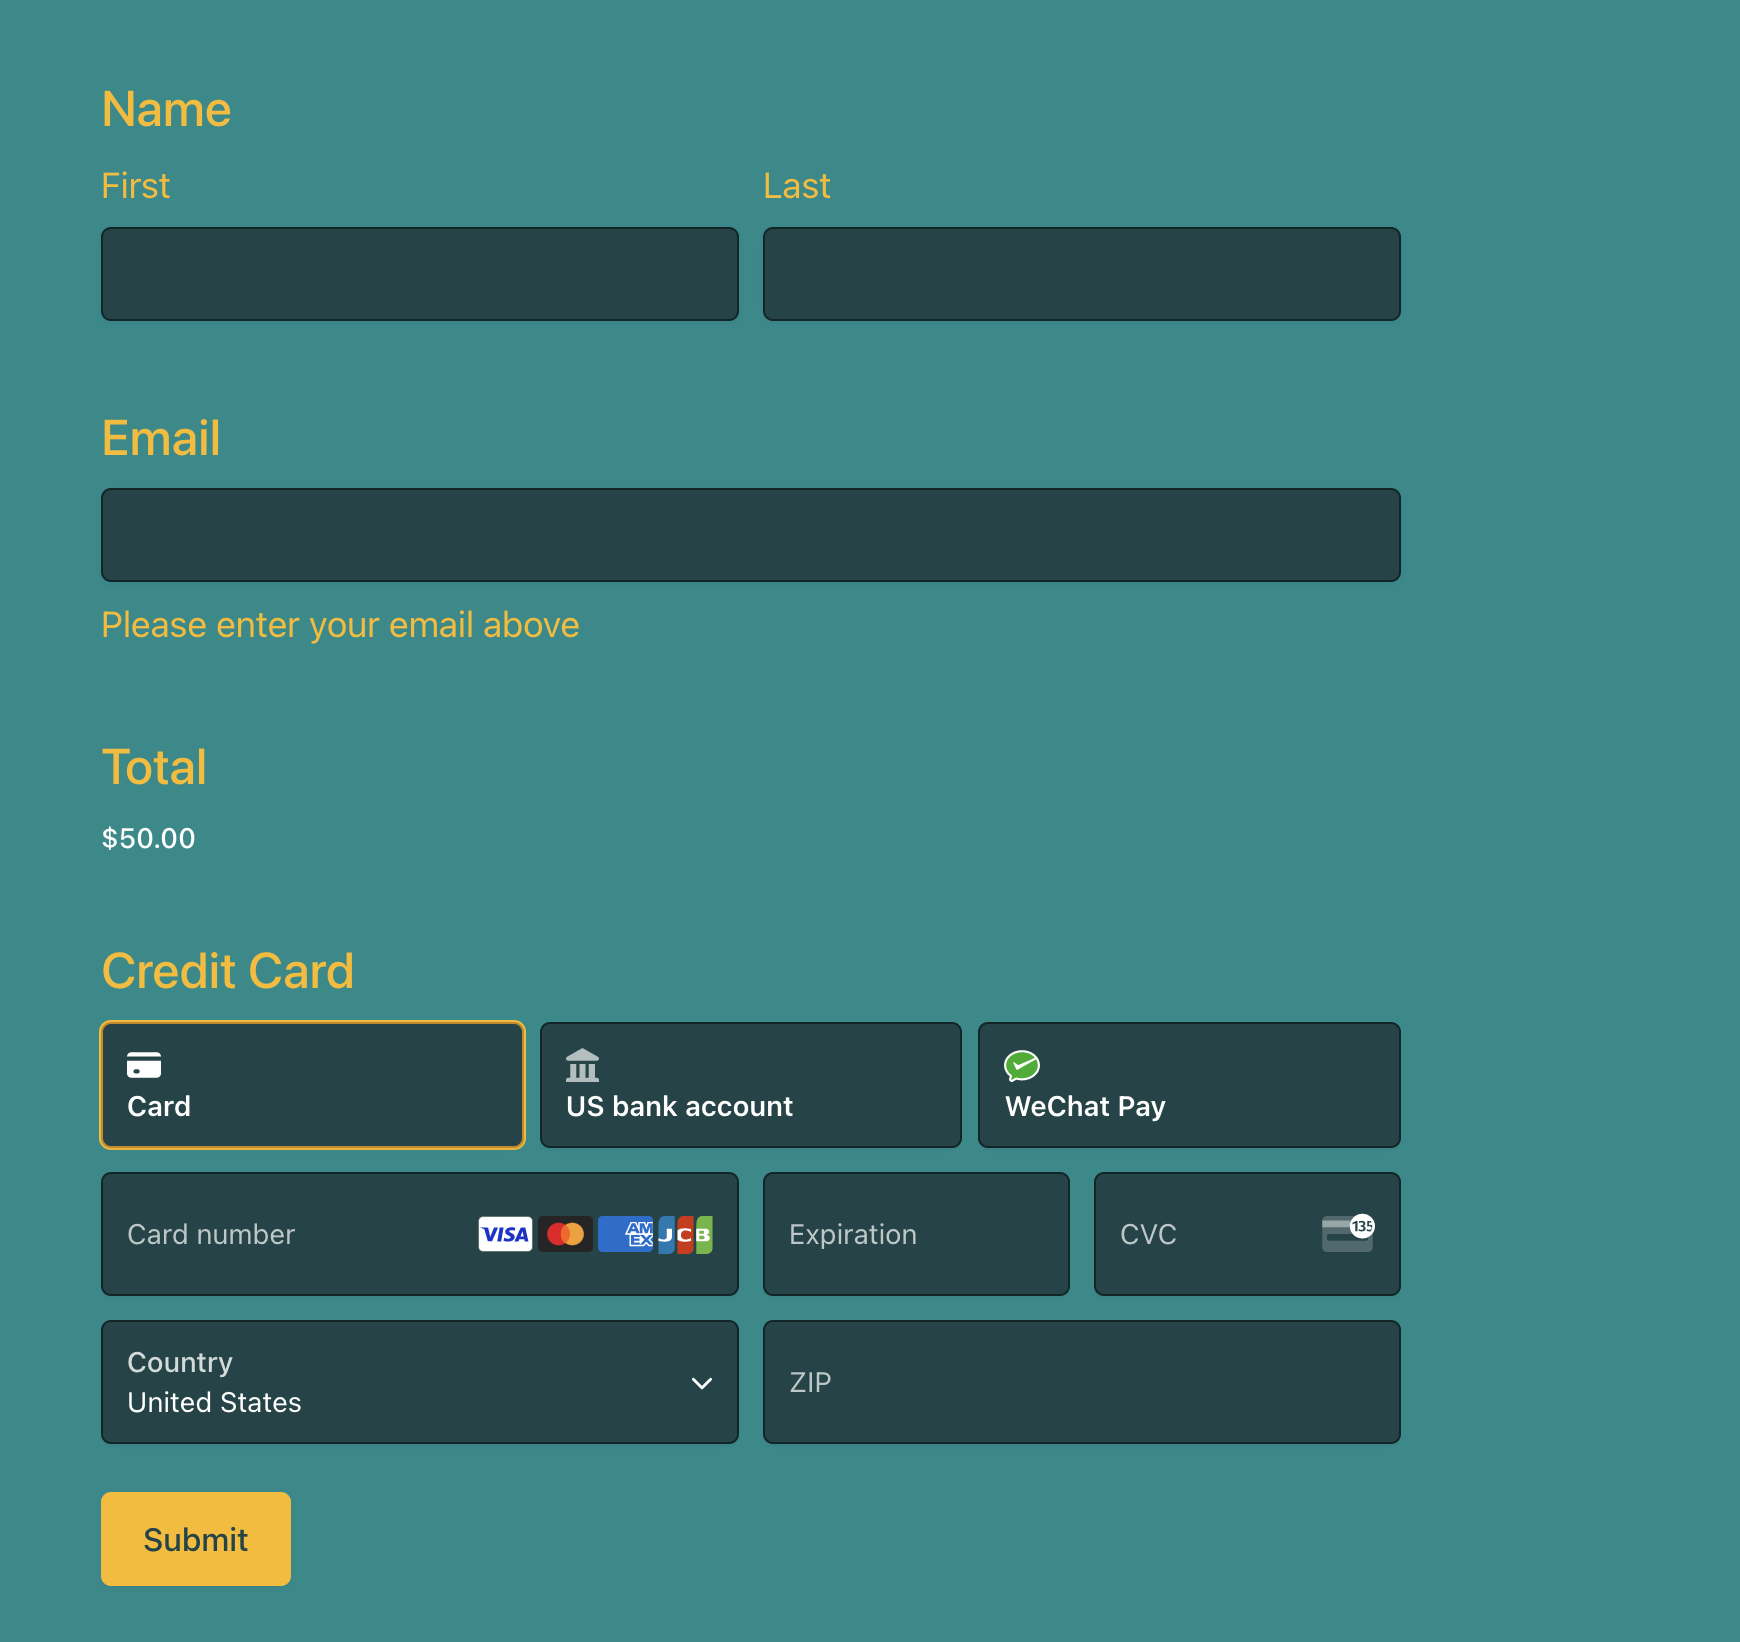
With everything connected and the values from Gravity Forms theme framework CSS API being passed to Stripe’s Element Appearance API, the Payment Element looks and feels like it is a native part of Gravity Forms. Very cool!
Here’s a summary of the new features you’ll find with Stripe Add-On 5.0…
20+ Payment Methods with Payment Element – Whether you want to accept card payments, payments using Wallets (e.g. Apple Pay, Google Pay), or take payments using other options – like ACH Debit and iDeal – Stripe’s Payment Element has you covered.
Autofill Payment Details with Link – Link is Stripe’s accelerated checkout. If customers choose to opt in, Link saves and autofills their payment and shipping details across hundreds of thousands of sites, streamlining their checkout experience.
The Gravity Forms Stripe Add-On is available to all Gravity Forms customers with an active Pro or Elite license. And for those with a Basic license, simply head on over to your Gravity Forms Account dashboard to update your plan.
Not yet a Gravity Forms customer, check out our different license types over on our Pricing page and make a purchase today!
If you want to keep up-to-date with what’s happening on the blog sign up for the Gravity Forms newsletter!


 –>
–>