Sentiment Analysis Using Gravity Forms OpenAI
Written by the Editorial team at Gravity Wiz…
Is a recent product release creating the majority of your negative sales or support conversations? Inversely, what is your business doing that creates a positive inbox? How can we get more of this?
Sentiment Analysis is a super handy AI-enabled tool that can help your business workflow right now, and it only takes a few minutes to set up.
By understanding the sentiment of incoming form submissions, support tickets, or email messages in large quantities, you unlock valuable insights for your business.
Among other things, it allows you to:
- Identify negative tickets and important issues quickly.
- Note to be more patient with negative or upset users.
- Analyze support sentiment trends, for example, timed around specific releases or products.
As we explore below, you can take this even further and automatically tag certain tickets based on sentiment, segment people, or even trigger sentiment-specific autoresponders, all based on the vibe.
What we mean by sentiment analysis: understanding the overall attitude or mood of a message.
Example:
- “You rock!” — sentiment feels positive.
- “You are the absolute worst.” — negative.
Let’s explore setting this up.
Setting Up AI-powered Sentiment Analysis
First, make sure you have the free Gravity Forms OpenAI plugin installed.
1. Set up a form.
- Add a Paragraph Text field for the description of the issue.
- Add a Hidden field for Sentiment.
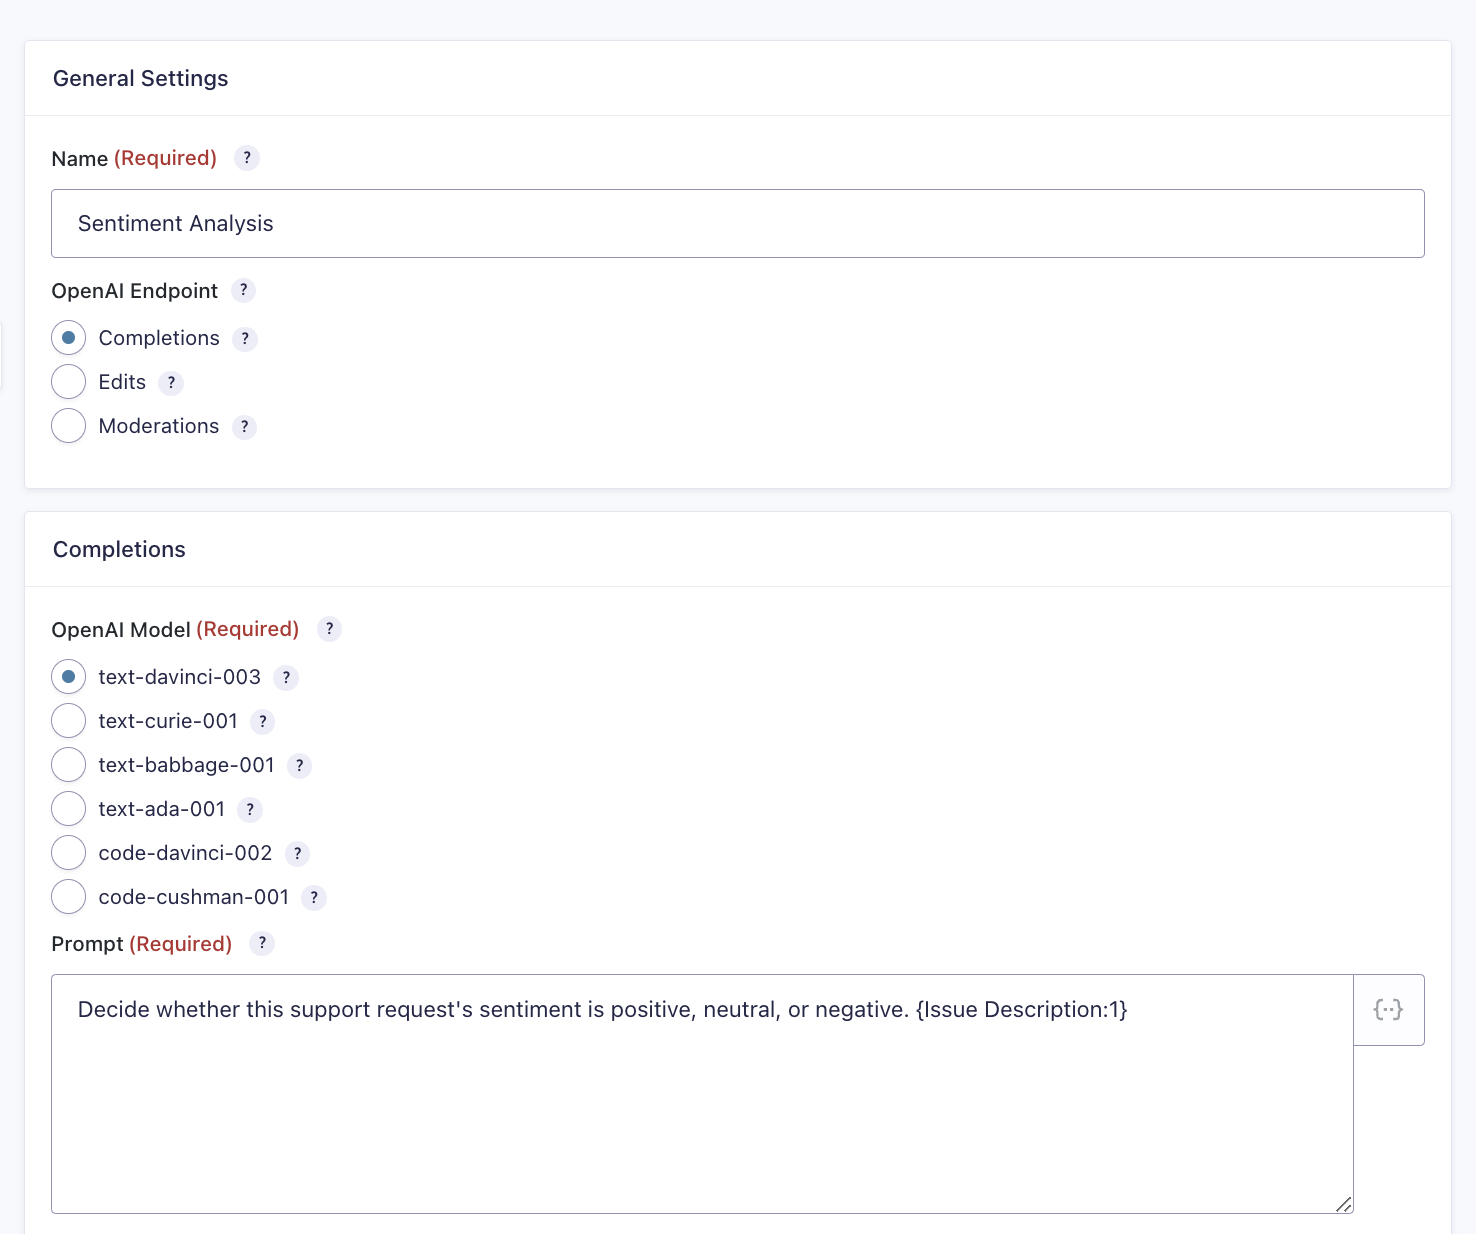
2. Set up a feed using Gravity Forms OpenAI.
- Feed Title: Sentiment Analysis
- OpenAI Endpoint: Completions
- OpenAI Model: text-davinci-003
- Prompt: Decide whether this support request’s sentiment is positive, neutral, or negative. {Issue Description:3}
Now, let’s test a few examples. Run these through your form submission.
- Negative: “I updated to the latest version today and it’s giving me a fatal error. Please fix. NOW!”
- Neutral: “Hey, wizards. I updated to the latest version today and it’s giving me a fatal error. I downgraded so all is well but I’d love to get back on the latest as soon as you’ve fixed this issue.”
- Positive: “Hey, wizards! I updated to the latest version today and I’m loving the new feature. Could you help me get it to do this other thing too?”
When viewing Gravity Forms entries, you should have the sentiment field showing something like this:
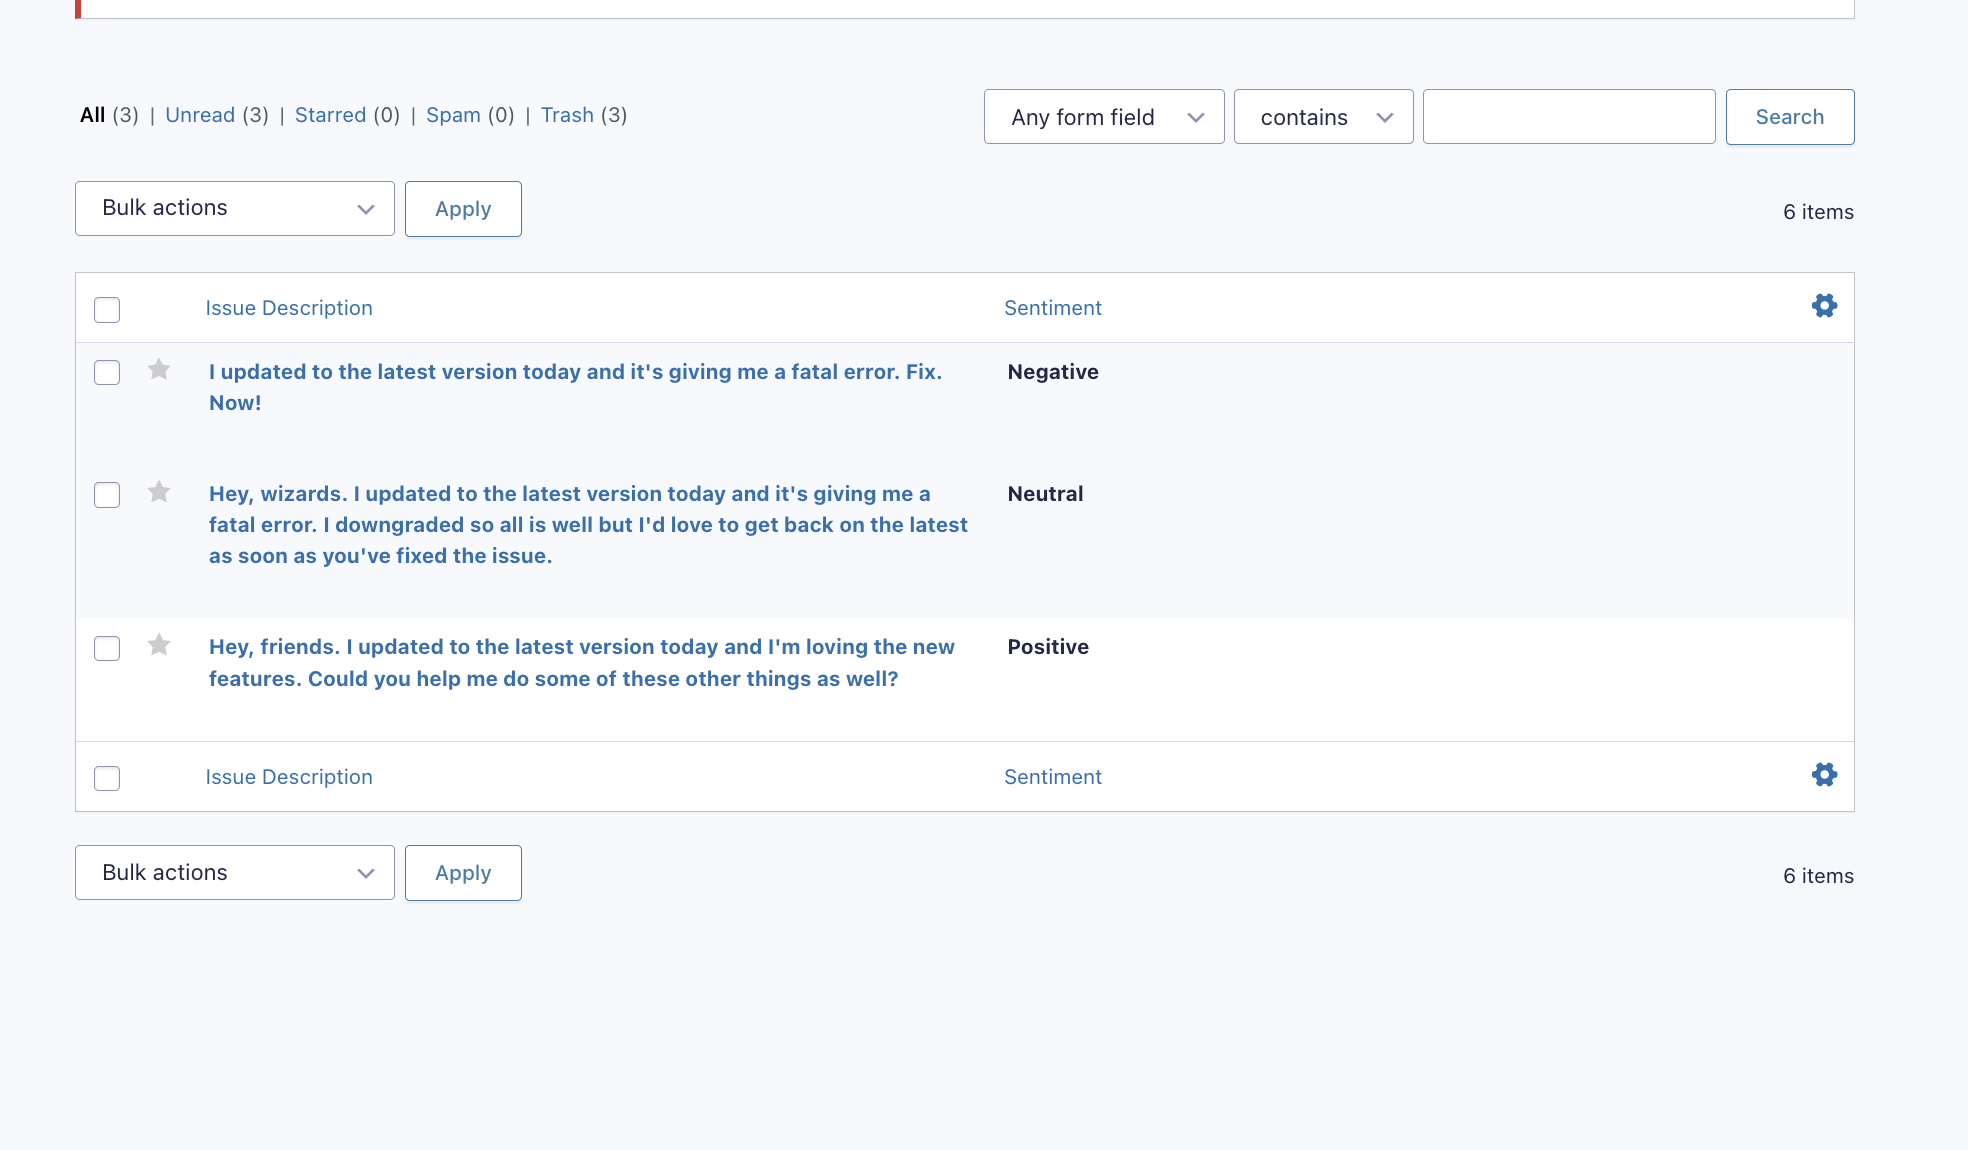
With this configured, you open the door to a few things. You can have all support requests automatically include this hidden field to check sentiment of support responses. The sentiment field’s output can be used in any other Gravity Form, notification, or other workflow/automation you have enabled.
Or, you could create a form that lets you input multiple tickets at a time and analyze them in larger quantities. Once there is an overall sentiment gathered on a large number of tickets, you can begin to sort and analyze.
This also paves the way for additional integrations — like Help Scout!
Take it Further: Reporting and Workflows with Help Scout
If you’re using the Gravity Forms Help Scout Add-On, you can use all of this information in your support workflow. The sentiment becomes a tag (learn more about tags) associated with that message or ticket. Here’s how to set that up.
First, ensure you have the Gravity Forms Help Scout Add-On installed.
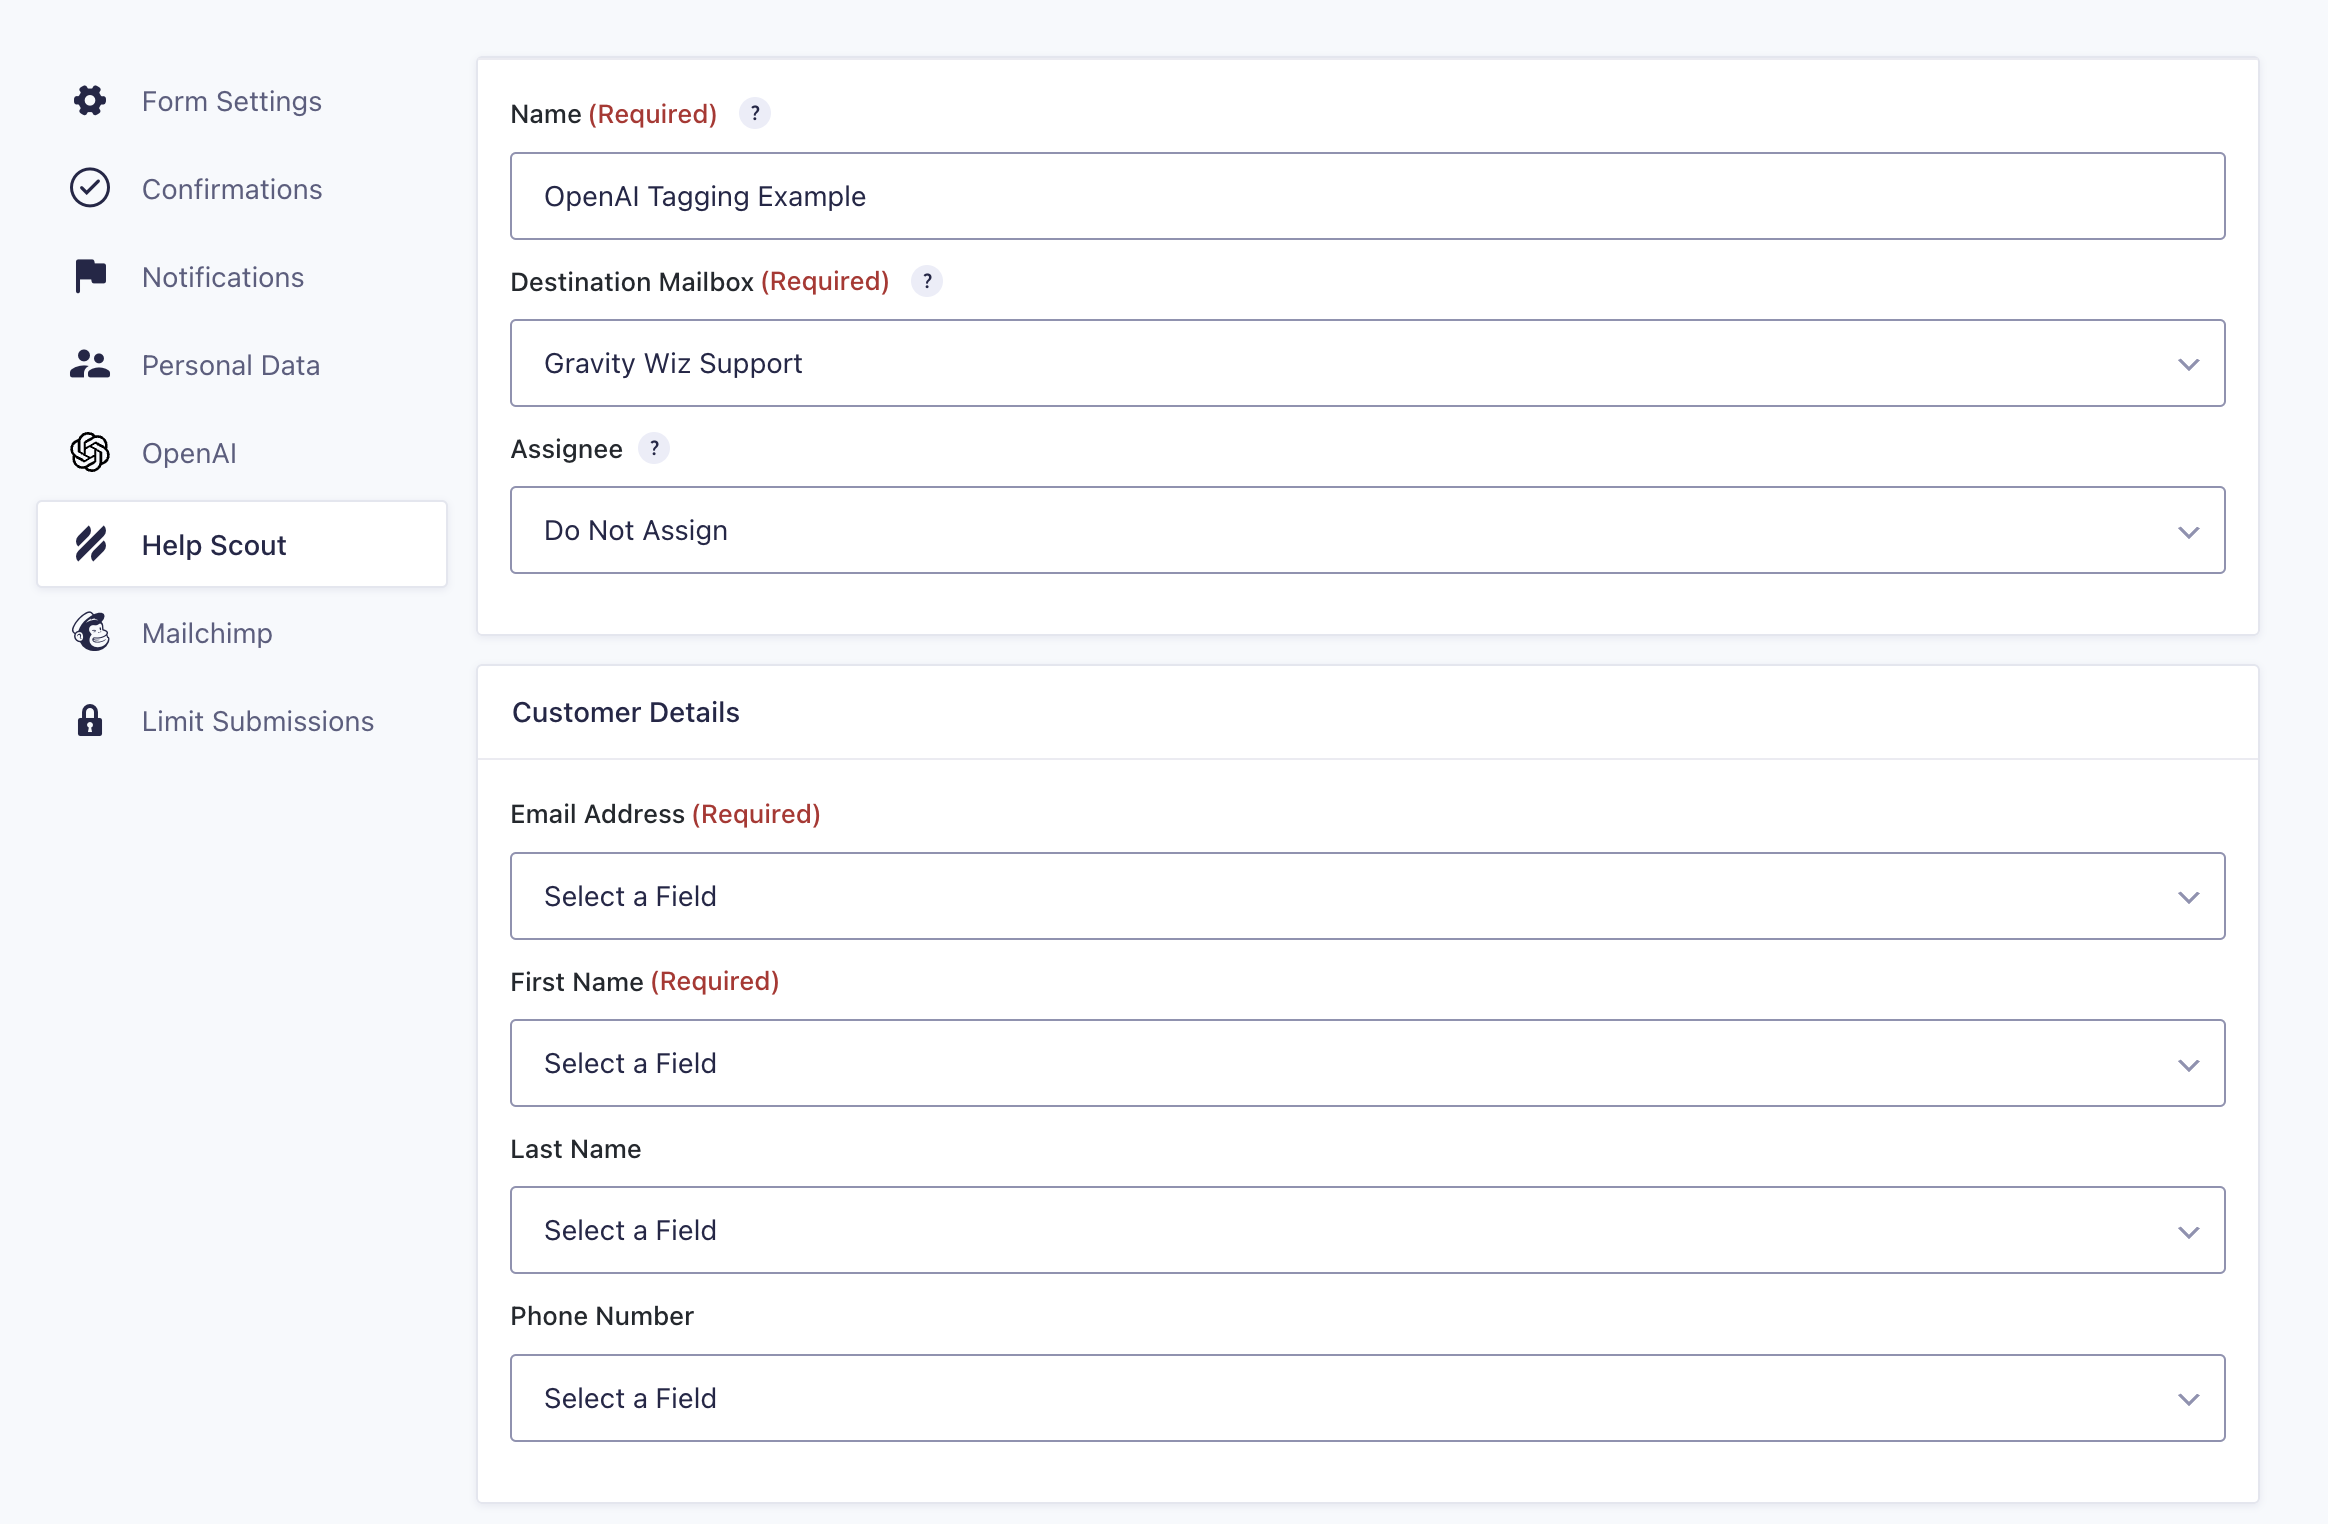
1. Set up a Help Scout feed, give it a name.
2. Set a destination mailbox (i.e. your Help Scout support account).
3. Configure the fields you would like to match, and optionally, assign the tickets.
Now, scroll down to the Message Details section.
1. Under Tags, select the field you previously configured for sentiment.
2. Set a subject line.
3. Customize the message body.
- Using the {all_fields} merge tag will output all form fields at once.
- Optionally, customize the usage of the {sentiment:2} field as a separate output.
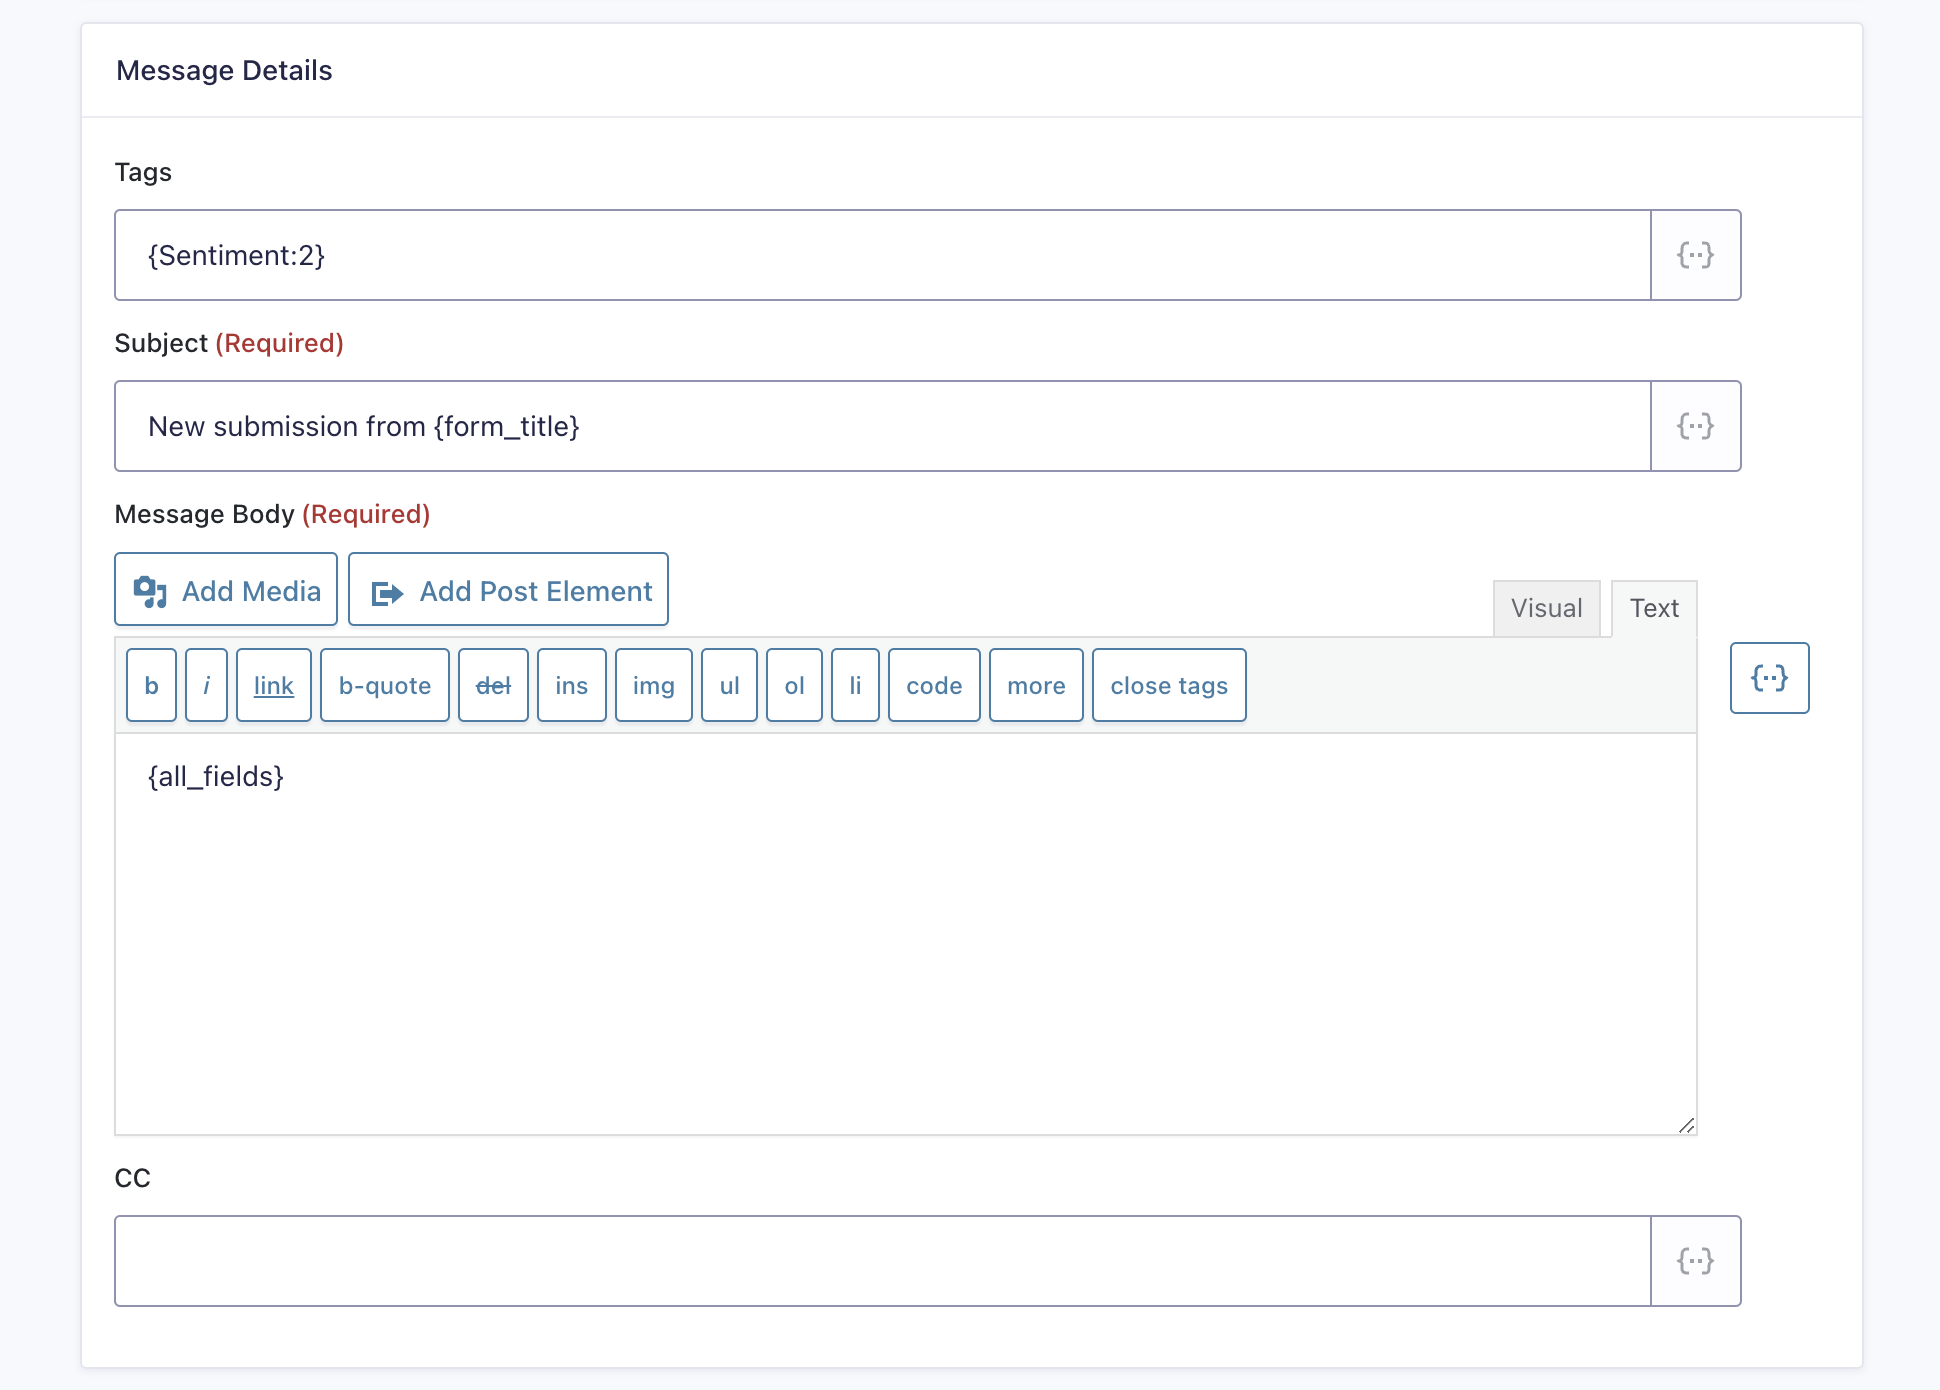
From here, when a new submission is sent to Help Scout, it will include a tag based on the Sentiment field.
Here’s a few examples of what tags allow you to do:
Create automations from specific tags. Examples:
- Mark negative sentiment tags as urgent.
- Automatically send these to a specific folder.
- Assign them to a specific person.
- Send a copy to the support lead.
- Trigger an autoresponder written specifically to address this type of sentiment.
Run reports on specific tags.
- This could be trend analysis, average response times, happiness level, reviews, time to resolution, or anything else.
- This becomes particularly helpful when you want to analyze support trends in the context of announcements, product releases, or any other significant events.
You could take this even further! For example, instead of just tagging the sentiment, use Gravity Forms OpenAI to note and label which product, event, person — or whichever relevant item you’d like to track — is being discussed. From here, additional categorization and workflows can be triggered, both in Help Scout or with Gravity Forms.
OpenAI’s ability to understand form submissions and the nuance within them is only going to get better. We encourage you to explore what’s possible!
