WordPress Workflows Tutorial with Gravity Flow
![]()
Gravity Flow is a Gravity Forms Certified Add-On, built for optimizing and automating recurring business processes. Perfect for organizations of all shapes and sizes, it can help you streamline your business processes and turn your forms, spreadsheets, follow-up calls, and emails into efficient workflows.
You can also implement review loops in your processes, allowing users to edit their entries before re-submitting a form for approval. Interested in learning more?
In this article, we’ll show you how you can use Gravity Flow for your WordPress-specific workflows, workflows powered by Gravity Forms, and other business applications.
What Is Workflow Management?
Workflow management is all about streamlining and automating the tasks performed by an organization.
‘Workflow’ refers to a series of tasks that are necessary to achieve some larger objective. Workflows (sometimes referred to as business processes) follow a set order, are predictable, and help achieve some definite outcome.
The aim of ‘workflow management’ is to optimize workflows to get the desired results.
Gravity Flow is a native WordPress integration for Gravity Forms. It’s designed to help you automate and streamline workflows, assign responsibilities, minimize errors, increase transparency, and bring accountability to your business processes.
Gravity Flow comes with a number of useful features, including feedback loops and process branching, reporting, scheduling, granular permissions, and audit trail.
So, let’s say you’re looking to set up a WordPress editorial workflow. Here’s an outline of what it might look like in Gravity Flow:
- Author submits blog post for approval
- Editor reviews blog post
- Asks for requests from Author
- Author makes changes and re-submits blog post
- Editor approves blog post and publishes it.
How to Set Up WordPress Workflows Using Gravity Flow
Let’s say you want to create a ‘Paid Time Off’ form for staff members:
Step #1: Create the Gravity Form
The first step is to create the ‘Paid Time Off’ form using Gravity Forms. Head over to Forms > New Form from the WordPress admin panel and give your form a title. Use the Gravity Forms form editor to build your form.
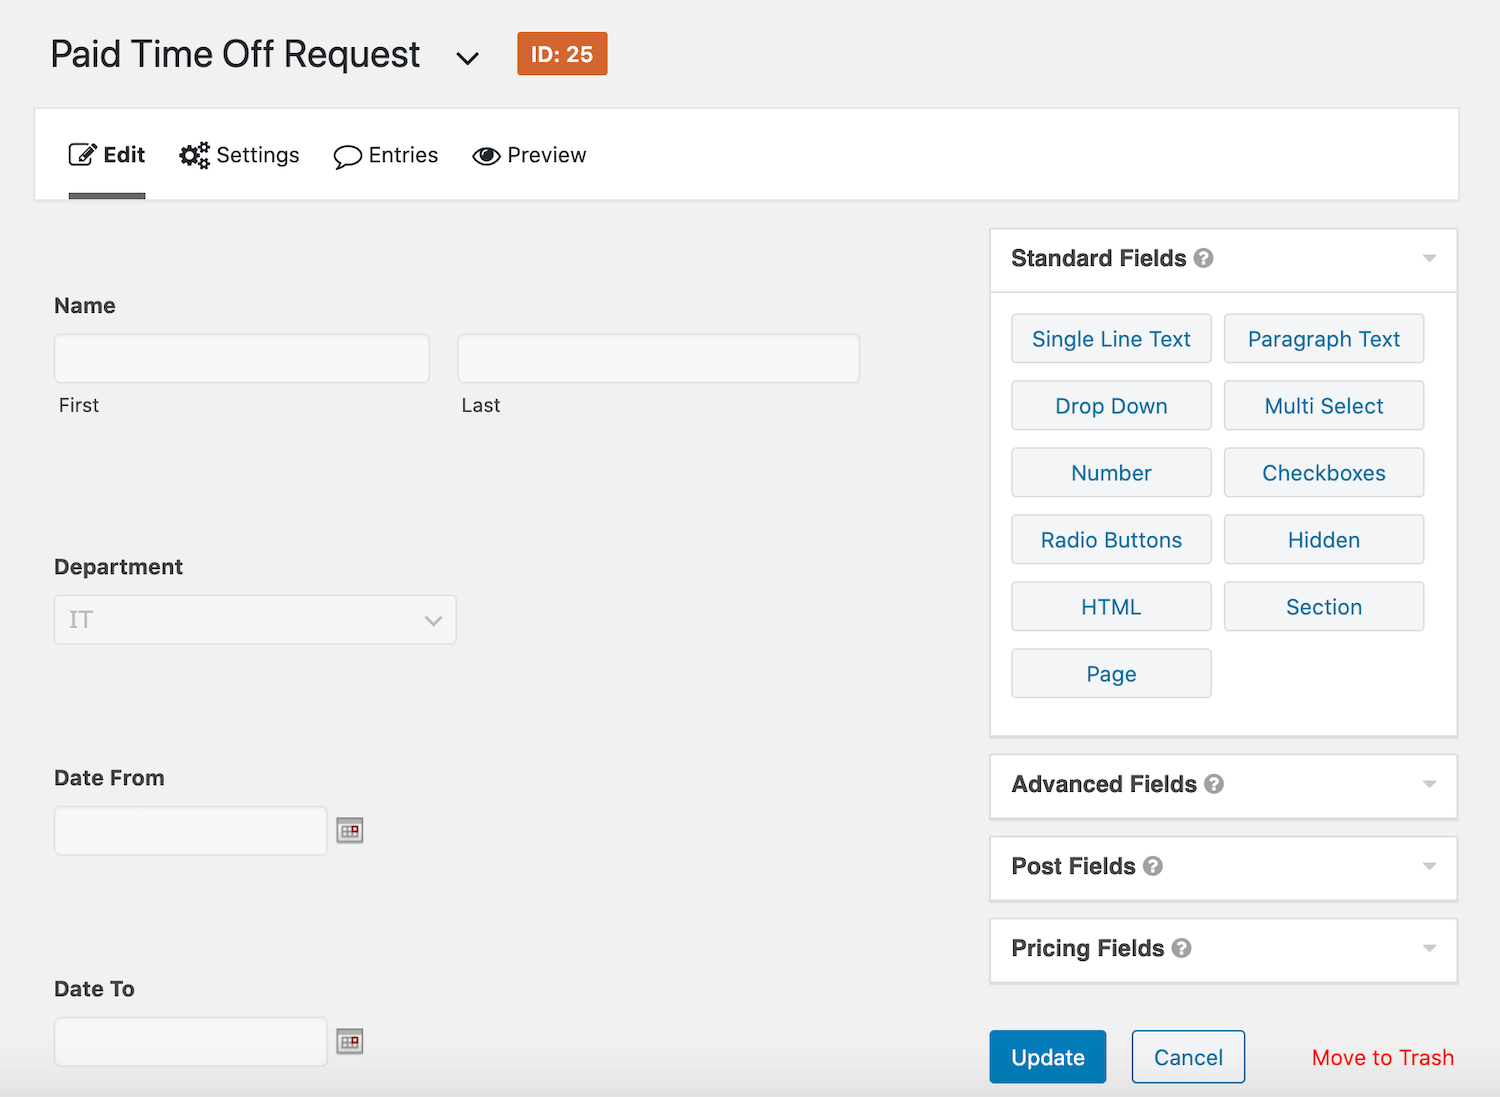
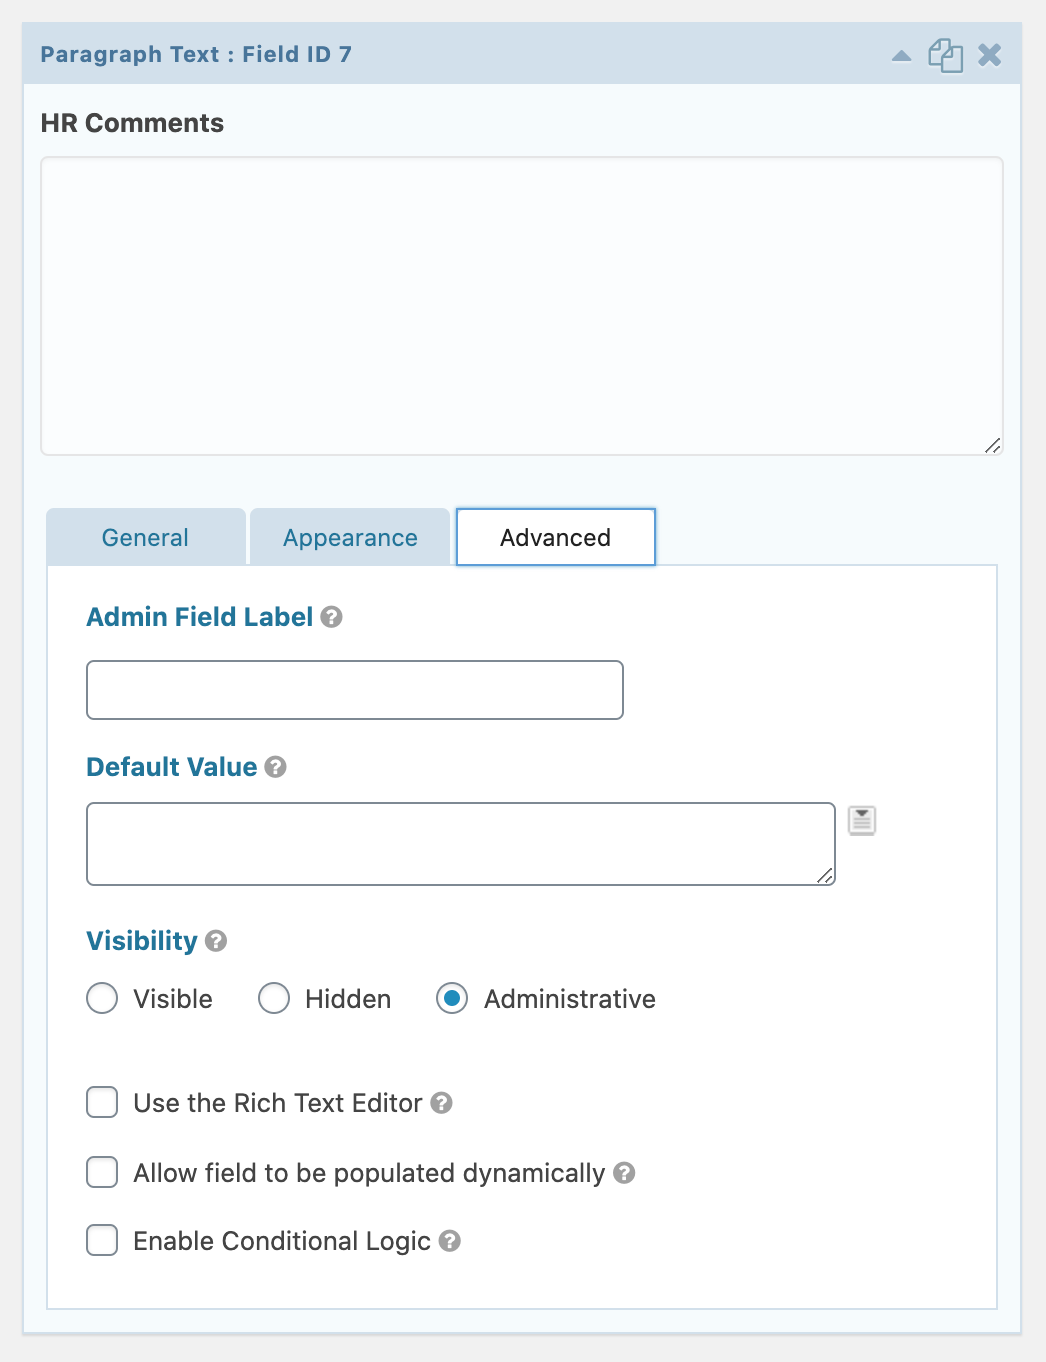
We’ve added two fields to the end of the form called ‘Days Remaining’ and ‘HR Comments’ which will only be visible to the form’s ‘Approver’ and ‘HR Processing’ user roles. We’ve done this by setting the form’s visibility to Administrative.
Click the Update button to proceed.
Step #2: Create Workflow Pages
When you install Gravity Flow, its installation wizard automatically creates pages for you for displaying the workflow on your site’s front-end. It creates three pages: Inbox, Status, and Submit by adding the corresponding shortcodes to each page:
Inbox –
Status –
Submit –
If you’re using Gutenberg, you can also use Gravity Flow blocks. You can open these pages at any time and add content, if necessary.
Step #3: Set Up Workflow Steps
Next, we’re going to set up three Gravity Flow workflow steps:
- Manager Approval
- Modification by Submitter
- HR Processing
Manager Approval Step
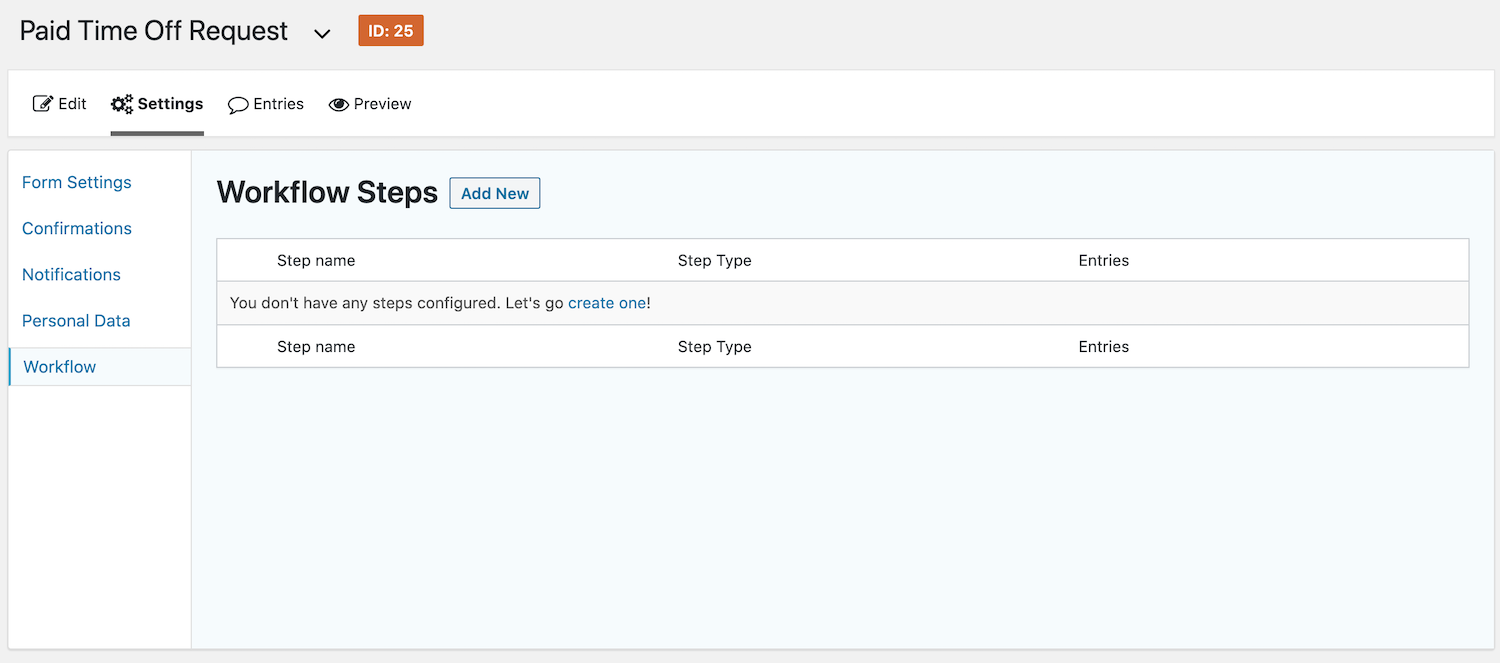
From the form editor, go to Settings > Workflow and click the Add New button.
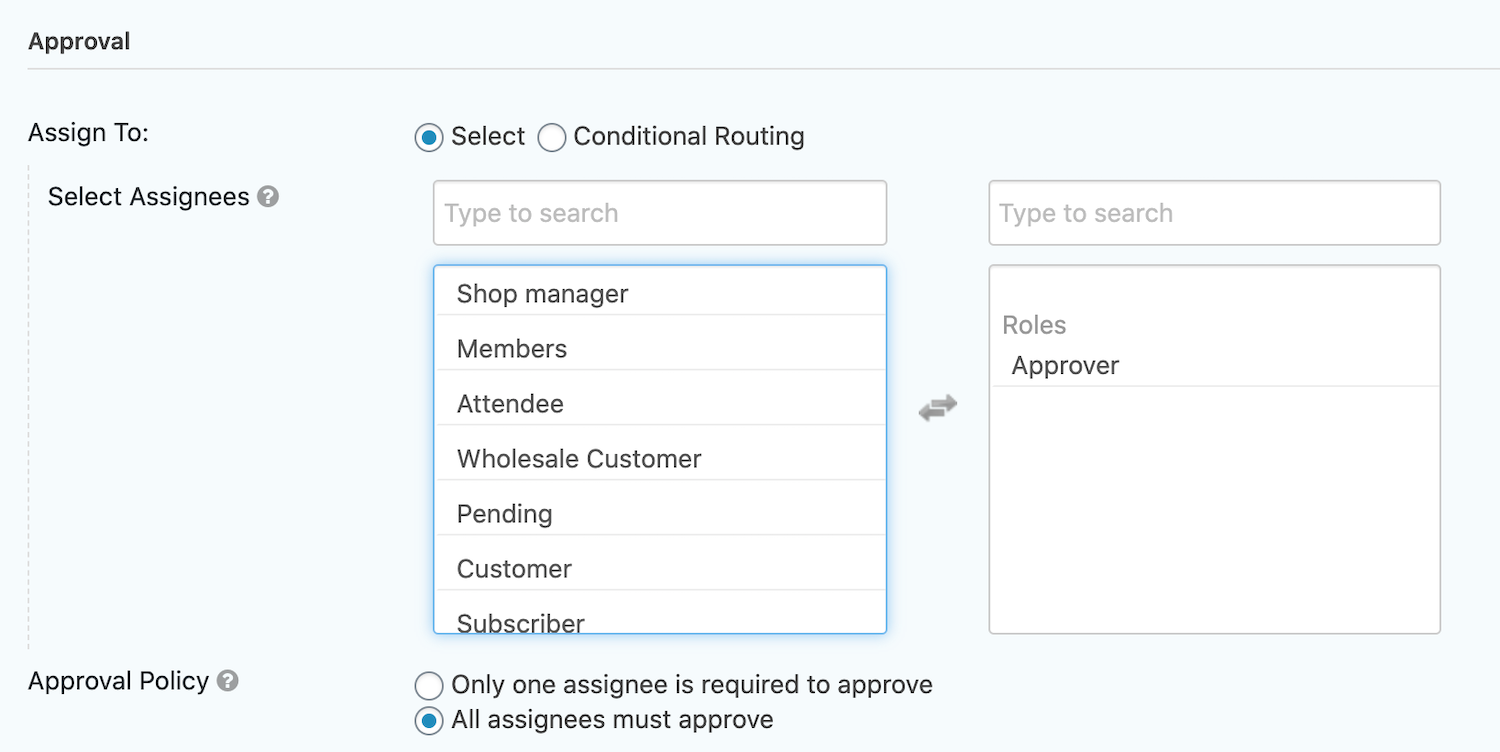
Enter the title in the Name field and add a description. Select the Approval option in the Step Type field.
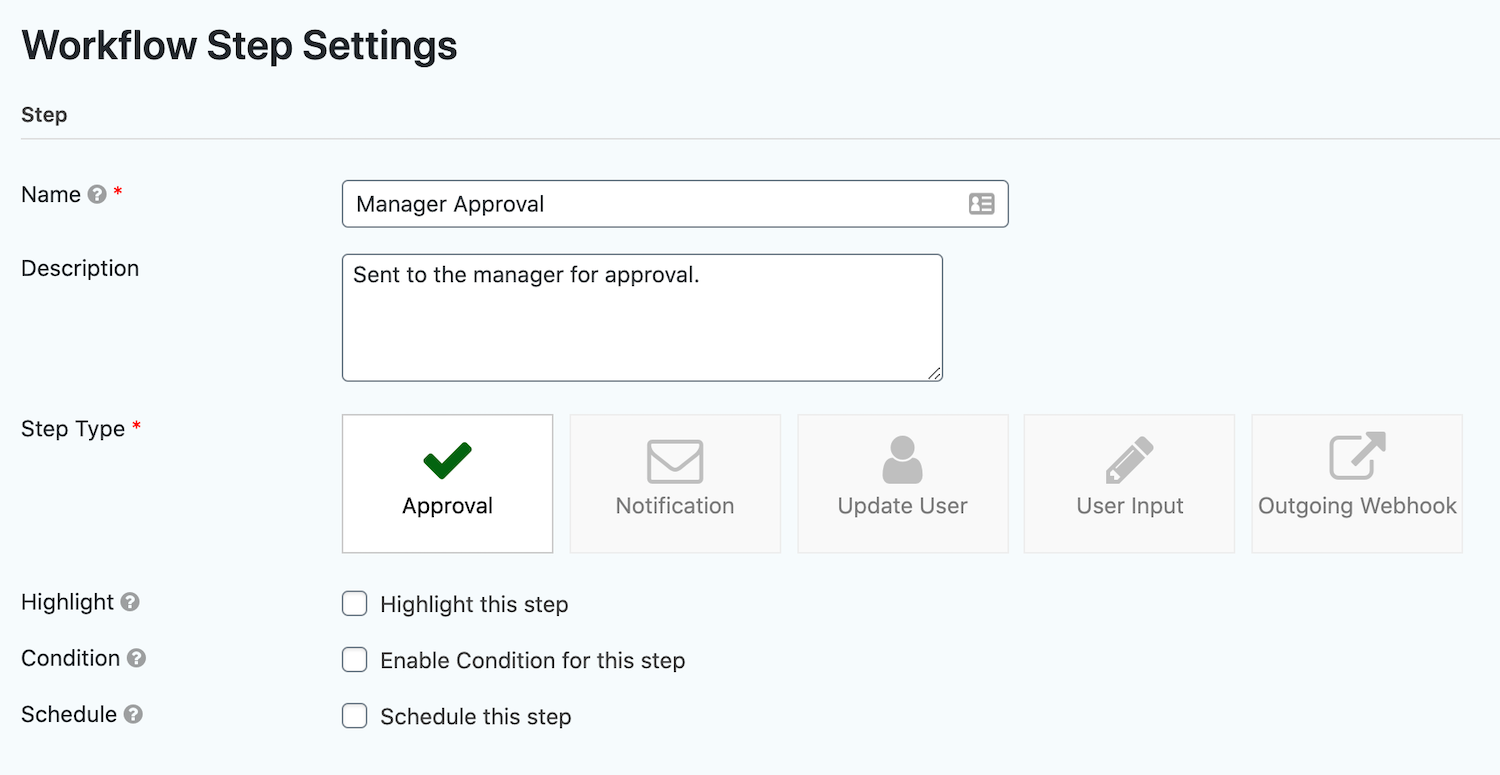
The Approval section lets you select the username of the approver. You can choose a specific user or user role.
From the same screen, scroll down to the Emails option to create email notifications. We’ll create three different email notifications for different stages in the workflow:
- Assignee Email for ‘Approver’
- Rejection Email for when ‘Submitter’ is rejected
- Approval Email for when ‘Submitter’ is approved
All you have to do is click the checkbox next to the Send an Email to the Assignee option under the Assignee Email tab and fill out the fields. You can use merge tags to enter data from the submitted form fields.
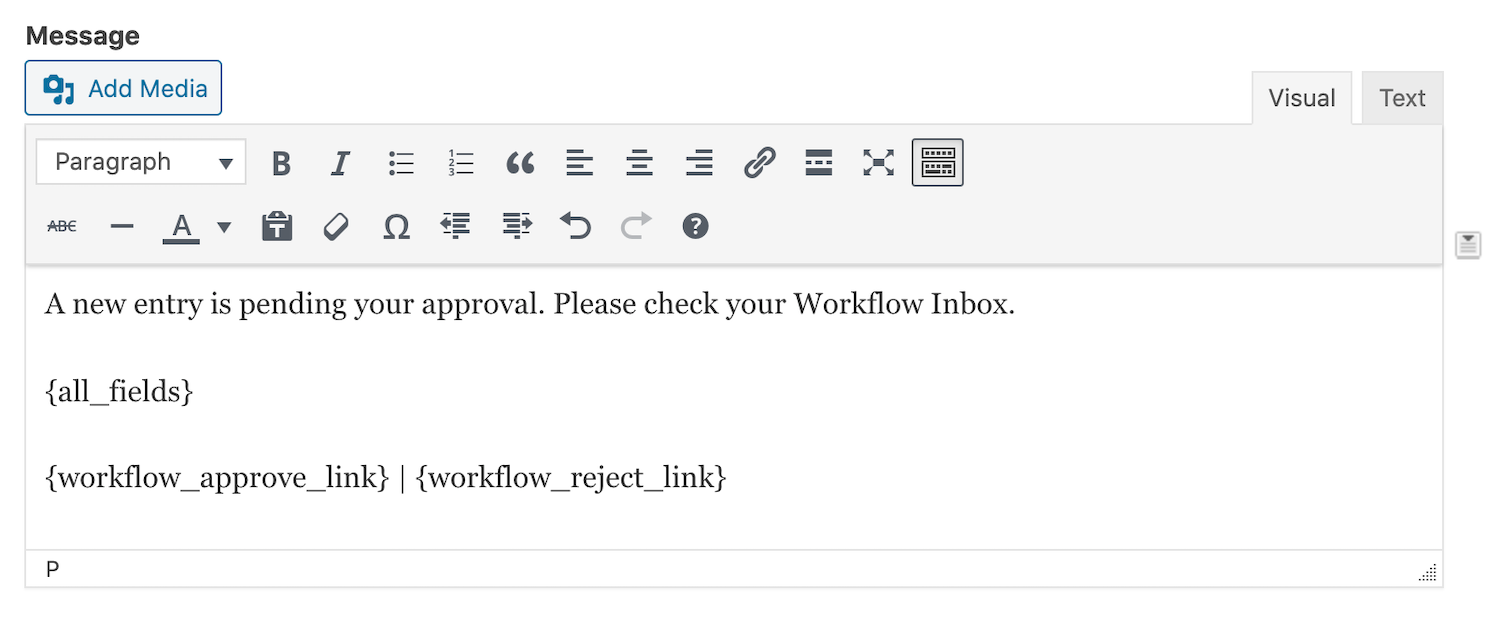 For example, you can use the “{all_fields}” merge tag to display all of the submitted form fields and “{workflow_approve_link}” and “{workflow_reject_link}” which lets the approvers approve or reject an entry directly from an email.
Repeat this step for the Rejection Email and Approval Email.
At this time, leave both the Next Step if Rejected option and the Next Step is Approved option set to their default values. We’ll come back and configure these options once the remaining workflow steps are created.
Click on the Update Step Settings button to continue.
Modification by Submitter Step
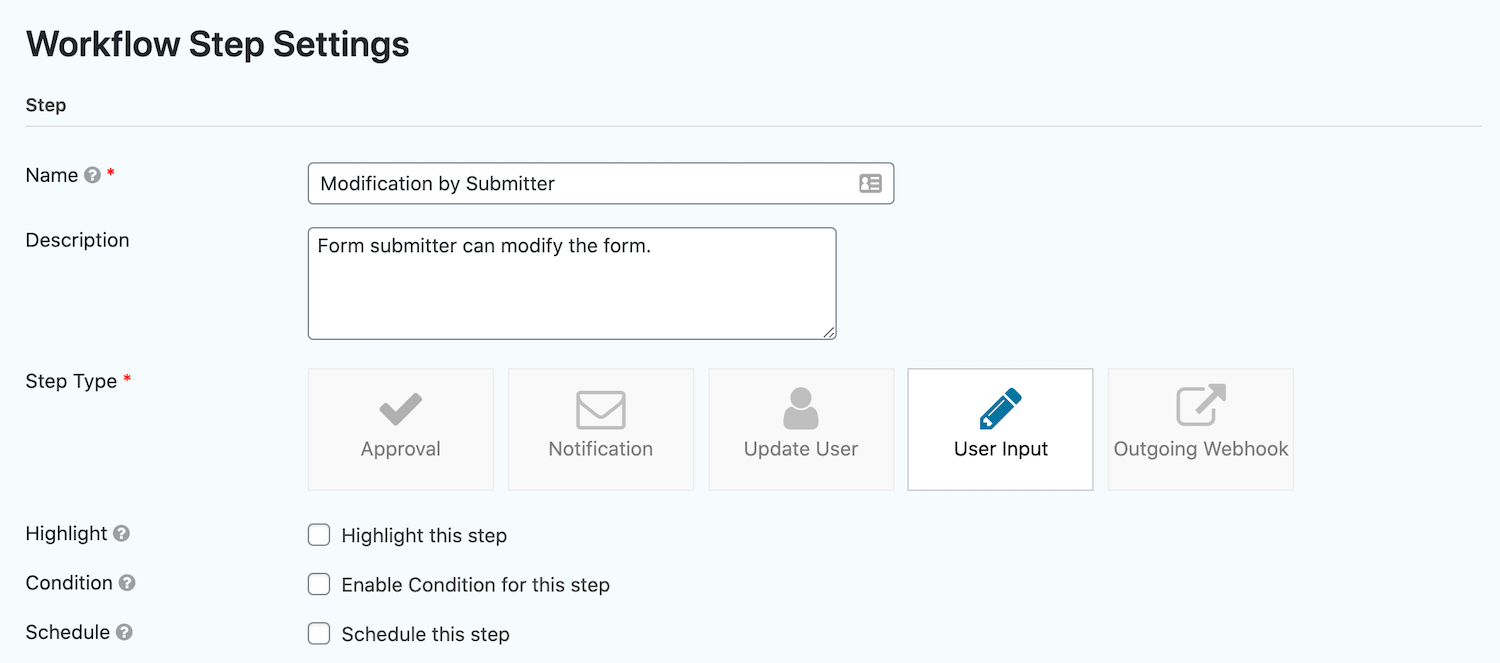
Click the Add Another Step link. Same as before, enter the title in the Name field and add a description. Select the User Input option in the Step Type field.
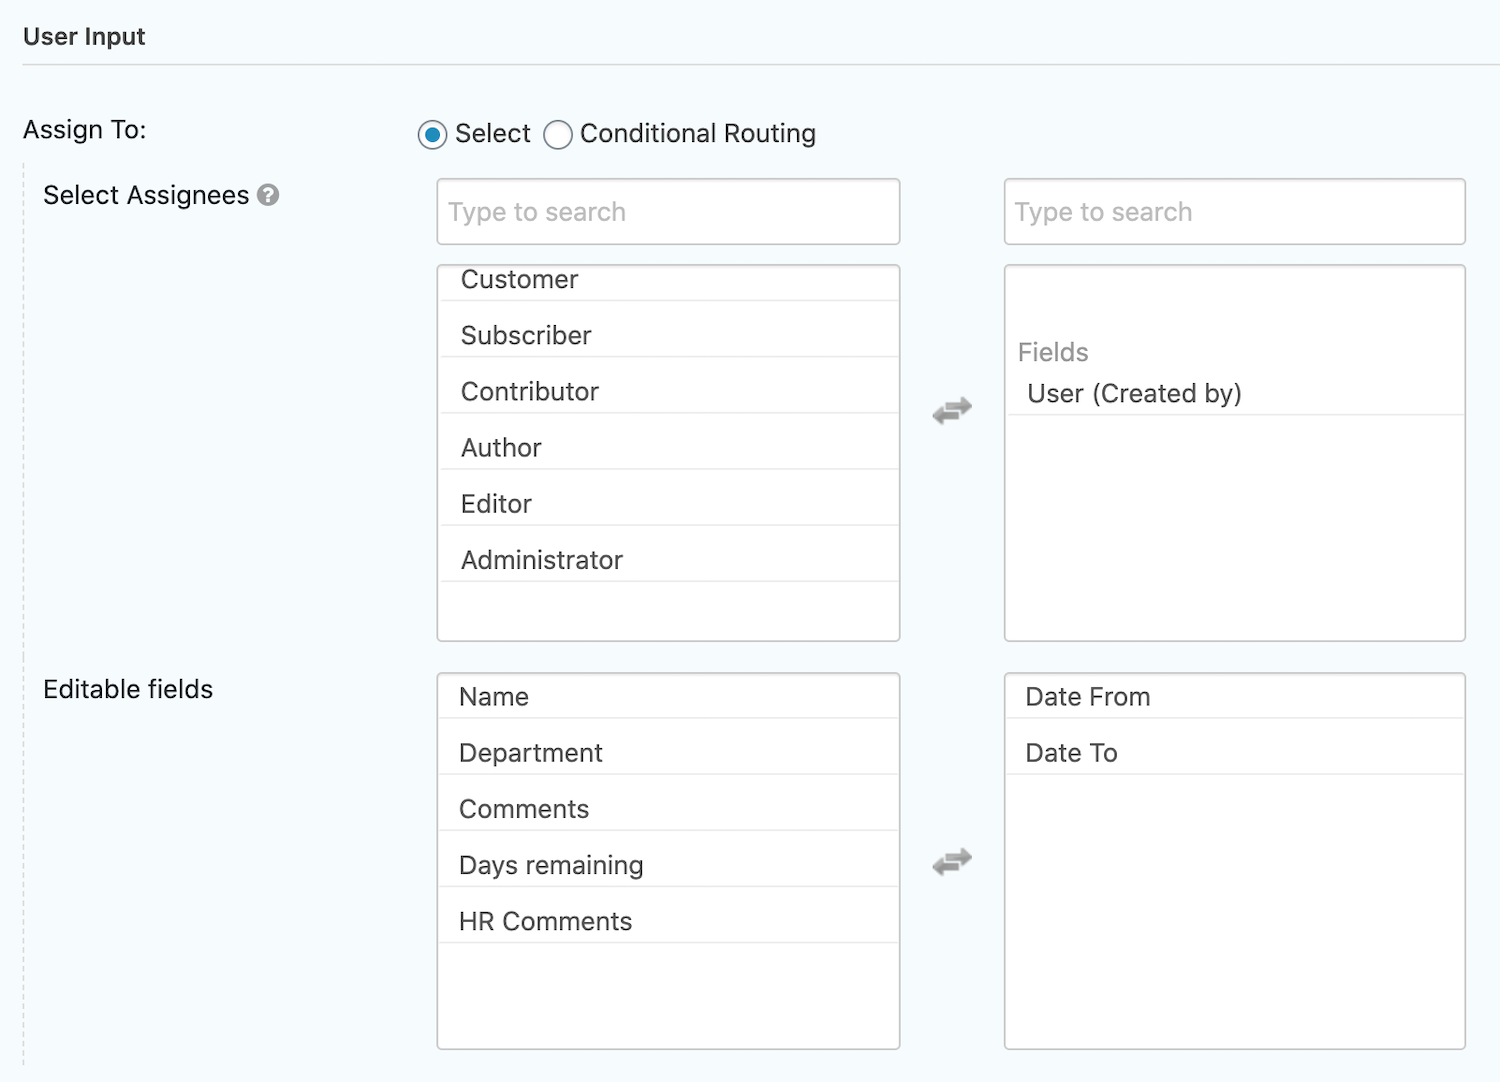
Complete the User Input section. In the Select Assignees section, select User (Created by) and in the Editable Fields section, select the Date From and Date To fields.
Configure the Email settings based on your preferences. Set the Next Step option to Manager Approval.

Once you’re done, click the Update Step Settings button.
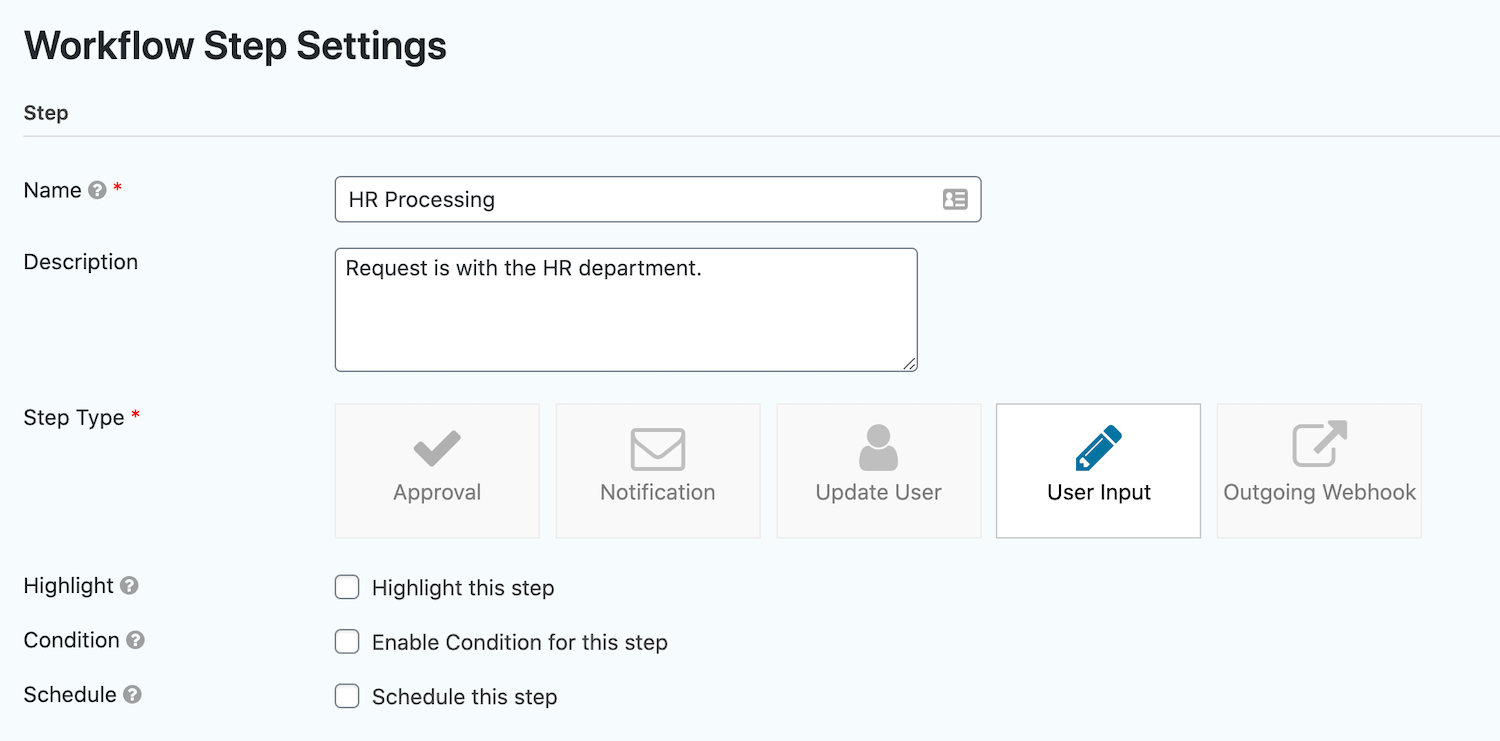
HR Processing Step
Click the Add Another Step link. Same as before, enter the title in the Name field and add a description. Select the User Input option in the Step Type field.
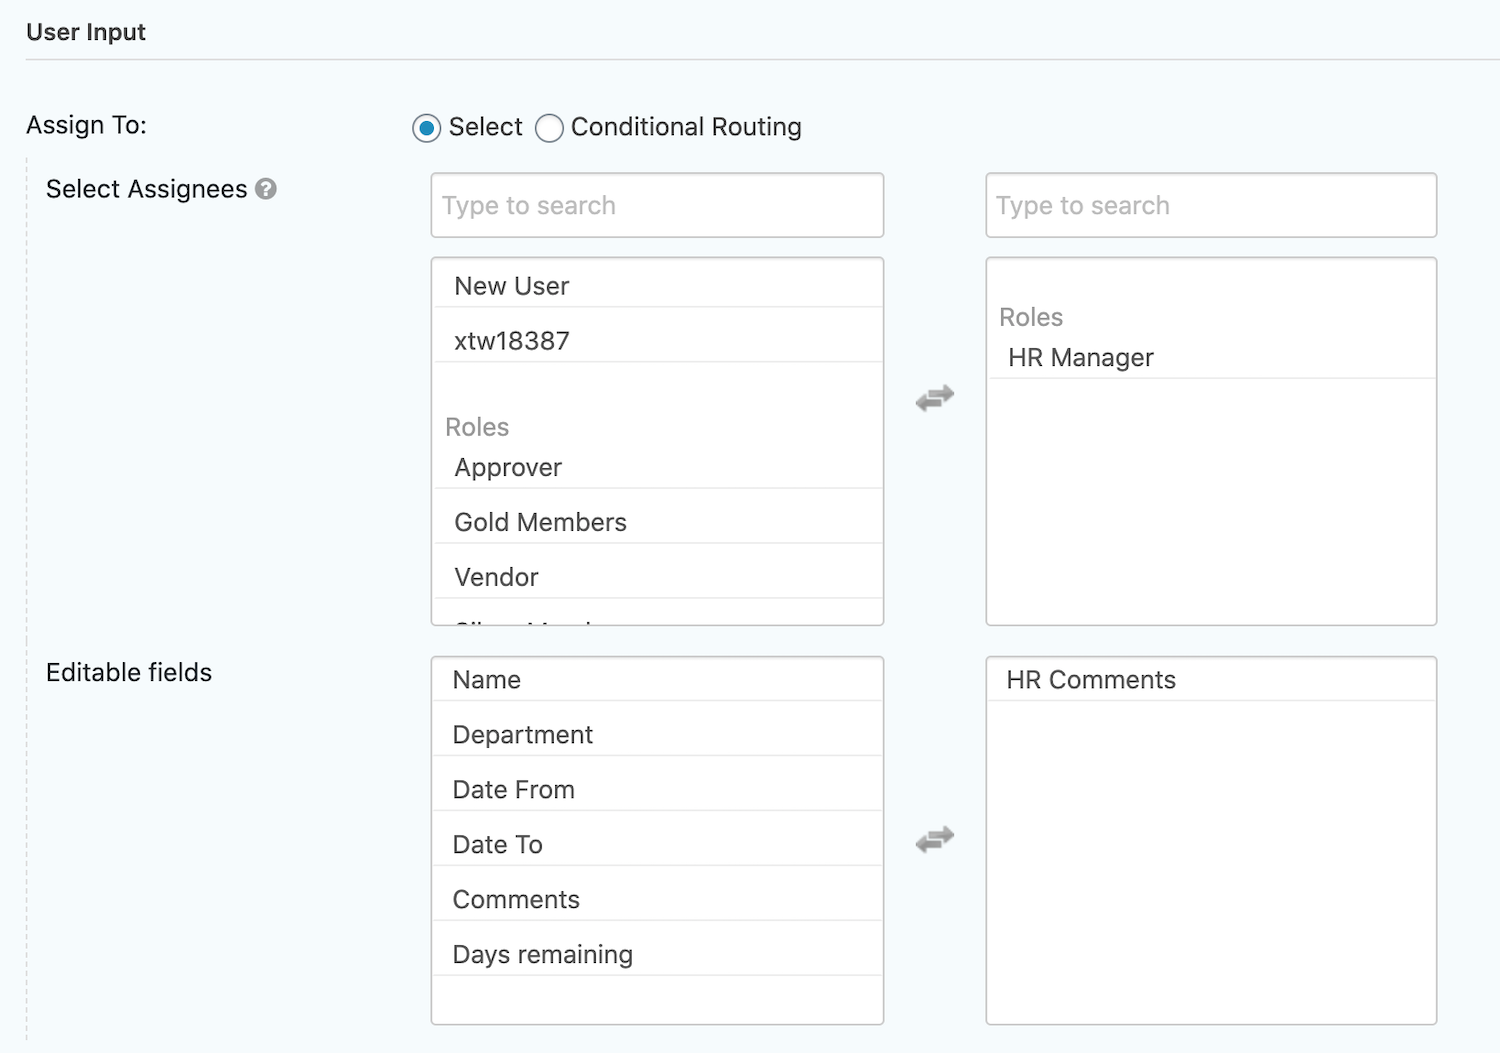
Complete the User Input section. In the Select Assignees section, select HR Manager and in the Editable Fields option, select the HR Comments field.
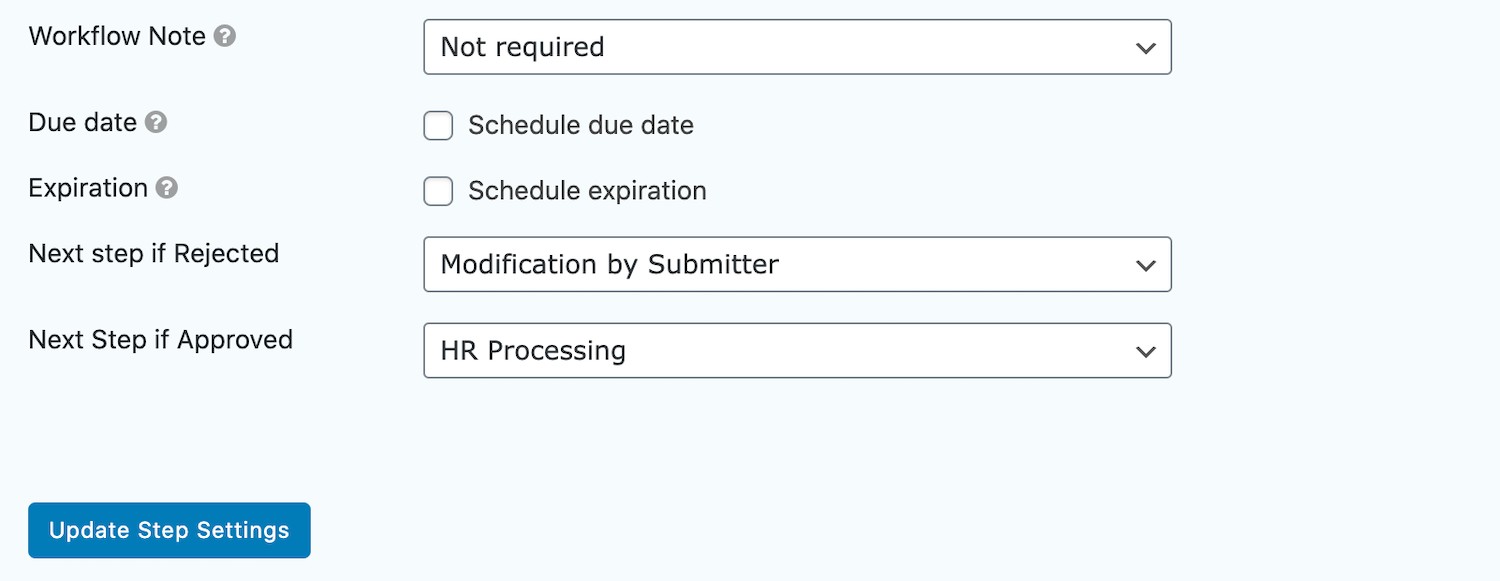
Set the Next Step option to Next Step in List. Once you’re done, click the Update Step Settings button.
Go back to the first workflow step i.e. Manager Approval Step and set the Next Step if Rejected option to Modification by Submitter and set the Next step is Approved option to HR Processing.
When you’re done, click on the Update Step Settings button.
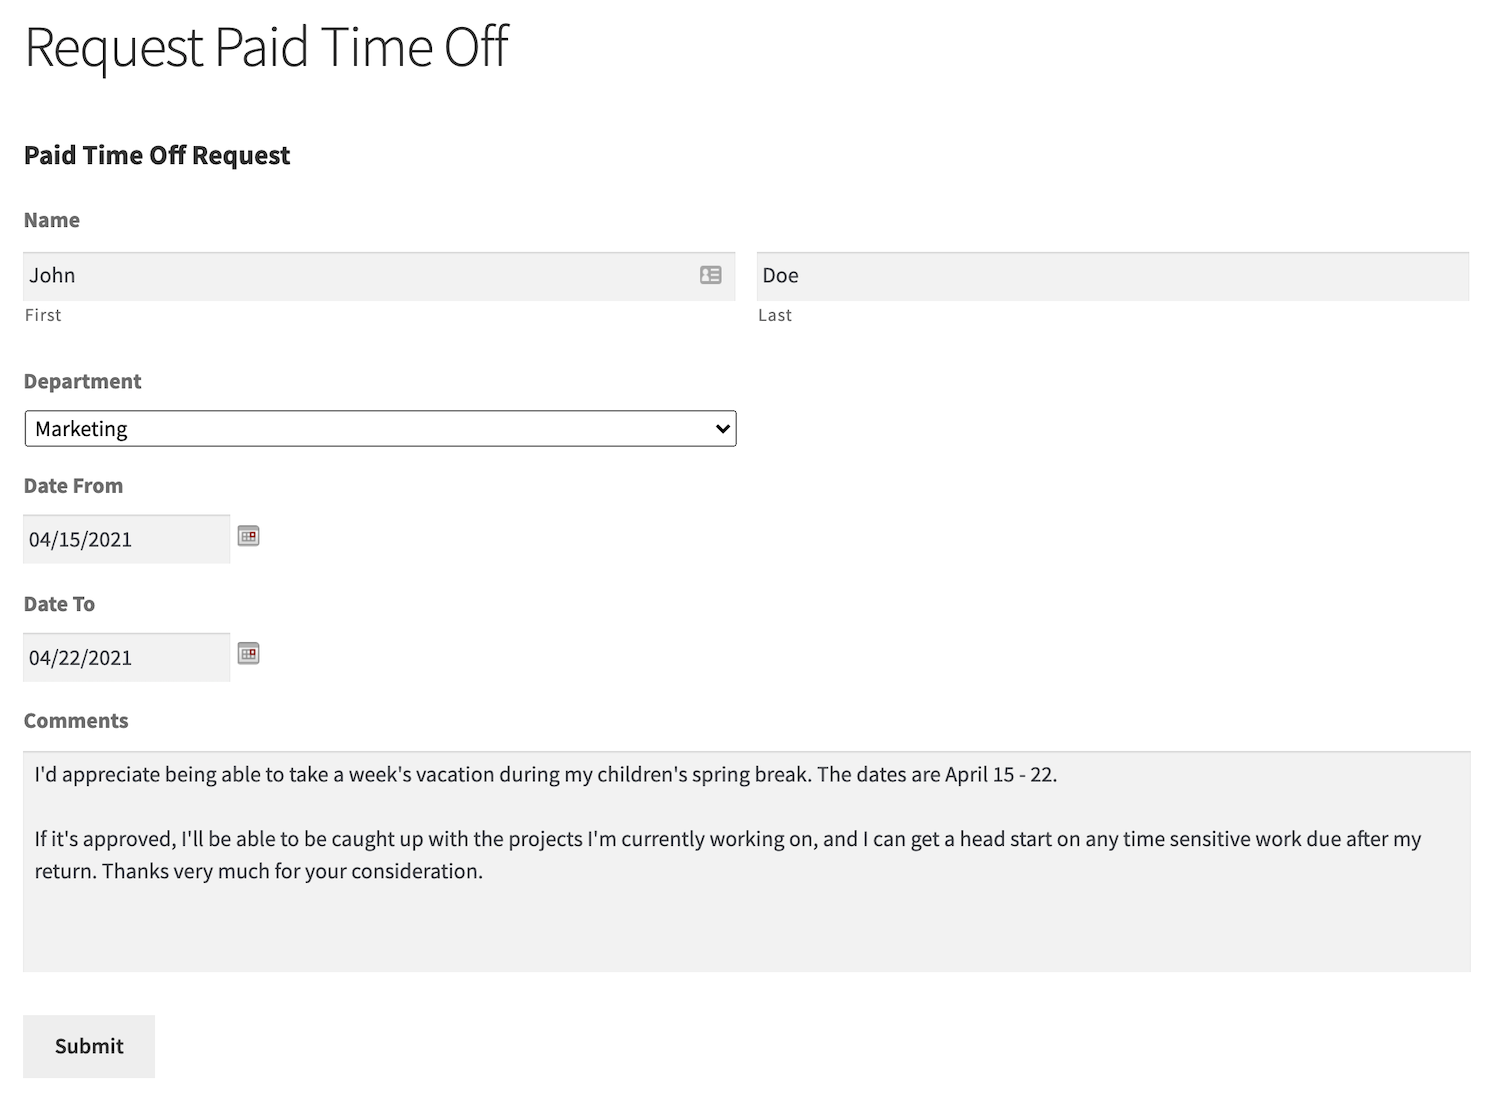
Step #4: Preview
Your form will look something like this on the front-end:
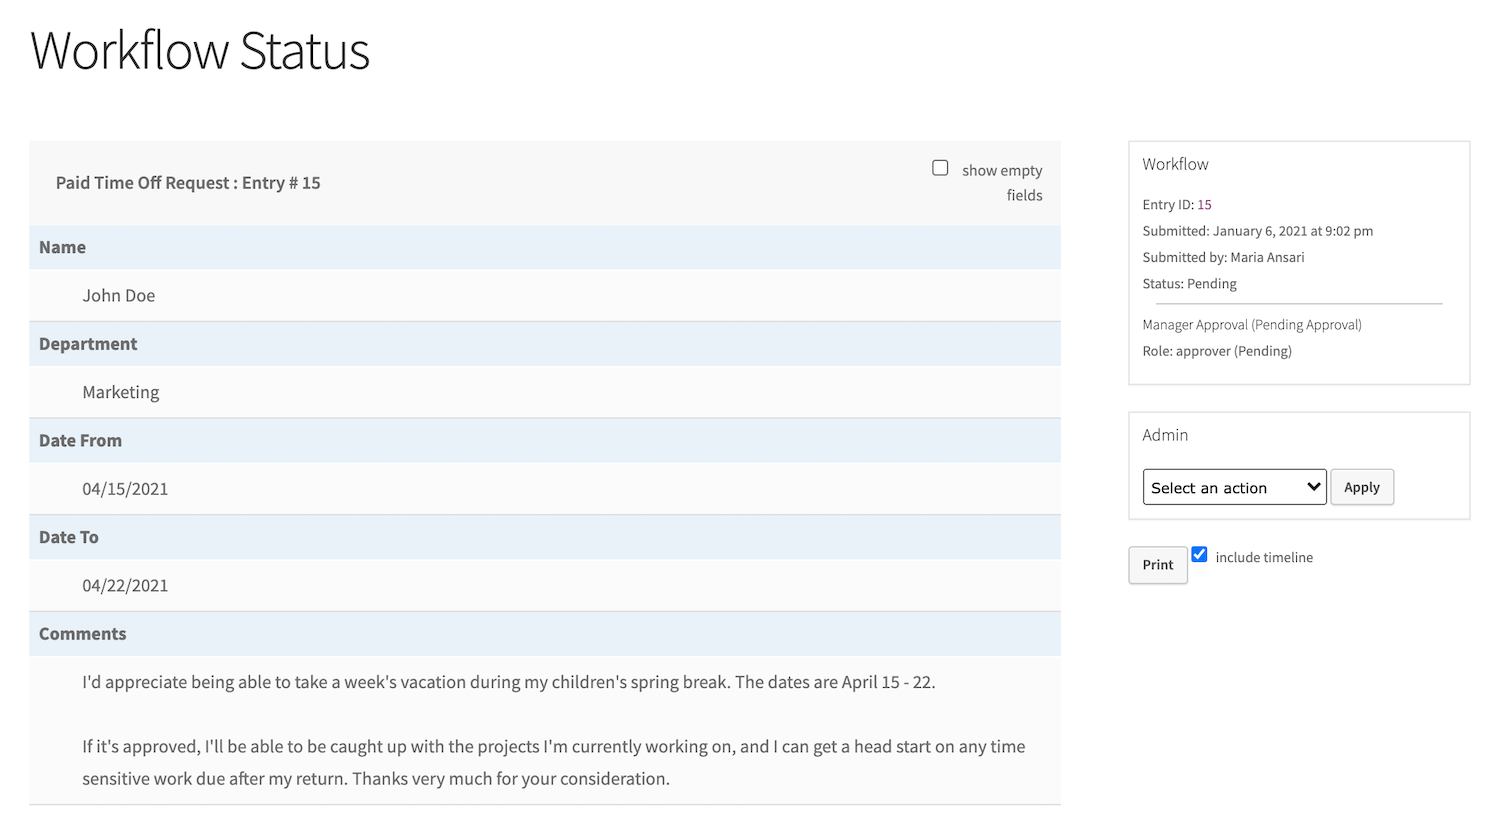
When the user submits the form, it’ll appear on the Status page.
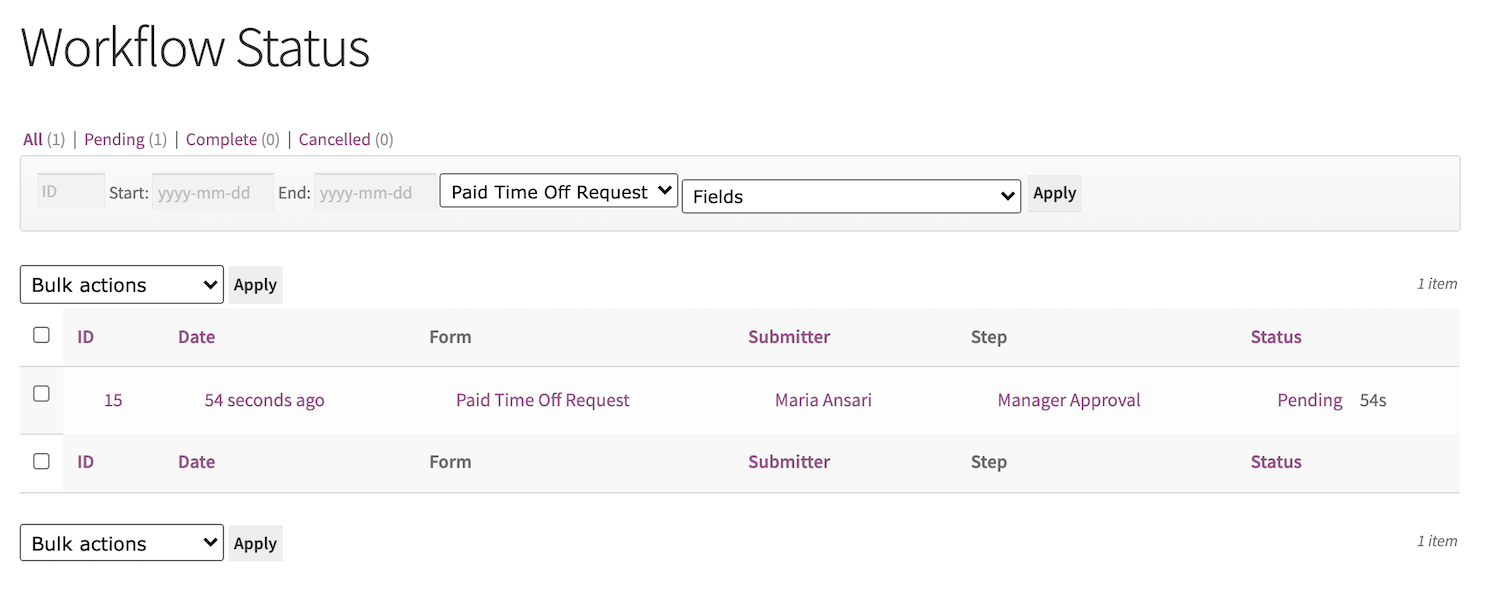
You can also view the entries:
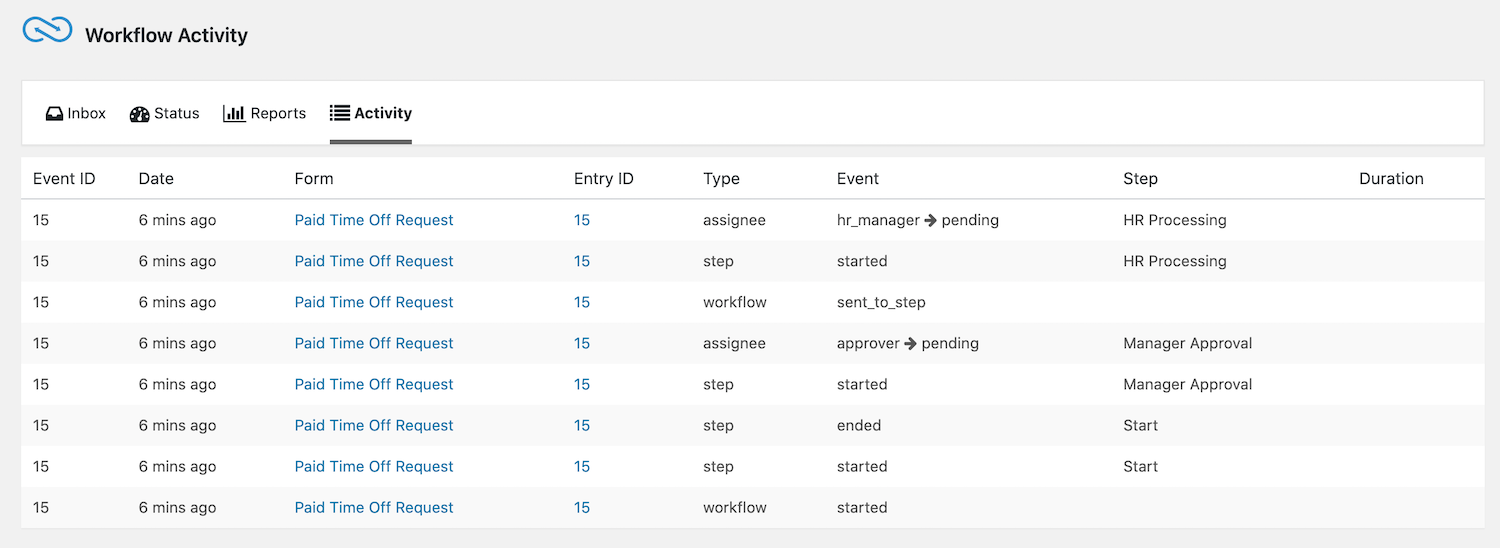
You also view workflow activity by heading over to Workflow > Activity from the WordPress admin panel.
Advanced Integrations
Let’s quickly take a look at the advanced features and integrations supported by Gravity Flow:
Email Notifications
You can send email notifications for different stages of the workflow.
Generate PDFs
The PDF Generator Extension lets Gravity Flow Administrators add simple PDF creation steps at any time in the process. The PDF template is built just like a notification with merge tags.
Take Payments Through Stripe or PayPal
The Gravity Flow Stripe Extension enables workflows to approve payments during the initial form submission (pre-orders), accept or reject the payment at a later date, refund payments, and set up and cancel recurring subscriptions. Similarly, the PayPal Extension lets Gravity Flow administrators add a payment step at any time in the workflow.
For instance, the form can capture the credit card information and approve a payment during the initial form submission. The form can include a series of User Input and Approval steps to complete a process. The payment is captured once the process ends.
Build Advanced Business Workflows
Here’s how Gravity Flow can help you build advanced business workflows using extensions:
The Flowchart extension is the simplest way to create more advanced workflows. Its Flowchart view feature helps you make complex workflows easy to follow, design, optimize, and communicate to your team members. With the Flowchart extension, you can easily switch between the standard step list view and a Flowchart view of the steps.
The Gravity Flow WooCommerce extension lets you add workflow automation to e-commerce orders. Whenever an order is created in WooCommerce, an entry is automatically generated in Gravity Forms which gets Gravity Flow to initiate the first step in the workflow.
This enables you to integrate orders more efficiently and more deeply within the business processes.
Set Up WordPress Workflows Today
Gravity Flow makes it easy for businesses to set up workflows, automating tasks and streamlining processes.
To recap, here’s what Gravity Flow can do for you:
- Help you set up automated feedback and review loops so users can modify forms before approval. This will facilitate communication and minimize confusion.
- Provide detailed reports of how long each task is taking and highlight bottlenecks. As a result, you’ll be able to increase efficiency and output.
Ready to automate your business processes? Get Gravity Flow today!

If you want to keep up-to-date with what’s happening on the blog sign up for the Gravity Forms newsletter!