Send Gravity Forms entries to Google Sheets with Zapier

Gravity Forms is the best WordPress form plugin on the market, enabling you to create custom forms that effortlessly collect the information you need. However, data collection is only part of the path to success. It is important that you can easily transfer your form data to the right tools and services to ensure your business achieves its goals.
Google Sheets is one of those tools! A go-to solution for many, using Google Sheets you can easily manage, analyze, and share all types of data to help support your business. And with the Gravity Forms Zapier Add-On, you can automatically send form entries to Google Sheets, streamlining the data transfer process and ultimately enabling you to gain clear insight into the information you have collected.
In this article, we discuss the benefits of sending Gravity Forms submissions to Google Sheets and look at just how easy it is to do so with the Gravity Forms Zapier Add-On. We’ll then walk you through how to set up Zapier automation and get your form entries sent to Google Sheets.
Gravity Forms to Google Sheets
There are numerous benefits to sending form entries to Google Sheets. Let’s take a look…
- Large Amounts of Data – If you have collected a high volume of submissions, or if your forms contain a large number of fields, then sorting through this data within your WordPress admin can be frustrating, time-consuming, and ineffective.
- View, Sort, and Analyze Data – Google Sheets makes it extremely easy to view, sort, and analyze data. You can view your form entries as a single directory of information, or drill down to analyze specific form fields, create graphs and charts to help further compare and interpret the data, and much more.
- Collaboration – Google Sheets makes it easy to share data within your organization, allowing employees to view form entries without needing access to your website dashboard.
Gravity Forms uses Zapier to connect forms with Google Sheets, so let’s now find out a bit about the Gravity Forms Zapier Add-On and how to get started using it…
Gravity Forms Zapier integration

The Gravity Forms Zapier Add-On enables you to integrate your forms with over 8,000 Zapier apps and services. One of our most popular add-ons, Zapier creates endless possibilities for form entry management, interactions between other third-party services, and automated workflows, to name a few options.
You can seamlessly integrate Zapier with any new or existing form on your WordPress website. Simply install the Zapier Add-On and then create Zaps within your Zapier dashboard. Or take advantage of the wide assortment of pre-built Zaps, ensuring a quick and easy Zap creation process.
So, are you ready to use the Zapier integration to move Gravity Forms entries to Google Sheets? Here’s the process step-by-step…
1. Install and configure the Zapier Add-On
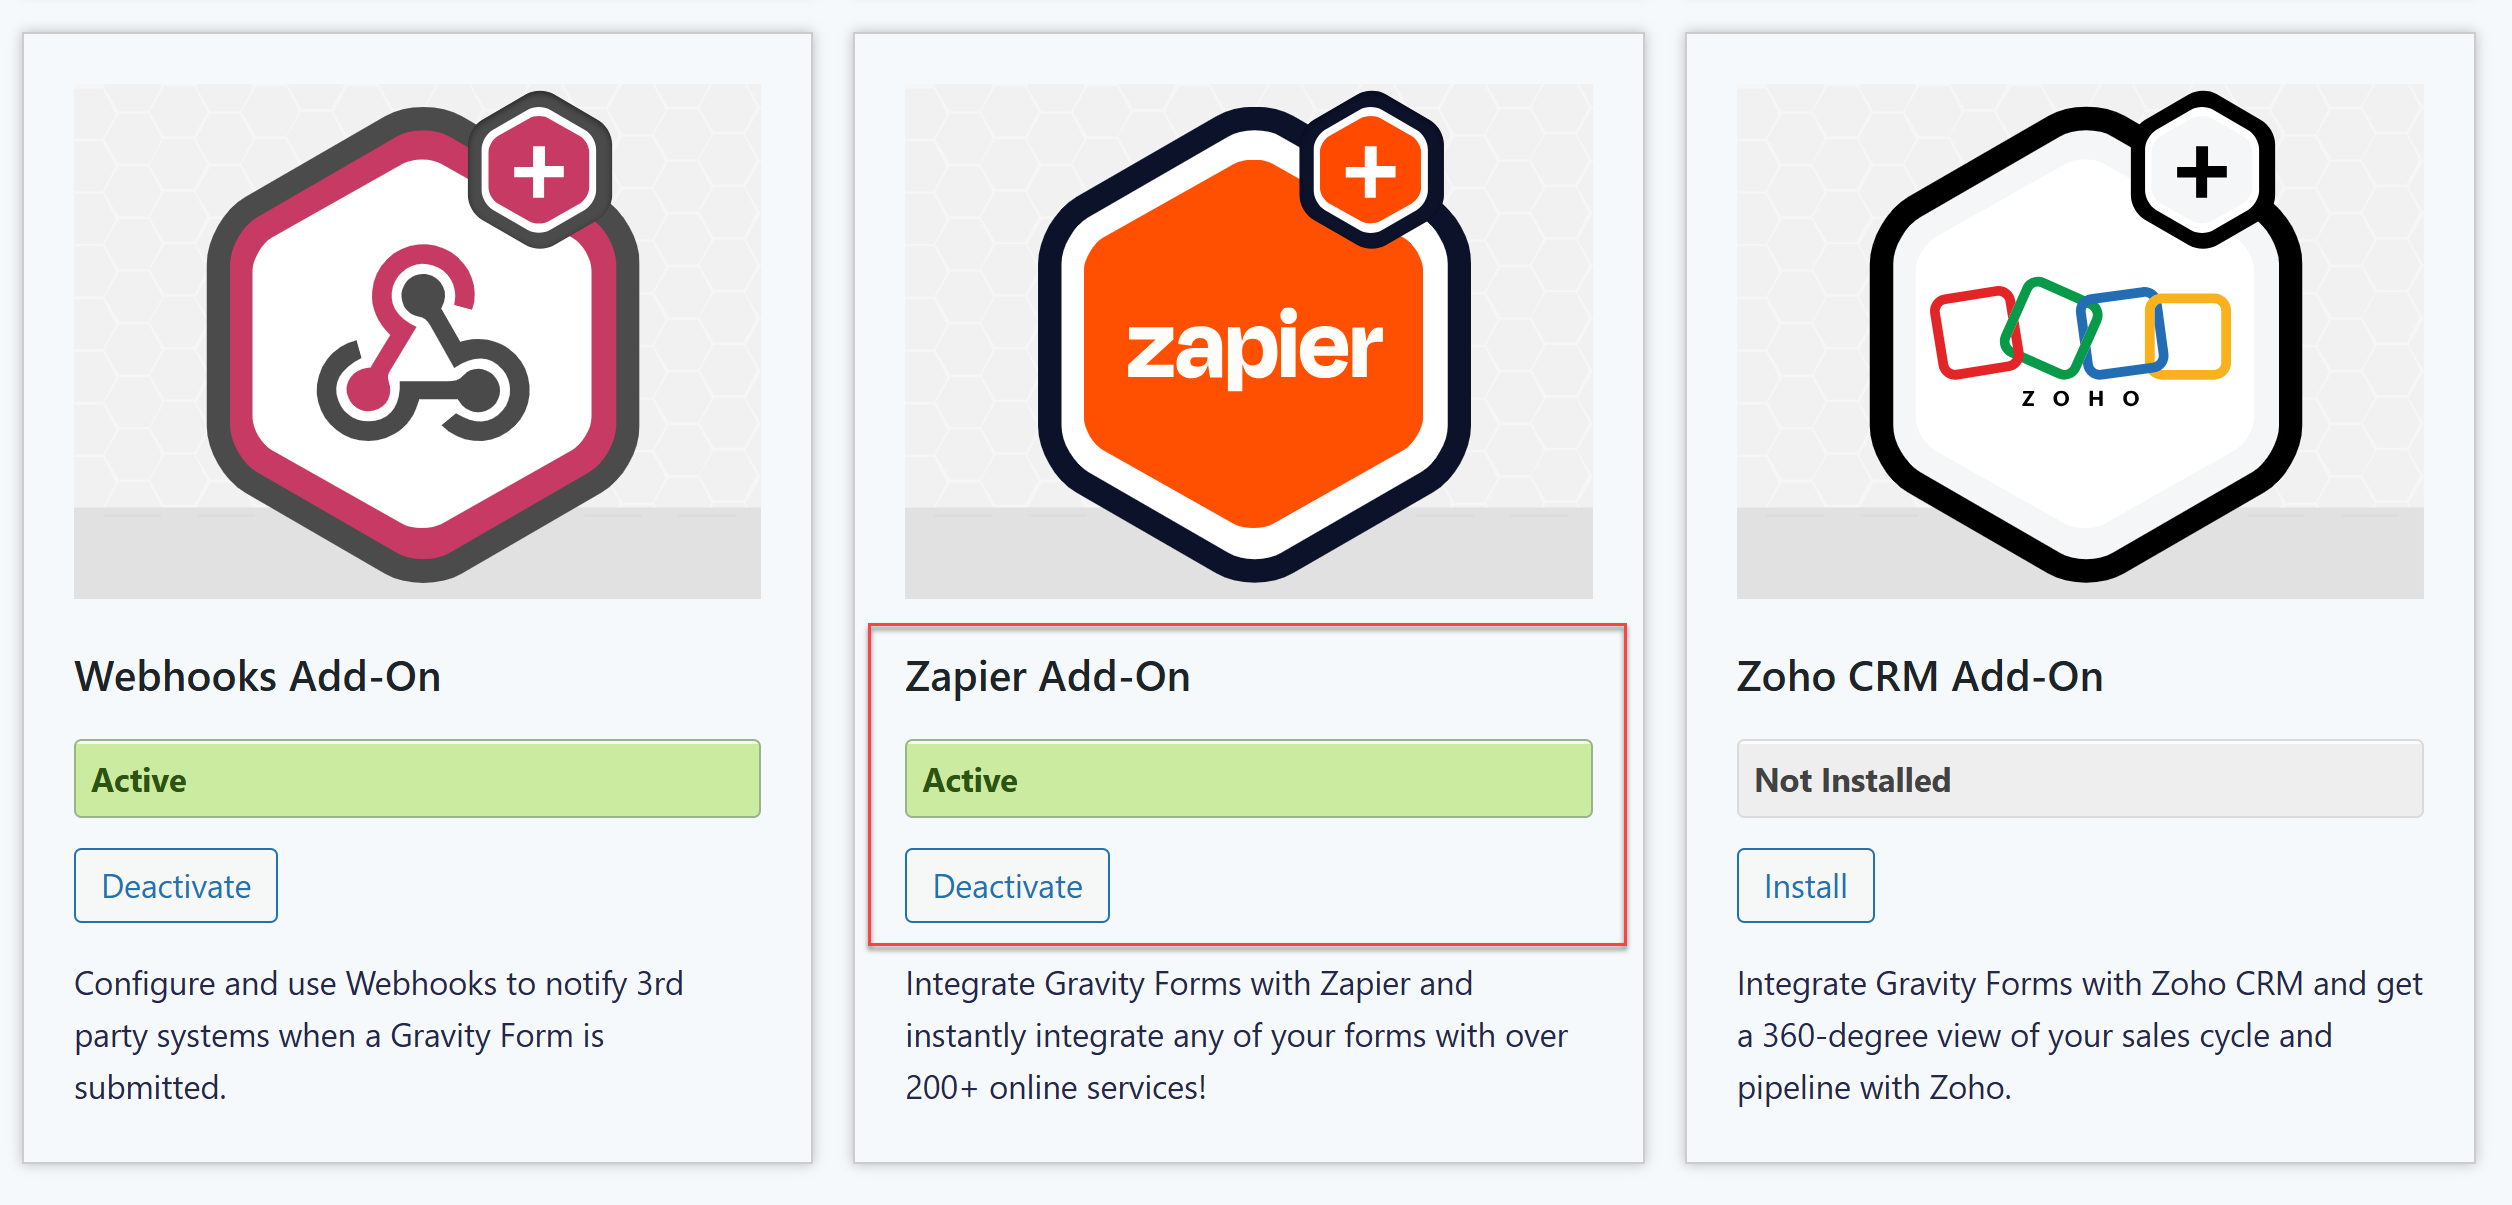
To install the Gravity Forms Zapier Add-On, simply open your WordPress dashboard and select Forms > Add-Ons. Then scroll down the page to Zapier and click on Install > Activate.
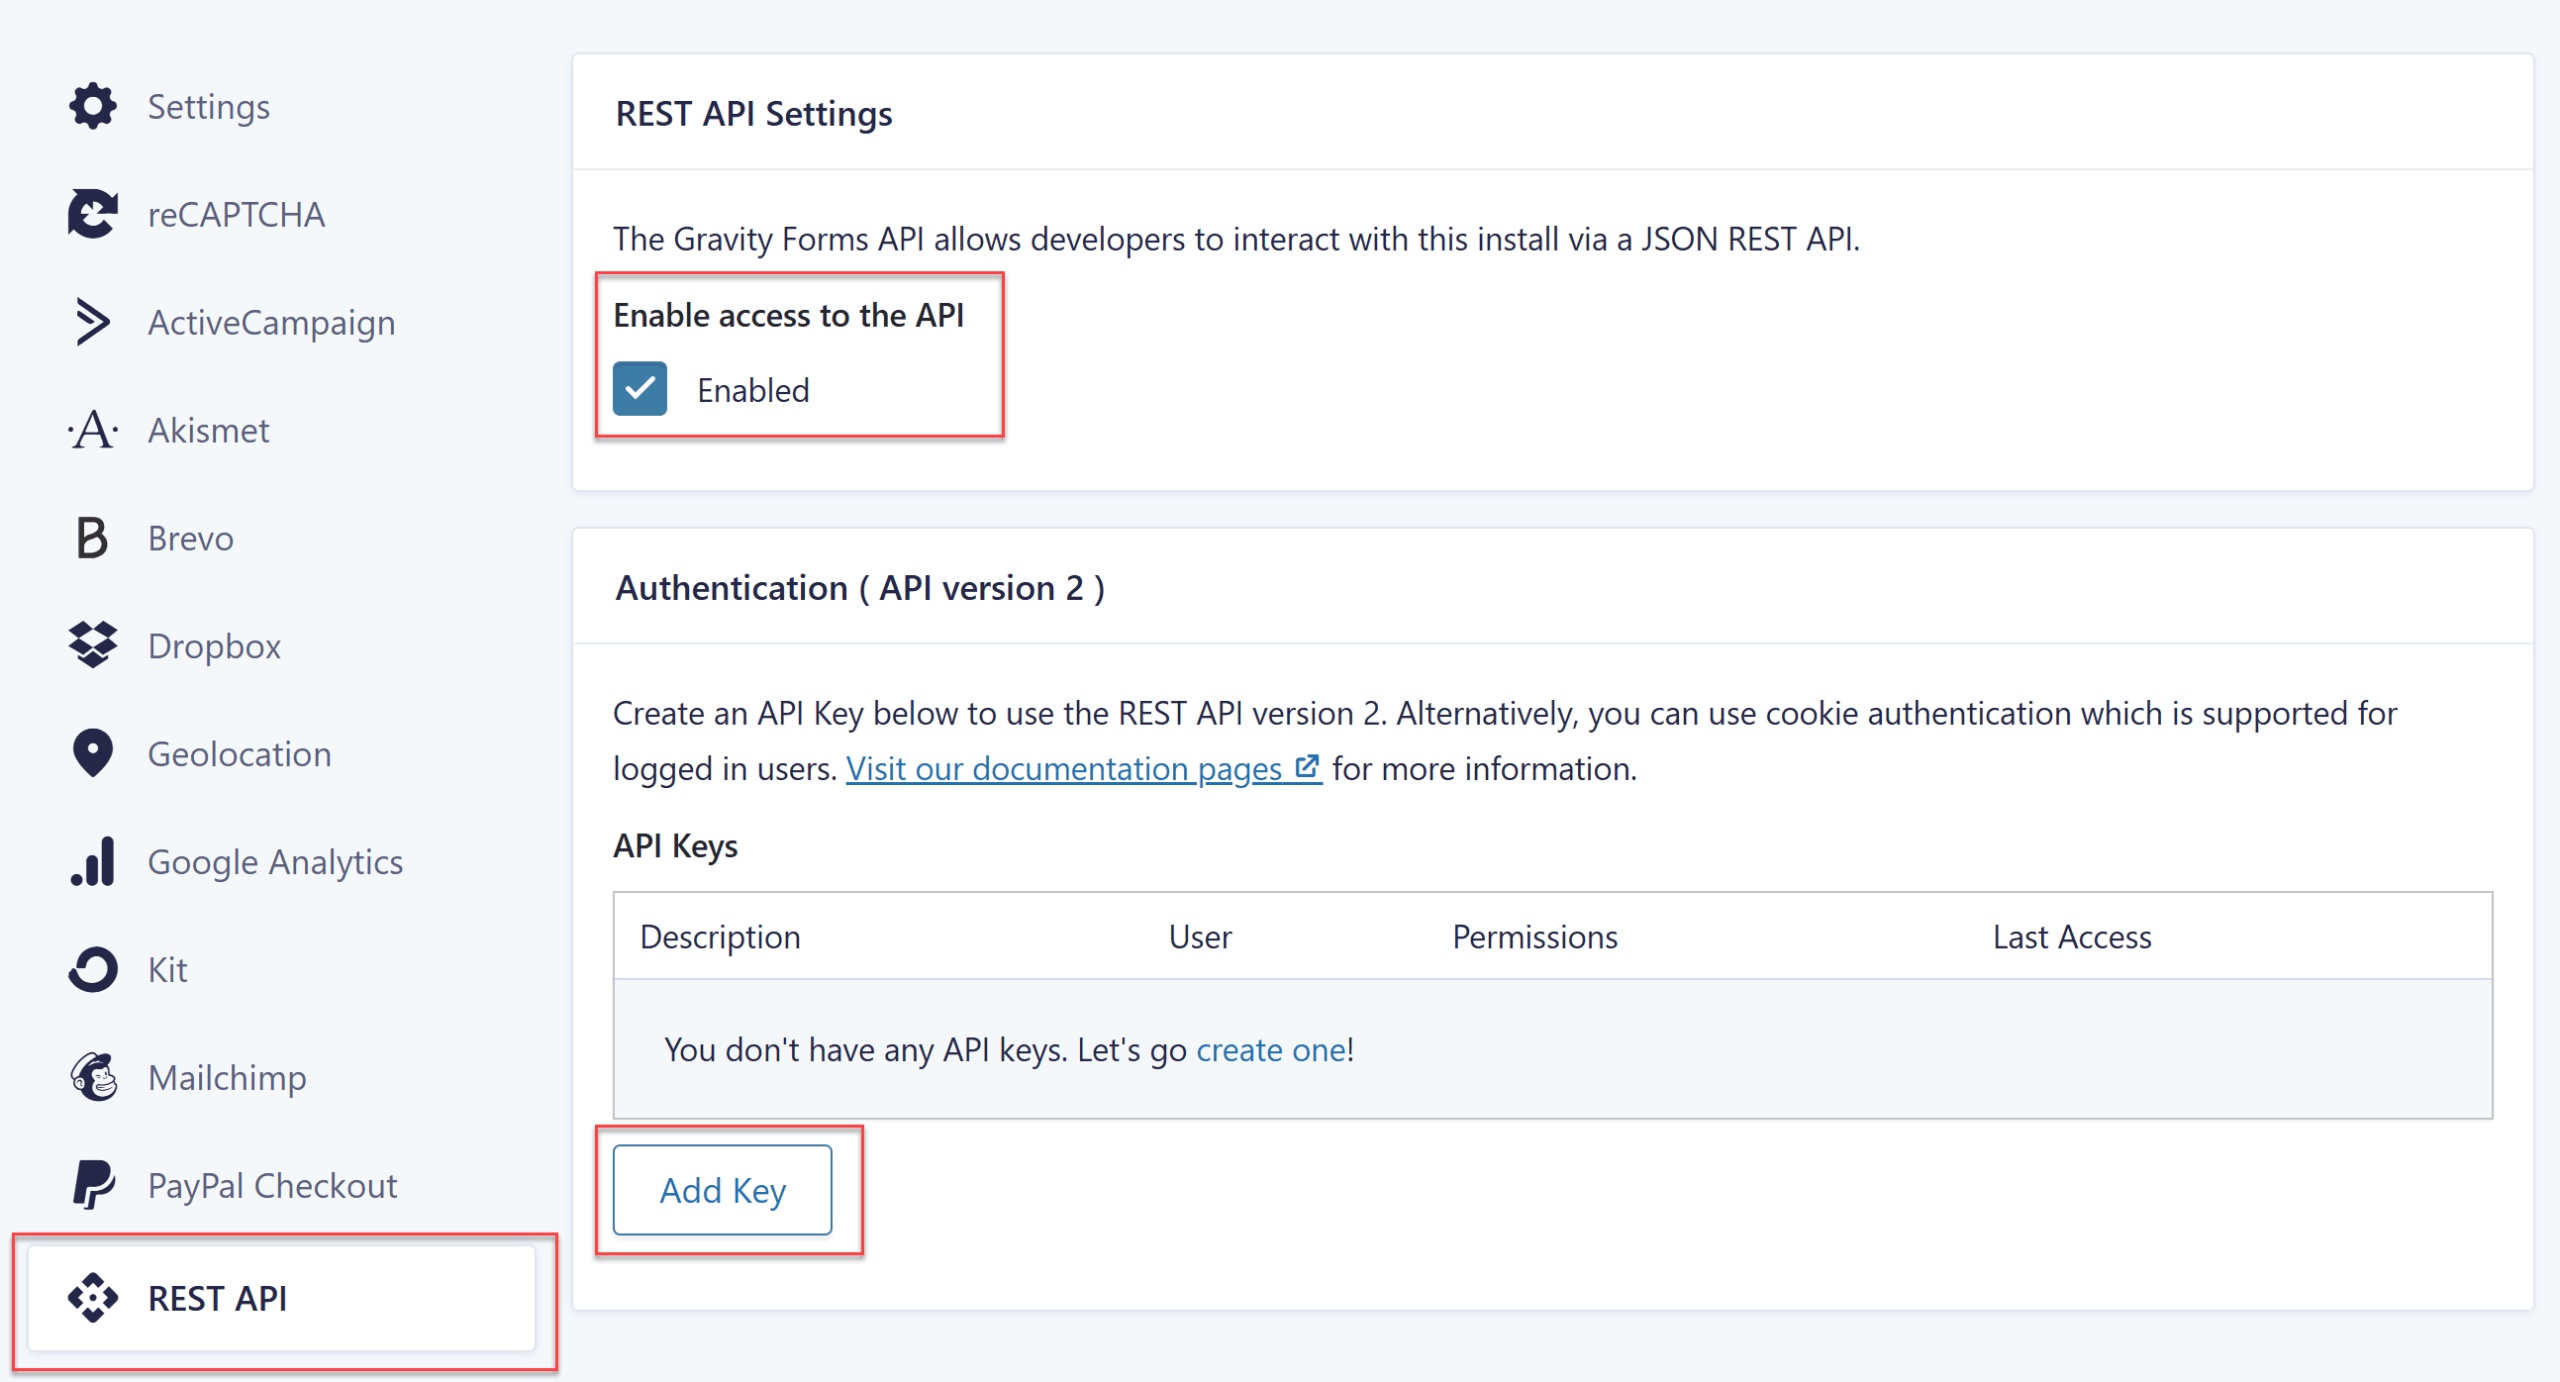
To connect Gravity Forms to Zapier, you need to generate an API key for the Gravity Forms REST API. This happens under Forms > Settings > REST API. Check the box to enable the API, then click Add Key under Authentication (API version 2).
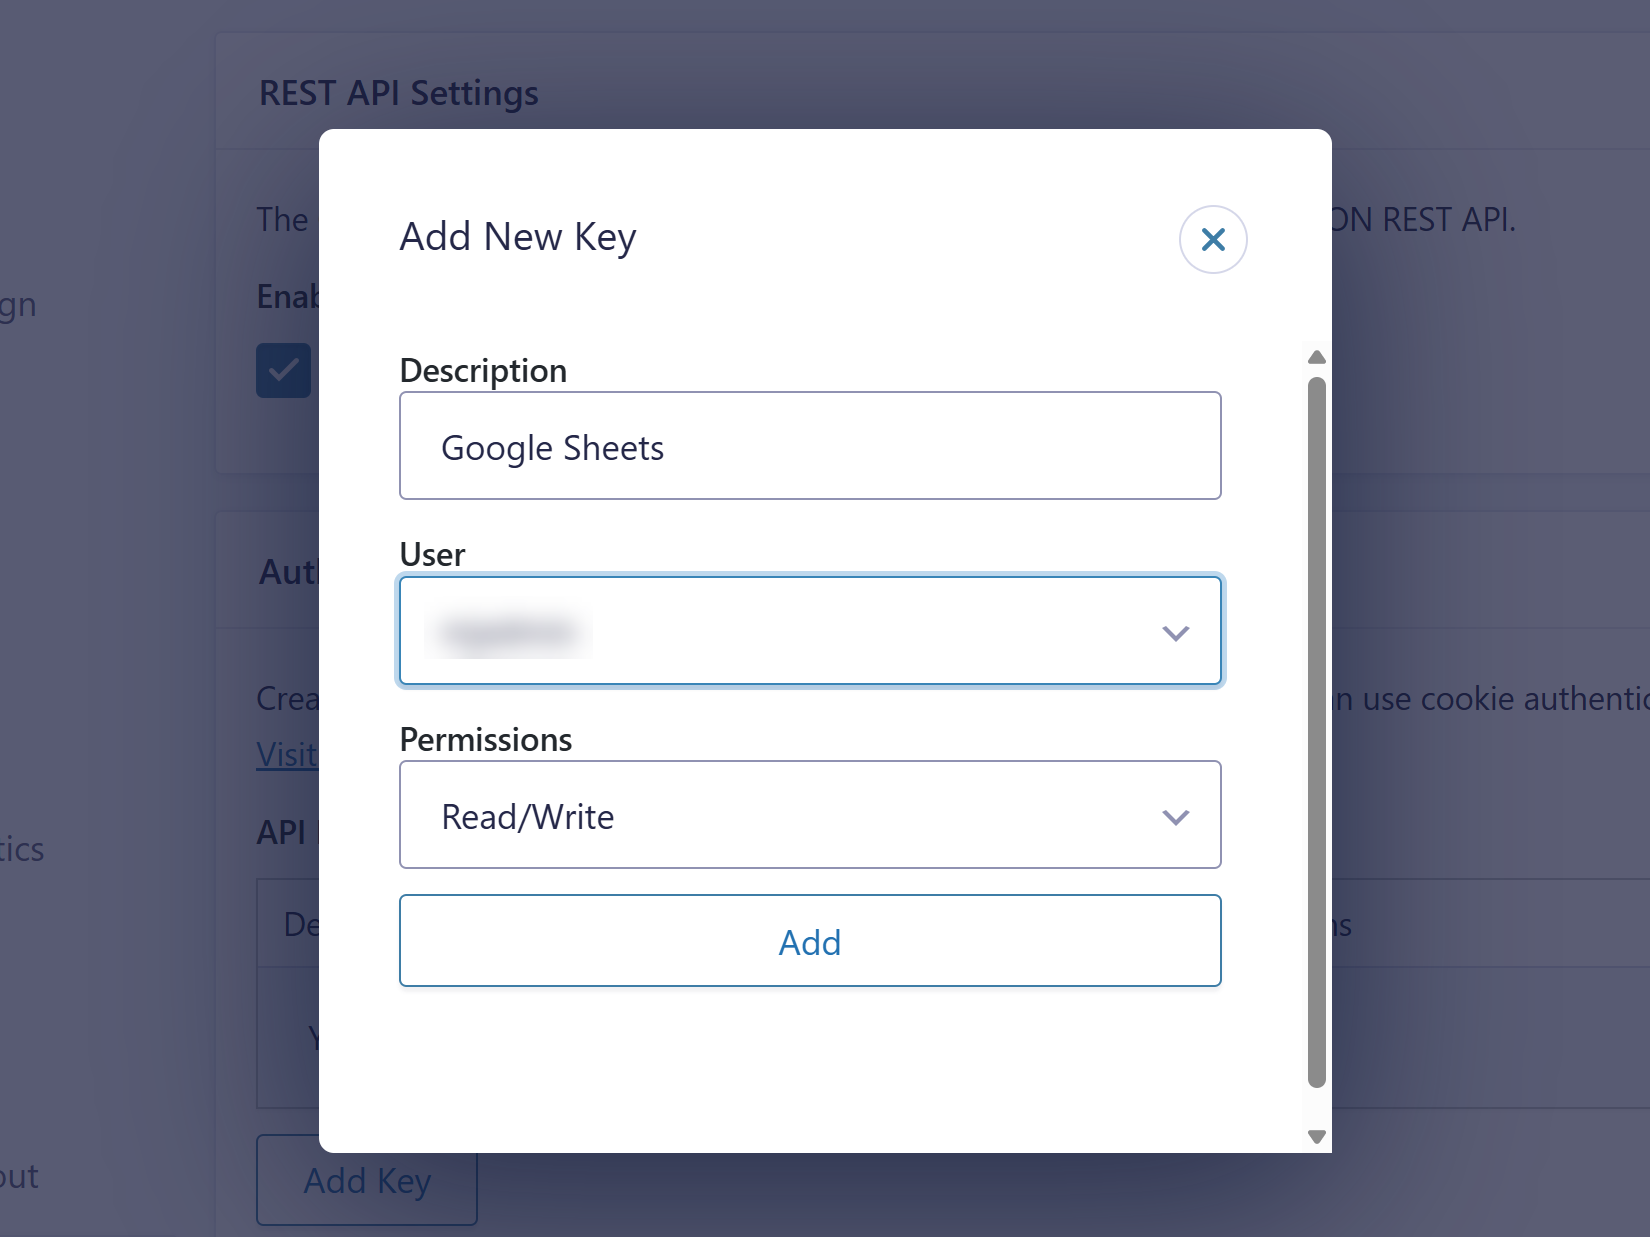
A pop-up will appear that you need to fill in as follows:
- Description – Helps you distinguish between different API keys if you have multiple.
- User – Select a user with the permission level to view and edit entries.
- Permissions – Choose Read/Write here.
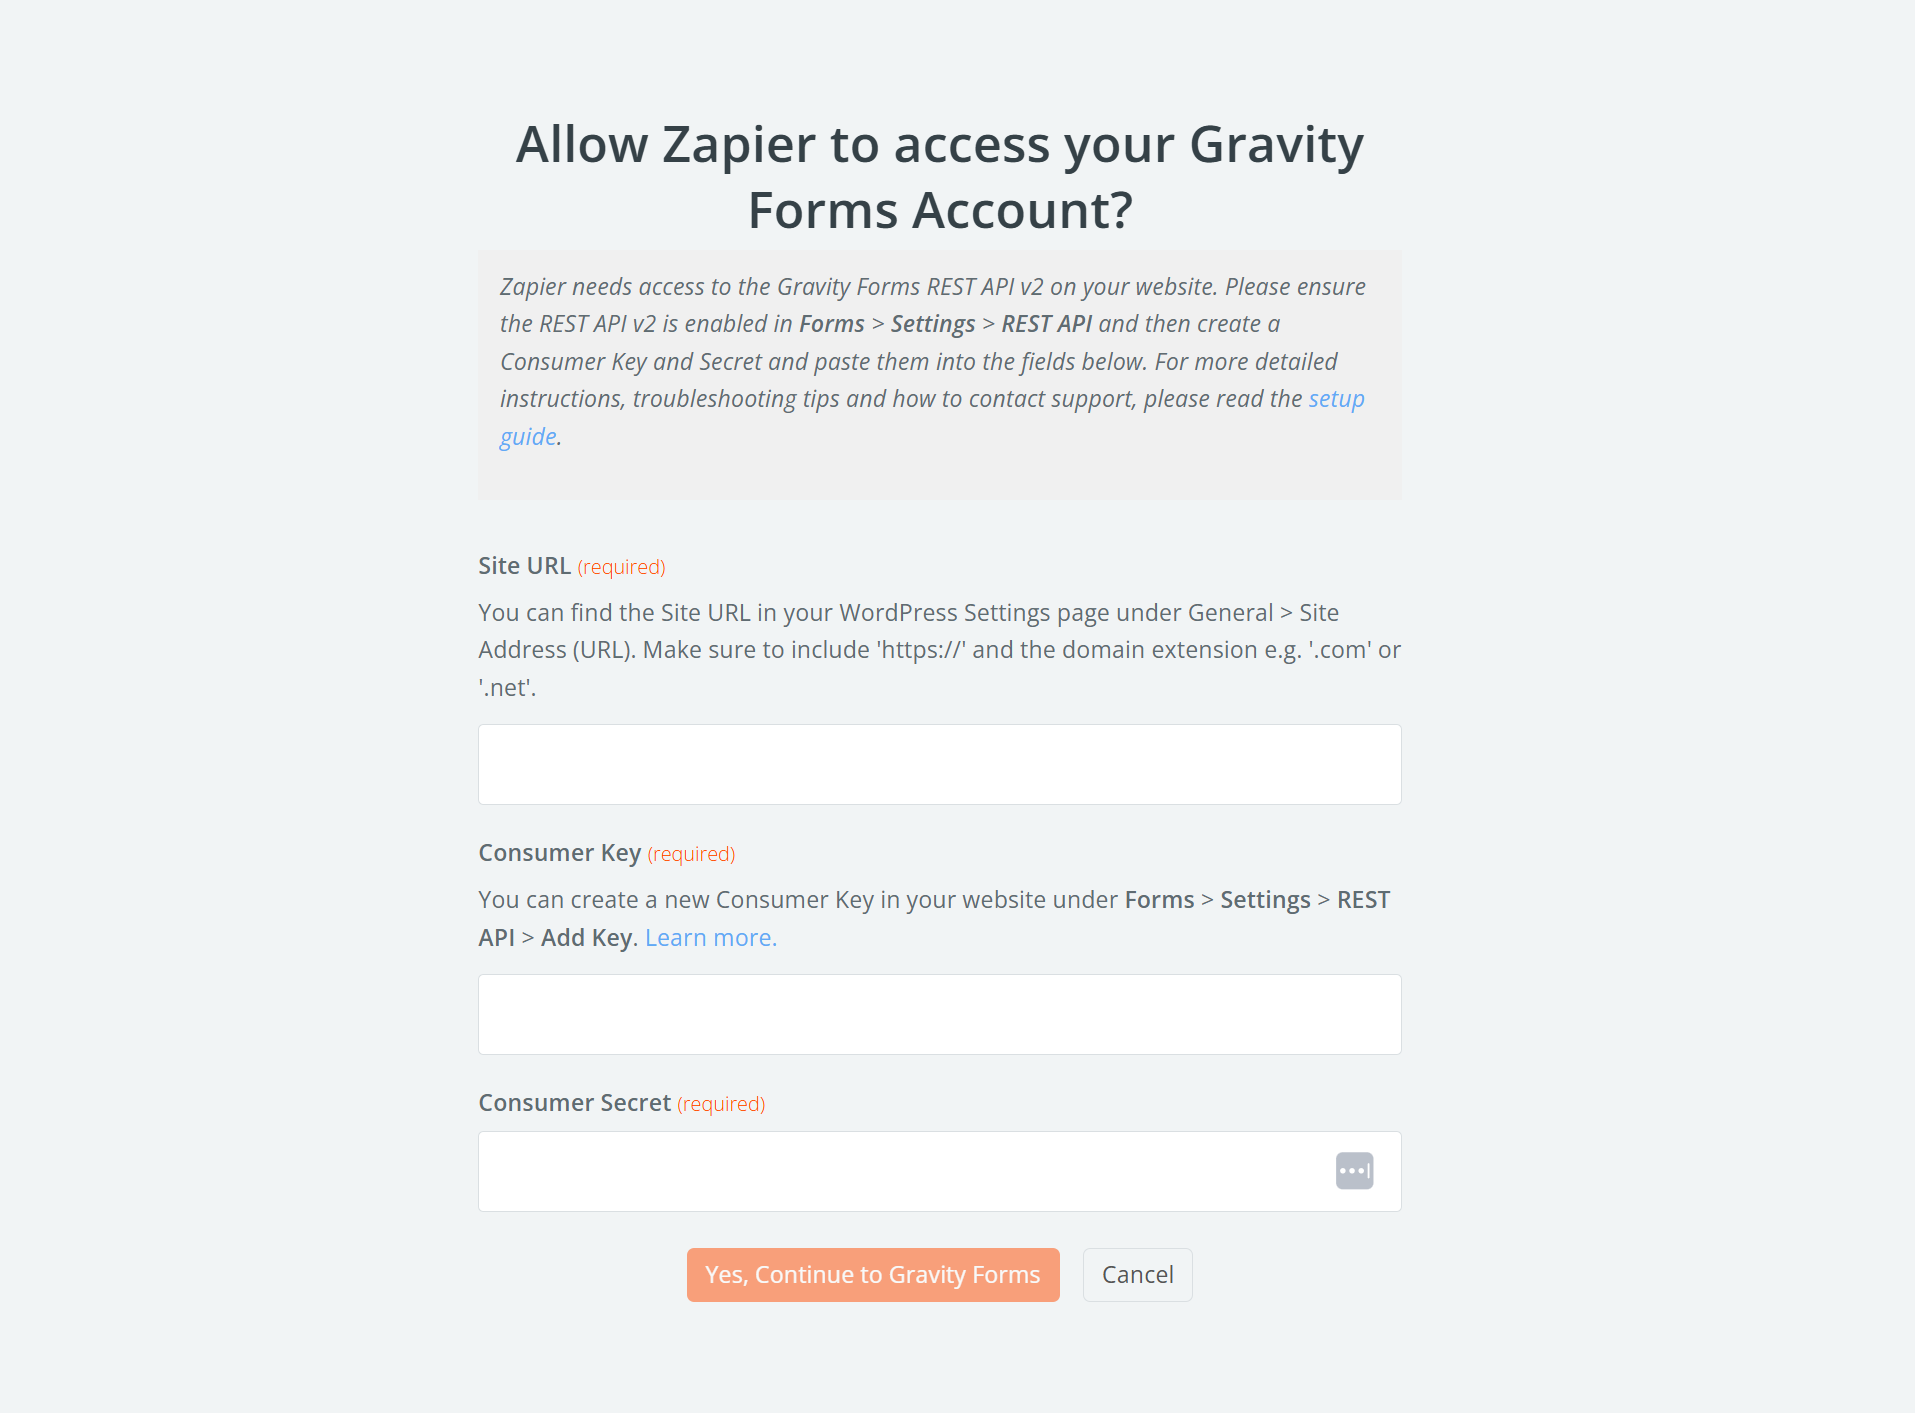
You will need to save the Consumer Key and Consumer Secret as you will need them to create a Zap.
For further information on setting up the Zapier Add-On, check out this article in the Gravity Forms documentation.
2. Create a Zap
For the next step, if you haven’t got one already, you will need to sign up for a free (or premium) Zapier account.
Once signed up, you’re ready to setup a Zap. Although you can create a Zap from scratch, Zapier provides a library of time-saving pre-built Zap templates that we recommend you take advantage of.
Navigate over to the Gravity Forms Zapier Integrations page and scroll down to find the most popular Zaps for Gravity Forms – among them you’ll find a Gravity Forms + Google Sheets workflow.
If you want to simply create a new row in a Google Sheet every time a form is submitted, click on Use this Workflow below.
The next steps all happen in Zapier’s editor, with Zapier walking you through the Zap setup process.

3. Zap configuration for Gravity Forms
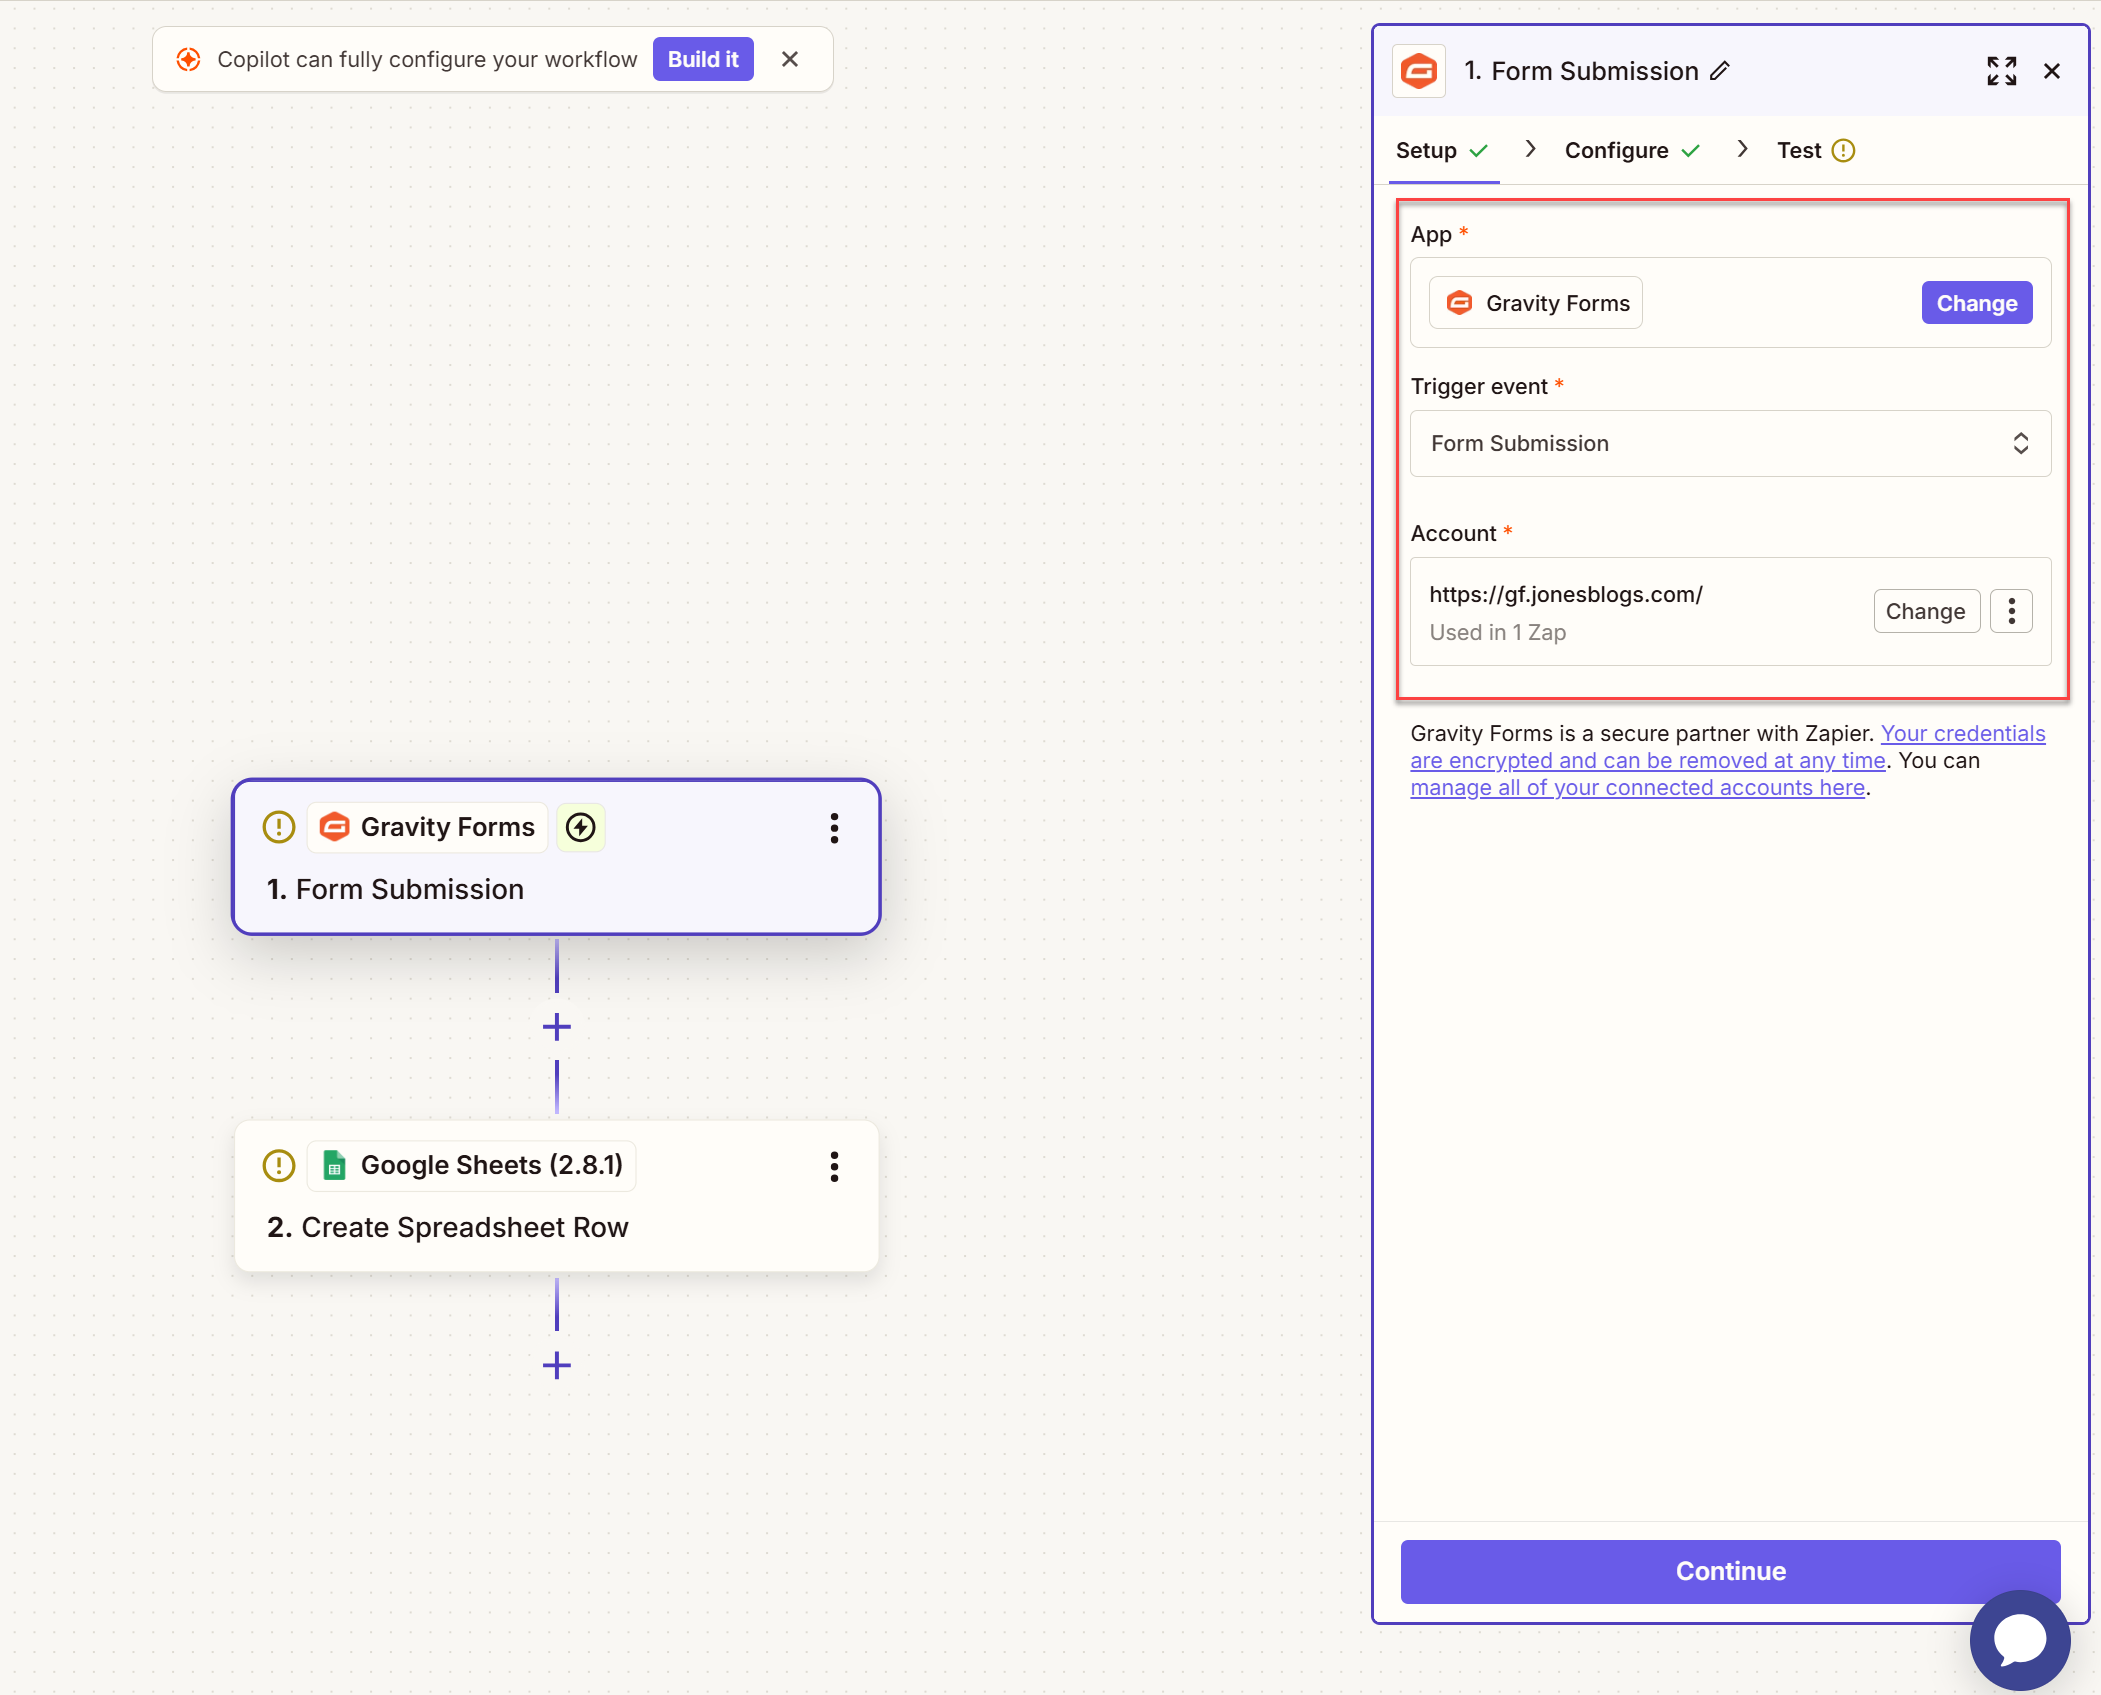
First, click on Gravity Forms, where you’ll be asked to Setup an account. You’ll need to enter your site URL and the Consumer Key and Consumer Secret you created earlier to connect your site with Zapier.
Once connected, you should also check that the Trigger Event is set to Form Submission. Then hit Continue.
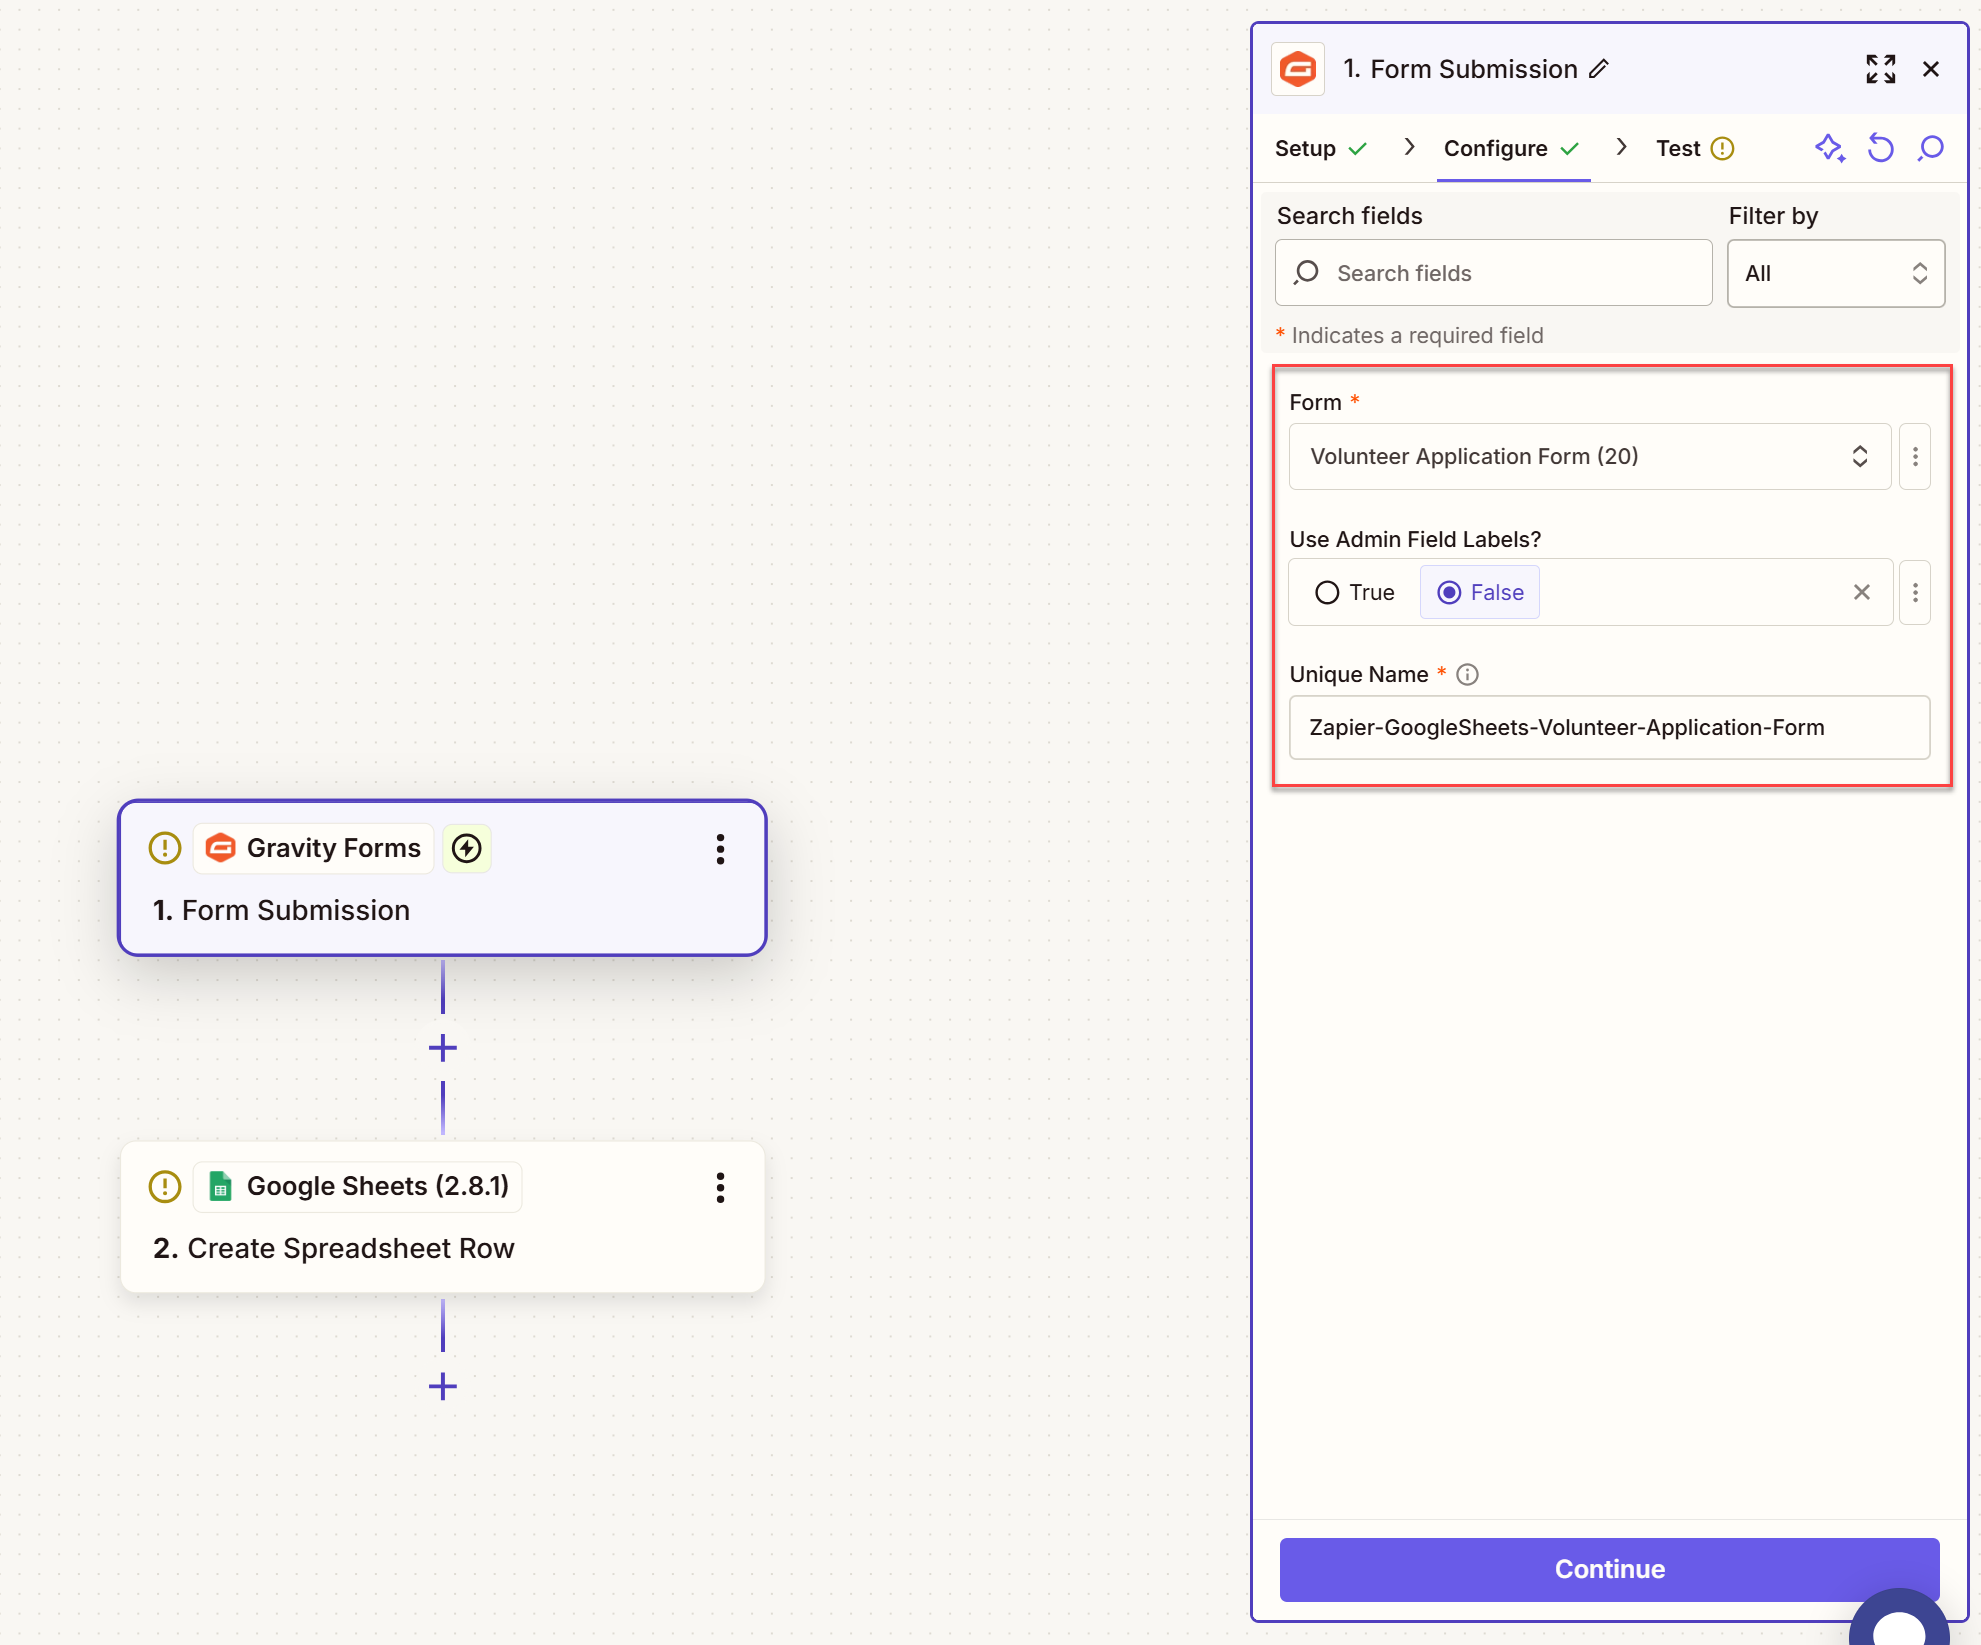
Next, under Configure, you will be asked to select the form you want to send data from – this can be any existing form on your website. If you want to create a new form, do so now within Gravity Forms and then refresh Zapier to list your form.
Underneath, the Use Admin Field Labels? section is not required, but you can fill it out if you have added Admin Labels. Then add a Unique name and again click Continue.
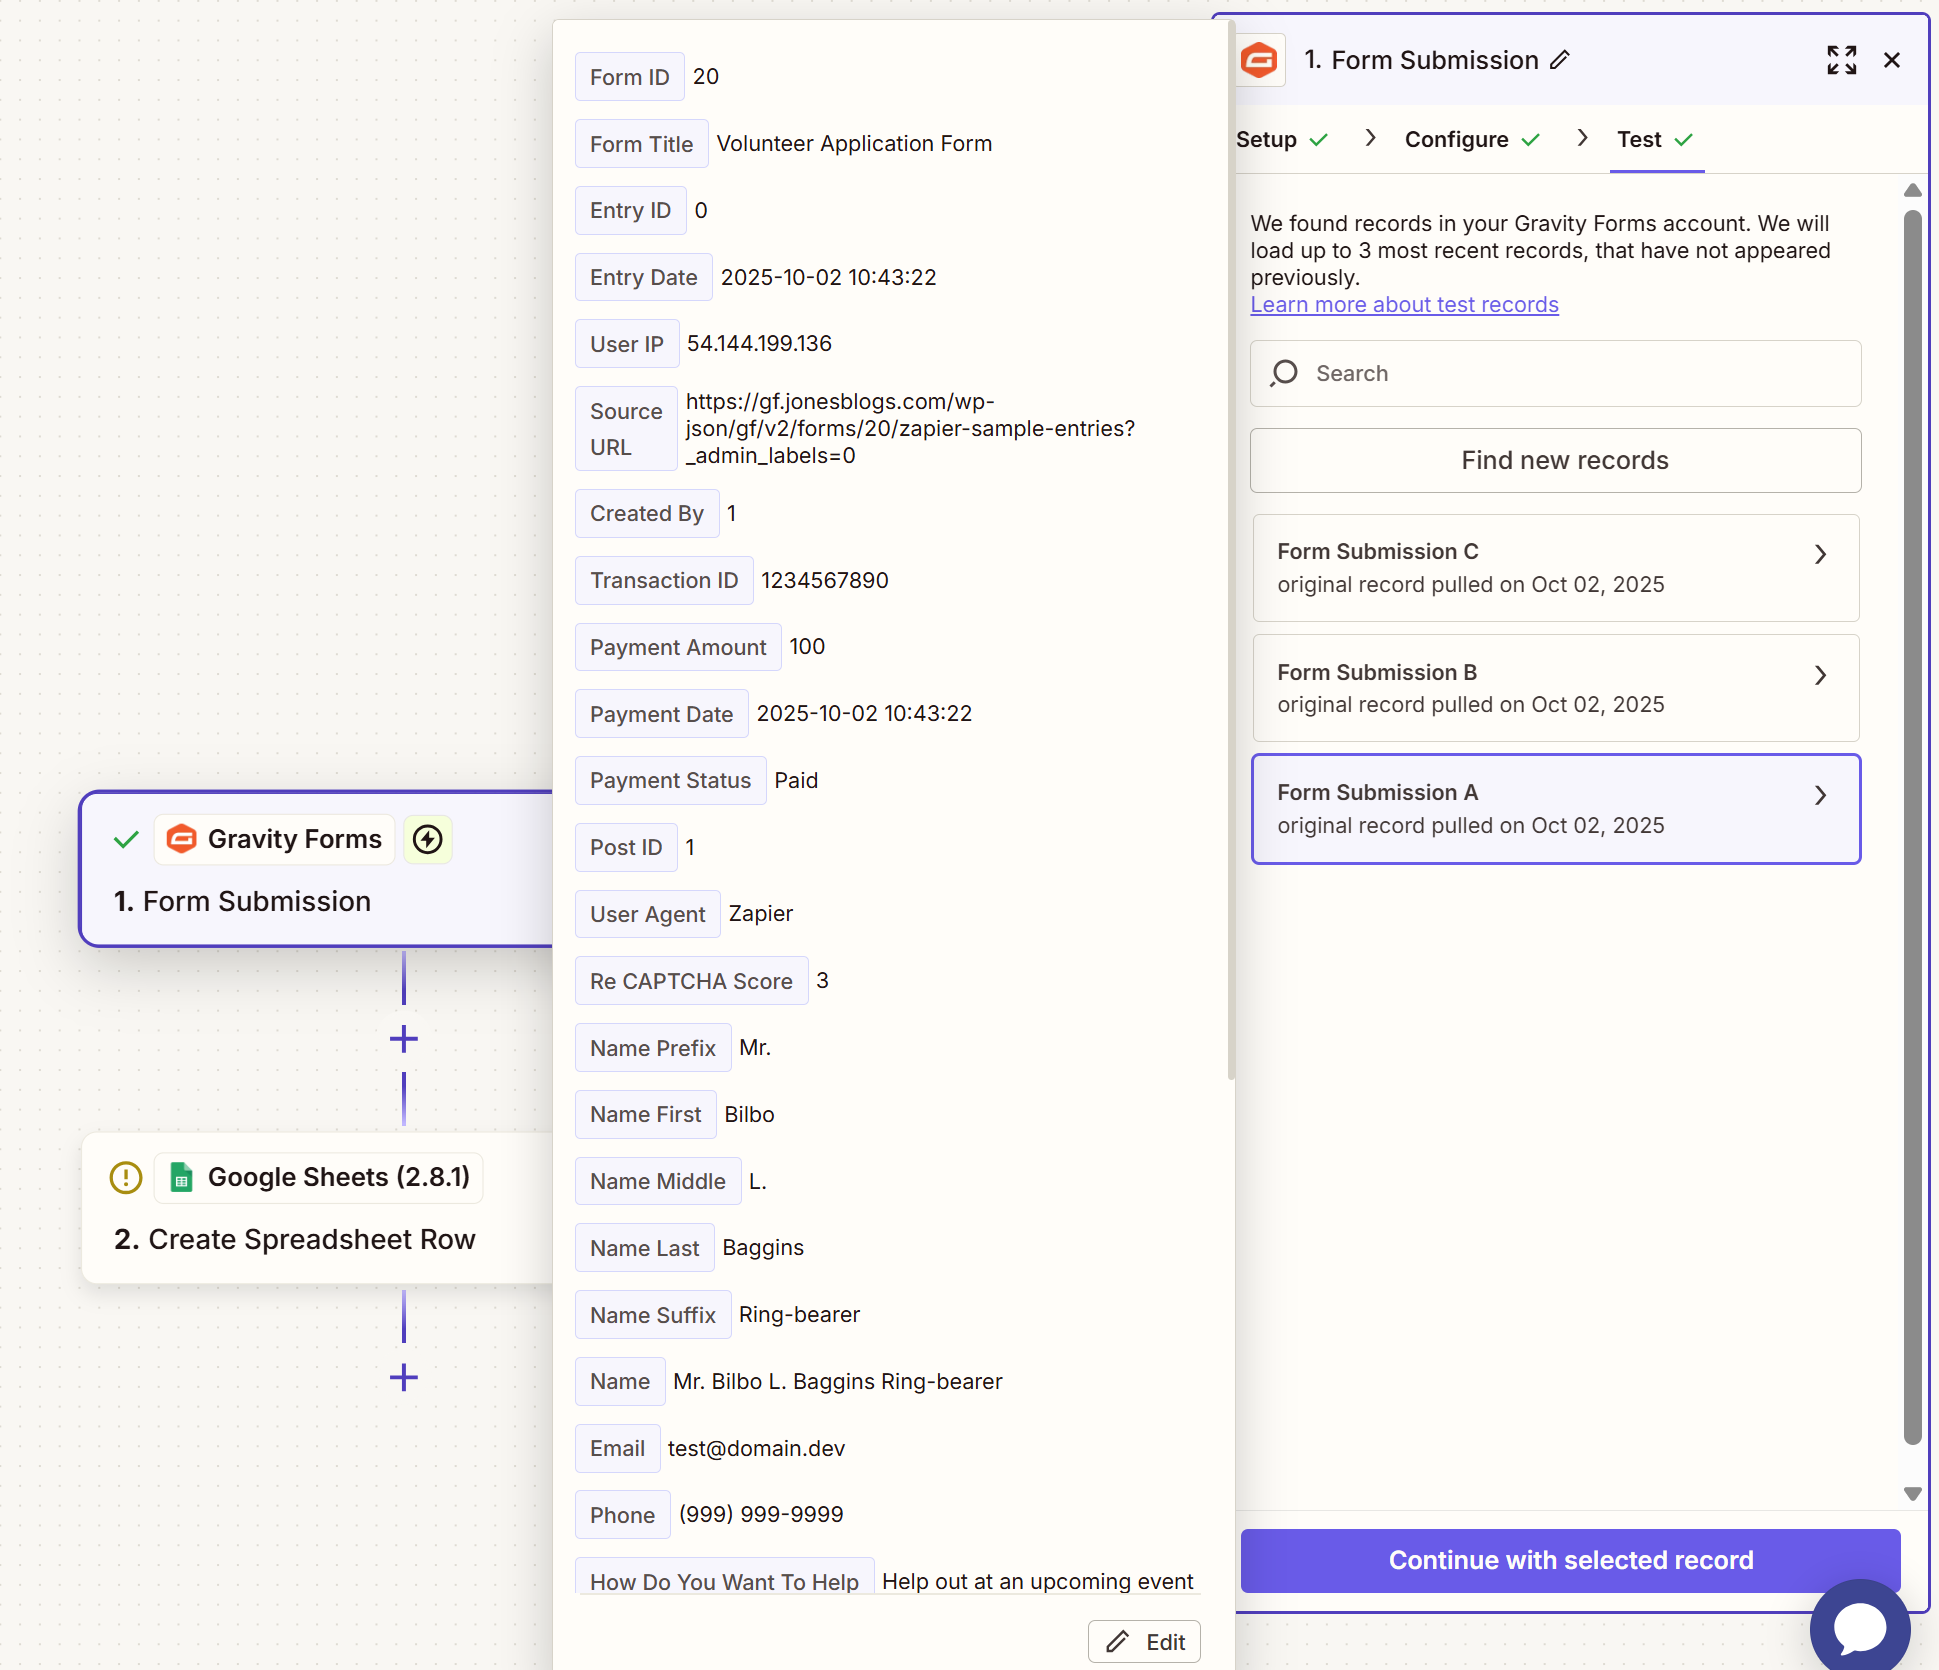
You’ll now be asked to Test what you’ve set up. Click on Test Trigger to ensure the connection works. You should end up with a viewable example submission record. Click Continue with selected record.
4. Zap configuration for Google Sheets
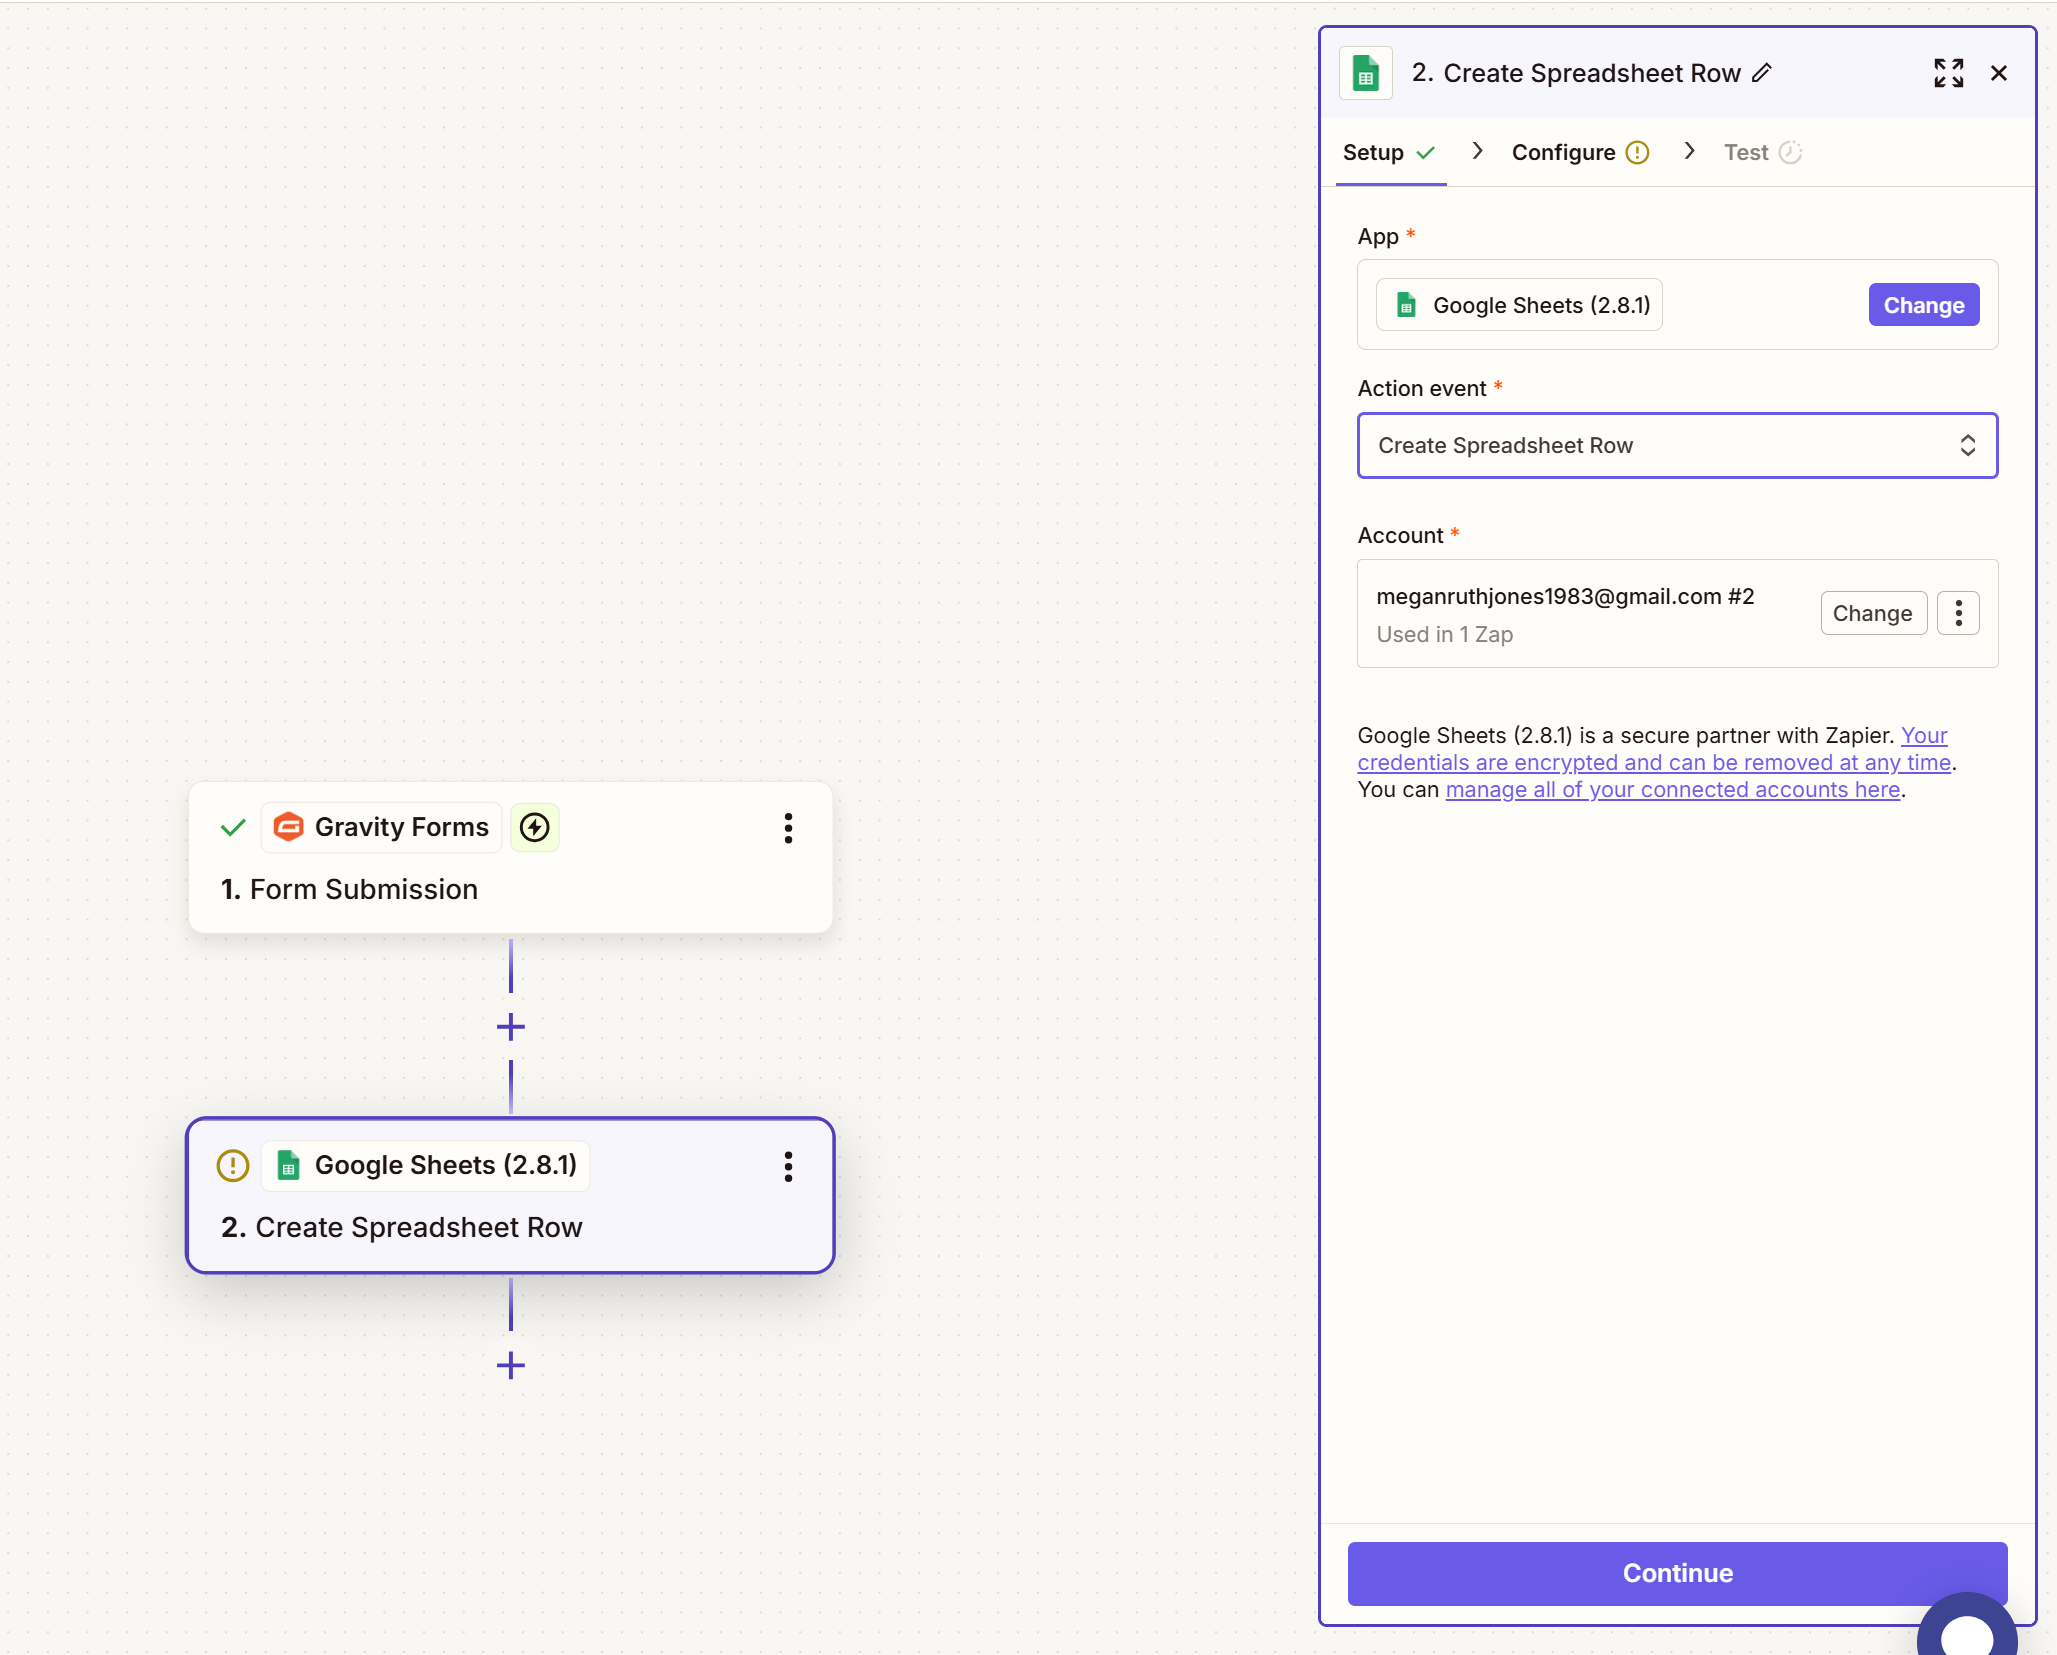
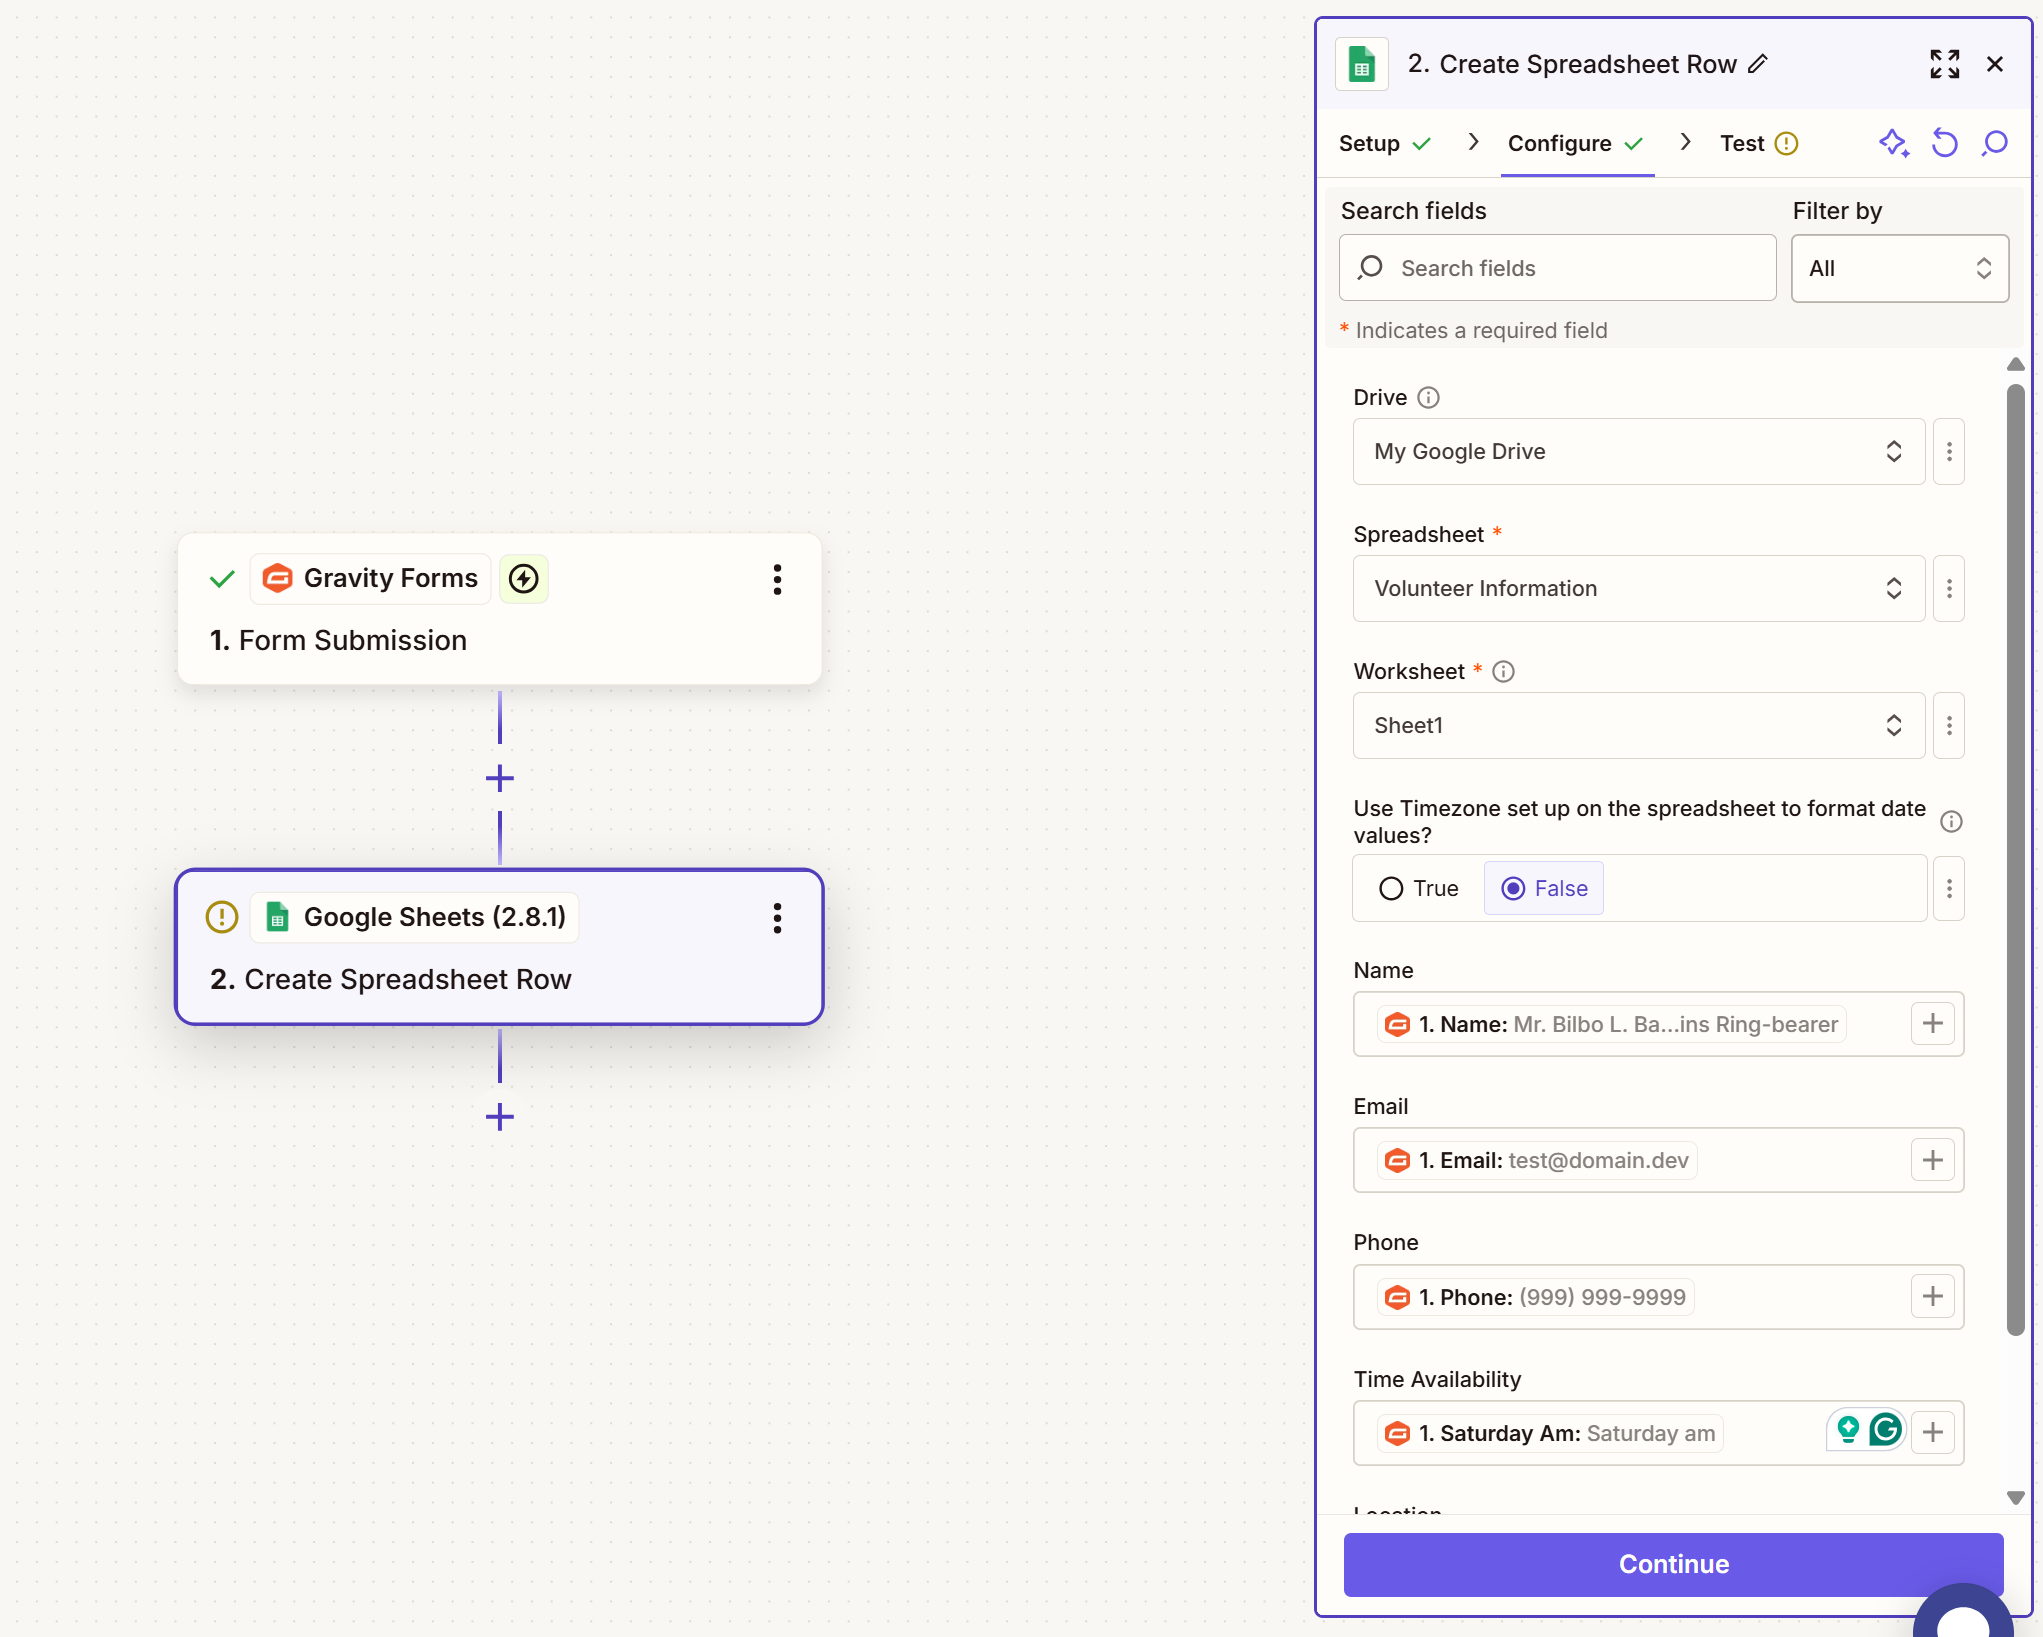
You’ll now need to complete the same process to connect to Google Sheets. Follow the instructions to authorize your account, then ensure the Action Event is set to Create Spreadsheet Row, so each new form entry will be displayed as a new row in Google Sheets.
Next, select the Drive, spreadsheet, and worksheet where you want the form data displayed. You may want to create a new spreadsheet – if so, go ahead and do so in Google Sheets and then refresh the Zapier page – you should now see your new spreadsheet listed.
Once a spreadsheet has been selected, you’ll need to map your form fields to spreadsheet columns. When the entry is sent to Google Sheets, it will use this mapping to determine where to display the values from your form.
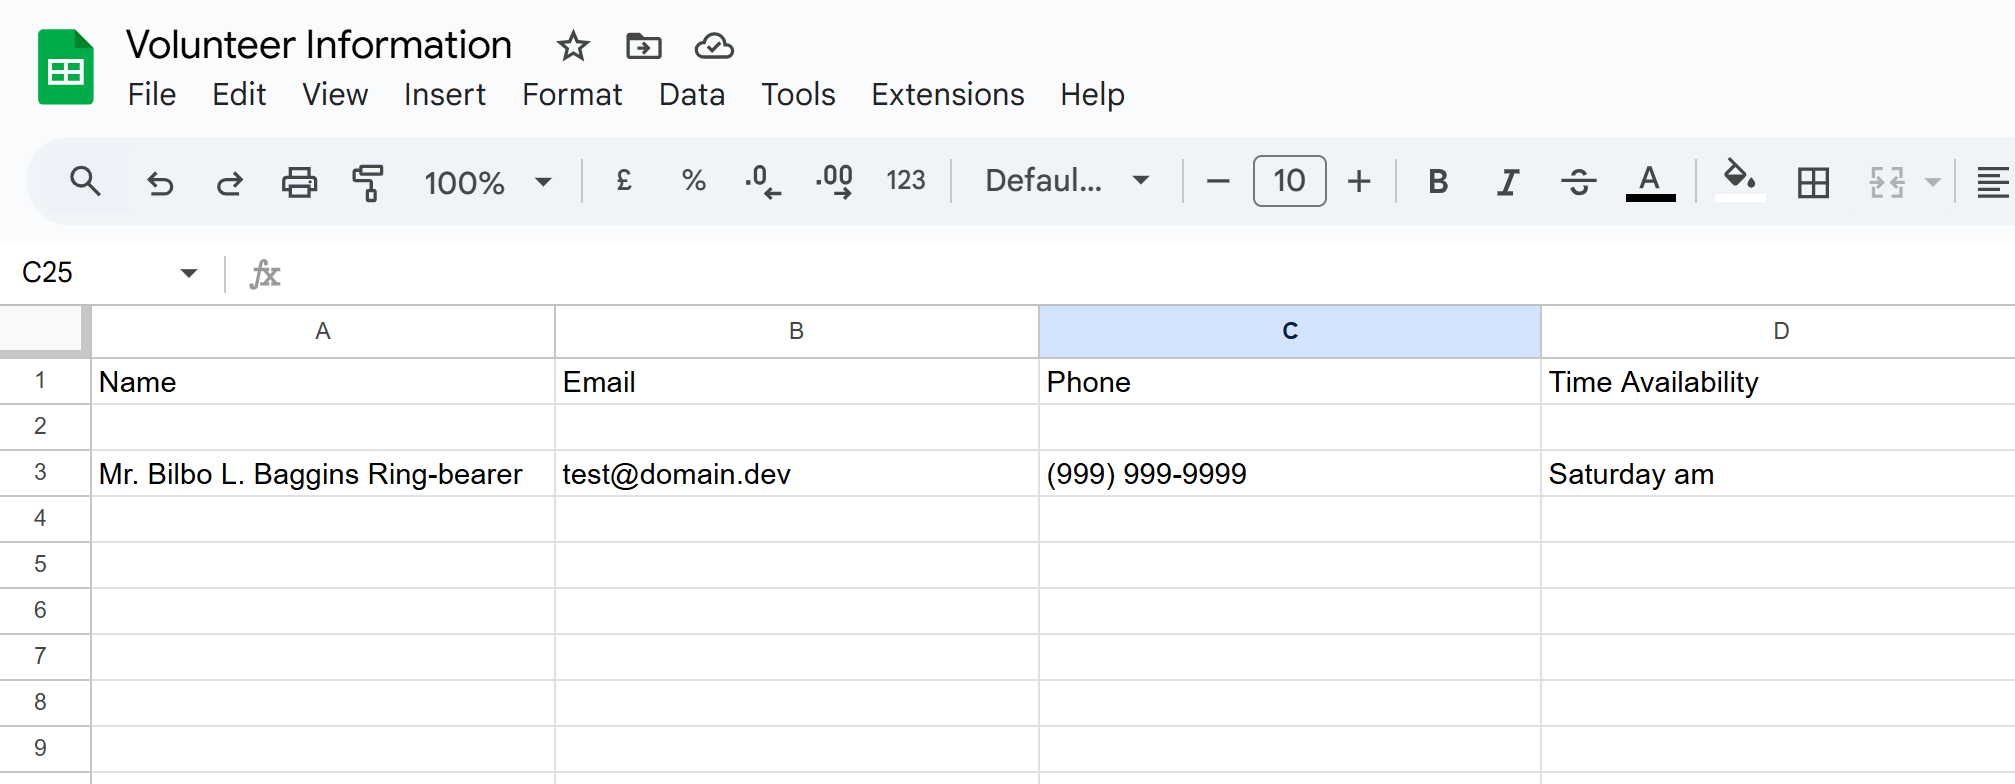
Zapier will now ask you to test the Zap – you should find an example row in your Google sheet.
If everything worked as expected, you can go ahead and Publish the Zap. Going forward, all form entries will now be sent to your Google sheet, it’s as simple as that!
For more information on using the Zapier Add-On, check out this Documentation.
Don’t Have Gravity Forms Yet?
If you don’t have Gravity Forms or the Zapier Add-On, don’t worry. You can still test out everything in this article for free inside your own personalized Gravity Forms demo and see why Gravity Forms is the top choice for WordPress sites worldwide.
Already in love? Purchase our premium WordPress form plugin today!

If you want to keep up-to-date with what’s happening on the blog sign up for the Gravity Forms newsletter!