Build stunning front-end displays for Gravity Forms entries with the Advanced Elementor Widget for GravityView
Written by the Editorial team at GravityKit…
The Advanced Elementor Widget for GravityView, brought to you by GravityKit, brings powerful design flexibility to anyone using Gravity Forms, GravityView, and Elementor together. With this new widget, it’s now possible to design and style front-end displays for your form entries without writing custom CSS.
This powerful widget combines GravityView’s dynamic data display capabilities with Elementor’s intuitive builder, giving you complete visual control over how your Gravity Forms-powered web applications look on the frontend.
What is GravityView?
GravityView is a Gravity Forms add-on by GravityKit that allows you to display, filter, and edit form entries on the front end of your site. With this new Elementor integration, you can now design those Views visually – no custom code required!
What you can build
With GravityView and Elementor, you can:
- Build a directory of form submissions with professional Elementor styling
- Create branded dashboards showing entries visually on the front end
- Design responsive layouts for reviews, job listings, member profiles, or any other form-based content
- Transform basic data tables into sleek displays that match your site’s design
Visual design made simple
Getting started is as straightforward as adding any other Elementor widget. Search for “GravityView” in the Elementor sidebar, drag the widget onto your page, and select which View you want to display from the dropdown menu.
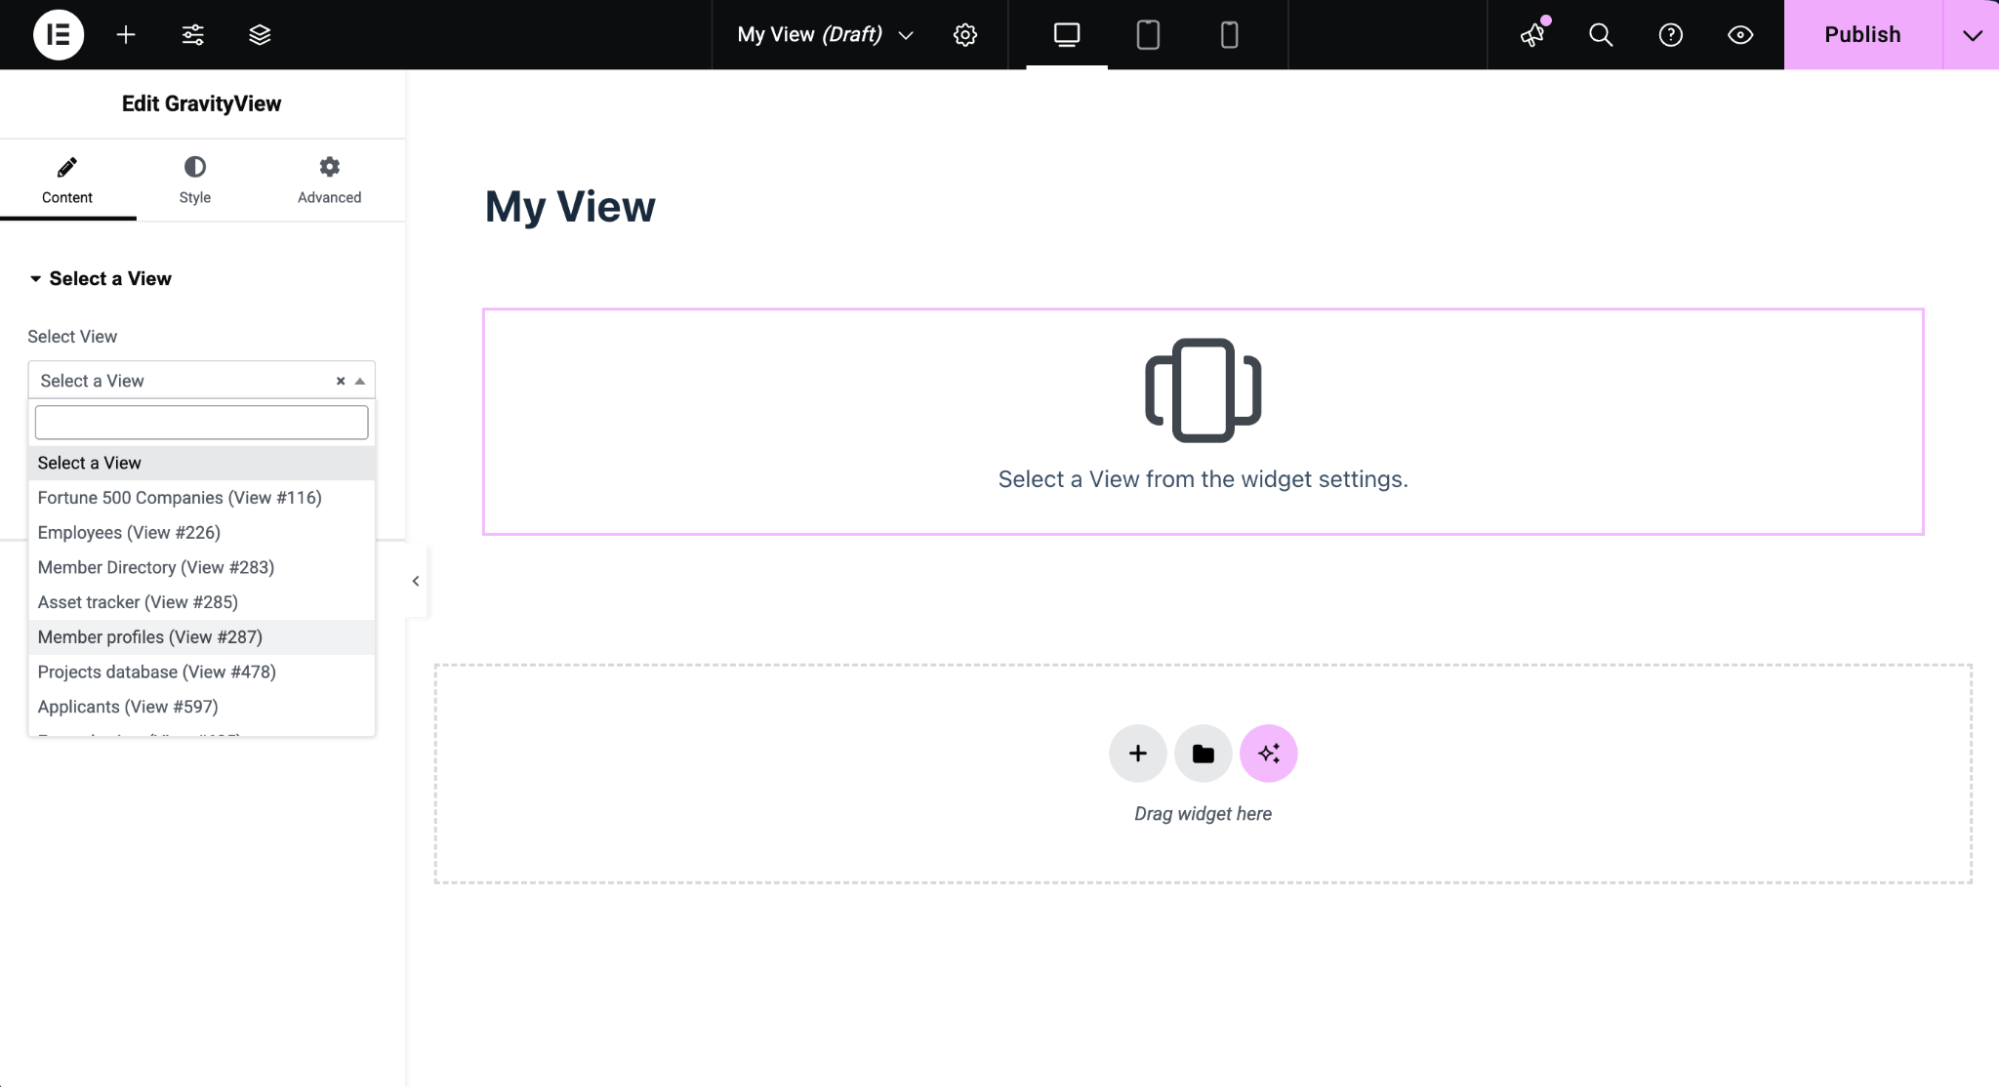
All the standard GravityView settings are available right in the widget’s Content tab. You can adjust these settings directly in Elementor without switching between screens or leaving the visual builder.
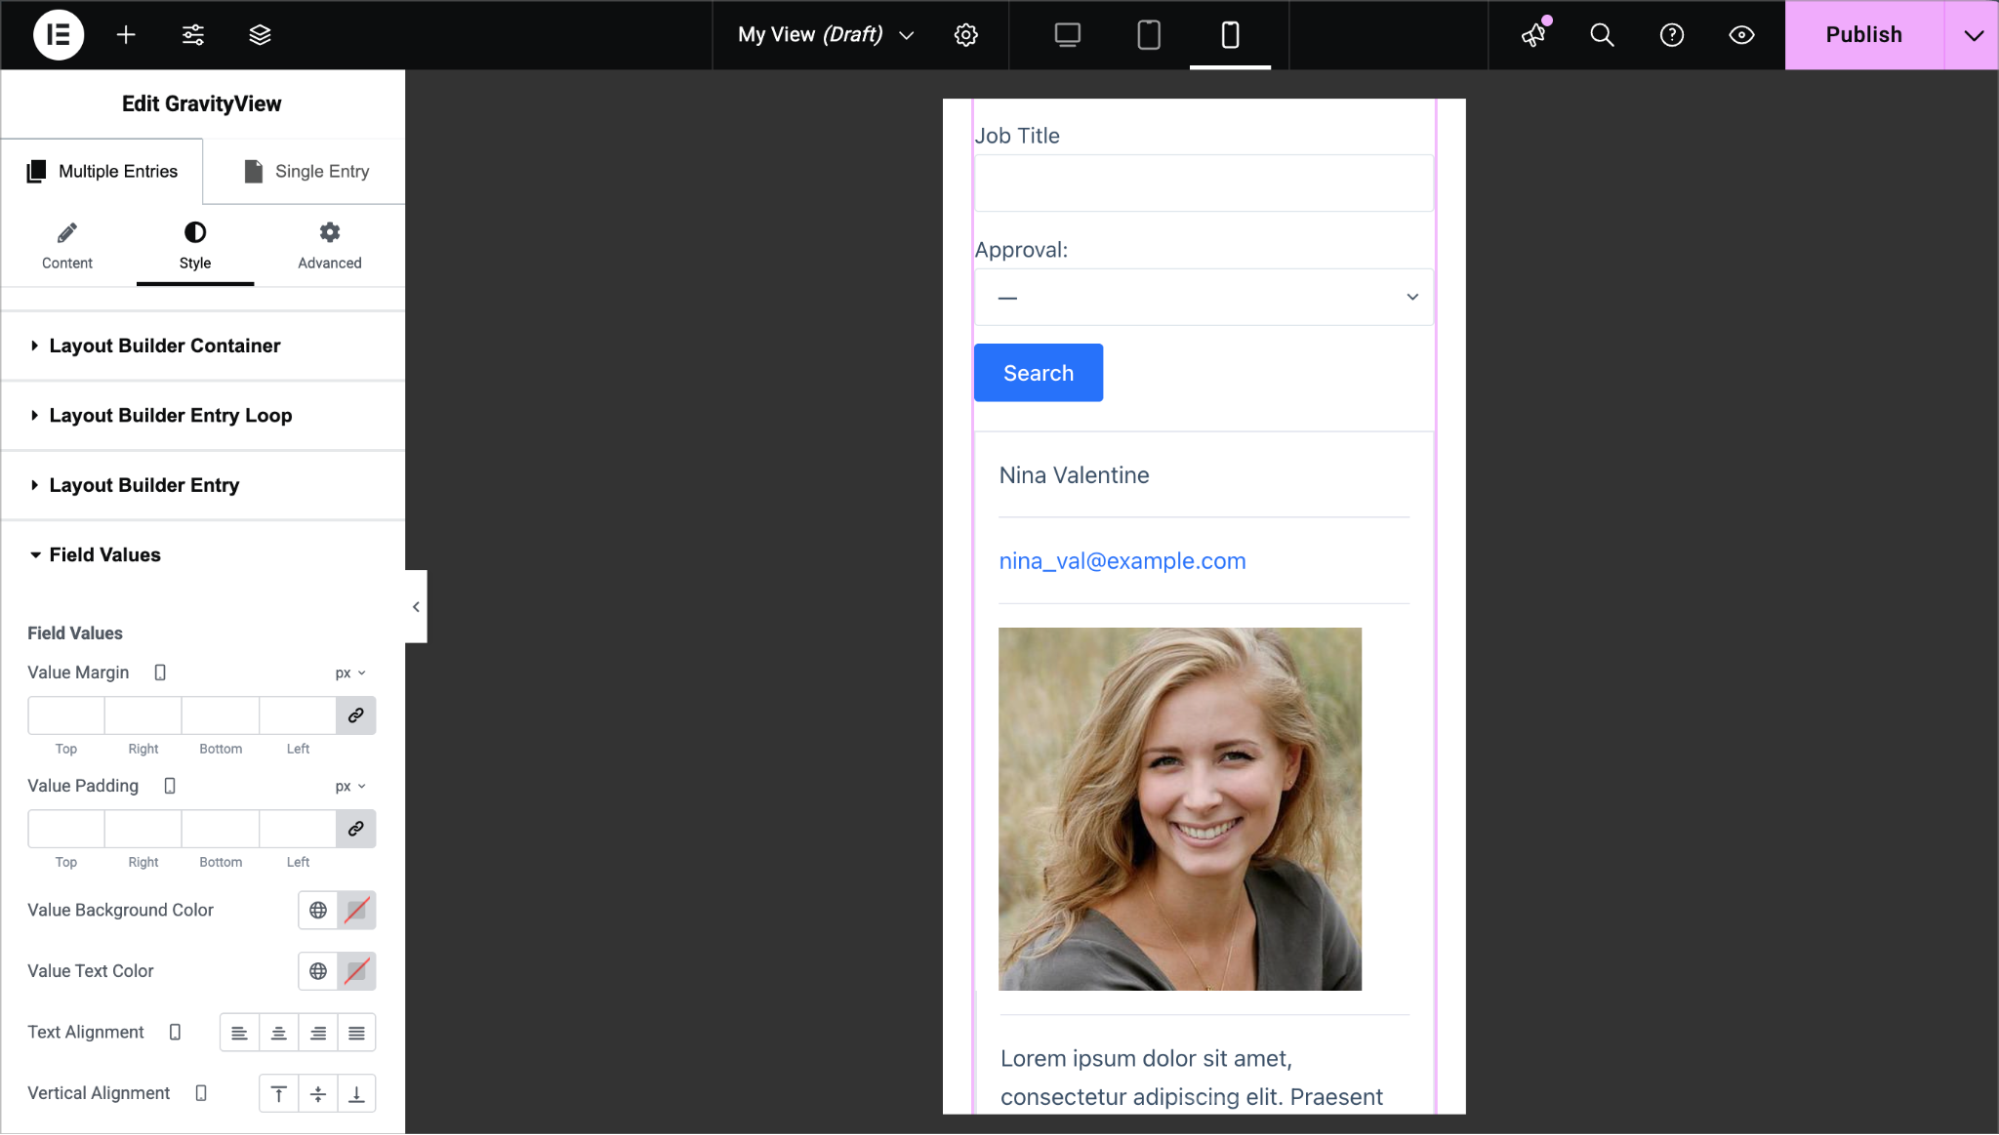
Extensive styling options
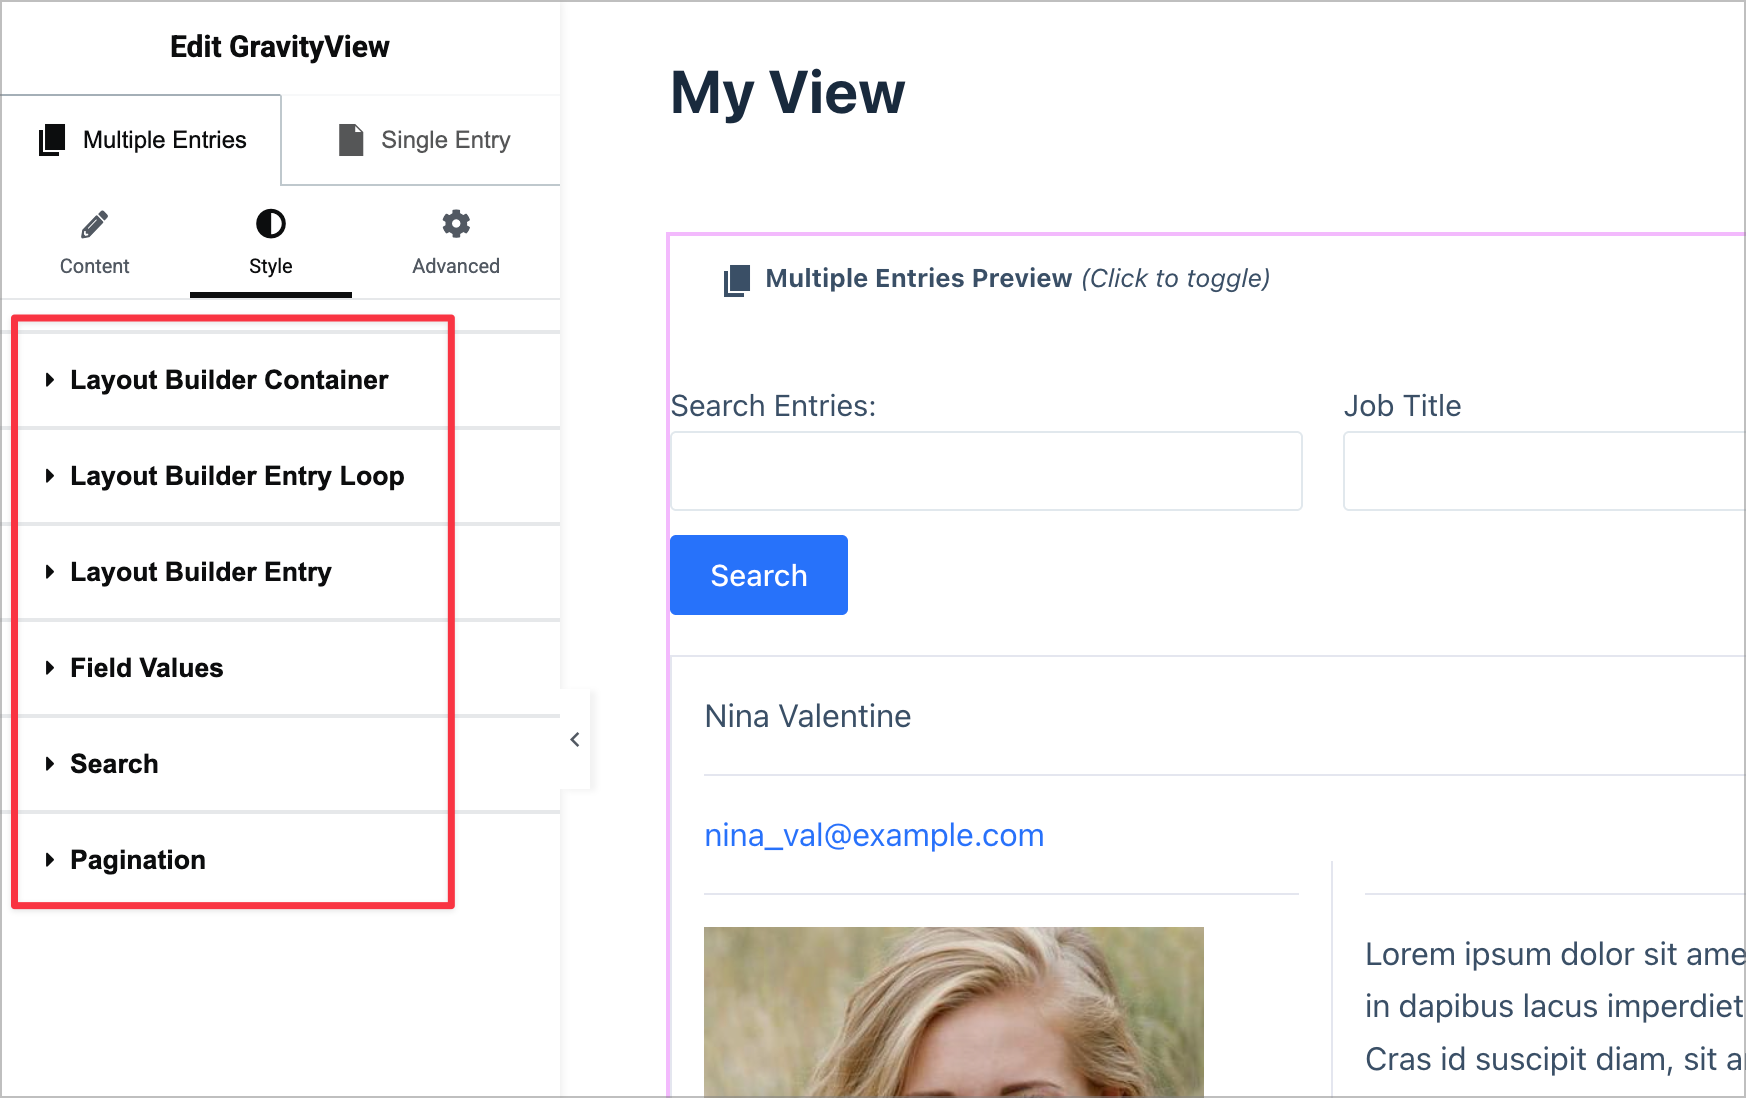
The Style tab gives you precise control over every part of your View. You can toggle between the Multiple Entries and Single Entry pages and adjust styles for each independently.
Depending on the layout your View is using (e.g., List, Table, Layout Builder), you’ll see dedicated styling options for each section. Elementor’s visual styling controls enable you to tweak every element, including:
- Text and background colors – Apply your brand colors throughout
- Spacing and padding – Adjust margins and padding for pixel-perfect layouts
- Typography – Control font sizes, weights, and styles
- And much more
Speed up the design process with hover preview and click-to-edit
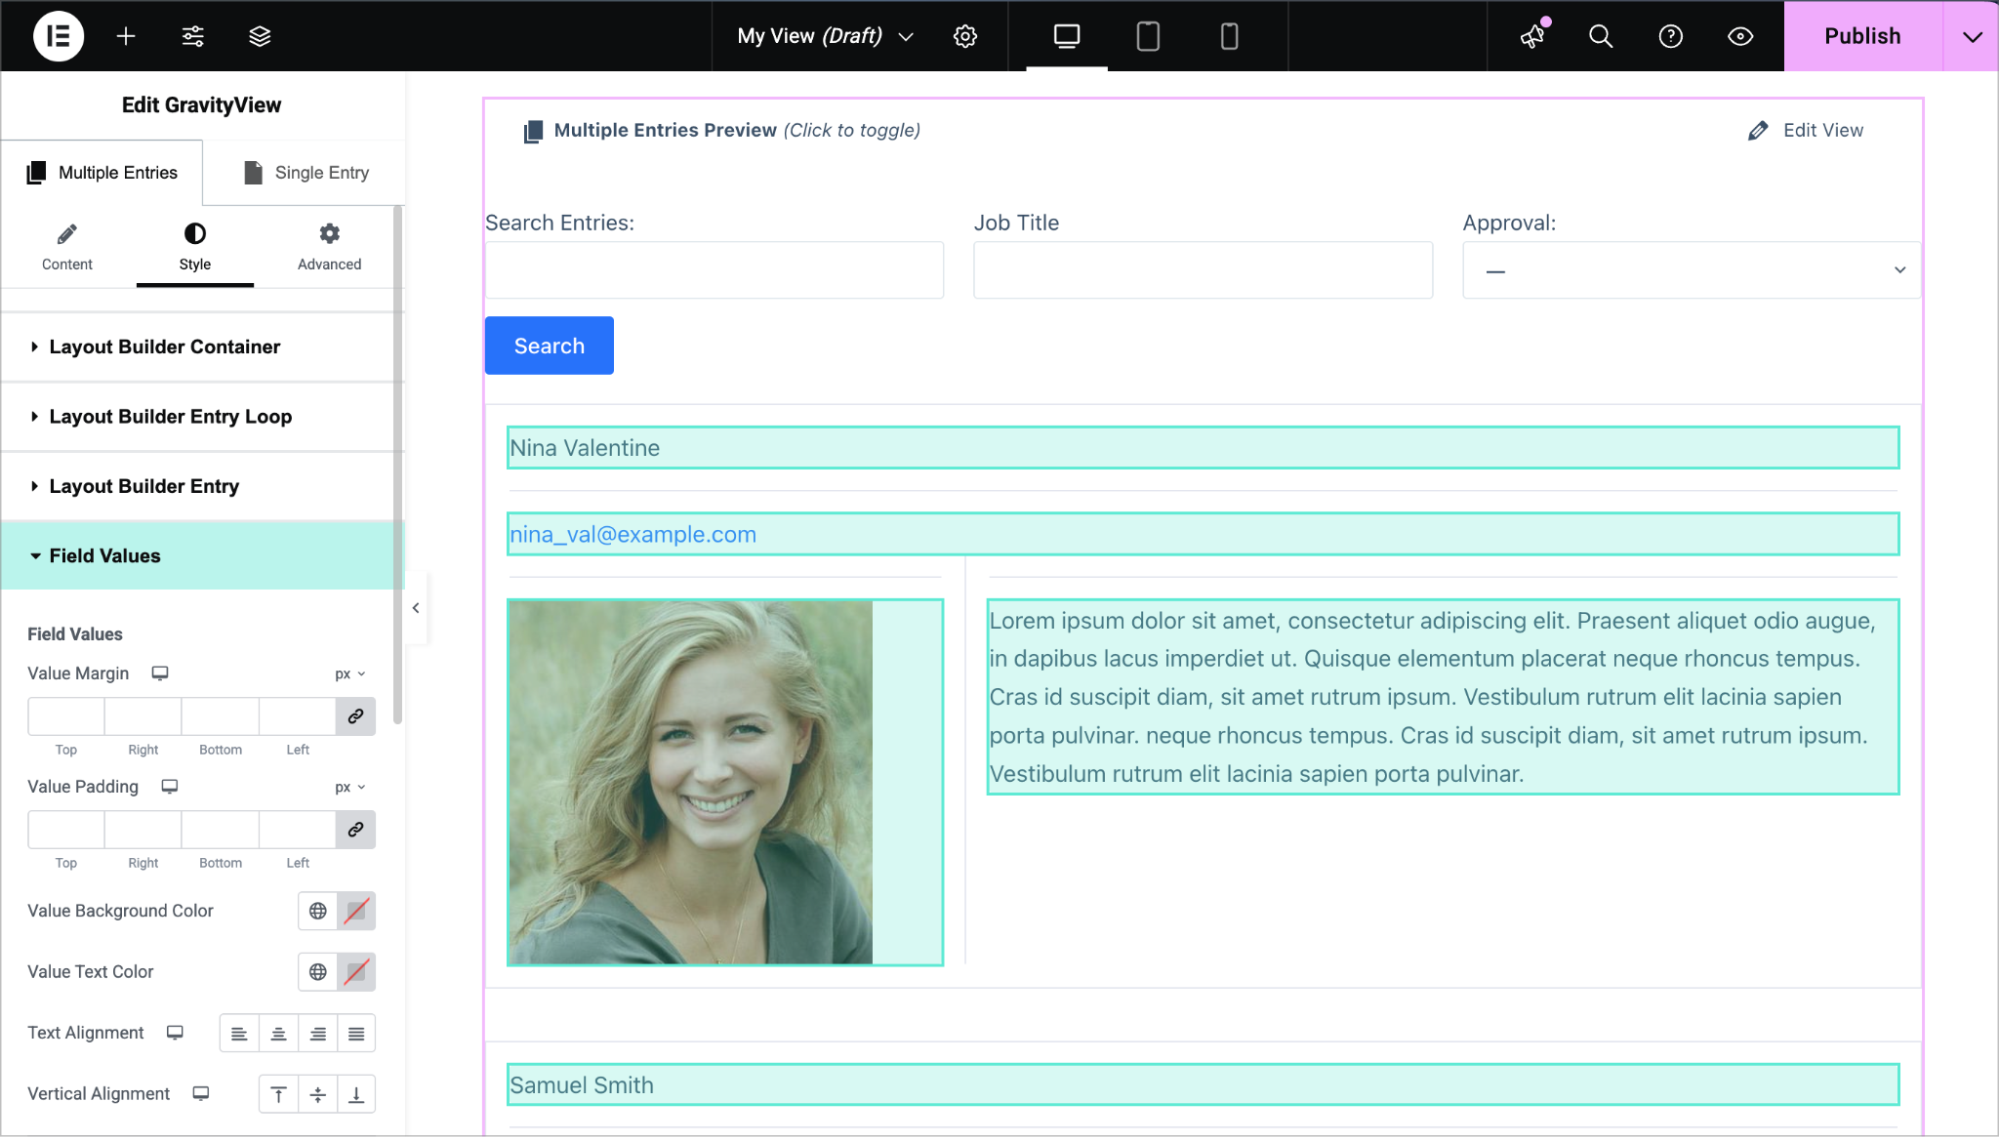
The integration makes it easy to see what you’re styling. When you hover over any section in the Style tab, the corresponding element highlights on your View.
Even better, you can click directly on any element in the preview and Elementor will automatically open its corresponding style settings, making it easy to style exactly what you want.
Build responsive designs for every device
Your form data displays should look great on desktop, tablet, and mobile. Elementor’s responsive controls make this simple.
Switch between device previews at the top of the interface and adjust styles for each screen size independently. Reduce padding on smaller screens, adjust font sizes, or completely change the layout – whatever works best for your design!
Each device size maintains its own styles, ensuring your Views look perfect everywhere.
Real-world example: Designing a simple member directory
What used to require custom CSS and developer knowledge can now be done visually in minutes.
Here’s an example where Casey uses the Advanced Elementor Widget to transform a basic member list into a sleek, modern directory layout.
Difference between the Basic and Advanced widgets
Gravity Forms users who use GravityView have access to the basic widget, which enables you to embed Views into any Elementor page and configure basic settings. GravityView Pro users have access to the advanced widget, which includes the extensive styling options and responsive controls described in this post.
Getting started
The integration is available now for GravityView users. You can learn more about GravityView and the Elementor integration at GravityKit.com, where you’ll also find detailed documentation to help you get started.
If you’re already using GravityView and Elementor, you can download the extension from the “Manage Your Kit” page in WordPress and start designing right away.