How to… Send Form File Uploads to Dropbox
 Gravity Forms makes it easy to create any type of form. From simple contact forms to more complex order and payment forms, the sky’s the limit. In some cases though, you might need to create a form that allows visitors to upload files on submission – don’t worry, Gravity Forms can help you with that too!
Not only does Gravity Forms provide built-in functionality for uploading files, but we also integrate with Dropbox, enabling you to safely store, and easily manage and access, any files uploaded via your forms.
In this article, we’ll discuss features of both the file upload field and Dropbox Add-On, as well as share a number of use cases for accepting files through your forms. Then we’ll finish off with a quick walk-through of how to get started with this useful add-on. Let’s jump in…
The Gravity Forms File Upload Field
With the Gravity Forms File Upload feature, you can accept file submissions through your forms, making it quick and easy to collect the information that you need.
By including the File Upload field on a form, you can allow people to submit:
- Documents
- Images
- Audio
- Videos
The Gravity Forms File Upload field also allows multi-file uploads, letting users upload more than one file.
For more information on the File Upload field, check out this article – How to… Accept File Submissions via a Form.
When Might You Use the File Upload Field?
The File Upload field can be used in a variety of situations. For example, if you accept guest posts or content submissions on your blog, you can use the form File Upload field so contributors can upload images and even articles if you wish.
Another example of why you might need this feature is if you’re hiring people through your site. Add the form File Upload field to your form so applicants can submit their resumes along with their applications.
Or, maybe you’re a designer or developer. In that case, you can use the form File Upload field to have clients submit their project briefs, signed contracts, or any other material you’ll need for the project.
A few other use cases include:
- Allow users to upload their profile photos.
- Have members or students upload completed workbooks or other coursework.
- Instruct people to upload competition submissions (artwork, photos, etc.).
In other words, whenever you need your website visitors, blog readers, or clients and customers to submit any type of document, you can use the File Upload field on your form.
But, once people are submitting files through your forms, you’ll need a place to store them. That’s where Dropbox comes in!
Dropbox: An Intro
Dropbox is an online file storage platform. Once you sign up for Dropbox, it will create a folder on your computer. Everything you upload to that folder will be synced to Dropbox so you can access it anywhere online.
Dropbox can be used as a backup for your files so you never have to worry about losing them if something happens to your computer. Dropbox can also be used to share files easily with others so you don’t have to send them through email.
Importantly, with Dropbox you can easily manage and access any files that have been uploaded, while keeping the data stored in a safe and secure solution.
The Gravity Forms Dropbox Add-On

The Gravity Forms Dropbox Add-On allows you to connect your Gravity Forms installation with your Dropbox account. Once you’ve enabled the integration, file uploads will be stored in your Dropbox folder. You can also use the integration to allow users to upload the files from their own Dropbox account.
You can specify where the file uploads should go using either a specific location in your Dropbox account or dynamically based on the form submission. In addition to that, you can use conditional logic to only send file uploads to Dropbox if certain conditions have been met.
To find out more about the Dropbox Add-On, check out the Gravity Forms Documentation.
How to Send Form File Uploads to Dropbox
Let’s now take a look at how you can get started with Dropbox and Gravity Forms using the Dropbox Add-On…
Step 1: Install Gravity Forms
The first thing you should do is install Gravity Forms on your site, if you don’t already have the plugin installed. To do this, purchase the Pro or Elite license and then download plugin.
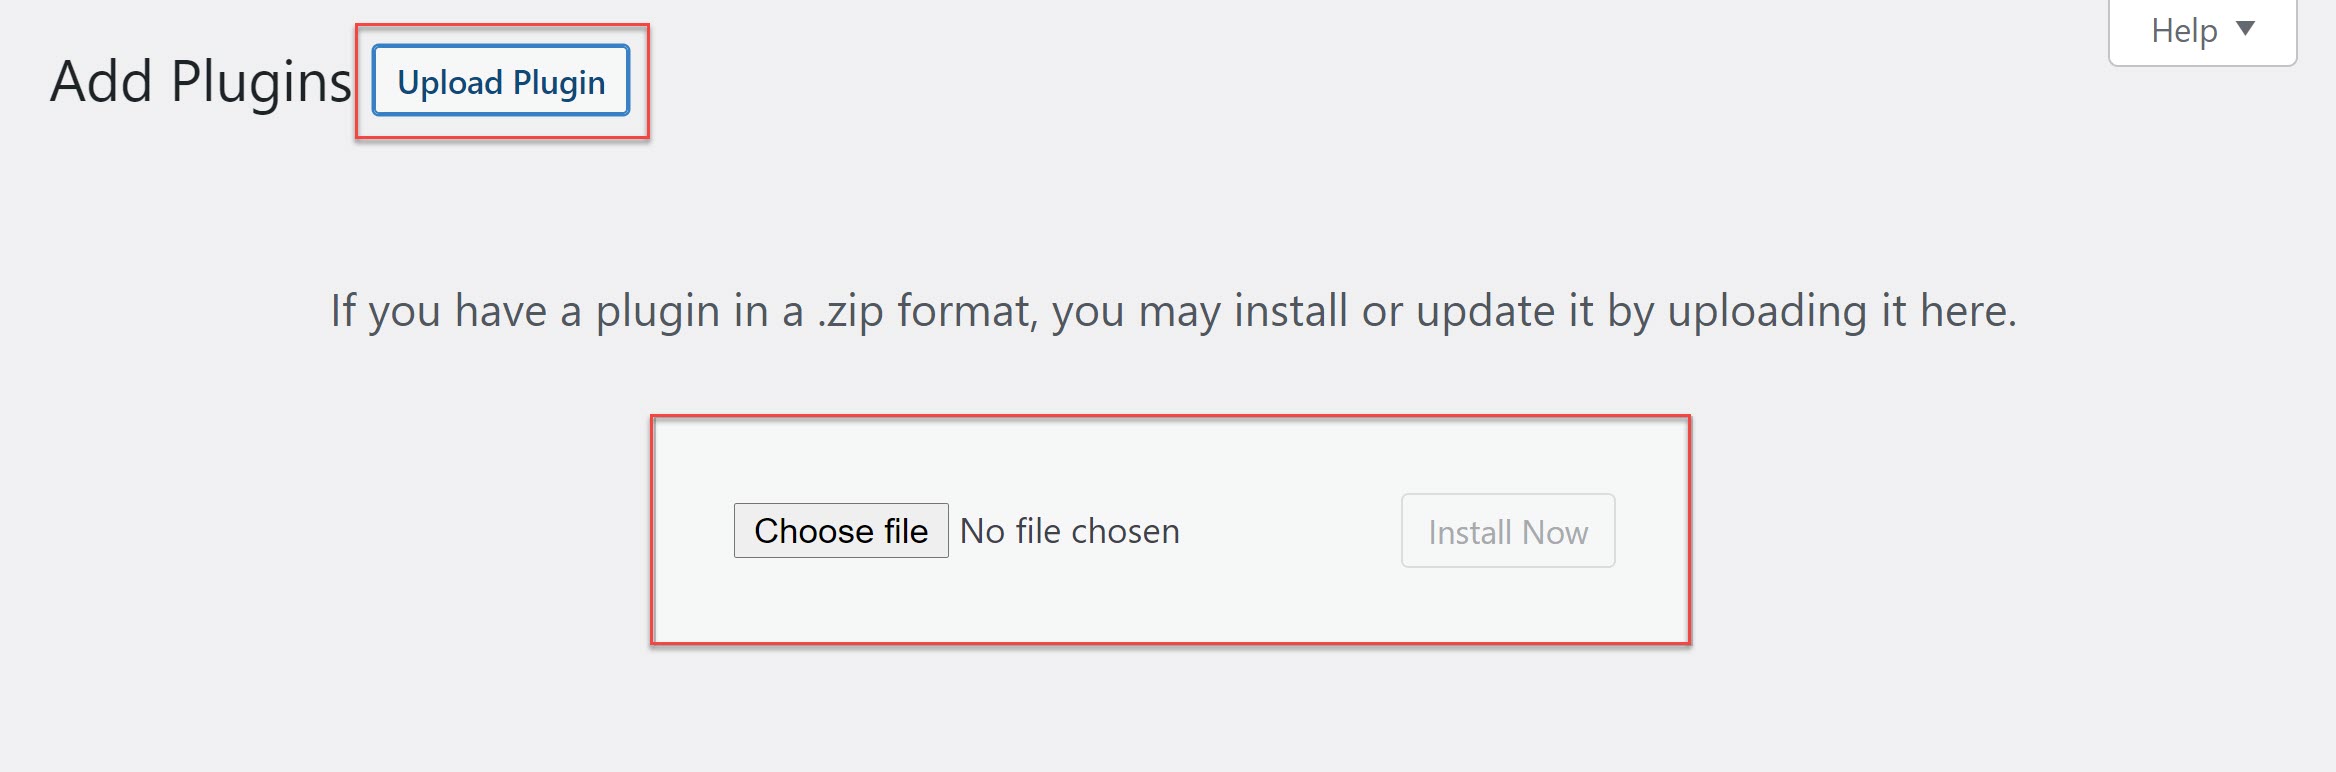
Log in to your WordPress dashboard. Go to Plugins > Add New > Upload. Locate the plugin zip file on your computer and then click the Install > Activate button. Once the plugin is installed, follow the instructions to register the plugin with Gravity Forms.
 For more information on how to get started with our plugin, check out this video tutorial – How to Install Gravity Forms on Your WordPress Website.
Step 2: Install the Dropbox Add-On
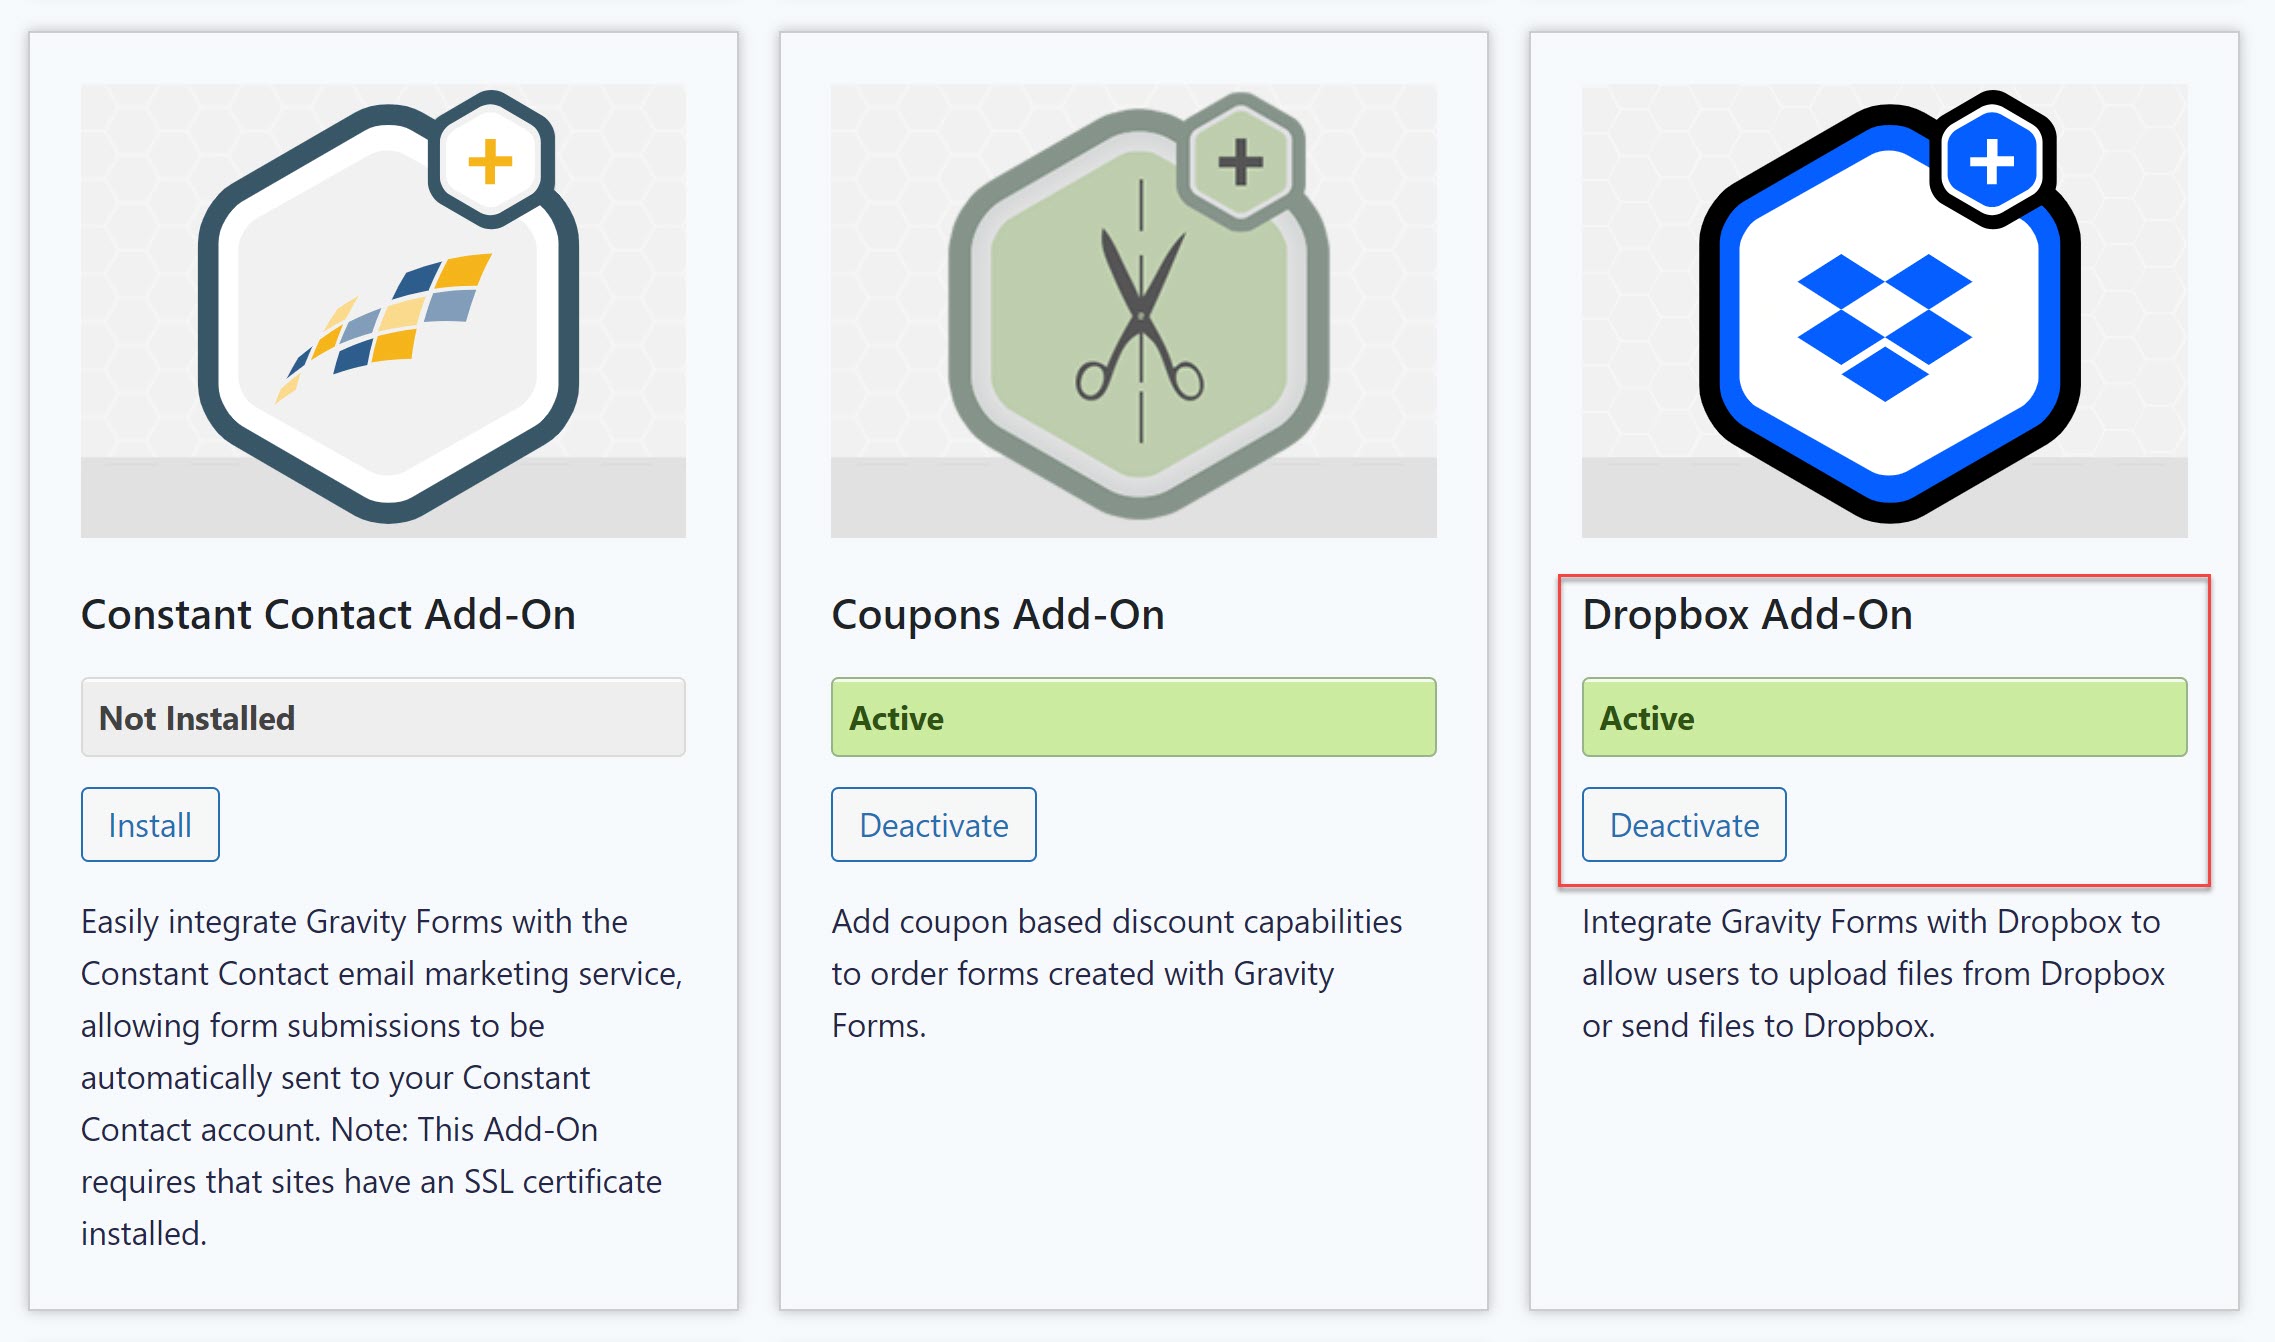
Next, go to Forms > Add-Ons. Within the Gravity Forms Add-On Browser, scroll down and locate the Dropbox Add-On. Click on Install > Activate.
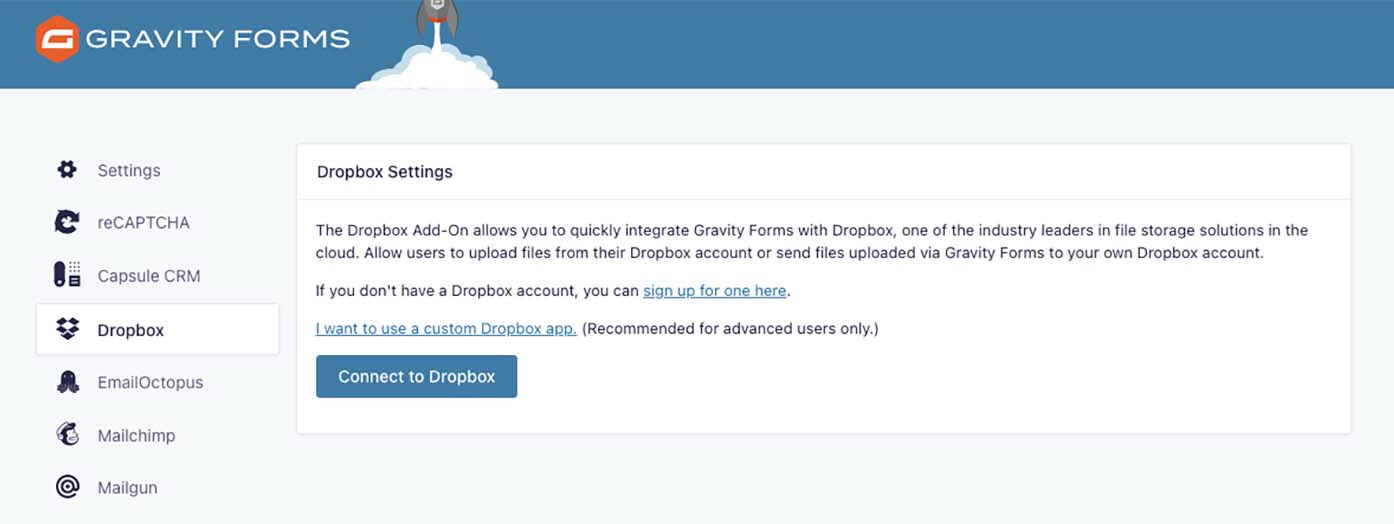
 Next, go to Forms > Settings > Dropbox. Click the blue Connect to Dropbox button – you’ll then be asked to log in to your Dropbox account and connect it with Gravity Forms.
By default, Gravity Forms will create a folder where all the file uploads will be stored. If you want to use a different location, you’ll need to set up a custom Dropbox app.
Step 3: Add a File Upload Field to Your Form
The Dropbox Add-On can be synced with any new or existing form. Simply select the form you want to sync with Dropbox, create a new form within the form builder, or import any of our free, fully customizable form templates.
To accept file uploads via your chosen form, your will need to include the File Upload field. So the next step is to add a file upload field to your form.
To access it, expand the Advanced Fields section and drag the File Upload Field to your form. You can then configure the field’s settings.
 For example, you can limit the file size as well as specify file types that can be uploaded through the form. You can also allow multi-file uploads.
For more information on the File Upload Field, check out this documentation.
Step 4: Create Dropbox Feed
The last step is to create a Dropbox feed for the form to sync the form with your Dropbox account. Go to the form’s settings and click on the Dropbox tab.
Press the Add New button to set up a new feed, give it a name, and select the specific File Upload field that you want to be uploaded to Dropbox from the dropdown menu.
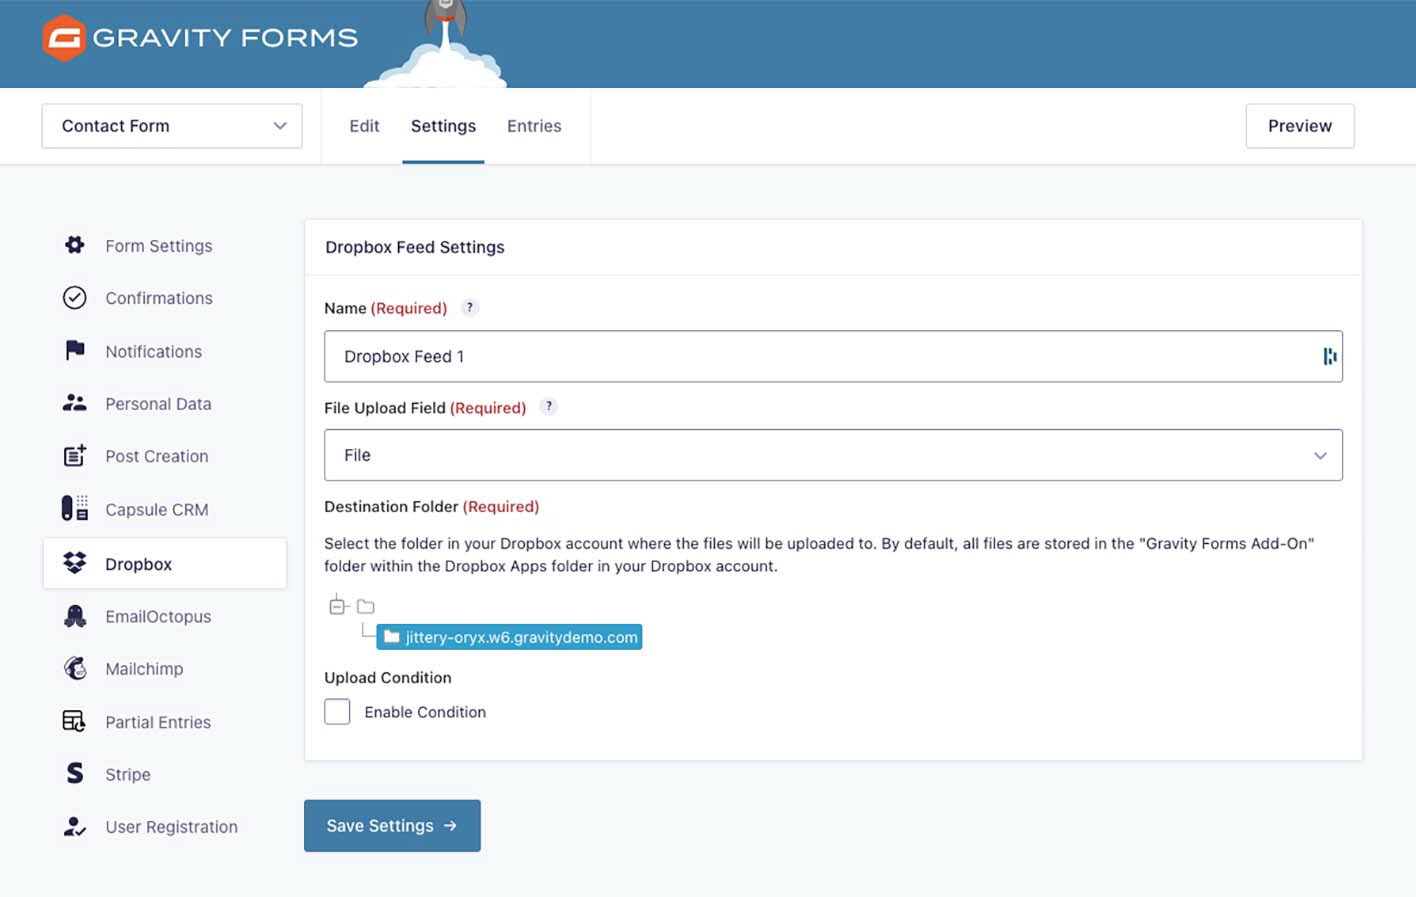 You can also select the folder where the files will be uploaded and enable conditions if you want to only upload files when those conditions are met. When you’re done click Save Settings.
You can then add the form to any page on your website using the Gravity Forms block in the Gutenberg editor.
Creating a Custom Dropbox App
As mentioned earlier, if you want to change the location where the file uploads are stored, you’ll need to create a custom Dropbox App. This will require you to have an SSL installed and active on your site.
To get started, visit the Dropbox App Console. Click the Create app button and select Scoped Access under the Choose API section. In the next step, select Full Dropbox and then enter the name for your custom app.
If you have a linked personal and a business account, you’ll need to select which account you want to own the app. Choose the correct account, sign in, and then click the Create app button.
 You’ll then be redirected to the control panel for your app where you need to copy the App key and App secret.
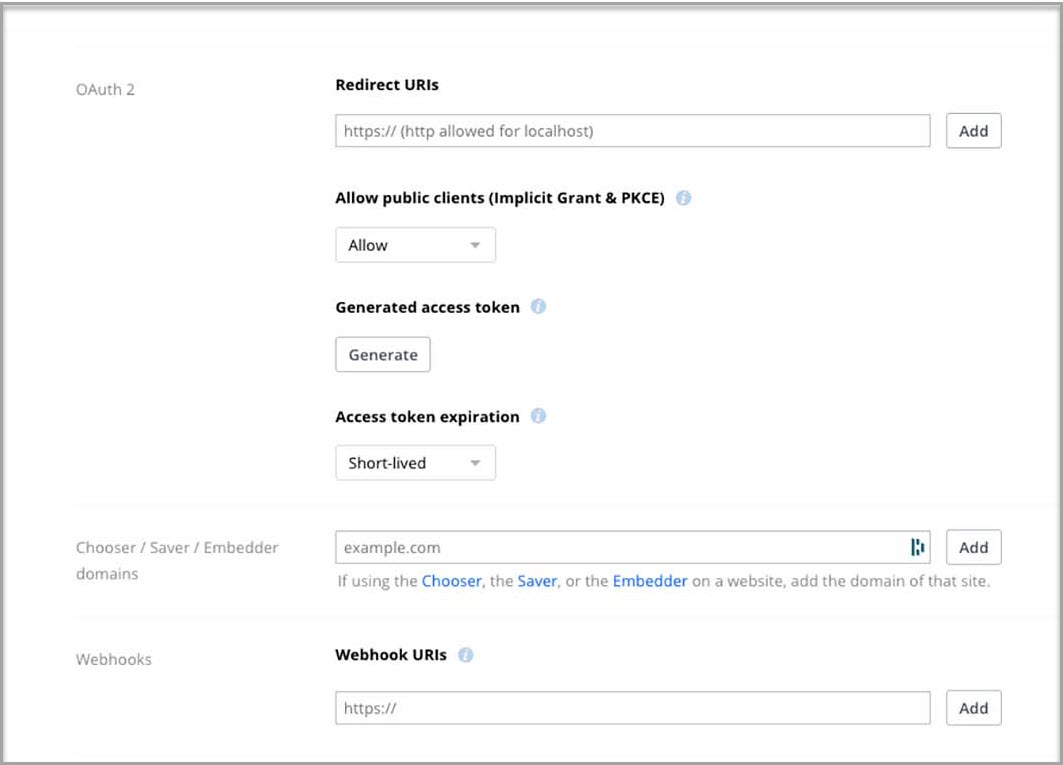
Next, add the OAuth Redirect URI that was provided in the add-on settings page to your Dropbox app settings under the OAuth2 Redirect URIs section. Keep in mind that if you want to use the Dropbox Upload Field, you’ll also need to enter your domain under the Chooser / Saver / Embedder domains and then click Add.
 Once you have entered all the information above, click on the Permissions tab. On this tab, you will need to select the files.content.write and files.content.read permissions. This will allow Gravity Forms to read your Dropbox user directories and to upload files to those directories when a form is submitted. Click the Submit button at the bottom of the page for the new Permissions to take effect.
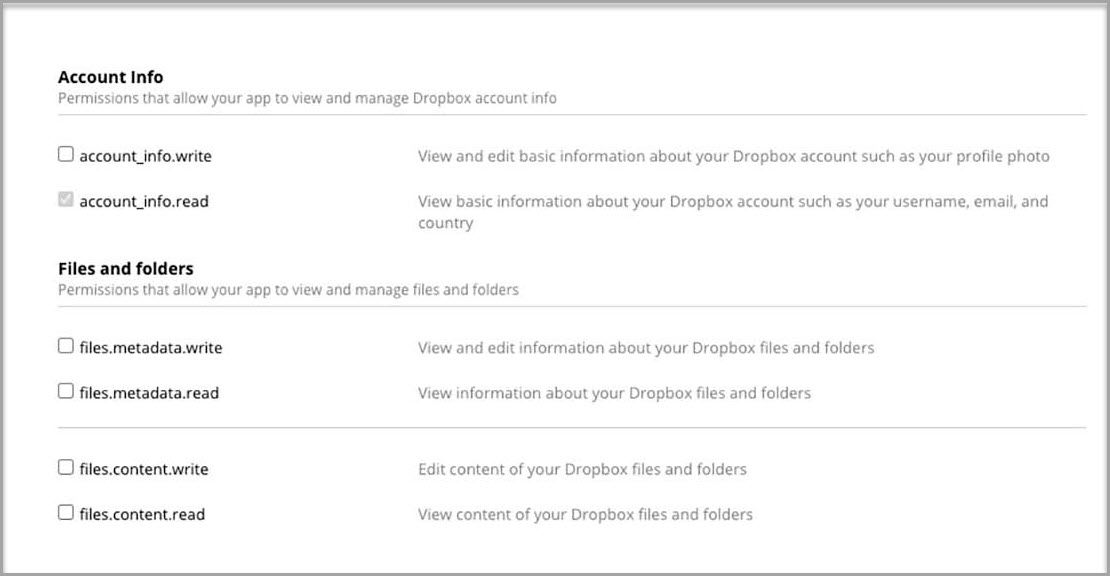 Now it’s time to configure the Dropbox Add-On. Go to Forms > Settings > Dropbox and click I want to use the custom Dropbox app. You’ll then need to paste in your Key and Secret you copied earlier. Click the Click here to connect to Dropbox button.
 You’ll then be able to select the folder where you want to save the file uploads whenever someone submits the form.
Ready To Store Form File Uploads In Dropbox?
Sending form file uploads to Dropbox is easy with Gravity Forms and our Dropbox Add-On. If you want to learn more about how this integration works, the following resources will be helpful:
Still don’t have Gravity Forms? No worries! Simply sign up for a free personalized demo of Gravity Forms and explore all the features that make our plugin a must have for WordPress website owners.
Try creating a form from scratch with our intuitive, drag and drop form builder and check out the many Gravity Forms Add-Ons to see how you can extend your forms even more.
Already sold on using Gravity Forms? Purchase our premium WordPress form plugin today!

If you want to keep up-to-date with what’s happening on the blog sign up for the Gravity Forms newsletter!